This post may contain affiliate sales links. Please read my disclosure policy.
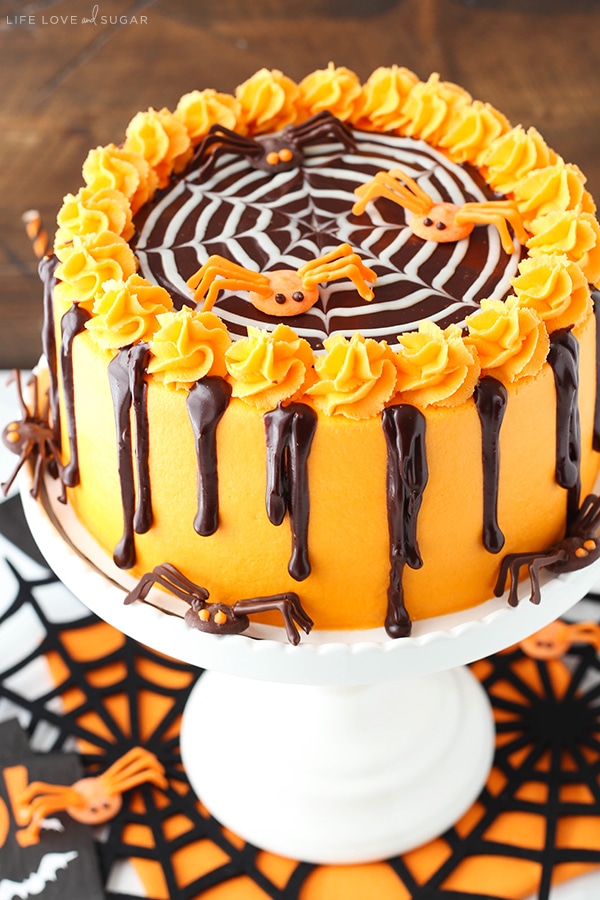
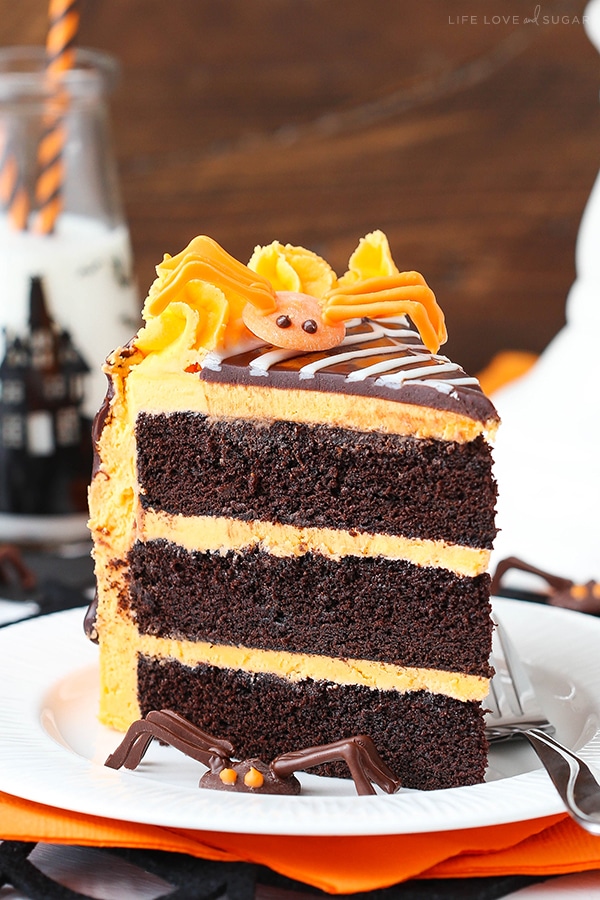
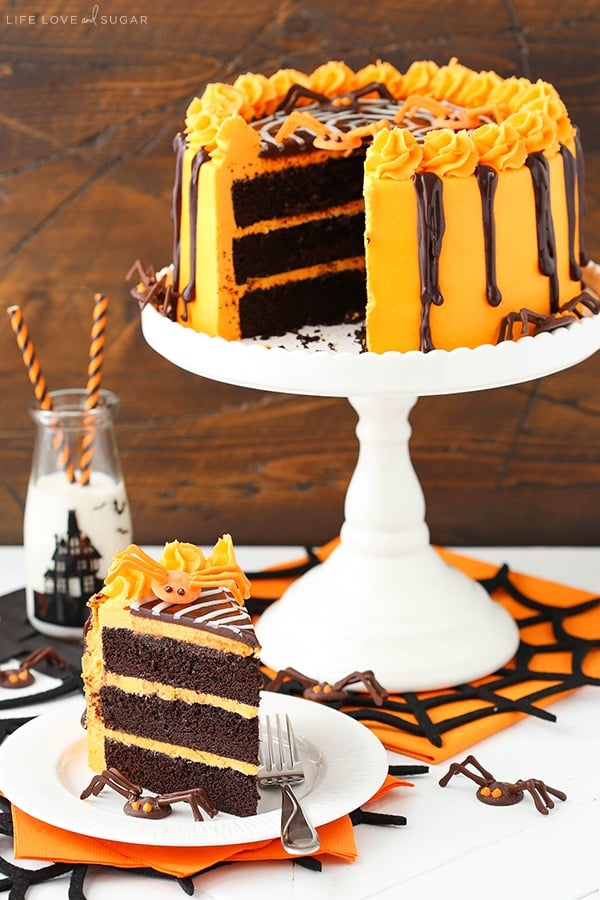
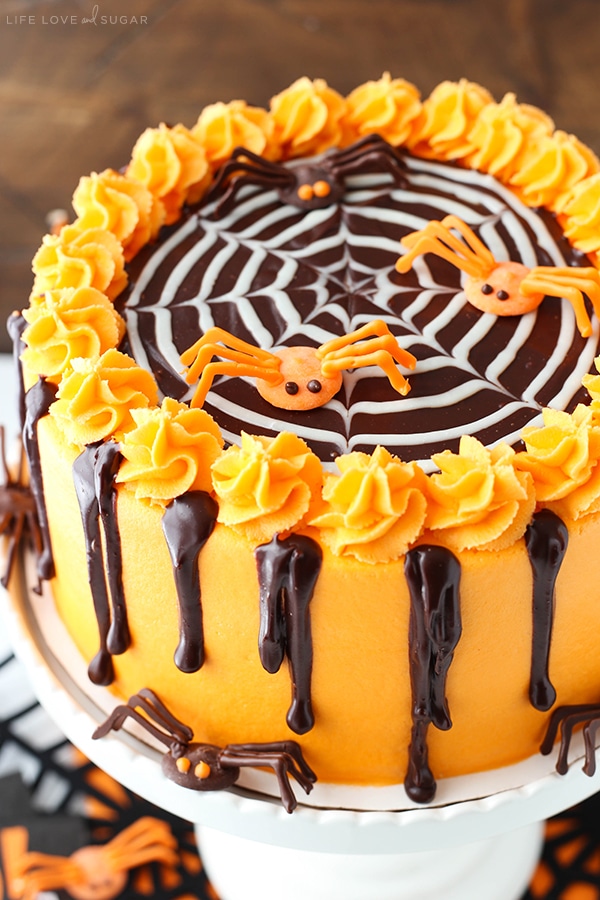
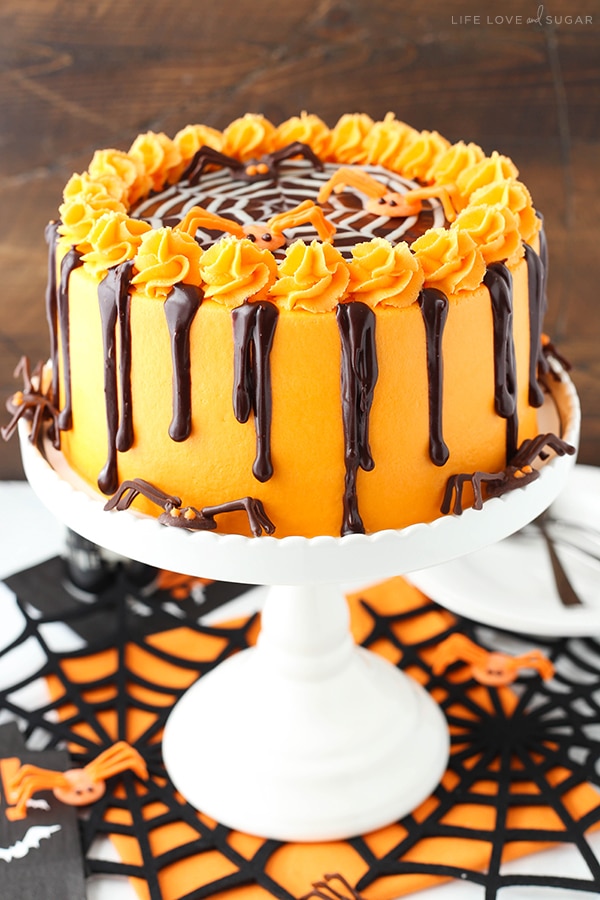
This Spiderweb-topped Chocolate Cake with Vanilla Frosting is awesome chocolate cake recipe for Halloween! The cake alone is actually perfect for any time – super moist and delicious – but the fun decorations are perfect for a spook-tacular Halloween! 🙂
This post is sponsored by Challenge Dairy, but all opinions are my own.
Can you believe it’s October already?! The year is just flying by but I have to admit, I’m kind of pumped. Not only does my cookbook release this month, but it’s officially the start of “the holidays”. For the next 3 months we’ve got one exciting holiday after another – starting with Halloween!
I used to always dress up as a kid for Halloween but as an adult not so much. I do dress up our black lab though. 🙂 She’s always super girl and she looks pretty cute in a cape. She’s not a huge fan of all the doorbell ringing so we usually sit outside with her in the driveway and hand out candy. That way she doesn’t lose her mind with the bell ringing and everyone gets to see how cute she is in her costume. I don’t dress her up often (only on Halloween, in fact), so when I do people need to see it. Plus she’s a pretty big dog so often kids can find her scary. I figure the costume brings the scary level down a notch because she’s super girl.
A CHOCOLATE CAKE KIDS WILL LOVE FOR HALLOWEEN
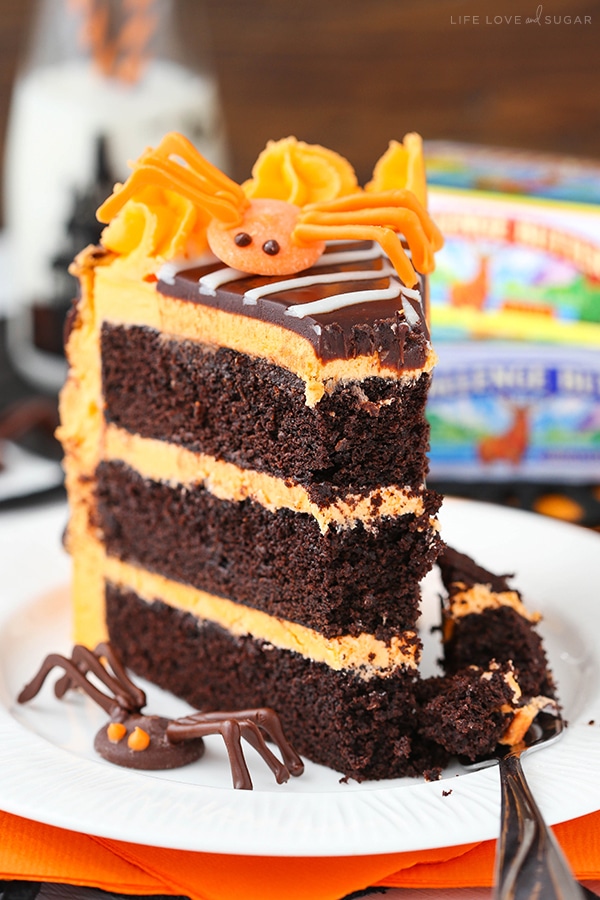
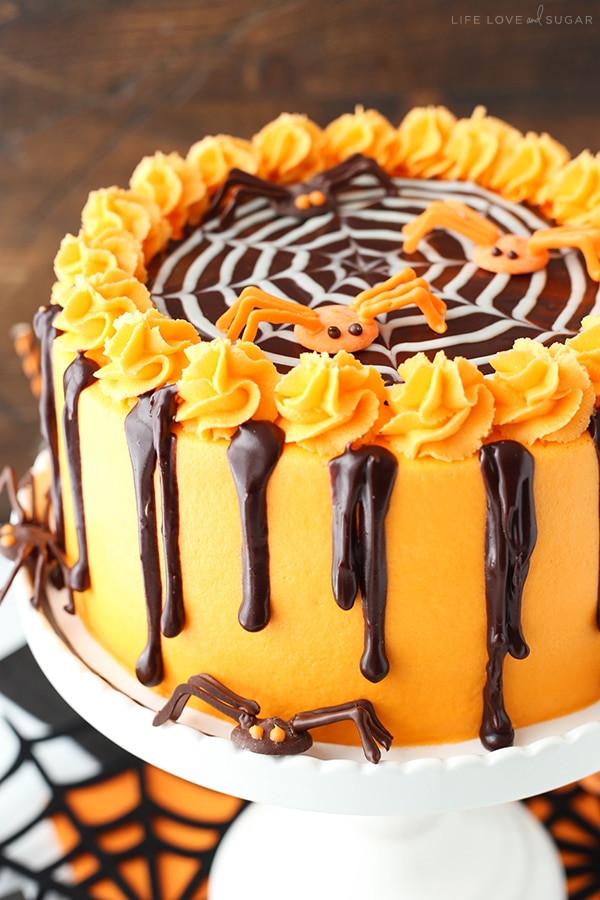
This cake also kind of brings the scary level down a bit. Let’s be honest – spiders are scary. The real things are, anyways. But the ones on this cake are so cute that even I fell in love with it! 😉
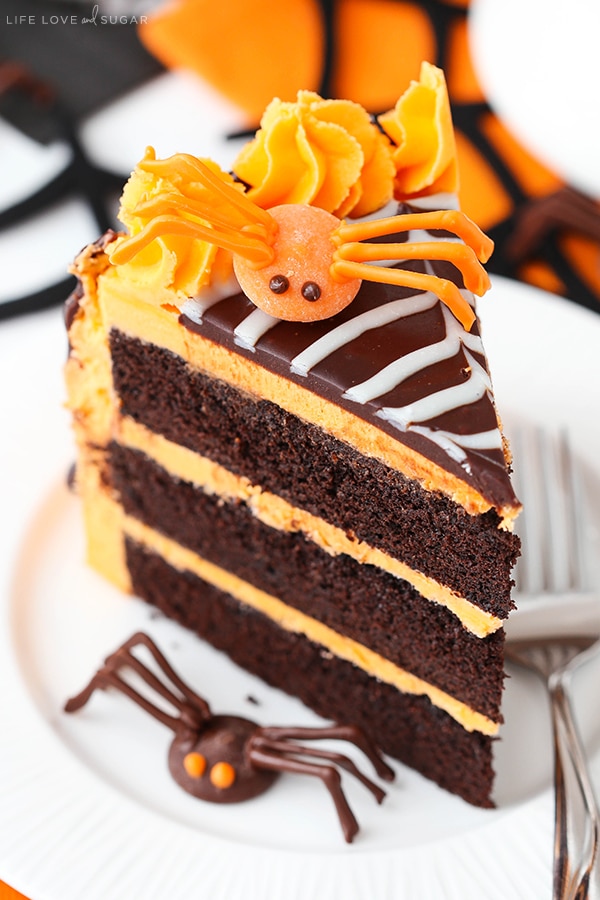
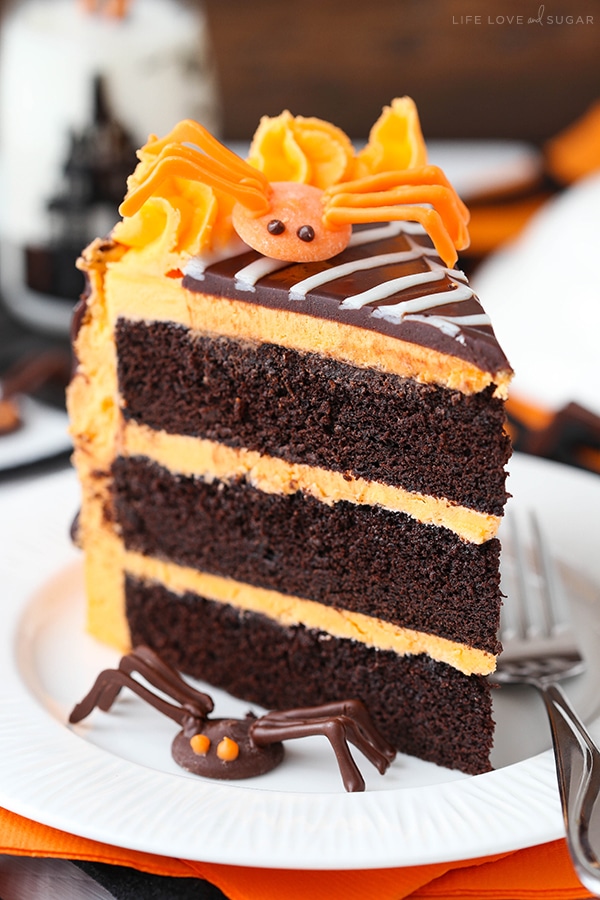
The spiders are made using melting chocolates. Here are a couple photos below to show you how they’re made. Some of the round chocolates are used as the bodies, then the rest are melted and piped with a small round piping tip to make the legs. A little melted chocolate helps them stick to the bodies and then you have some super cute spiders with beautiful long legs. 🙂
The spiderweb is made by spreading chocolate ganache on top of the cake, then piping a swirl of white chocolate ganache on top. Use a toothpick to draw some lines from the center of the web to the outsides of the cake and you’re done! Nice and quick!
Underneath all the Halloween fun is a wonderful chocolate cake! It’s got a great dark shade that’s perfect for Halloween.
HOW TO MAKE THIS HALLOWEEN CHOCOLATE CAKE
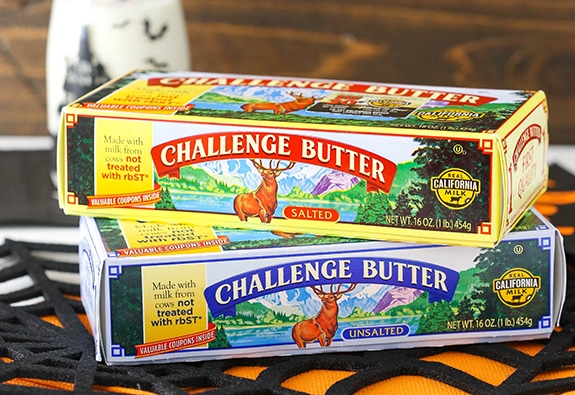
To put the cake together, you’ll want to start by creaming the Challenge butter and sugar together. It’s important to fully cream the butter and sugar for the full 3-4 minutes. This step adds air to the batter that makes sure your cake is light and fluffy! As you know, I love my Challenge butter and I love working with them. Their butter is 100% sweet cream and goes from farm to fridge in just 2 days. There’s nothing better than fresh, good quality butter and my mom introduced my to Challenge about a year ago. I’ve been a fan ever since.
Next you’ll add the eggs one at a time until they’re incorporated into the batter. The mix of water, vanilla and cocoa powder is added next. They are mixed together prior to adding to the batter and have almost a sour cream consistency. The final steps are alternating adding the dry ingredients and milk to the batter, then it’s time to bake the cake!
The cake is frosted with a vanilla buttercream that’s tinted orange for Halloween. Of course any great buttercream uses a good quality butter as it’s base and I chose my favorite Challenge butter.
Once everything is ready and decorated, you’ve got a super fun Halloween cake on your hands! The chocolate cake is so tender and moist – I just love it! I know you will too!
Spiderweb Chocolate Cake with Vanilla Frosting
- Prep Time: 45 minutes
- Cook Time: 30 minutes
- Total Time: 1 hour 15 minutes
- Yield: 12-14 Slices
- Category: Dessert
- Method: Oven
- Cuisine: American
Description
This Spiderweb-topped Chocolate Cake with Vanilla Frosting is awesome chocolate cake recipe for Halloween! The cake alone is actually perfect for any time – super moist and delicious – but the fun decorations are perfect for a spook-tacular Halloween!
Ingredients
CHOCOLATE CAKE
- 1 cup (224g) unsalted Challenge butter
- 2 cups (414g) sugar
- 4 eggs
- 1 tsp vanilla extract
- 3/4 cup (180ml) water
- 3/4 cup (85g) dark cocoa powder blend
- 2 cups (260g) all purpose flour
- 1 tsp baking soda
- 1/2 tsp salt
- 3/4 cup (180ml) milk
VANILLA BUTTERCREAM
- 1 1/2 cups (336g) salted Challenge butter
- 1 1/4 cups (237g) shortening
- 10 1/2 cups (1208g) powdered sugar
- 1 1/2 tbsp vanilla extract
- 3–4 tbsp (90ml-105ml) water
- Orange icing color
CHOCOLATE GANACHE
- 4 oz semi sweet chocolate chips
- 5 tbsp (75ml) heavy whipping cream
WHITE CHOCOLATE GANACHE
- 2 oz white chocolate chips
- 1 tbsp (15ml) heavy whipping cream
- Orange melting chocolate
- Dark cocoa melting chocolate
Instructions
1. Preheat the oven to 350°F (176°C). Line the bottom of three 8-inch (20cm) cake pans with parchment paper and grease the sides.
2. Beat butter and sugar until light in color and fluffy, about 3-4 minutes.
3. Add eggs one at a time, beating just until blended.
4. Add vanilla, water and cocoa powder to another bowl and whisk until smooth.
5. Add chocolate mixture to batter and mix until combined. Scrape down the sides of the bowl as needed to make sure everything is well combined.
6. Combine flour, baking soda and salt in a separate bowl.
7. Alternate adding the flour mixture and milk to the batter. Begin by adding half of the dry mix, then mix well. Add the milk and mix well, scraping down the sides as needed. Add the remaining flour mixture and mix until smooth.
8. Divide batter between the cake pans. Bake for 26-30 minutes, or until a toothpick inserted comes out with a few crumbs.
9. Remove cakes from the oven and allow to cool for 3-4 minutes, then remove from pans to a cooling rack to finish cooling.
10. While the cakes cool, make the frosting. Beat the butter and shortening together until smooth.
11. Slowly add about 1/2 of the powdered sugar, mixing until smooth between each addition of powdered sugar.
12. Add the vanilla extract and 3 tablespoons of water to the frosting and mix until smooth.
13. Slowly add the remaining powdered sugar, mixing until smooth between each addition of powdered sugar.
14. Add additional water to the frosting, as needed to get a smooth consistency.
TO PUT THE CAKE TOGETHER:
15. Use a large serrated knife to remove the domes from the tops of the cake layers so that they are flat.
16. Place the first layer of cake on your serving plate or on a cardboard cake circle.
17. Spread 1 cup (240g) of frosting into an even layer.
18. Add the second layer of cake, then another cup (240g) of frosting.
19. Top the cake with the third layer of cake.
20. Frost the outside of the cake with the remaining frosting. For help getting a smooth finish, refer to my tutorial on how to frost a smooth cake with buttercream.
21. Pipe a swirl border of frosting around the top edge of the cake. Set the cake aside.
TO DECORATE THE CAKE:
22. To make the chocolate ganache, add the chocolate chips to a metal or glass bowl. Microwave the heavy whipping cream until boiling, then pour over the chocolate chips. Cover the bowl with clear wrap for about 5 minutes, then whisk chocolate until smooth.
23. Use a spoon or piping bag with tip to drizzle chocolate down the sides of the cake, between each frosting swirl.
24. To make the white chocolate ganache, add the white chocolate chips to a metal or glass bowl. Microwave the heavy whipping cream until boiling, then pour over the white chocolate chips. Cover the bowl with clear wrap for about 3 minutes, then whisk chocolate until smooth. If needed, microwave the mixture for another 5-10 seconds, then continue whisking until smooth.
25. Reheat the chocolate ganache slightly, if needed, then spread remaining chocolate ganache evenly onto the top of the cake, inside the border.
26. Pipe a swirl onto the top of the chocolate ganache, starting from the center of the cake and spiraling out towards the border of the cake.
27. Use a toothpick to create the web effect. Place the toothpick in the center and drag it out towards the border to create a line. I drew 8 lines total.
TO MAKE THE SPIDERS:
28. Melt the orange melting chocolate and place into a piping bag with a small round tip (I used a Wilton 4). You could also use a ziplock bag with a corner cut off. Pipe the legs in the shape of an “L”. You’ll need 6 legs per spider, for about 3 or 4 spiders. Repeat with the dark cocoa melting chocolate. (See photo of example of spiders)
29. Once the legs are made and cooled, set out 4 or 5 circles of melting chocolate for the bodies. Working with one leg at a time, pipe a small dot of melted chocolate onto the side of the body and place a leg is position. Hold it in place for about 30 seconds, or until you can take your hand away and it stays in place. Add 3 legs to each side of the body.
30. To make the eyes, microwave the chocolate on 10 second intervals, stirring between each until melted, and pipe the eyes onto the bodies.
31. Place the spiders on top of and around the cake.
32. Refrigerate the cake until ready to serve. The cake is best served at room temperature.
Notes
I used Wilton Candy Melts for the melting chocolates.
Nutrition
- Serving Size: 1 Slice
- Calories: 1120
- Sugar: 117.2 g
- Sodium: 223.3 mg
- Fat: 63.9 g
- Carbohydrates: 135.6 g
- Protein: 8 g
- Cholesterol: 152.9 mg
Enjoy!




This cake was DELICIOUS!!! Everyone raved about it. I loved the frosting too. I used it for a birthday cake so made it pale pink with dark pink and white flowers. This is my new “go to” chocolate cake recipe. Thank you AGAIN Lindsay for another fantastic recipe!!!
Wonderful! So glad you enjoyed it!
This cake looks amazing! What sort of tip did you use to pipe the orange swirls around the border? And what size tip did you use for the white chocolate swirl? Thanks!
I used ateco 844 for the border. Not sure about the white.
I just made this cake and it is difficult but very doable with your instructions and patience. It is so beautiful and delicious. Thank you
I have had the best results from this recipe as well as the moist vanilla cake. I am a home baker and i bake exclusively gluten free. The only changes I make to either of these cakes is of course gluten free flour and one box of pudding for the chocolate I use devils food and the vanilla is french vanilla, the cakes are moist and stand up to decorating. I have found that gluten free flour can make things overly dry so the pudding fixes that. I wish I could post pictures
I’m so glad to hear that both recipes have worked well for you!
I dropped the pudding, it was making them heavier then I realized! Now we have light fluffy moist cake and cupcakes! I wanted to share a photo but I dont see where I can do that
can i turn this into vanilla cake by replace the cocoa powder with flour? please help thanks
No, but I would recommend my Moist Vanilla Layer Cake if you would like to use vanilla cake.
I made this cake yesterday for my husbands 56th Birthday and it is beautiful! I did my own devil’s food cake recipe but your buttercream icing was a huge hit! And the spiders are a little time consuming but so darn cute. I did not sooth my icing like yours but was beautiful with a little texture. Hubby said it was the best decorated Halloween/b’day cake he has ever got!
I’m so glad you enjoyed it!
I love this cake! It’s so adorable! I have a dumb question thou, do you put all 3 cake pans on the same oven rack or do you divide them between 2 oven racks?
Thanks so much!!
I usually divide them between two racks. 🙂
me 2
This cake looked so delisious the first time I made it, It was themost decadent pastry I have ever consumed.
Wow, the spider web on top of the cake is absolutely incredible! I’m so impressed with the whole cake!
Thanks Miranda!
Gorgeous cakes and ideas, very good blog :)).
Thanks so much Irena!
Hi Lindsay
Can you give me some brands of dark cocoa powder blend. Thanks.
I usually use the Hersheys dark cocoa.
Gorgeous as always! I’ll try it in the halloween 😀 thanks for the recipe!
p.s. from your portuguese fan