This post may contain affiliate sales links. Please read my disclosure policy.
This Strawberry Ice Cream Cake combines moist and fluffy vanilla cake, creamy strawberry ice cream, and a delicious strawberry filling made from fresh strawberries. It’s full of fresh, fruity flavor and the perfect way to celebrate summer.
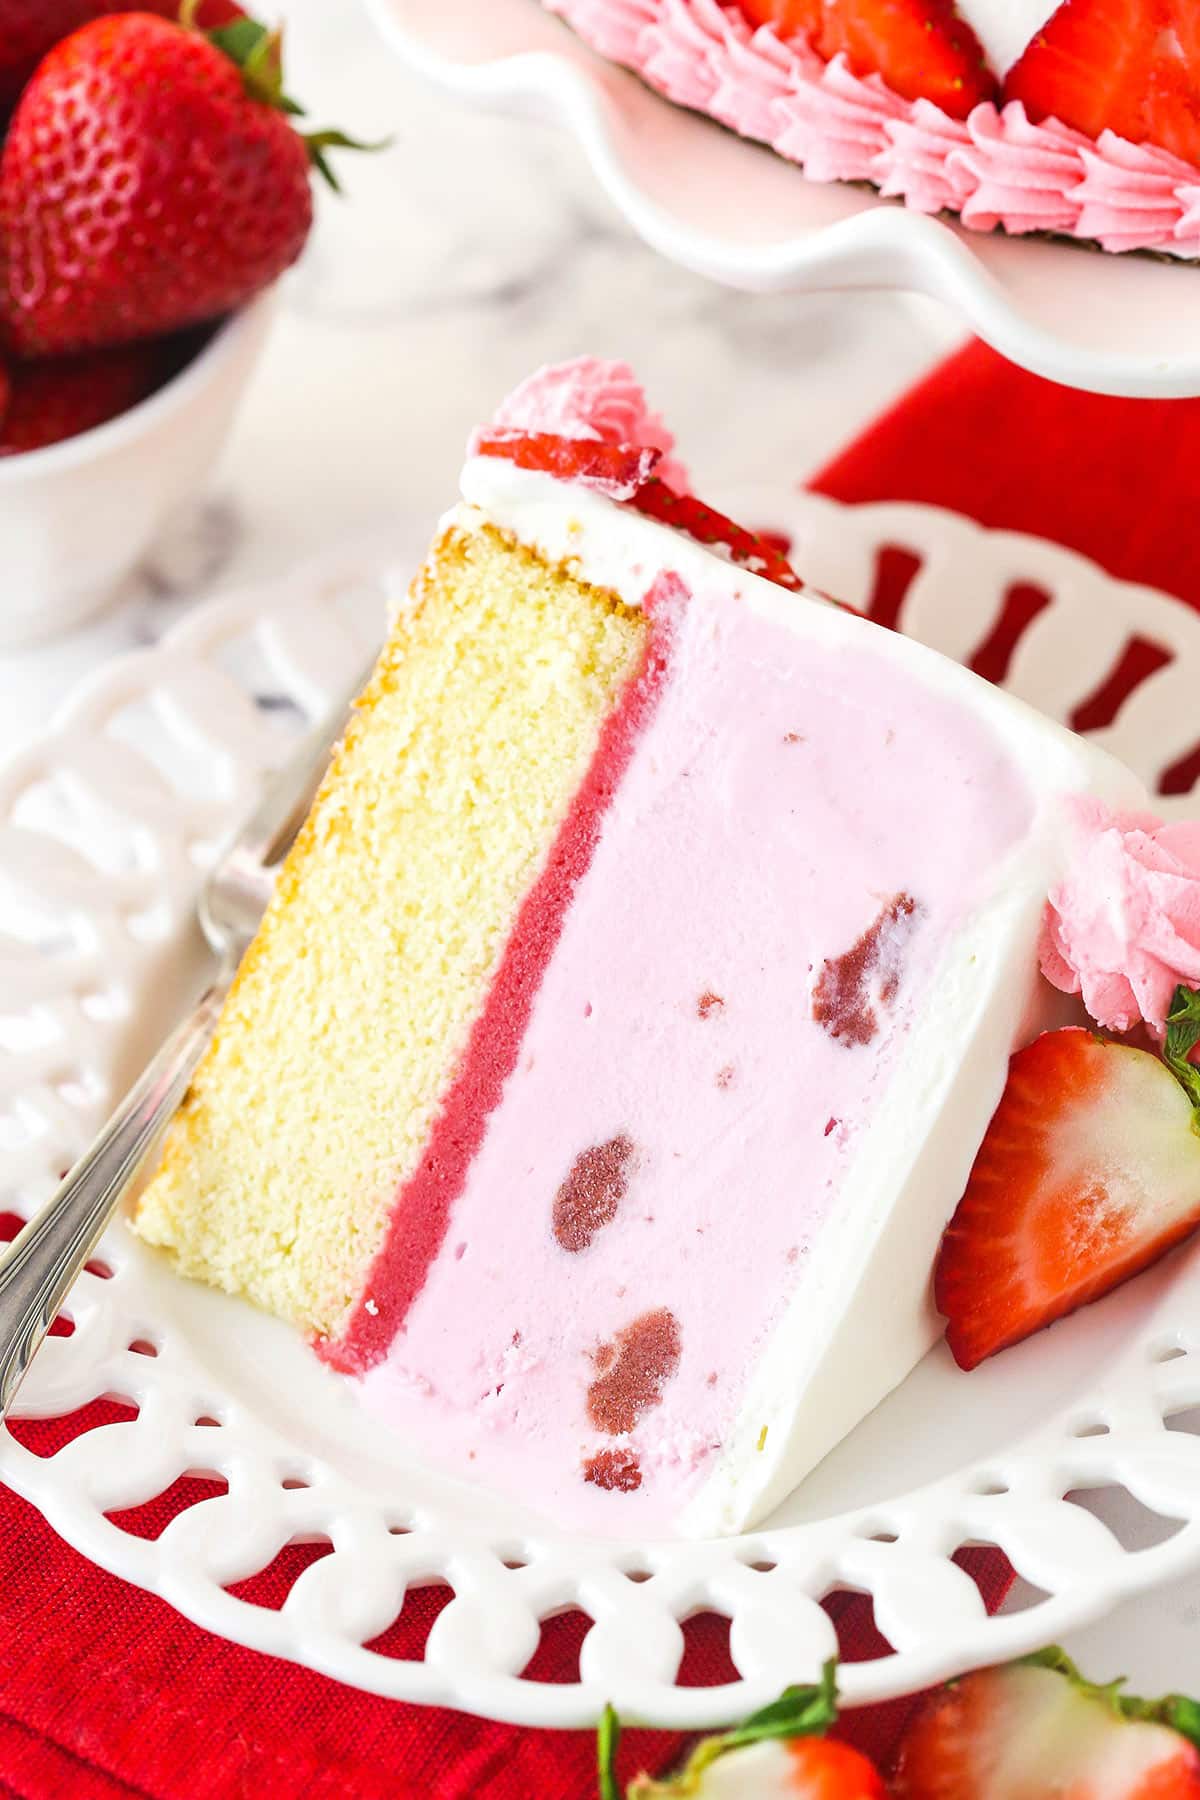
Table of Contents
Easy Strawberry Ice Cream Cake
I love all kinds of cake – ice cream cakes included. They are perfect for all kinds of occasions. And so many people love eating ice cream with their cake, why not make a cake that includes both?! This cake does just that, with the bonus of including fresh strawberries for summer.
This strawberry ice cream cake recipe is super easy to follow too. It starts with my well-loved Moist Vanilla Layer Cake, but the recipe is cut in half for just one 8-inch cake layer. It makes a wonderful base for this ice cream cake. On top of the cake layer is a strawberry filling. It’s an extra step that may seem unnecessary, but I wanted to pack a little something extra into this cake and the filling layer does just that. It’s cooked over the stove to remove the excess water so that it’s not icy, but ends up creamy and full of strawberry flavor. If you’re a big strawberry fan, you don’t want to leave this layer out.
The cake is topped with strawberry ice cream and you can either use store-bought or make your own. I love my no-churn strawberry ice cream and it would make a great homemade option. However you go about about the ice cream layer, finish off your ice cream cake with some homemade whipped cream and decorate as you like. This cake is sure to be a hit for summer – and even year-round for true ice cream cake lovers!
Why You’ll Love This Strawberry Ice Cream Cake Recipe
This strawberry ice cream cake recipe has completely stolen my heart. Here are some of my favorite things about it.
- The cake. This cake is wonderfully moist (thanks to vegetable oil) and rich in flavor (thanks to butter). It’s so delicious and a great ice cream cake base.
- Delicate, refreshing flavors. The combination of creamy strawberry ice cream, light and fluffy vanilla cake, and the sweet pop of real strawberry flavor from the fruity filling makes for the perfect, refreshing taste experience.
- Textural bliss. The soft, moist cake complements the creamy, smooth ice cream beautifully. They are different enough to keep things interesting but also blend together seamlessly to make a wonderfully cohesive dessert.
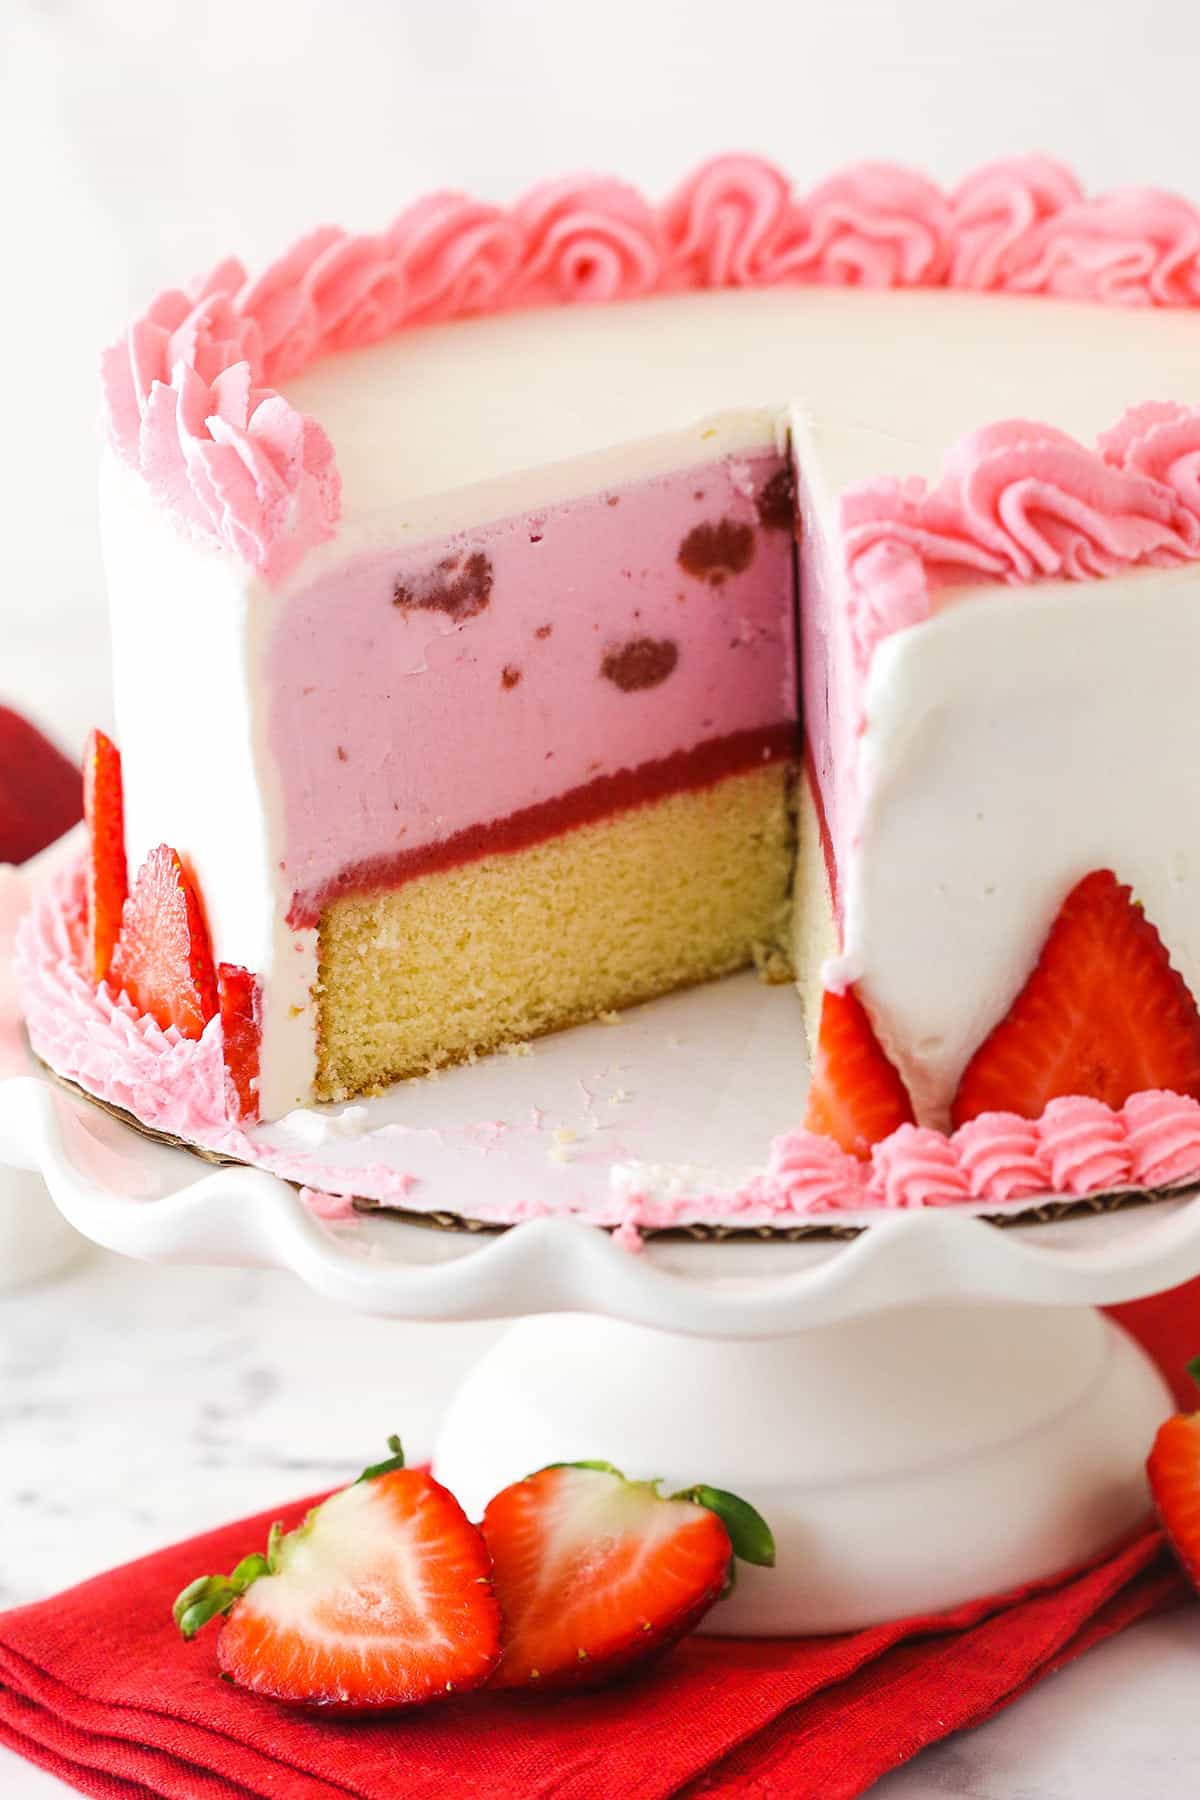
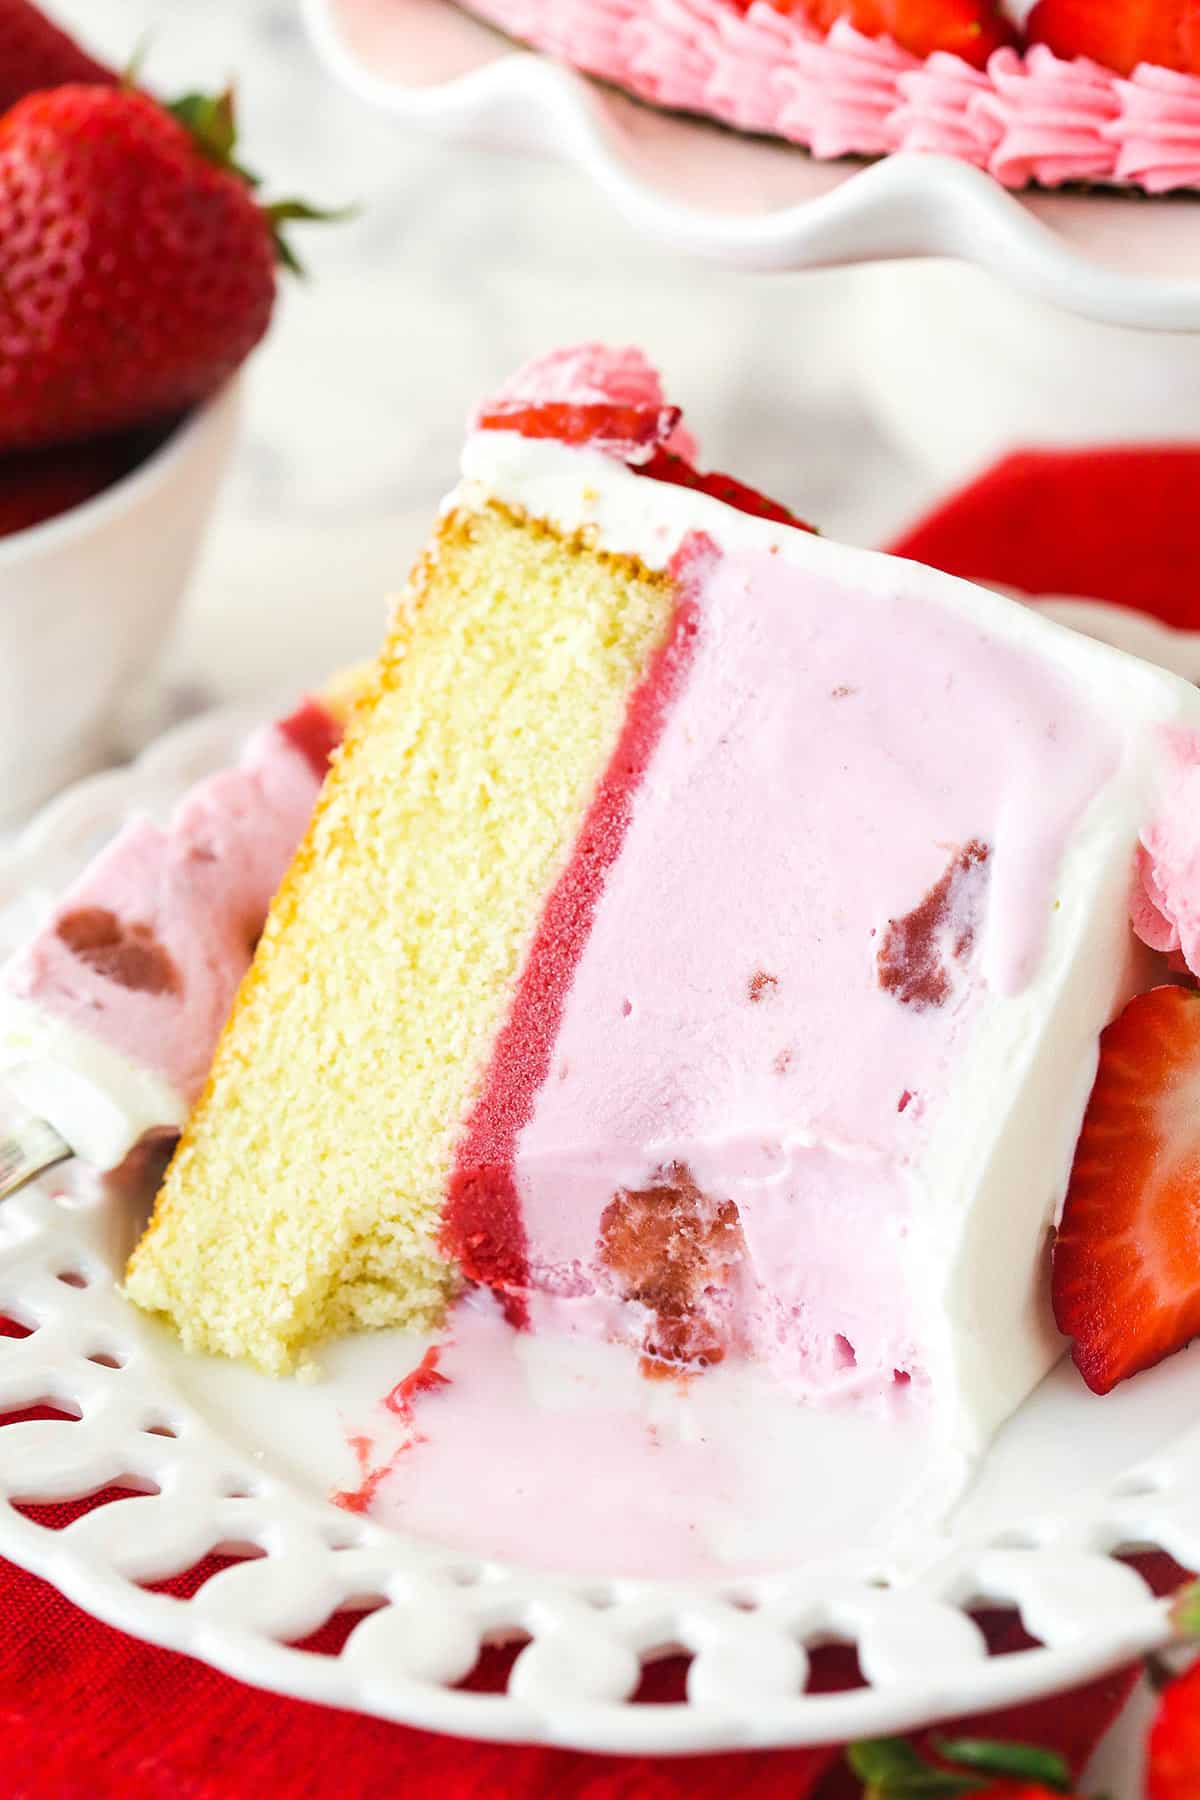
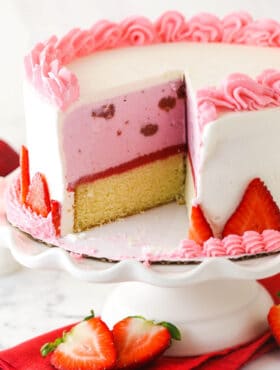
- Aesthetic. Frosted in a pure white whipped cream frosting, this cake is so elegant at first glance. Then, when you slice it open, the cheerful pink of the ice cream next to the even brighter pink of the strawberry filling makes it a celebration of color, perfect for any occasion.
What You’ll Need
Here’s a list of ingredients needed to make this delightful strawberry ice cream cake. Be sure to scroll to the recipe card below for precise measurements.
Strawberry Ice Cream Cake
- Strawberry ice cream – Store-bought is great or, if you have a little extra time on your hands, this no-churn strawberry ice cream is super easy and absolutely divine.
Vanilla Cake Layer
- All-purpose flour – Be sure to measure with either a food scale or using the scoop and measure method to be sure not to over or under measure your flour.
- Baking powder – For the perfect rise and texture.
- Salt – Always needed to accentuate the flavors in the cake. Be sure not to leave it out.
- Unsalted butter – The butter must be at room temperature, otherwise, it will not cream properly with the vegetable oil, sugar, and vanilla.
- Vegetable oil – For some extra moisture in the cake.
- Sugar – This adds sweetness to the cake as well as moisture, and contributes to the cakes tender texture.
- Vanilla extract
- Eggs – Be sure to use large eggs.
- Milk – Whole milk or 2% will work well.
Strawberry Filling
- Chopped strawberries – Be sure to pick sweet smelling strawberries. The sweeter they smell, the better their flavor will be and therefore the better your filling will be.
- Heavy cream – Don’t substitute this for another kind of milk. It will thin it out too much. The cream adds creaminess to the filling, which makes it a nice texture even when frozen.
- Sugar – For some added sweetness and volume.
- Cornstarch – To help thicken the filling.
Whipped cream
- Heavy whipping cream – The heavy whipping cream must be cold, otherwise it will not whip up and hold volume properly.
- Powdered sugar – To stabilize the whipped cream. With the powdered sugar added, it will never wilt.
- Vanilla extract
- Sliced strawberries – Optional. They are great to decorate the cake with.
- Pink/Red gel icing color – This is optional. You can mix it into some of the whipped cream to be piped in swirls over the cake if you would like to decorate that way.
How to Make Strawberry Ice Cream Cake
Ready to make the best strawberry ice cream cake you could ever imagine? Here’s a quick look at how to do it. For more detailed instructions, scroll to the recipe card below.
To make the cake layer
- Prep. Line the bottom of an 8-inch cake pan with parchment paper and grease the sides. Preheat oven to 325°F.
- Combine the dry ingredients. Whisk together the flour, baking powder, and salt.
- Cream. Beat the butter, sugar, oil, and vanilla extract for 2-3 minutes.
- Add the eggs. Mix in the eggs, one at a time.
- Put it all together. Mix half of the dry ingredients into the butter mixture. Slowly mix in the milk followed by the rest of the dry ingredients.
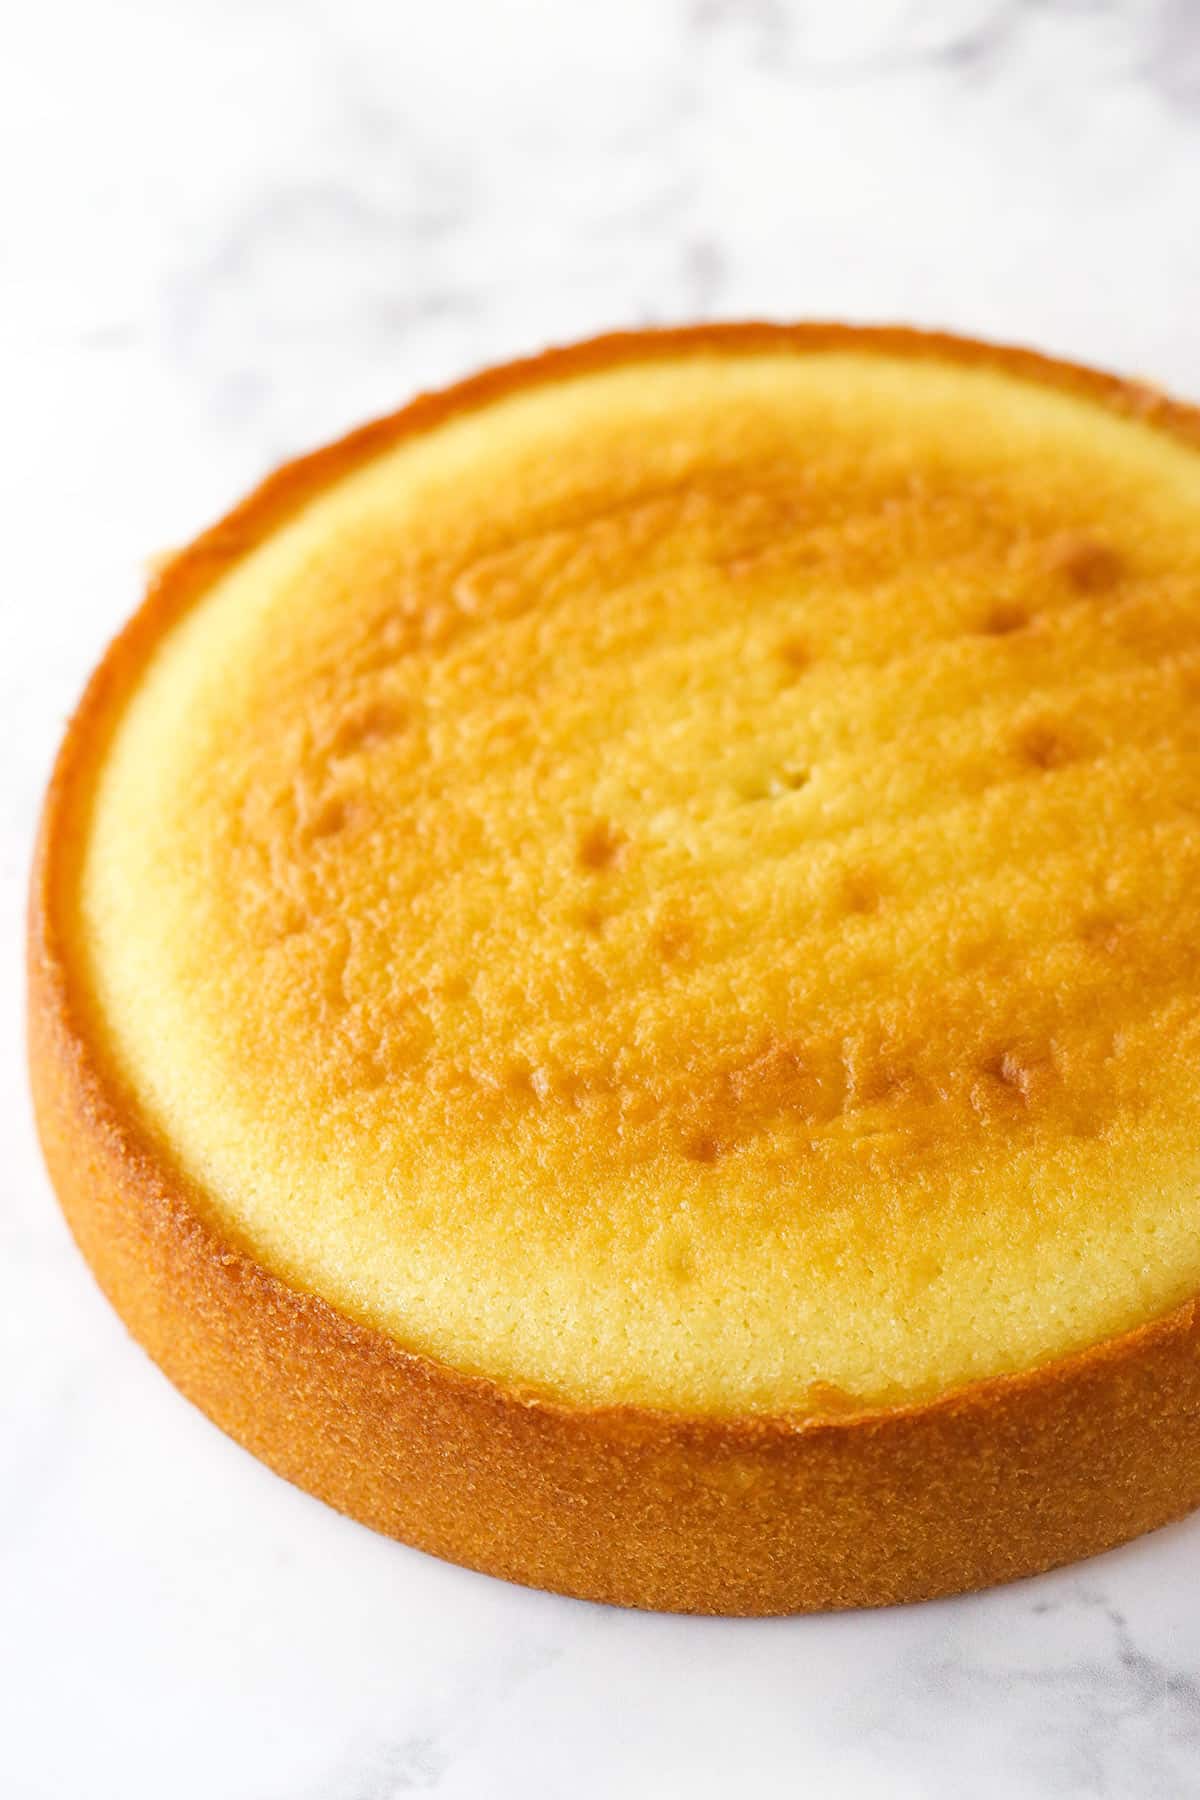
- Bake. Pour the batter into the cake pan and bake for 30-35 minutes.
- Cool. Allow the cake to cool in the pan for a couple of minutes before transferring it to a wire rack to cool completely.
To make the strawberry filling
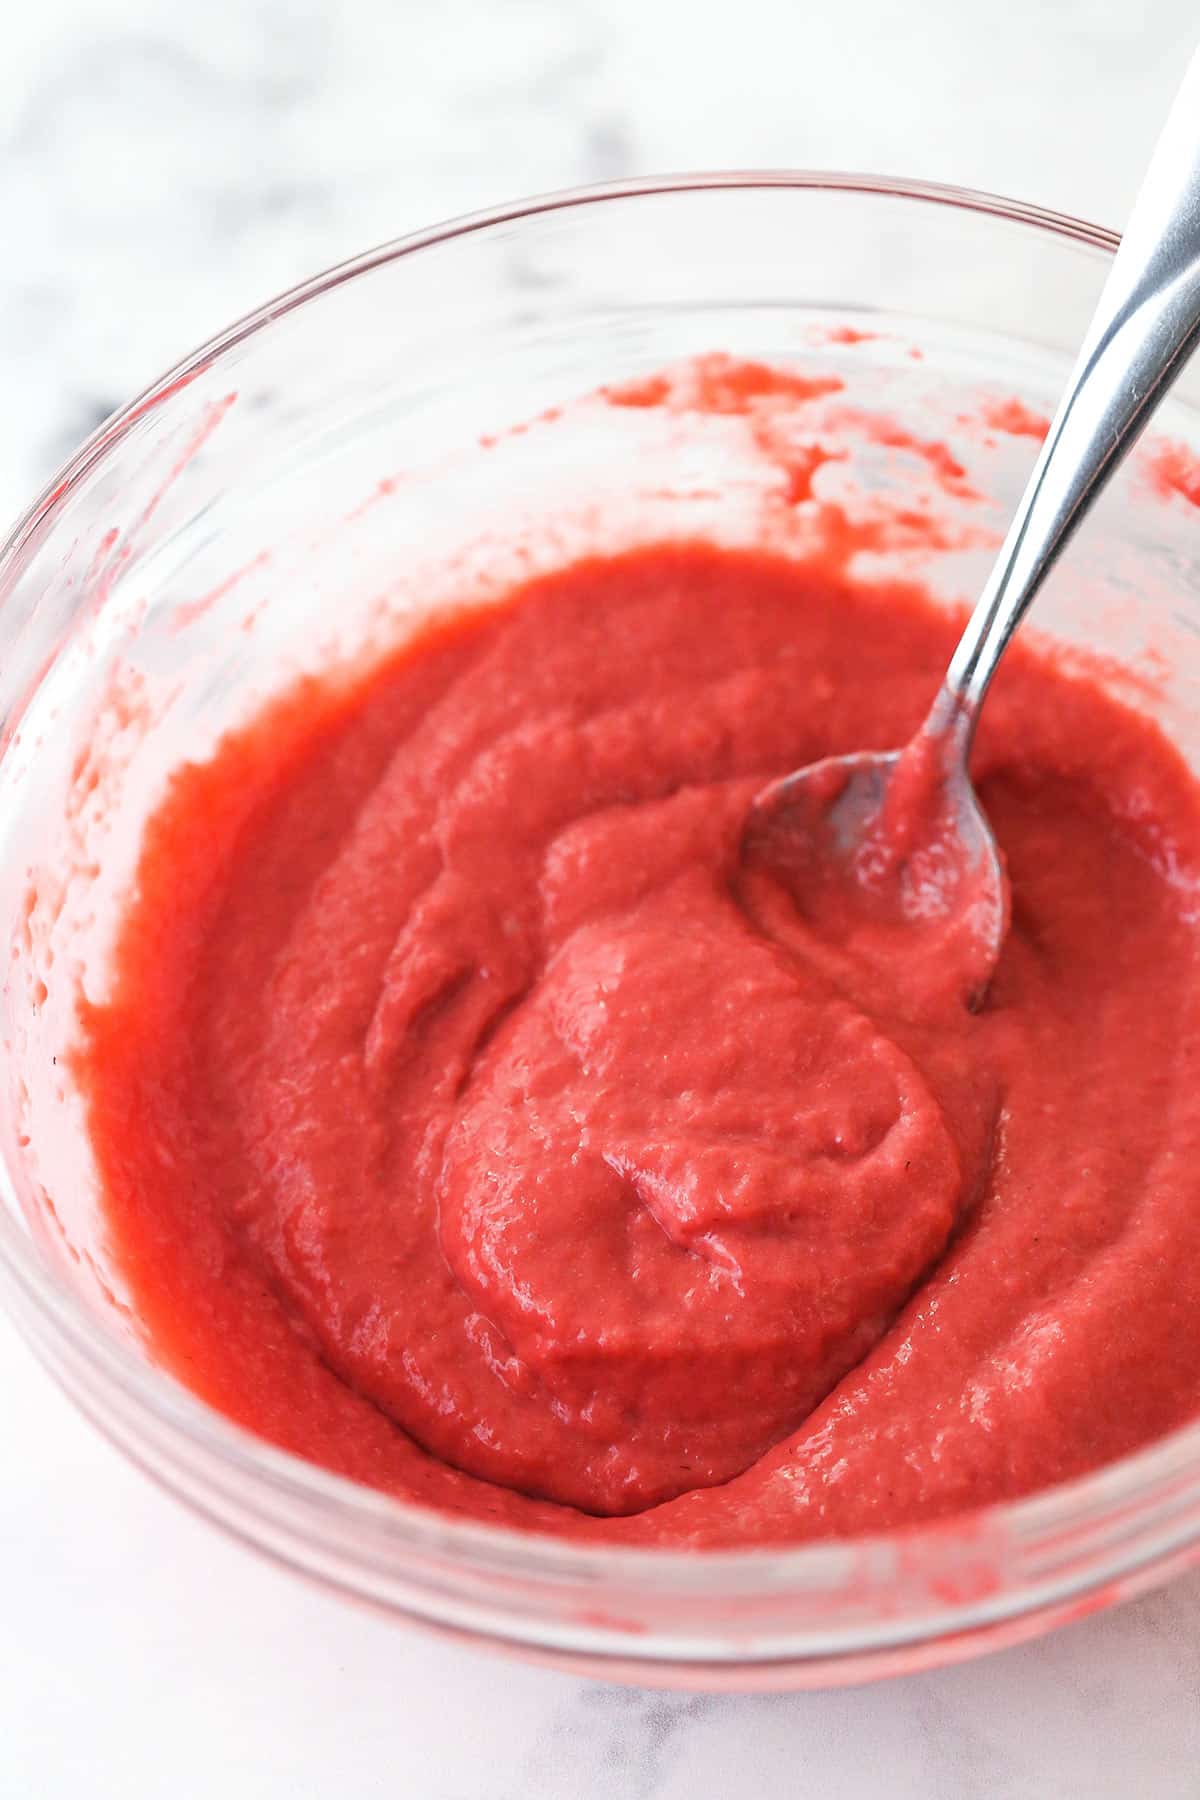
- Make the reduction. Puree the strawberries and strain the mixture through a fine mesh sieve (optional). Transfer the strained puree to a saucepan and cook over medium heat on the stovetop until reduced by half.
- Put it all together. Whisk together the cream, sugar, and cornstarch. Add the mixture to the saucepan (with the strawberry reduction) and bring to a gentle boil. Cook for 45-60 seconds.
- Cool. Transfer the filling to a heat-proof bowl to cool.
To build the cake
- Soften your ice cream. Set the ice cream out for 15-20 minutes.
- Prep your pan. Line your 8-inch pan (the same one you used for the cake) with two pieces of clear wrap, going in opposite directions and extending past the edges of the pan (enough to fold over the top of the cake).
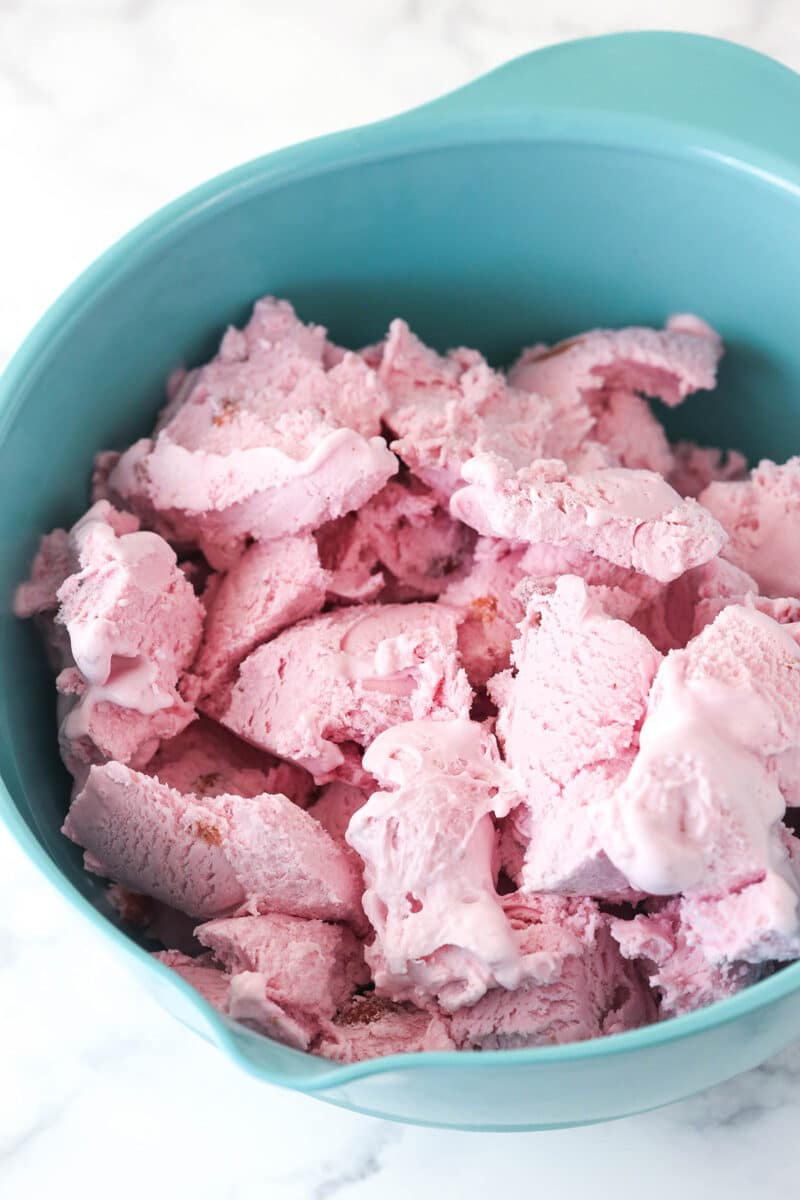
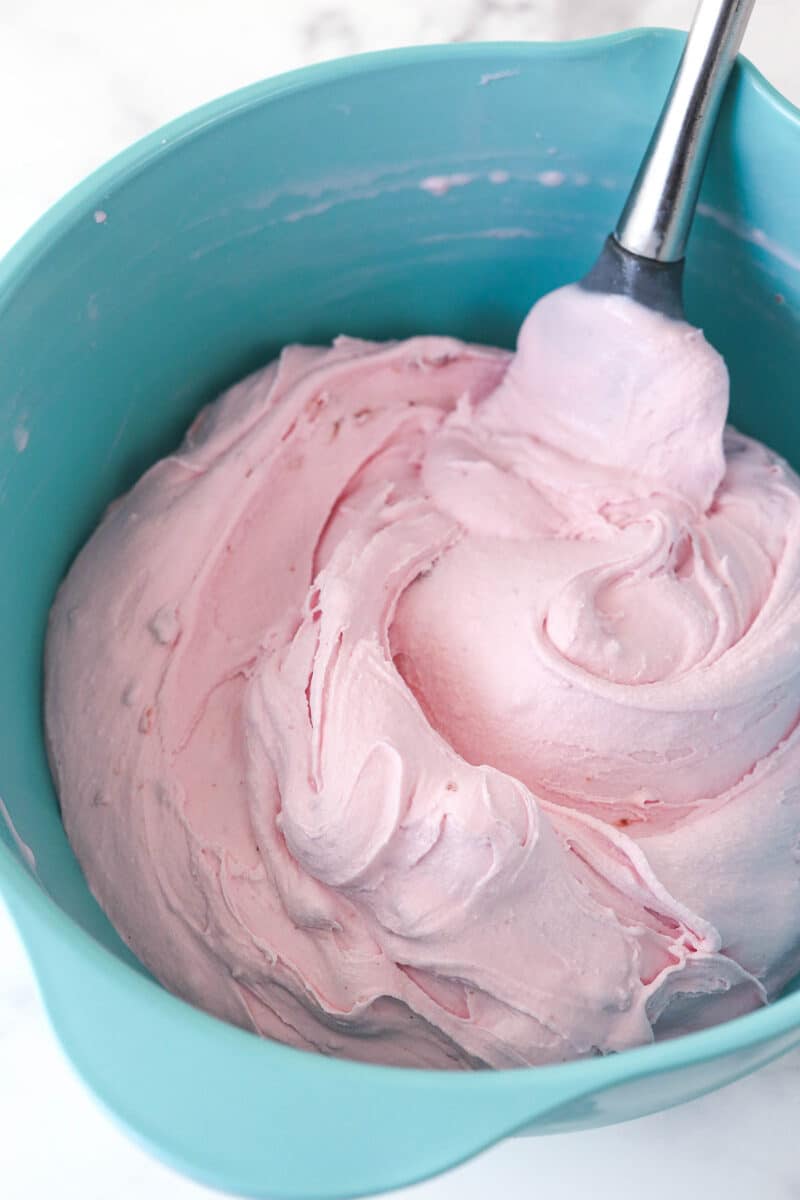
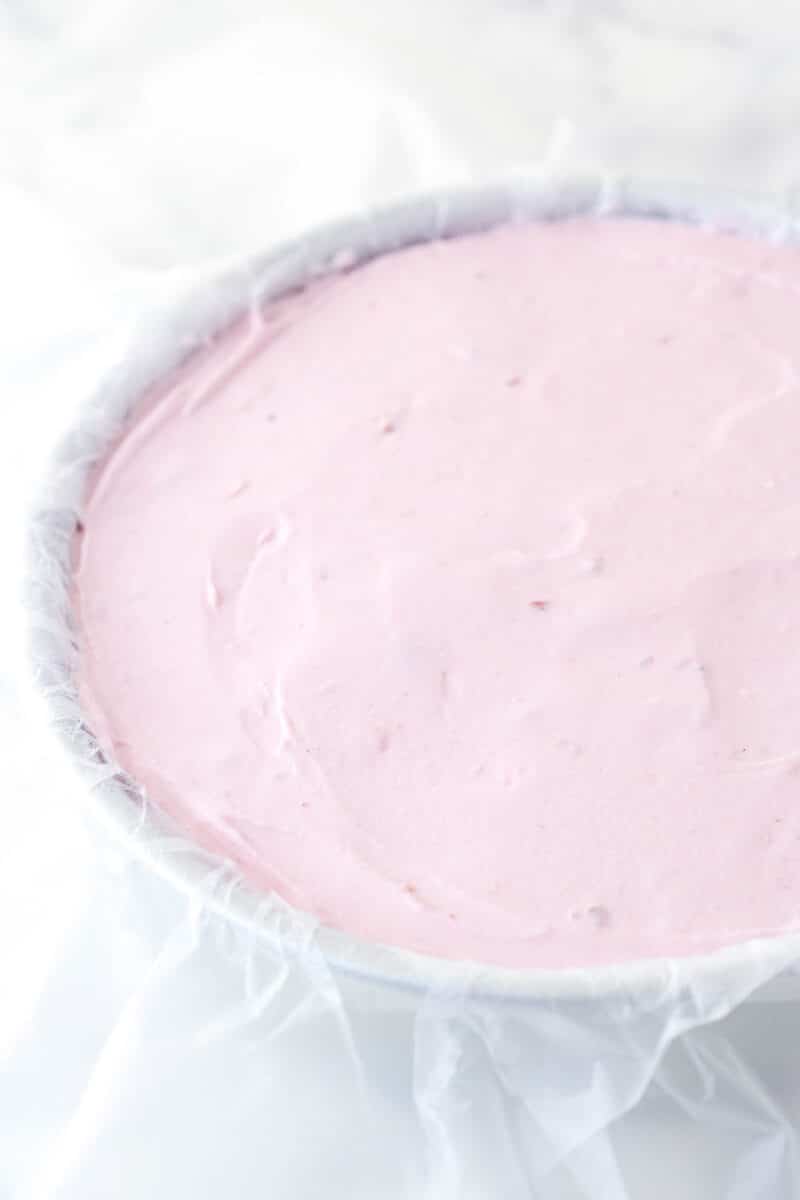
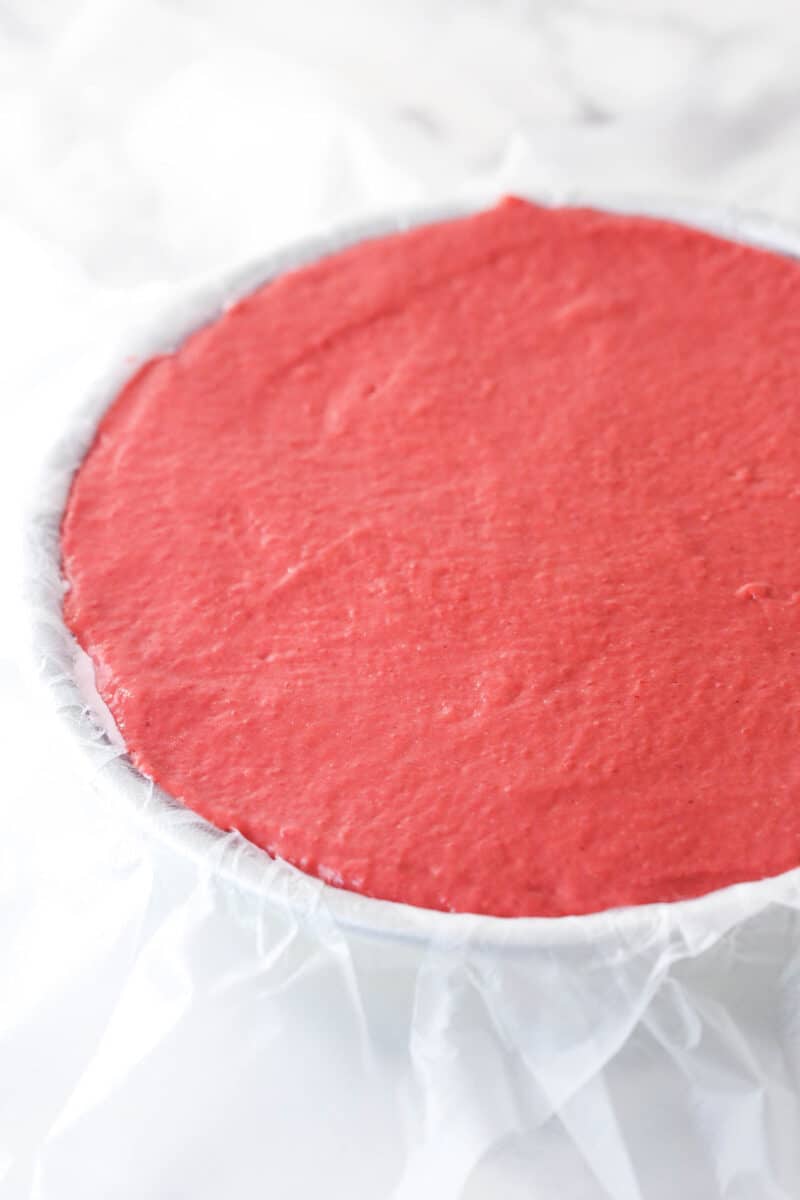
- Assemble. Stir the ice cream until creamy and smooth and spread it into the bottom of the pan. Spread the cooled strawberry filling over the top of the ice cream and chill in the freezer for 15 minutes. Remove the dome from the top of the cake and set it on top of the strawberry filling.
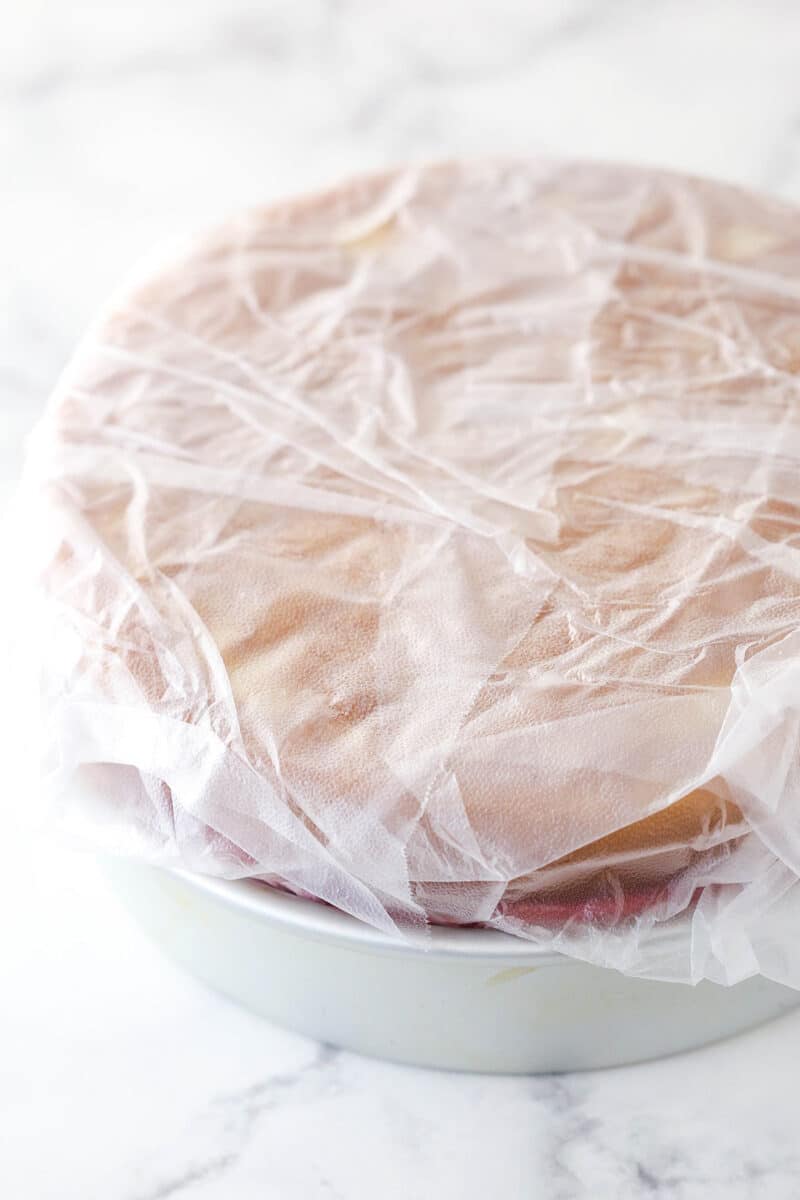
- Freeze. Use the excess clear wrap to wrap around the cake and freeze for 3-4 hours.
To finish the cake
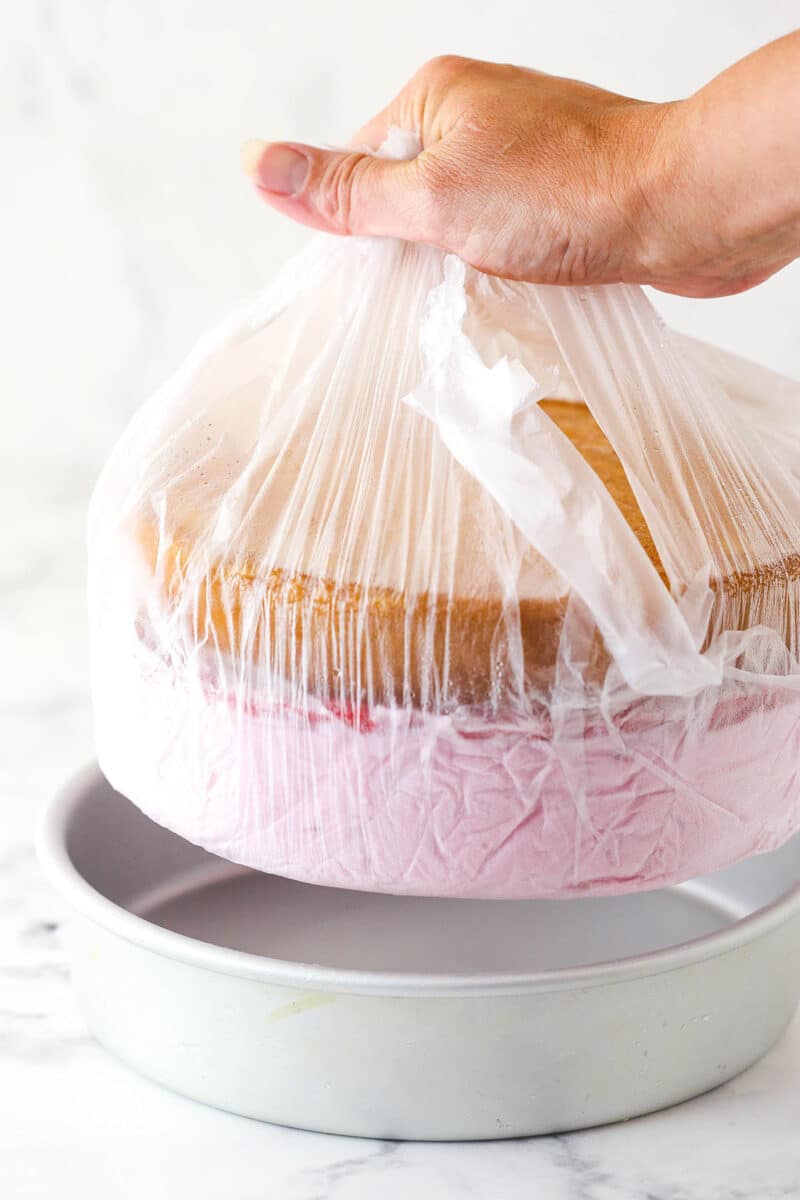
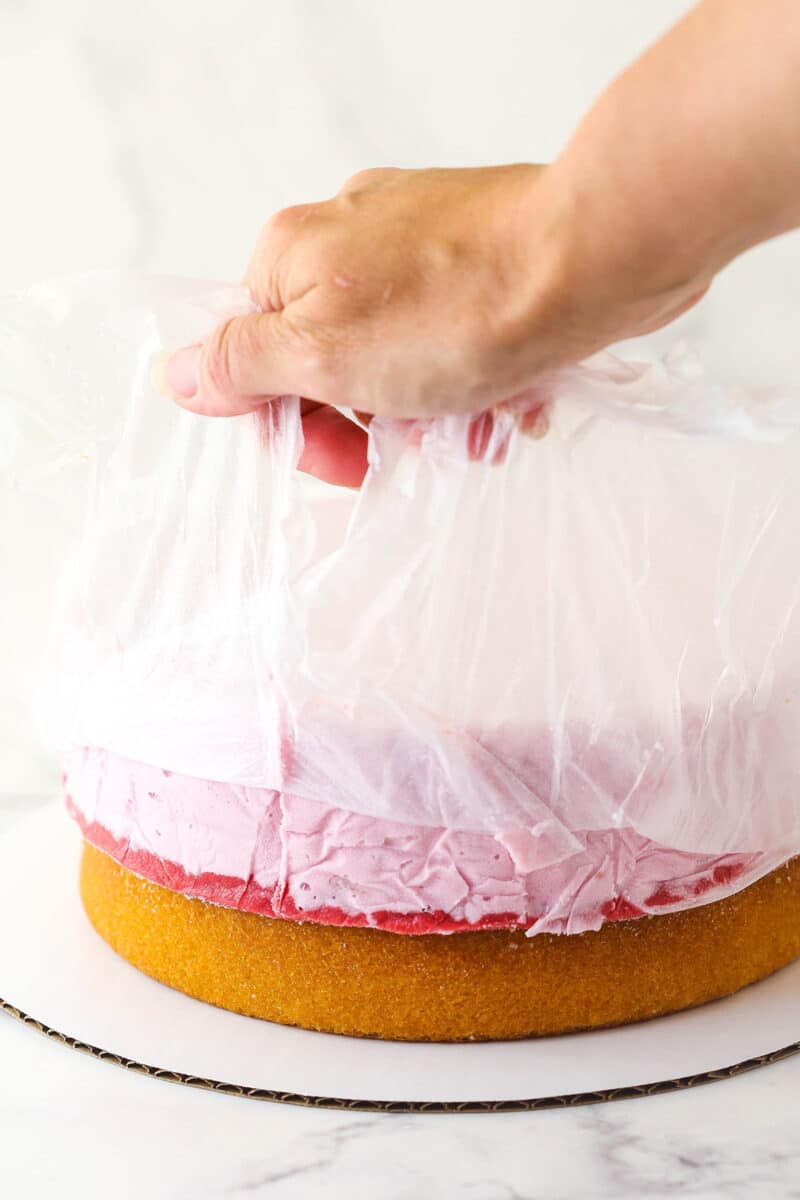
- Invert the cake. Turn the cake over onto a serving platter and remove the clear wrap.
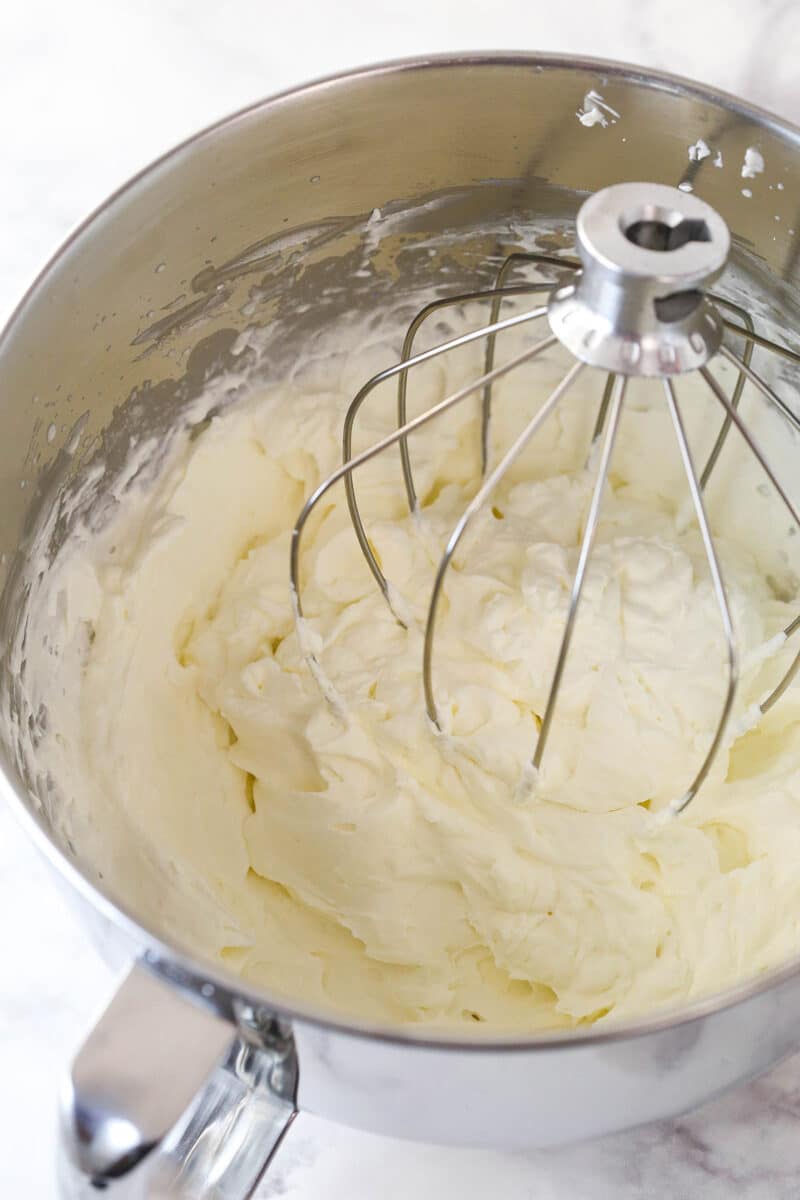
- Make the whipped cream frosting. Beat the heavy whipping cream, powdered sugar, and vanilla extract on high speed until stiff peaks form.
- Frost. Frost the cake with the whipped cream.
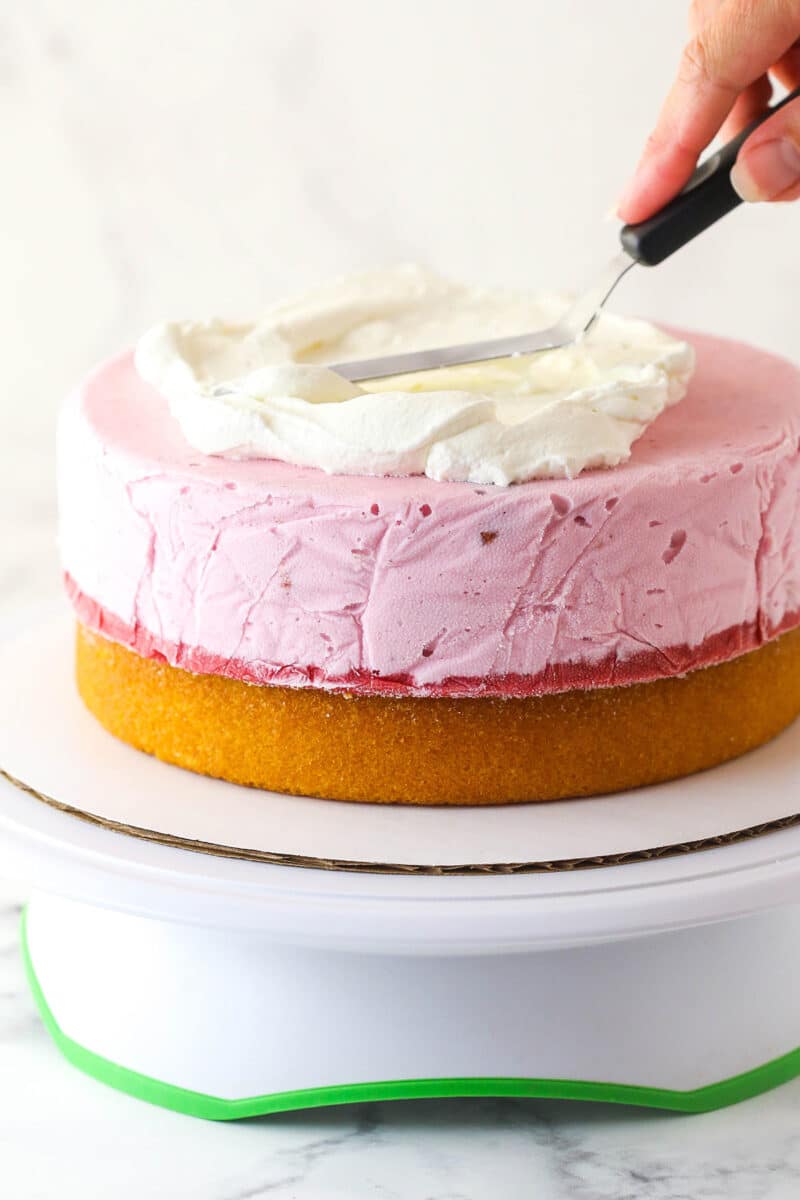
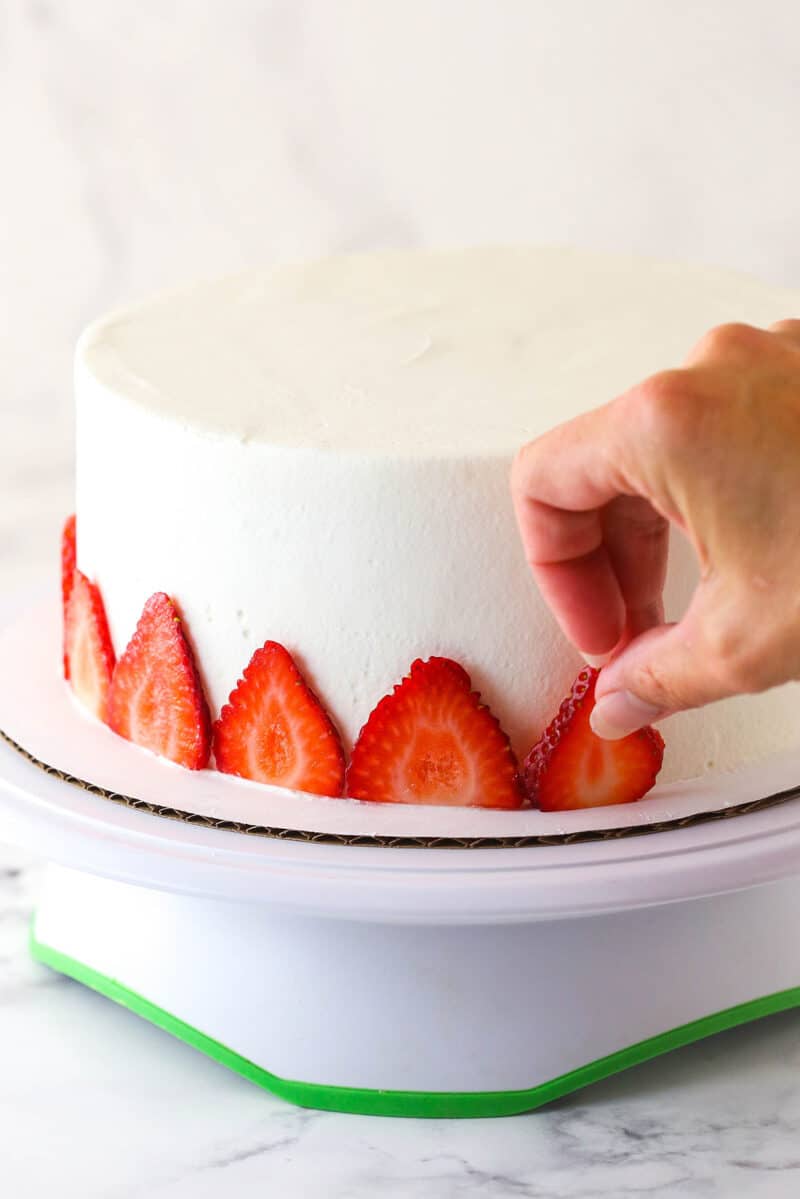
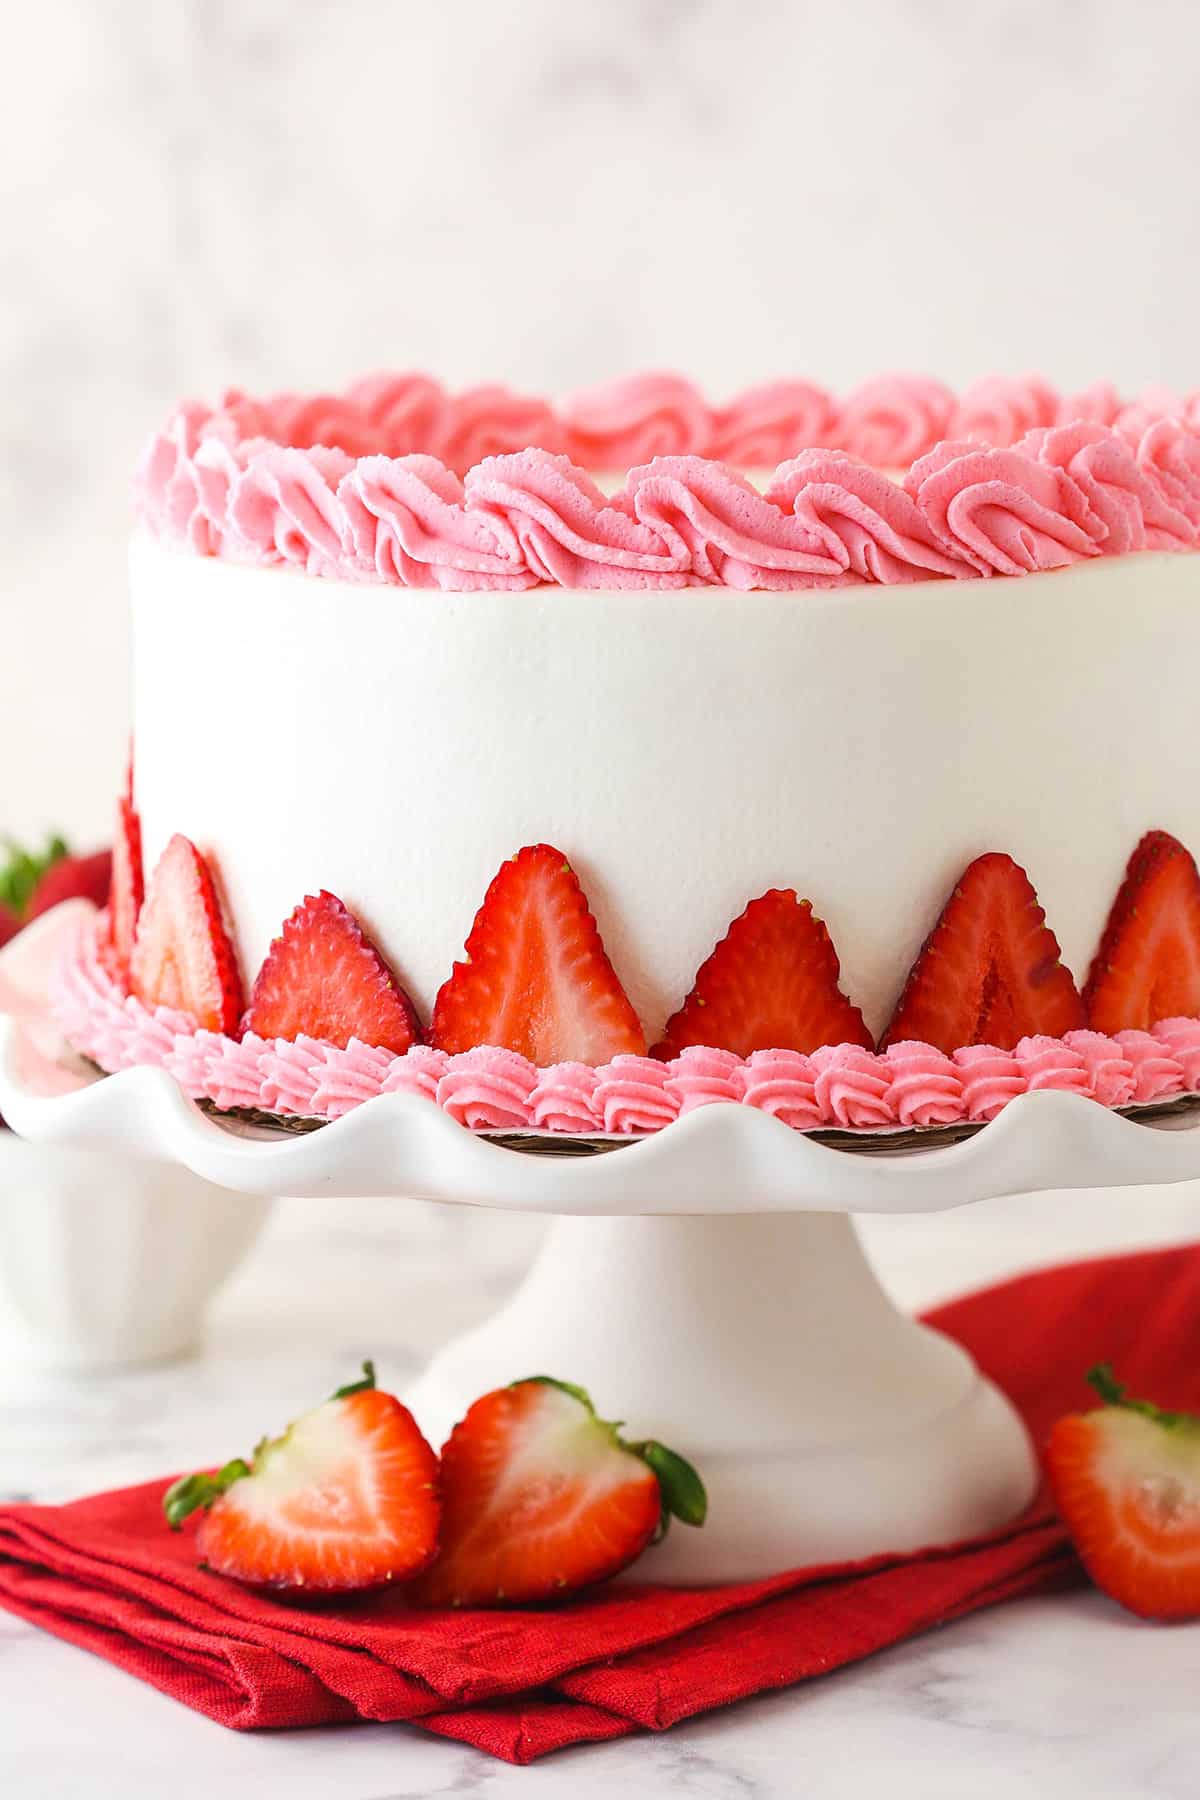
- Decorate. Arrange slices of fresh strawberry around the edges of the cake and, if you’d like, mix the gel icing color with any remaining whipped cream and pip it over the top of the cake.
- Freeze. Store the cake in the freezer until ready to serve.
Tips for the Best Ice Cream Cake
Before diving into this recipe, you’ll want to have a look at the following tips and tricks. They will help you avoid some common pitfalls and give you the best ice cream cake possible.
- Room temperature butter. It is important that the butter used in the cake batter is at room temperature. Otherwise, it won’t cream properly with the oil, sugar, and vanilla.
- Don’t skimp on creaming time. When creaming together the butter, oil, sugar, and vanilla, you want the mixture to be fluffy and significantly lightened in color and texture. This will help ensure that your cake is nice and fluffy. Cutting creaming time short will give you a dense cake, as will over creaming.
- Scrape the sides of the bowl. When adding ingredients and mixing them into the cake batter, it is important to scrape down the sides of the bowl. This ensures that all ingredients are properly incorporated into the batter.
- Don’t over-mix. When combining the wet and dry ingredients for the cake batter, mix just until everything is combined. Over-mixing can cause the glutens in the flour to overdevelop which will give you a tough, dense cake.
- Consistency matters. When cooking the strawberry filling, remember that it will continue to thicken as it cools. So don’t boil it for too long (45 seconds to 1 minute should do). If the filling is too thick, it won’t spread over the ice cream easily.
- Cool the strawberry filling. Be sure to let the strawberry filling cool completely before assembling the dessert. If it is too warm, it will melt the ice cream. Pinched for time? Pop it in the fridge for a bit to speed up the cooling process.
- Allow the cake to cool completely. If you don’t, the ice cream will melt when you attempt to assemble the cake.
- Soften the ice cream. Allow the ice cream to soften for 30 minutes or so at room temperature before assembling the dessert. If the ice cream is too frozen, it will be difficult to spread over the strawberry filling. I like to scoop the ice cream into a bowl so that it softens more evenly.
- Cold heavy whipping cream. The whipping cream needs to be cold, otherwise, it won’t hold volume properly and you’ll end up with a flat cream frosting.
- Decorate quickly. Frost and decorate the cake quickly to ensure that the ice cream doesn’t melt.
Serving Suggestions
It’s best to let the ice cream cake soften a bit before slicing. So take it out of the freezer about 5 minutes before serving. Slice the cake using a long, serrated knife. I recommend wiping the knife clean and dipping it in hot water between each cut. Serve the cake quickly. If you are using paper plates, be sure that they are nice and sturdy. This is a heavy cake!
Looking to doll your ice cream cake up a bit? Drizzle a slice with a little Easy Strawberry Sauce or Easy Homemade Hot Fudge Sauce.
Can This Be Prepared in Advance?
If you would like to make the components for this dessert ahead of time and assemble it later, feel free! Go ahead and make the cake up to 2 days in advance. Allow it to cool completely before storing it in an airtight container or Ziplock bag at room temperature until you are ready to assemble.
You can also make the strawberry filling up to 3 days ahead of time. Allow it to cool before pressing clear wrap onto the top of the mixture and storing it in the fridge.
The full ice cream cake also be made several days in advance and stored in the freezer.
How to Store Strawberry Ice Cream Cake
This cake will stay good in the freezer for up to 1 week. Store it in an airtight cake carrier or, if you don’t have one, wrap the whole dessert in a double layer of plastic wrap. I suggest popping it in the freezer for a couple of hours first to allow the frosting to firm up a bit.
More Ice Cream Cake Recipes
Feeling excited about ice cream cake? Good. Me too. That’s why I’ve compiled a list of some of my favorite ice cream cake recipes for you. Have fun!
- Ice Cream Cake Recipe
- Banana Mocha Ice Cream Cake
- Oatmeal Chocolate Chip Cookie Ice Cream Cake
- Copycat Dairy Queen Ice Cream Cake
- Strawberry Crunch Ice Cream Cake
- Oreo Brookie Ice Cream Cake
Strawberry Ice Cream Cake
- Prep Time: 1 hour 15 minutes
- Chill Time: 4 hours
- Cook Time: 45 minutes
- Total Time: 6 hours
- Yield: 12-14 Servings
- Category: Dessert
- Method: Oven
- Cuisine: American
Description
This Strawberry Ice Cream Cake combines moist and fluffy vanilla cake, creamy strawberry ice cream, and a delicious strawberry filling made from fresh strawberries. It’s full of fresh, fruity flavor and the perfect way to celebrate summer.
Ingredients
Ice Cream
- 1.5 quart or half gallon carton Strawberry Ice Cream OR no-churn strawberry ice cream
Vanilla Cake Layer
- 1 1/4 cups (163g) all-purpose flour
- 1 1/4 tsp baking powder
- 1/4 tsp salt
- 6 tbsp (84g) unsalted butter, room temperature
- 2 tbsp vegetable oil
- 3/4 cup (155g) sugar
- 1 1/2 tsp vanilla extract
- 2 large eggs
- 1/2 cup + 2 tbsp (150ml) milk
Strawberry Filling
- 3 cups (376g) chopped strawberries (you’ll need 1lb strawberries)
- ¼ cup (60ml) heavy cream
- ¼ cup (52g) sugar
- 1 ½ tsp cornstarch
Whipped cream
- 2 cups (480ml) heavy whipping cream, cold
- 1 cup (115g) powdered sugar
- 1 1/2 tsp vanilla extract
- Sliced strawberries, optional
- Pink/Red gel icing color, optional
Instructions
To make the cake layer:
- Prepare an 8-inch cake pan with a parchment paper circle in the bottom and grease the sides. Preheat oven to 325°F (176°C).
- Combine the flour, baking powder and salt in a medium sized bowl and set aside.
- Add the butter, sugar, oil and vanilla extract to a large mixer bowl and beat together until light in color and fluffy, about 2-3 minutes. Do not skimp on the creaming time.
- Add the eggs one at a time, mixing until mostly combined after each. Scrape down the sides of the bowl as needed to be sure all ingredients are well incorporated.
- Add half of the dry ingredients to the batter and mix until mostly combined.
- Slowly add the milk and mix until well combined. The batter will look curdled, but that’s ok.
- Add the remaining dry ingredients and mix until well combined and smooth. Scrape down the sides of the bowl as needed to be sure all ingredients are well incorporated. Do not over mix the batter.
- Pour the batter evenly into the prepared cake pan and bake for 30-35 minutes, or until a toothpick comes out with a few crumbs.
- Remove the cakes from the oven and allow to cool for about 2-3 minutes, then remove to cooling racks to cool completely.
To make the strawberry filling:
- To make the strawberry filling, add the strawberries to a food processor or blender and puree until smooth. You should have about 1 1/2 cups of puree. Strain it through a fine mesh strainer to remove the seeds, if desired.
- Add the puree to a medium sized saucepan and cook over medium heat. Allow the mixture to come to a slow boil, stirring consistently to keep it from burning, until it has thickened and reduced to 3/4 cup, about 20-25 minutes. To measure, pour the puree into a measuring cup. If it’s more than 3/4 cup, add it back to the pan and continue cooking.
- When the puree has thickened and reduced, combine the heavy cream, sugar and cornstarch and whisk together. Pour the cream mixture into the strawberry reduction and gently whisk to combine. Continue to heat over medium heat until the mixture comes to a gentle boil. Boil for 45 seconds to 1 minute, or until it looks like it’s thickened nicely. It will continue to thicken as it cools, so you don’t want it to thicken too much.
- Remove from mixture from heat, pour into a heat proof bowl and allow to cool to at least room temperature (or refrigerate it to cool it more quickly). If you’re making it ahead, you can press clear wrap onto the top of the mixture and place it in the fridge for 2-3 days.
To build the cake:
- Set your ice cream out for 15-20 minutes before you need it to let it soften, but not melt. I like to scoop it out into lots of smaller scoops so that it can soften more evenly.
- Line your 8-inch pan with two pieces of clear wrap, one on top of the other going in opposite directions. The pieces of clear wrap should be long enough that you can use them later to lift the cake out of the pan. Press the clear wrap into the pan and press against the bottom and sides to flatten it.
- Once the ice cream has softened, stir until creamy and smooth, then pour the ice cream into the lined pan and spread it into an even layer.
- Add the cooled strawberry mixture to the top of the ice cream and spread into an even layer. Place the pan in the freezer for 15 minutes or so for things to firm up a bit.
- If your vanilla cake layer isn’t flat, use a large serrated nice to trim off the dome. Place the cake on top of the strawberry layer, with the trimmed side down on the strawberry layer. Use the excess clear wrap to wrap around the cake and place in the freezer for 3-4 hours or until completely firm.
To finish the cake:
- When the cake is frozen and firm, use the clear wrap to loosen and lift the cake out of the pan. Turn it over onto a cardboard cake circle or a serving platter. Remove the clear wrap from the top of the ice cream.
- To make the whipped cream frosting, add the heavy whipping cream, powdered sugar and vanilla extract to a large mixer bowl and whip on high speed until stiff peaks form.
- Frost the cake with the whipped cream, working quickly so that the ice cream doesn’t melt, then decorate as desired. I added some strawberry slices to the outside bottom of the cake, then colored the remaining whipped cream with some pink and red gel icing color and piped on a top and bottom border.
- Store the cake in the freezer until ready to serve. If you have room in your freezer, store it in an air tight container. The cake is best if eaten within a week or so.
Nutrition
- Serving Size: 1 Slice
- Calories: 464
- Sugar: 25.4 g
- Sodium: 119.6 mg
- Fat: 22.7 g
- Carbohydrates: 61.7 g
- Protein: 6.2 g
- Cholesterol: 89 mg




Hi, can I use 9 inch spring form pan’s instead? Would I have to modify the recipe?
This sounds really delicious and something new to try. Thank you for sharing this.
Simon
Hi Lindsay — wondering how you freeze the cake once it is out of the springform pan and topped with cool whip and strawberries? I was thinking about using some tin foil and tenting it around the top as I’m concerned about messing up, but I also want to avoid freezer burn. What do you suggest? Thanks!
Foil should work well. One thing I’ve done before is to put a few toothpicks in the top of the cake before adding the foil or clear wrap. They might poke some holes in the wrap, but they should mostly keep it from messing up the top of the cake. Craft stores like Michaels also sell cake boxes that you might be able to use too.
This cake looks so delicious! I’m excited to make this cake for my son’s birthday Do I cover the cake while in the freezer?
If you have something that will cover it nicely, that’d be ideal.
Love how gorgeous the strawberries look – they really are nature’s art!
Oh my god this might be the most beautiful strawberry cake I’ve ever seen.
oh my gosh this is fantastic! Love how well it is structured so that it holds together perfectly!
So gorgeous! Next time I made an ice cream cake, I’m trying your recipe for the ice cream layers. It is perfect!
What a beautiful cake! Love the homemade strawberry ice cream layer!
I’ll tell you what’s a work of art, this gorgeous cake! I mean wow! It seriously looks so perfect. I love it!
Thanks Jessica!
OH MY GOSH!!!! I kid you not….I was just on your blog LAST NIGHT looking for a strawberry ice cream cake recipe to make for Easter. My jaw just dropped when I saw this on here this morning!!! What are the chances?! Will be making this cake for Easter and this – https://www.lifeloveandsugar.com/2014/05/01/chocolate-chip-cookie-dough-ice-cream-cake/
We have a big family 🙂
How crazy is that? I’m so glad I read your mind! 🙂 Both are excellent choices – enjoy them! Happy Easter!
Your creations are always so stunning. Love the gorgeous layers and all those strawberries!
This is such a work of art! I don’t know how you get those layers lookin’ so fabulous!
Just want one little bite….
Have a great week!
Fruit IS nature’s art, it’s so pretty! It looks so gorgeous on this cake, and I am totally loving that pink ice-cream layer!
Now, if you ship me a slice, no one gets hurt 😉 Pinned!
I am in love. Girl I have a recipe like this in the book. I adore strawberry anything and this one takes the cake literally lol.
I can’t wait to see the one in the book! I already know I’ll love it! 🙂
Wow, waxing poetic about fruit. It’s okay! I feel the same way about peanut butter.
This is gorgeous. Very much nature’s art, enhanced by you!