This post may contain affiliate sales links. Please read my disclosure policy.
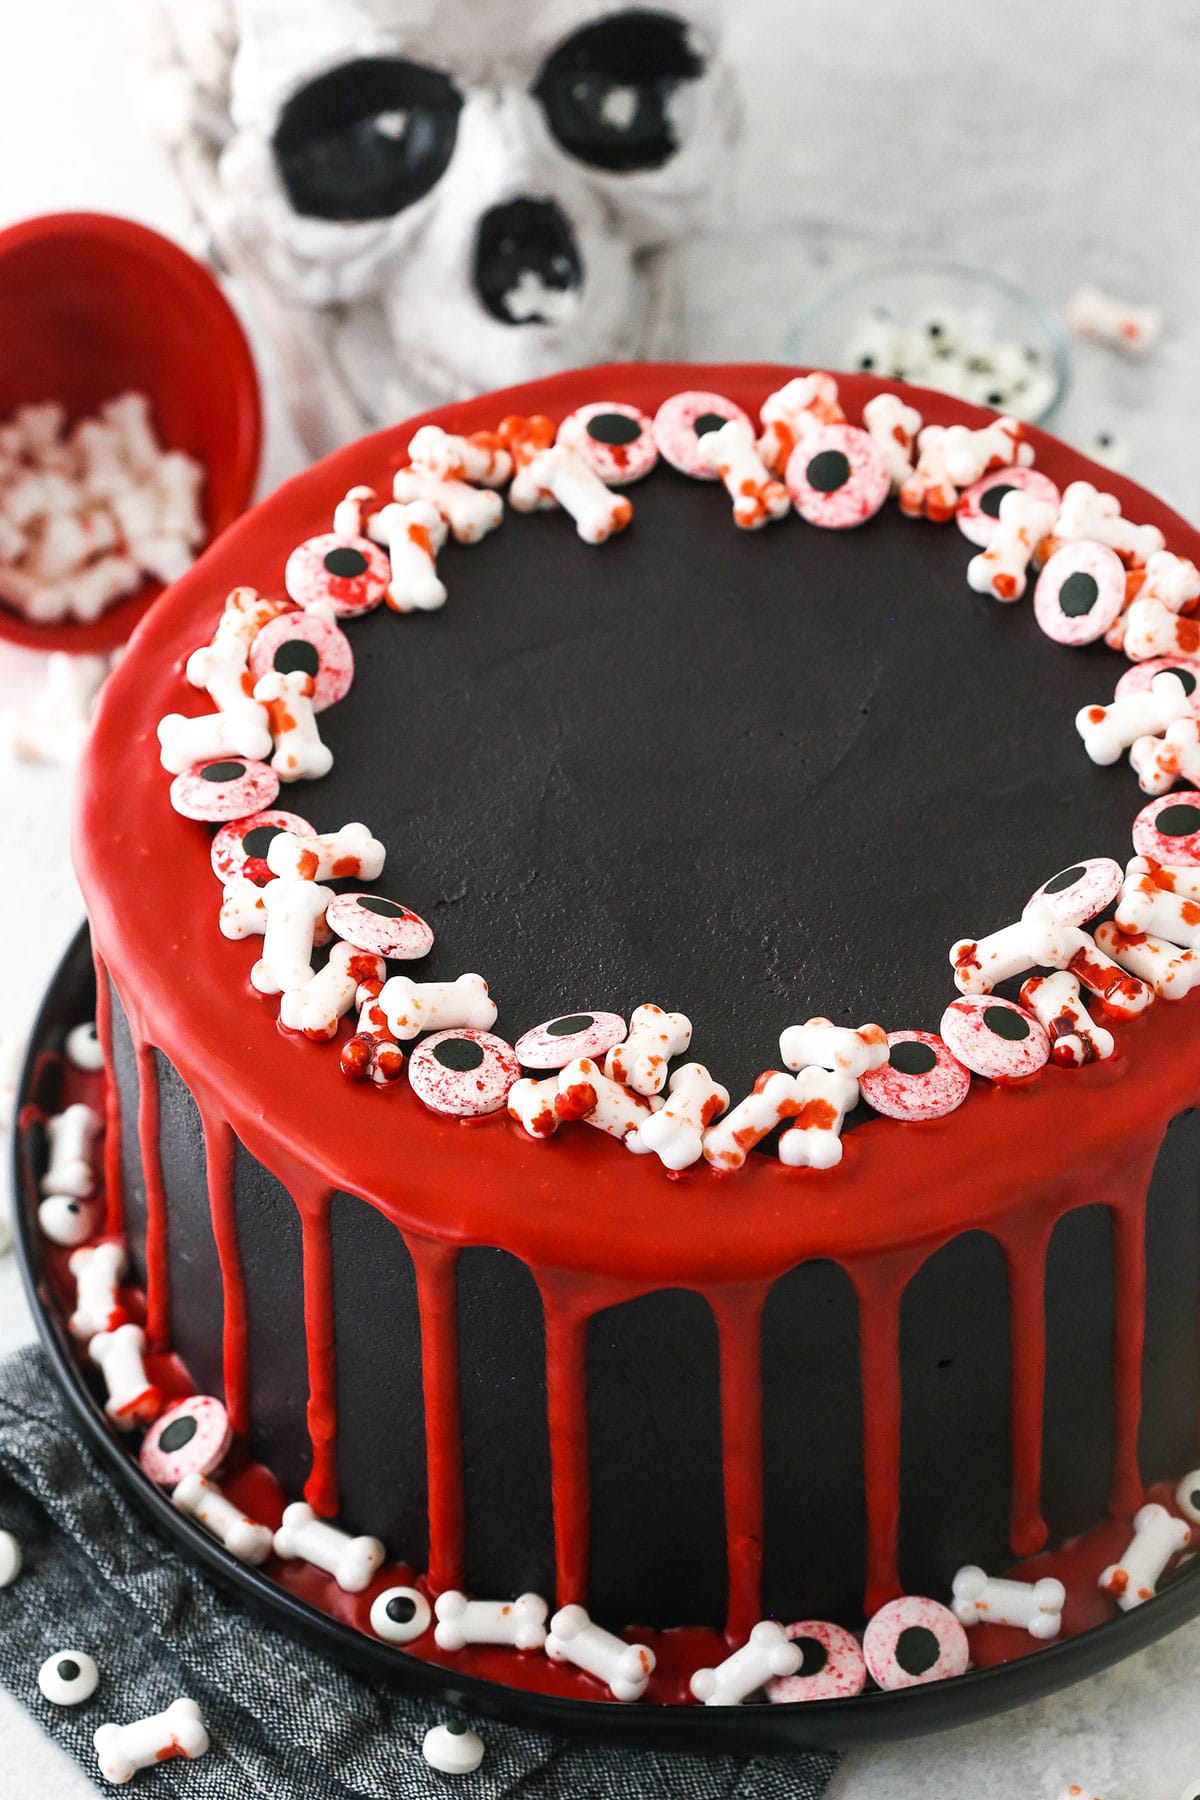
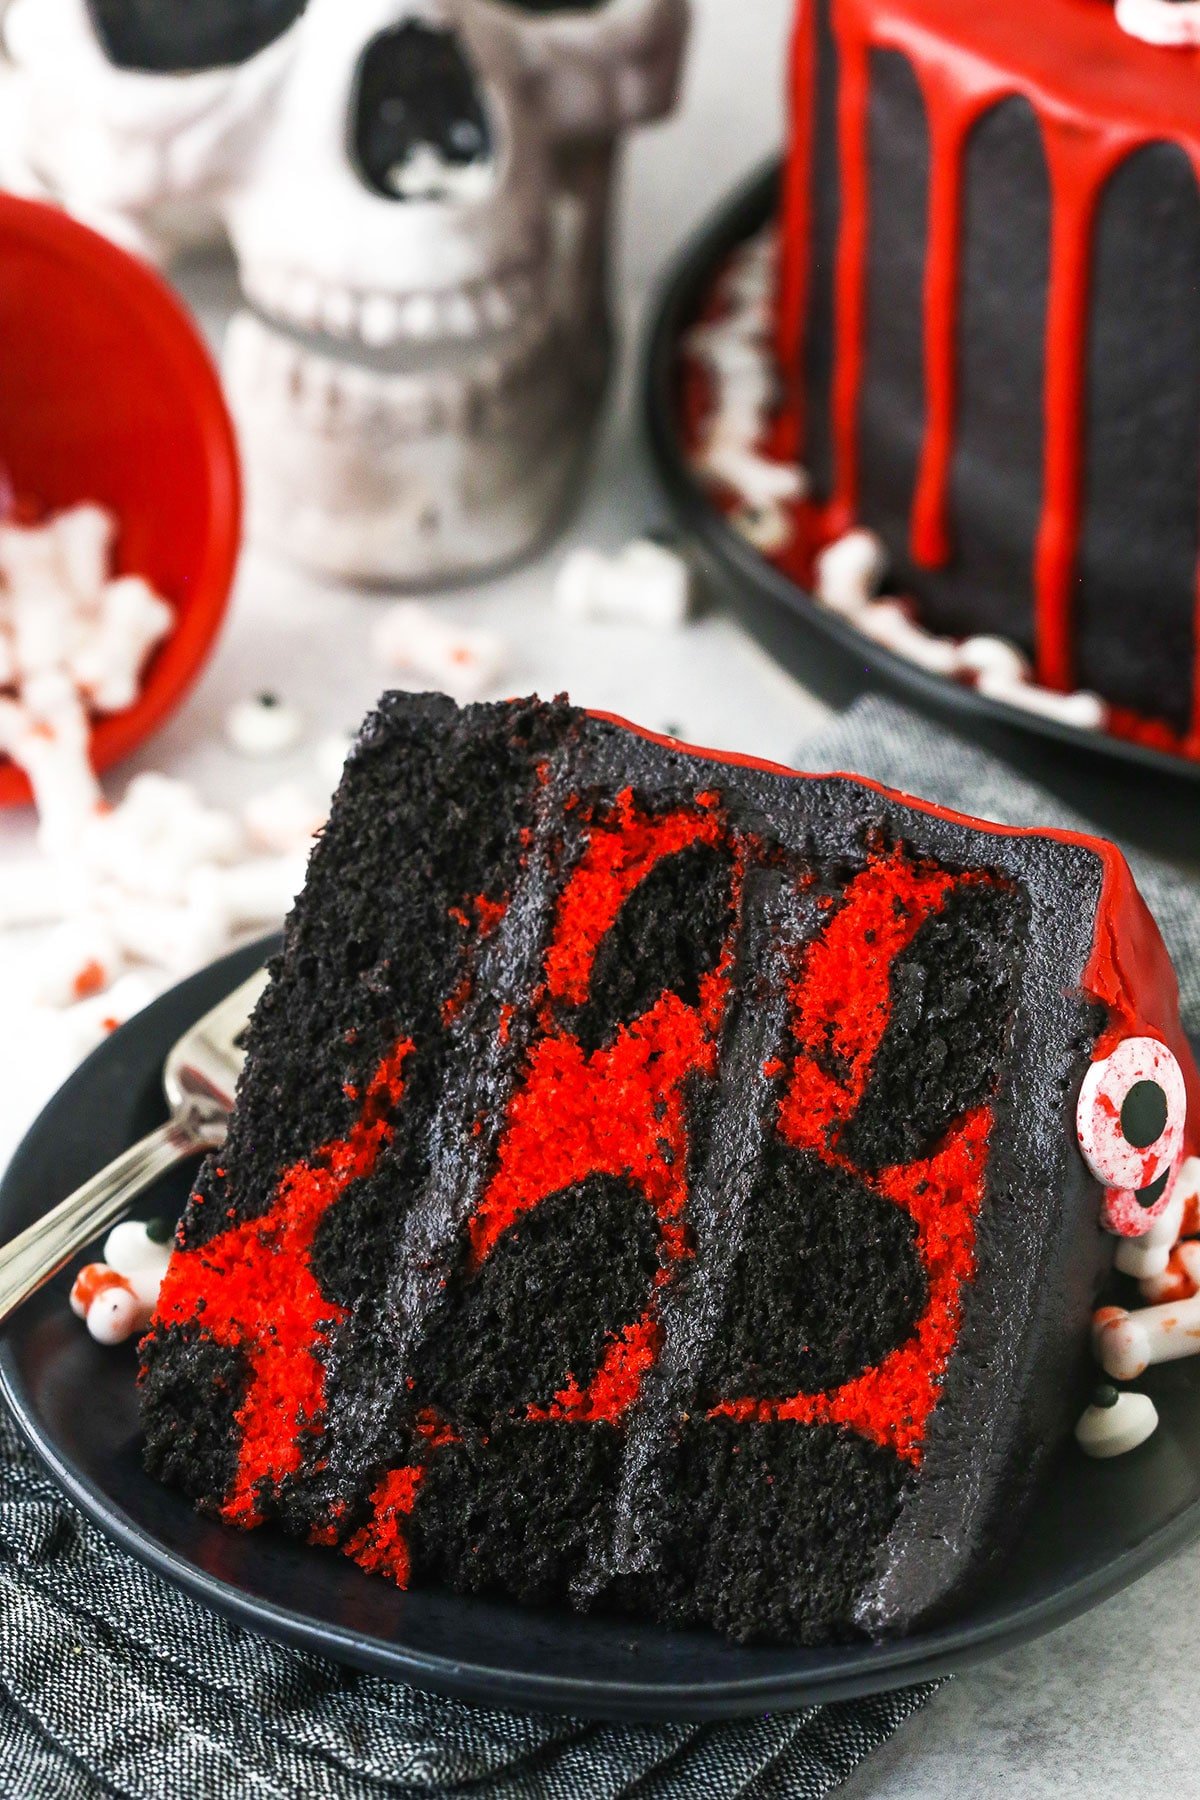
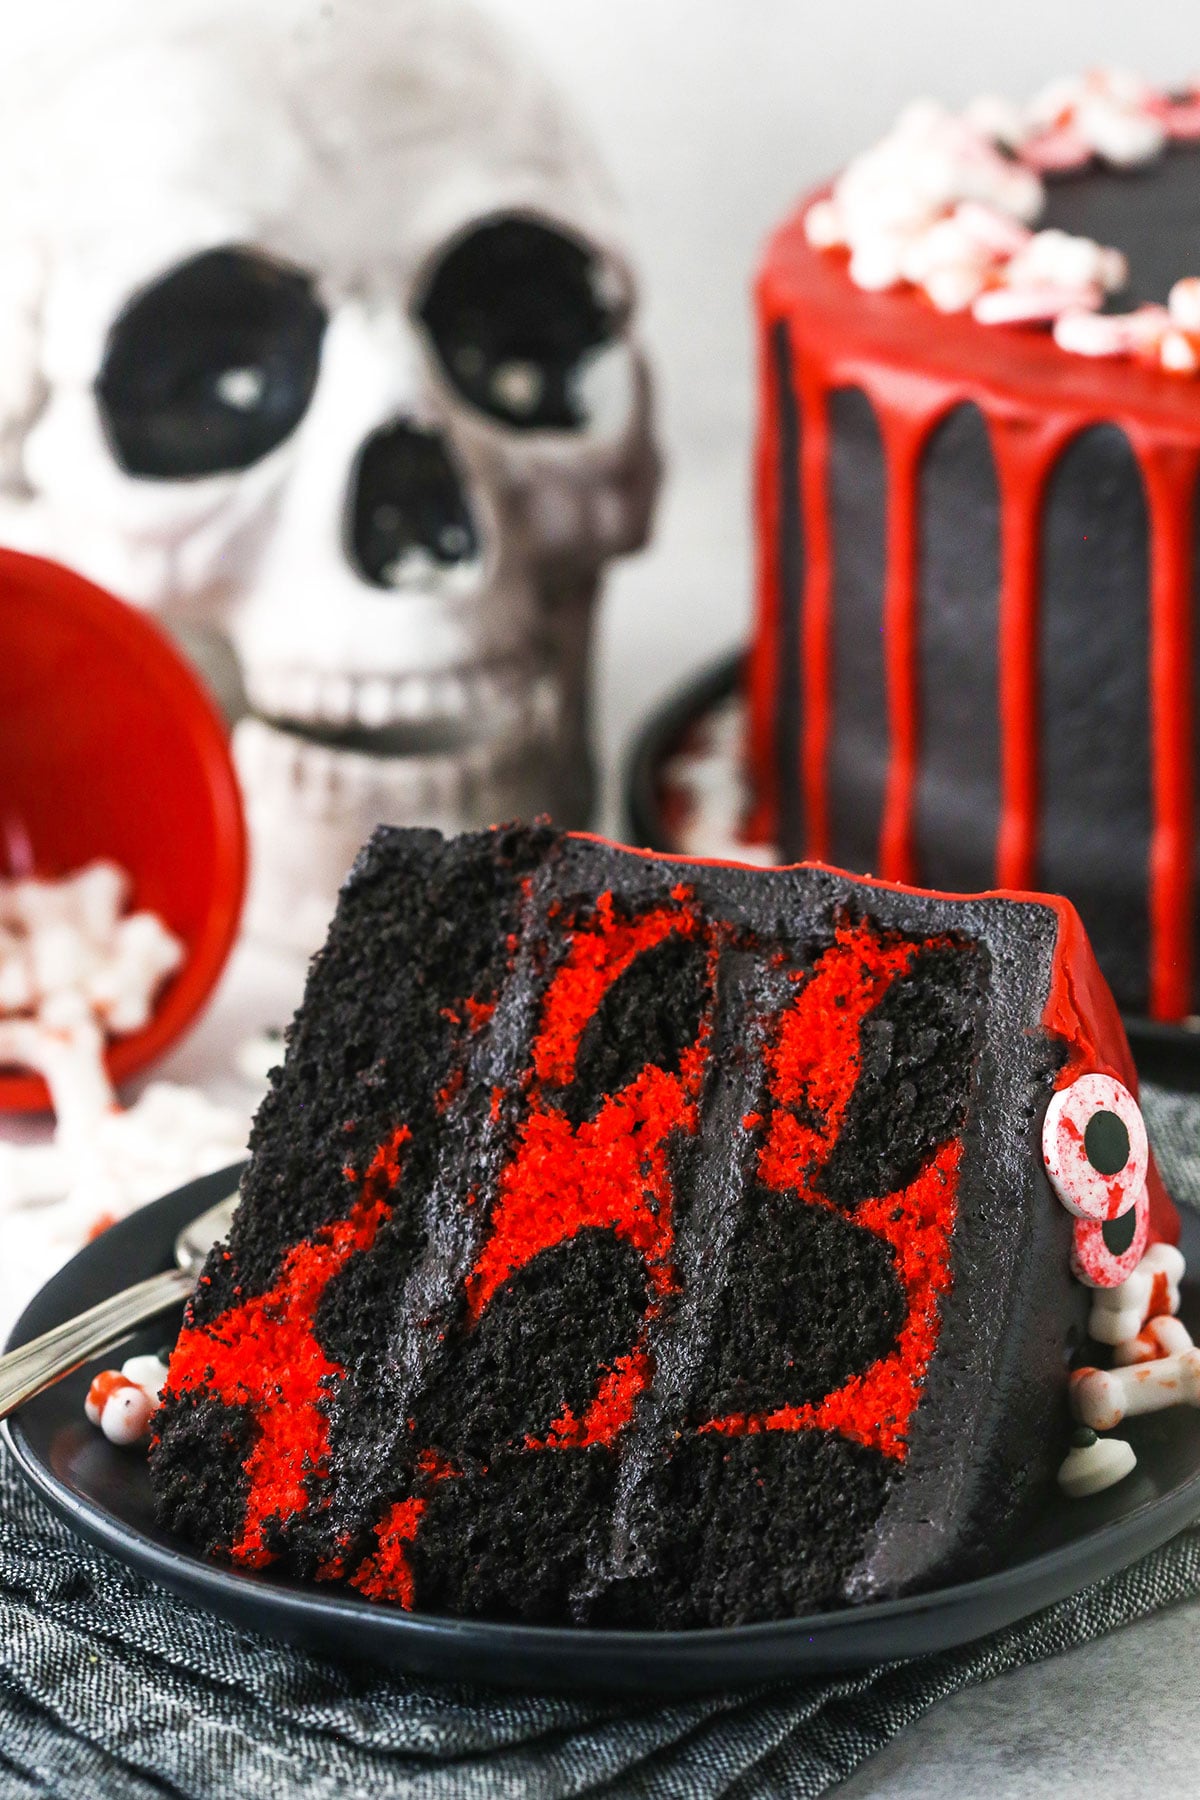
This is the perfect Spooky Halloween Marble Cake for your Halloween parties! The red and black marble cake is decorated with drippy red “blood” with bloody bones and bloody eyeball sprinkles!
Spooky Halloween Cake
I’m so excited to share this cake with you today. It might be some of the most fun I’ve had making a cake in a while. I’ve had the bloody bones sprinkles that are used on the cake hanging around my sprinkle collection for quite some time and I finally decided to use them. They inspired this cake and I’m so glad they did.
While Halloween colors are often orange and black, there’s no doubt that the spookier combination is red and black. “Spooky” is definitely the word of the month in our house. The boys are so much more into holidays and such this year and their favorite word for Halloween decorations is “spooky”. Well, in the interest of being spooky and playing off of the bloody bones, red took orange’s place in this cake.
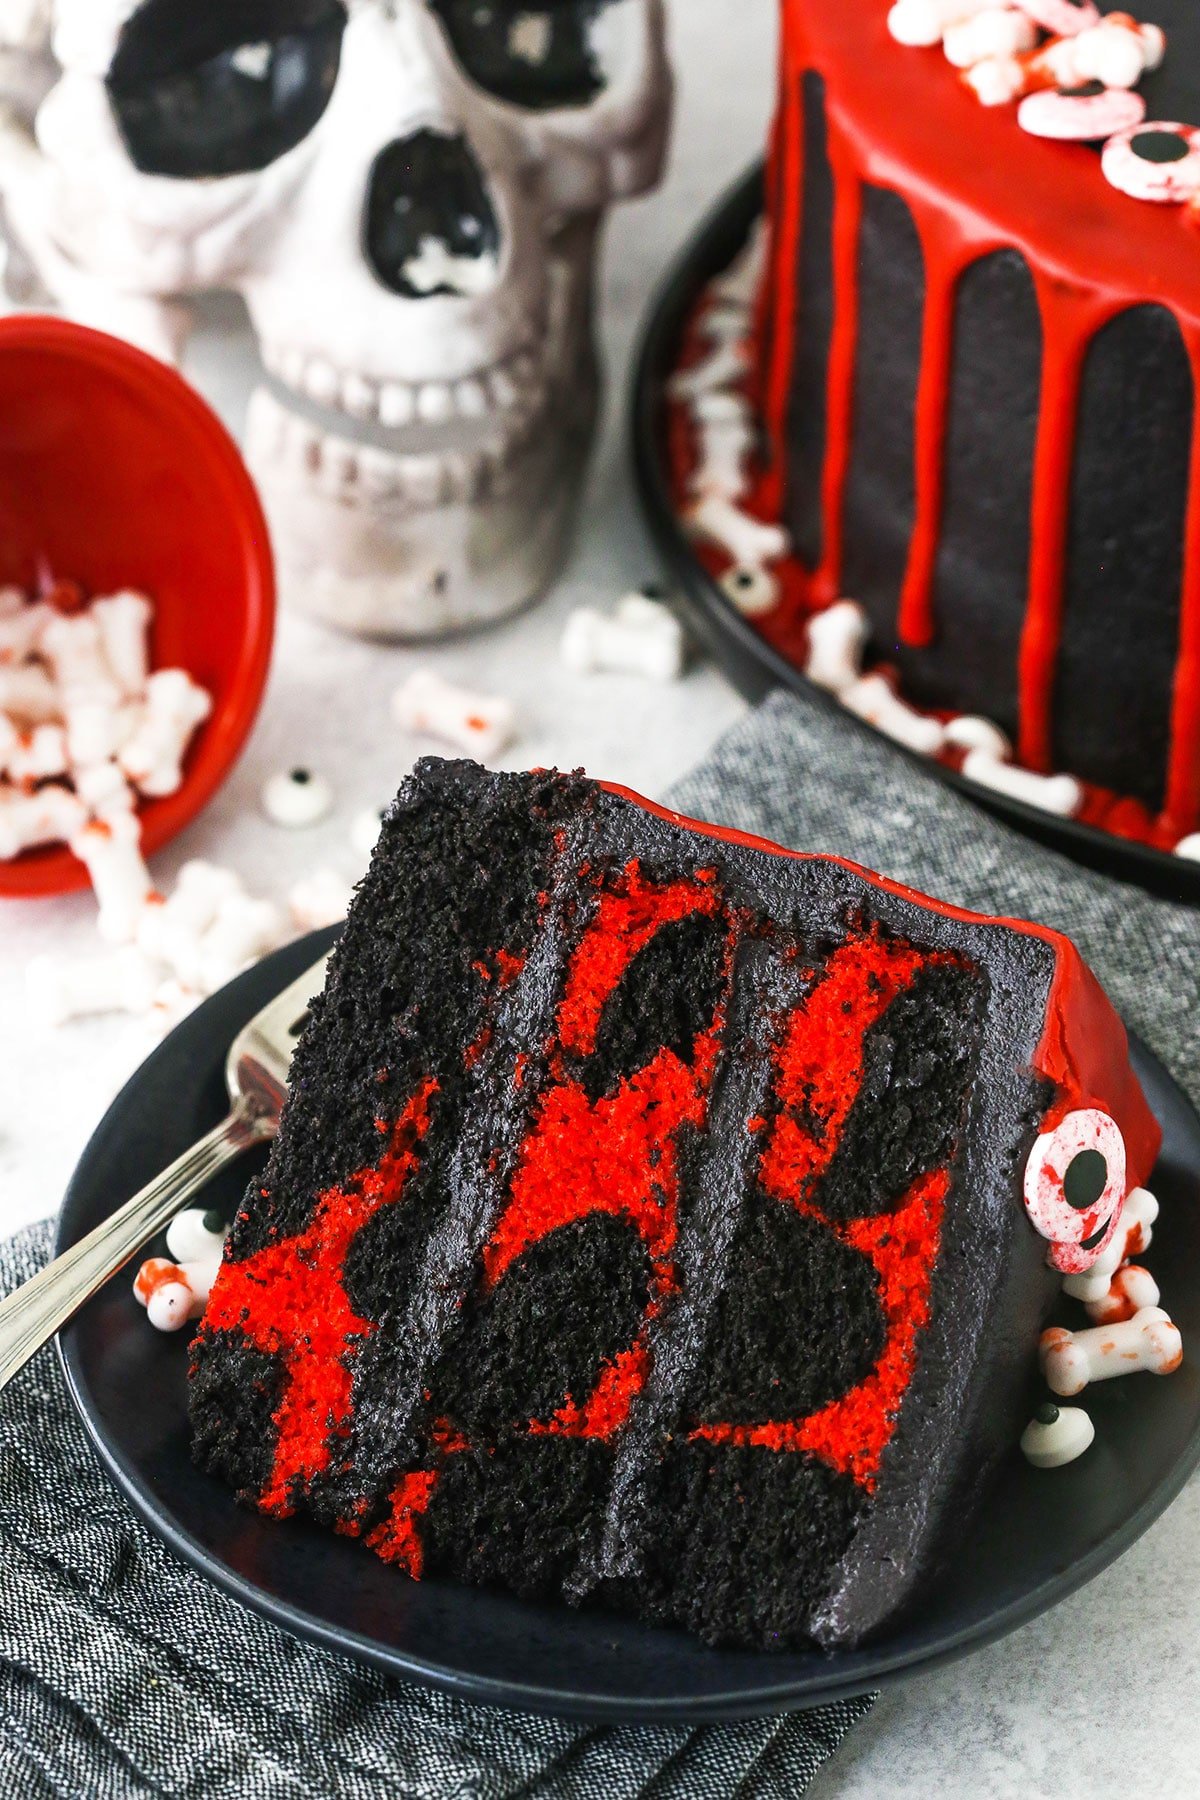
And it’s definitely a delicious cake too! The red is the vanilla part of the marble cake and the black is the chocolate. The black buttercream is also chocolate. In fact, you can’t really color vanilla buttercream with black. It just won’t get dark enough. So you need chocolate buttercream to provide a brown base to start with. You will need a good bit of black gel icing color to get a nice black color.
I’m truly in love with this cake. It’s so fun and really not hard to make. Plus, it’s super yummy. The perfect statement cake for Halloween.
Halloween Marble Cake Ingredients
This cake may take a little planning simply because you’ll want to make sure you have time to get the sprinkles you’ll need to decorate it. I found mine in stores, but they are also available online (links within recipe card and below). And lately it’s been hard to find red candy melts and black gel icing color in store, so you may also need to get those online. Otherwise, the rest of the ingredients should be readily available.
Marble Cake Ingredients
- All Purpose Flour: The base of the cake.
- Baking Powder and Baking Soda: Both are used to give the proper rise and texture to the cake.
- Salt: Always needed for flavor.
- Butter: Unsalted and room temperature. If you only have salted butter, you can use that. Just leave out the additional salt.
- Vegetable Oil: For extra moisture in the cake.
- Sugar: Sugar not only provides sweetness, but also moisture.
- Vanilla Extract: For flavor.
- Eggs: Make sure they are large eggs.
- Buttermilk: Buttermilk helps tenderize the cake. I like to use powdered buttermilk.
- Chocolate: I recommend a bittersweet chocolate baking bar that’s about 60% cocoa. One that’s less won’t provide the same amount of flavor and one that’s more could make it a little bitter.
- Black Gel Icing Color: For coloring the black batter.
- Red Gel Icing Color: For coloring the red batter.
Chocolate Buttercream
- Butter: Unsalted and at room temperature.
- Powdered Sugar: This is an American buttercream so there’s a good bit of powdered sugar. It provides volume to the buttercream and affects the consistency.
- Cocoa Powder: Natural unsweetened cocoa powder.
- Vanilla Extract: For flavor.
- Cream: You could also use water or regular milk
- Black Gel Icing Color: For coloring the buttercream. You’ll need a good bit.
Red Drip
- Candy Melts: I like to buy Wilton brand red candy melts. Since they’re already red, there’s no need to mess with coloring anything. And while I’ve never used a brand other than Wilton, you should be able to without a problem.
- Cream: I use heavy whipping cream and I don’t recommend substituting that.
- Sprinkles: Any sprinkle would be fine, but bloody bones and eyeballs do work well. Find the links for those in the tips section and in the recipe card.
How to Make Halloween Marble Cake
Make the cake layers
- Prep the Pans and Oven: Prepare three 8 inch cake pans with parchment paper circles in the bottom and grease the sides. Preheat oven to 350°F (176°C).
- Make the Cake Batter: This cake uses the traditional creaming method, so it’s nice and straight forward.
- Divide the Batter In Half: Place it in two separate bowls for coloring. If you have a food scale, I like to weigh the batter and then divide it in half evenly. Set one bowl aside.
- Color Cake Batter: To one bowl, add the red gel icing color and gently fold to combine until it reaches a nice red color. Set aside. For the black batter, melt the chopped chocolate, then add it to the uncolored bowl of cake batter along with the black gel icing color and gently fold together to combine. Work somewhat quickly so that the chocolate in the cake batter doesn’t firm up too much and make the cake batter more difficult to work with.
- Add to Cake Pan: Drop alternating heaping spoonfuls of each batter to the cake pans and gently shake the pan side to side to spread it evenly. Repeat until you’ve used all the cake batter between the three pans.
- Bake and Cool: Bake for 20-25 minutes, or until a toothpick inserted comes out clean. Remove the cakes from the oven and allow to cool for about 2-3 minutes, then transfer to cooling racks to cool completely.
Make the Frosting
- Beat Butter: Beat the butter in a large mixer bowl until smooth.
- Add Dry Ingredients: Add half of the powdered sugar and the cocoa powder and mix until well combined and smooth.
- Add Flavoring and Liquid: Add the vanilla extract and 3 tablespoons of water or milk and mix until well combined and smooth.
- Add Remaining Dry Ingredients: Add the remaining powdered sugar and salt and mix until well combined and smooth.
- Adjust Consistency and Add Color: Add additional water or milk, if needed to get the right consistency of frosting, then add the black gel icing color to get the right shade of black.
Assemble and Decorate
- Flatten Cakes: Use a large serrated knife to remove the domes from the top of the cakes so that they’re flat. These cakes don’t have a large dome, but I like to make sure they’re completely flat.
- Build and Frost Cake: Place the first cake on a serving plate or a cardboard cake round. Spread about 1 cup of chocolate buttercream evenly on top of the cake. Add the second layer of cake on top, then another cup of chocolate buttercream. Top the cake with the final layer of cake and frost the outside of the cake with the chocolate buttercream.
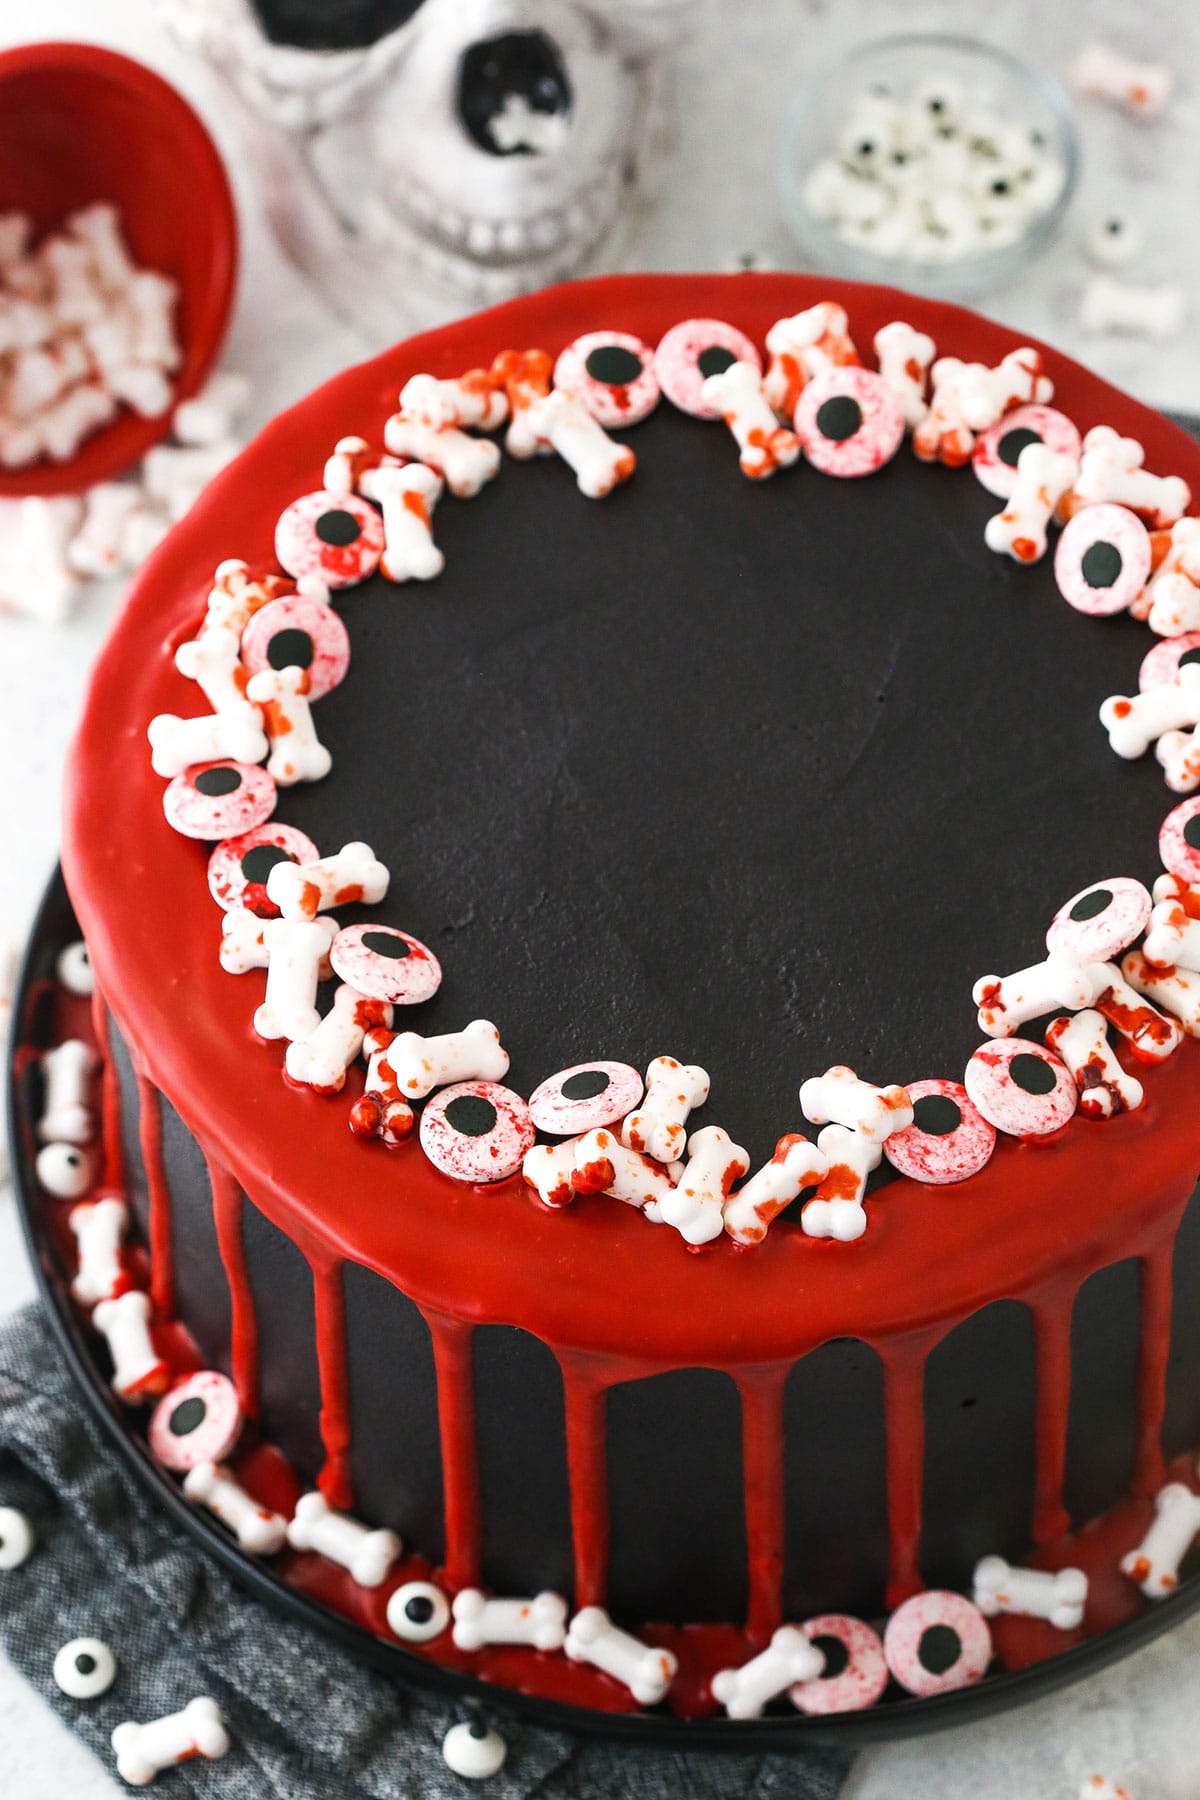
- Add Red Drip: To make the red drip, add the candy melts to a bowl. Heat the heavy whipping cream just until it begins to boil, then pour it over the candy melts. Allow it to sit for 2-3 minutes, then whisk to combine. It likely won’t melt all the way, so heat it in the microwave in 15 second increments, stirring between each, until fully melted. Set aside to cool a bit. Drizzle the red drip around the edges of the cake, then add a little bit to the edges on top. Don’t fill in the center.
- Decorate: Decorate the cake with bone and eye ball sprinkles.
Tips for the Best Halloween Marble Cake
Your cake will come out perfect if you follow the recipe and take note of these simple tips and tricks.
- Use Bittersweet Chocolate: I strongly recommend sticking with bittersweet chocolate for this cake. I find it gives the best flavor and texture to the chocolate cake portion.
- Cream Butter and Sugar Well: You’ll need to cream your butter, sugar and vegetable oil for at about 2 to 3 minutes. Don’t stop until the mixture fluffs up and turns a lighter shade. But you also don’t want to over-cream. If it starts to look a little curdled, rather than fluffy, you may have over-creamed.
- Don’t Over Mix Batter: Don’t keep mixing your cake batter once everything is well incorporated, or you’ll over mix it and the cake will end up more dense.
- Order Sprinkles Ahead: For the ultimate spooky look, you’ll want to plan ahead so that you have your sprinkles available. If you can’t find them in a store, there are several online options: Bloody Bones, more Bloody Bones, Crime Scene Sprinkle Mix, Bloody Eyeball Sprinkles, Bloody Severed Fingers
More Great Halloween Treats
- Mini Candy Corn Cheesecakes
- Mummy Rice Krispie Treats
- Bat Oreo Cookie Balls
- Dirt Cookie Cups
- Spiderweb Cake
Spooky Halloween Marble Cake
- Prep Time: 1 hour 45 minutes
- Cook Time: 20 minutes
- Total Time: 2 hours 5 minutes
- Yield: 12-14 slices
- Category: Dessert
- Method: Oven
- Cuisine: American
Description
This is the perfect Spooky Halloween Marble Cake for your Halloween parties! The red and black marble cake is decorated with drippy red “blood” with bloody bones and bloody eyeball sprinkles!
Ingredients
Marble Cake
- 2 1/4 cups (293g) all purpose flour
- 2 1/2 tsp baking powder
- 1/4 tsp baking soda
- 1/2 tsp salt
- 1/2 cup (112g) unsalted butter, room temperature
- 1/2 cup vegetable oil
- 1 1/2 cups (310g) sugar
- 1 tbsp vanilla extract
- 4 large eggs
- 1 cup (240ml) buttermilk*
- 5 oz bittersweet chocolate (60% cacao), chopped**
- Black gel icing color
- Red gel icing color
Chocolate Buttercream
- 2 1/4 cups (504g) unsalted butter
- 8 cups (920g) powdered sugar
- 1 cup (114g) natural unsweetened cocoa powder
- 2 tsp vanilla extract
- 5–7 tbsp (75-105ml) water/cream
- 1/4 tsp salt
- Black gel icing color
Red Drip
- 4 oz red Wilton candy melts
- 2 tbsp heavy whipping cream
- Sprinkles (see notes)
Instructions
Make Cake Layers
- Prepare three 8 inch cake pans with parchment paper circles in the bottom and grease the sides. Preheat oven to 350°F (176°C).
- Combine the flour, baking powder, baking soda and salt in a medium sized bowl and set aside.
- Add the butter, vegetable oil, sugar and vanilla extract to a large mixer bowl and beat together until light in color and fluffy, about 3-4 minutes. Do not skimp on the creaming time.
- Add the eggs two at a time, mixing until well combined after each. Scrape down the sides of the bowl as needed to be sure all ingredients are well incorporated.
- Add half of the dry ingredients to the batter and mix until combined.
- Add the buttermilk and mix until well combined.
- Add the remaining dry ingredients and mix until well combined and smooth. Scrape down the sides of the bowl as needed to be sure all ingredients are well incorporated. Do not over mix the batter.
- Divide the batter in half in two separate bowls. If you have a food scale, I like to weigh the batter and then divide it in half evenly. Set one bowl aside. To the other bowl, add the red gel icing color and gently fold to combine until it reaches a nice red color. Set aside.
- Melt the chopped chocolate, then add it to the uncolored bowl of cake batter along with the black gel icing color and gently fold together to combine. Work somewhat quickly so that the chocolate in the cake batter doesn’t firm up too much and make the cake batter more difficult to work with.
- Drop alternating heaping spoonfuls of each batter to the cake pans and gently shake the pan side to side to spread it evenly. Repeat until you’ve used all the cake batter between the three pans.
- Bake for 20-25 minutes, or until a toothpick inserted comes out clean.
- Remove the cakes from the oven and allow to cool for about 2-3 minutes, then transfer to cooling racks to cool completely.
Make the Frosting
- To make the frosting, beat the butter in a large mixer bowl until smooth.
- Add half of the powdered sugar and the cocoa powder and mix until well combined and smooth.
- Add the vanilla extract and 3 tablespoons of water or milk and mix until well combined and smooth.
- Add the remaining powdered sugar and salt and mix until well combined and smooth.
- Add additional water or milk, if needed to get the right consistency of frosting, then add the black gel icing color to get the right shade of black.
Assemble and Decorate
- To put the cake together, use a large serrated knife to remove the domes from the top of the cakes so that they’re flat. These cakes don’t have a large dome, but I like to make sure they’re completely flat.
- Place the first cake on a serving plate or a cardboard cake round.
- Spread about 1 cup of chocolate buttercream evenly on top of the cake.
- Add the second layer of cake on top, then another cup of chocolate buttercream.
- Top the cake with the final layer of cake and frost the outside of the cake with the chocolate buttercream.
- To make the red drip, add the candy melts to a bowl. Heat the heavy whipping cream just until it begins to boil, then pour it over the candy melts. Allow it to sit for 2-3 minutes, then whisk to combine. It likely won’t melt all the way, so heat it in the microwave in 15 second increments, stirring between each, until fully melted. Set aside to cool a bit.
- Drizzle the red drip around the edges of the cake, then add a little bit to the edges on top. Don’t fill in the center. See my tips on making a drip cake for more guidance.
- Decorate the cake with bone and eye ball sprinkles. See links to sprinkles in the notes below.
- Store cake in an air tight container until ready to serve. Cake is best if eaten within 3-4 days.
Notes
*I use powdered buttermilk. Regular buttermilk also works. Ina pinch, regular milk would be fine, but the cake is more tender and moist with buttermilk.
**I strongly recommend sticking with bittersweet chocolate for this cake. I find it gives the best flavor and texture to the chocolate cake portion.
There are several sprinkle options:
Bloody Bones
More Bloody Bones
Crime Scene Sprinkle Mix
Bloody Eyeball Sprinkles
Bloody Severed Fingers
Nutrition
- Serving Size: 1 slice
- Calories: 915
- Sugar: 95.6 g
- Sodium: 196.1 mg
- Fat: 50.2 g
- Carbohydrates: 117.3 g
- Protein: 6.8 g
- Cholesterol: 152.1 mg










Would I be able to replace the gel icing with food coloring?
Do you need to add quite a bit of it. And I have not seen black food coloring. But you could certainly try it.
I haven’t tasted it yet but I have made it and I don’t think I put enough colouring in . How much should I use to make it dark red and not dark pink?
I’m not sure of the exact amount that I used but it should look red, not pink, before you bake it. You also want to be sure you use gel icing color, which is more concentrated.
Hi, if I wanted to rectify this recipe for 2 cake tins instead of 3, should I just remove a third of recommended ingredients?
You can do it that way, or you can divide all the batter between 2 pans and bake them a little longer.
I can’t find 60% cocoa bittersweet chocolate – the lowest I can find is 71% Will it make a huge difference? Should I do something different is using 71%
Also – looking at using this in a regular bundt cake pan, I assume it will turn out fine?
That’s fine, it just may be slightly more bitter.
It’ll be much more dense in a bundt pan and I haven’t tested it that way, but you can certainly try it.
The cake (and the red drip) came out fine, it’s the frosting I’m having trouble with. I used as much black gel coloring as I could, but, no matter what, the frosting looked more grey than black. What could I have done wrong?
It doesn’t sound like you did anything wrong. That’s fairly normal. It darkens as it sits. If you just frost the cake, it’ll darken and be black.
I loooove this! The intense dark black and blood red make for the PERFECT Halloween colours, and the marble inside looks absolutely gorgeous 😍 Plus the eyeball and bone candies on the outside are the best thing to top it all off, too! This looks *almost* too good to eat 😋
My daughter’s school colors are black and red, so this cake is perfect. Could I use the same batter and icing and make cupcakes instead? If so what changes would you suggest?
Yes, cupcakes would be fine. You’ll want to fill the cupcake liners about 1/2 way. I would recommend about 4 tablespoons of batter and alternate the colors. Bake time should be 15-18 minutes.
This cake was amazing! So delicious
So glad you enjoyed it!
When you say we can use regular milk instead of powdered buttermilk do you mean regular POWDERED milk or regular milk?
I just read through the note you are referring to and can see how it was confusing. I’ve updated it.
Buttermilk is going to be ideal in this cake and give you a cake that is more tender and moist. You can use liquid or powdered buttermilk. If you can’t get buttermilk for some reason, regular milk would be fine. Buttermilk would just be better.
If i make it a day before i have to use it, would you recommend storing it in a fridge or in room temperature?
Either way would be fine. If you’re serving it the next day, I would typically leave it at room temperature.
This looks so cool. Can you add black coco powder to the black cake batter or will they change the texture of the recipe?
I did not test it with this recipe. I’m guessing it would change the outcome, but I can’t say for sure without testing it.
I really want to make this cake, but I would like to make it as a tray bake. Would that work, do you think?
I haven’t tried it, but I think it would be fine.
OMG I do not have gel colouring, would it be ok if I replace the gel colouring for normal food colouring.Can not wait to make this cake. My brother is going to love this cake.Thank you
The problem with normal food coloring is that you will need a good bit more to get the same rich colors. But you could try it.
Fun to make! Did have a small issue with chocolate batter hardening but just put on top of stove so heat from oven warmed a bit and back to stirring. Was not the same consistency of the red batter but came out good in end. Just used a clean butter knife to swirl slightly and worked good. The frosting is easy enough in kitchen aid mixer. Decorating next. Put aside quiet time because steps move quickly.
I’m so glad you enjoyed it!
Oh my goodness, I HAVE to make this cake!!! I don’t have 8 inch pans though. Is it possible to use three 6 inch pans instead?
You could do 6 inches. I might cut the recipe in half though.