This post may contain affiliate sales links. Please read my disclosure policy.
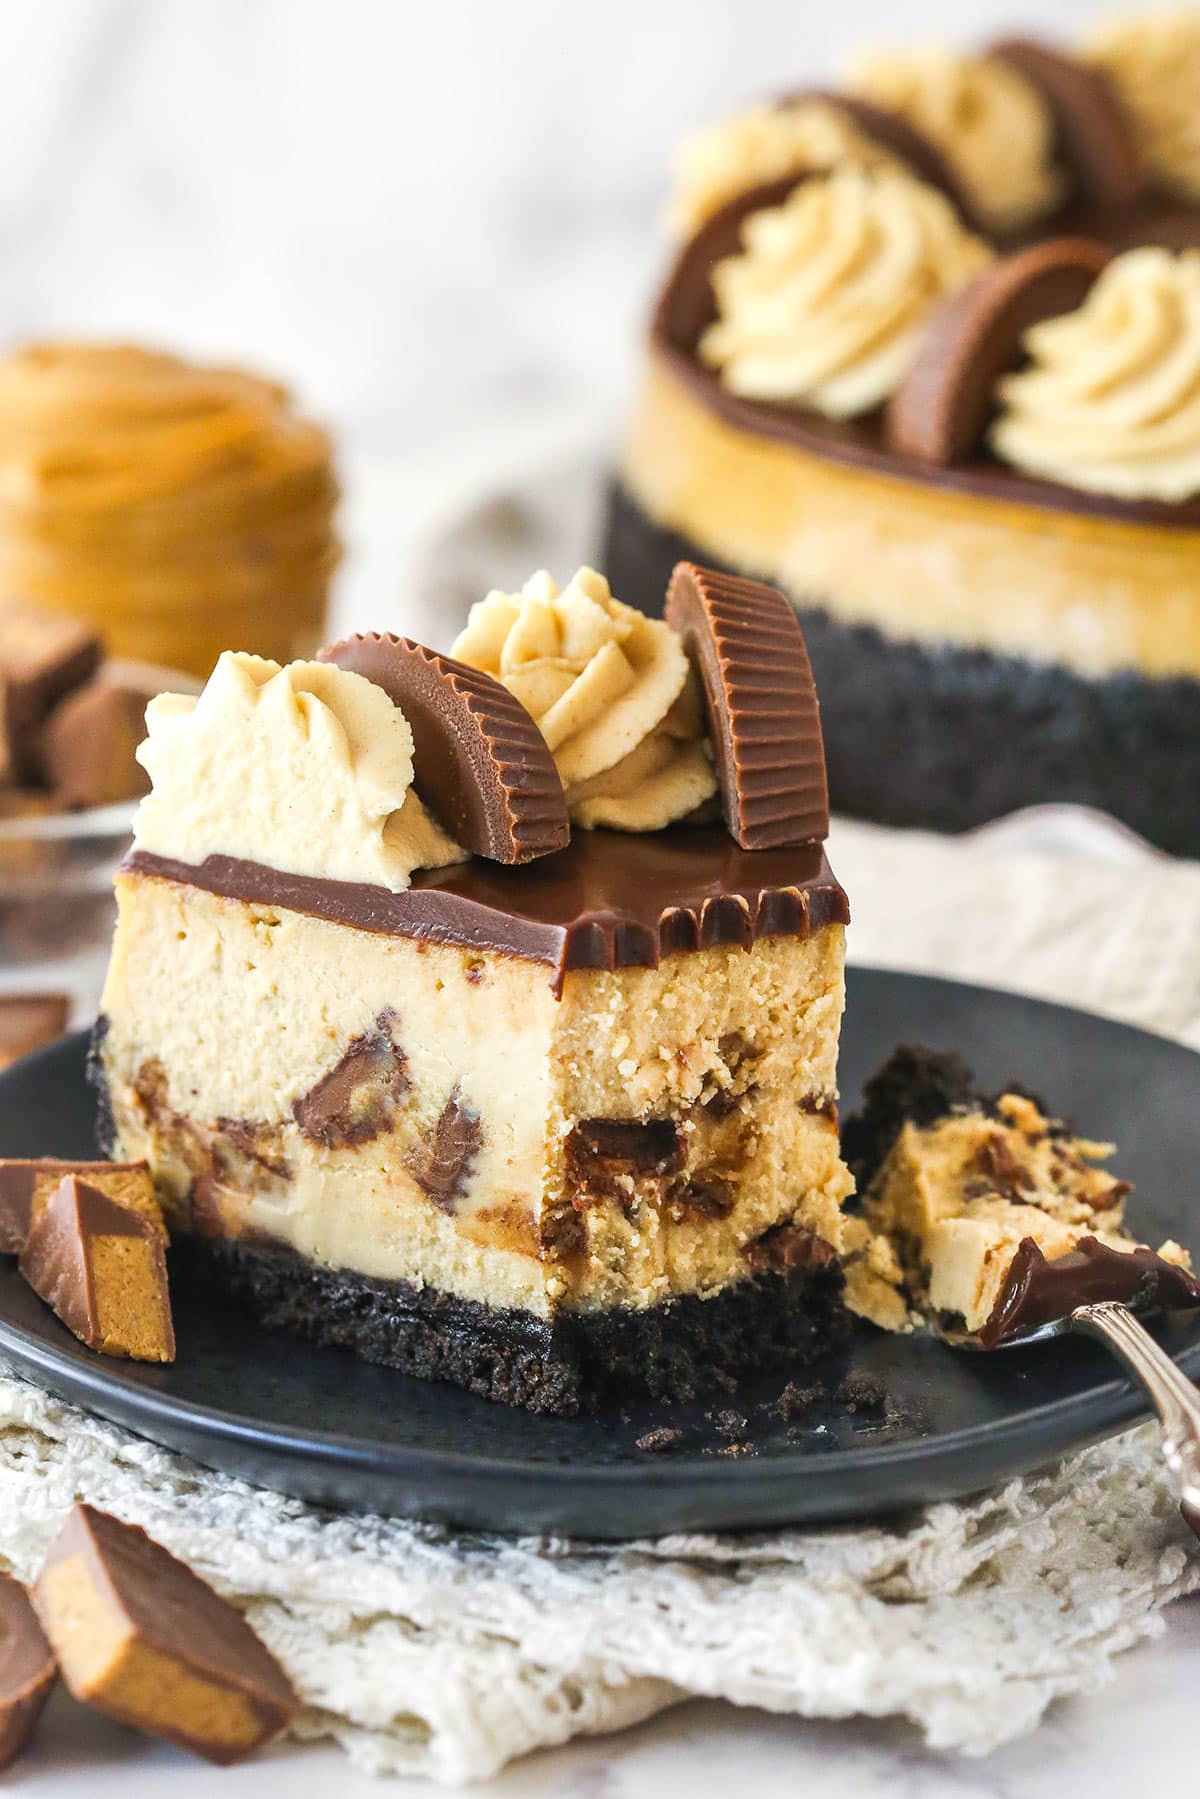
With peanut butter and Reese’s cups in the filling and a chocolate ganache layer on top, this Reese’s Cheesecake recipe is full of chocolate-y peanut butter goodness. If you love Reese’s cups, you won’t be able to resist this cheesecake!

Why You’ll Love This Reese’s Cheesecake Recipe
I have a no bake Reese’s cheesecake, but it was time for a baked one. And it’s so good! The filling of this cheesecake is very similar to my peanut butter cheesecake, but I did reduce the peanut butter and sugar a bit. With the added Reese’s in this one, it doesn’t need the extra bit of peanut butter or sugar. I tried it with even less peanut butter and felt like this is just the right amount. There’s also plenty of chopped Reese’s.
- Perfect balance of chocolate & peanut butter. You get just the right amount of peanut butter and chocolate mixed in this cheesecake. The mini Reese’s add both chocolate and peanut butter, plus the filling and whipped cream are made with peanut butter, while a rich chocolate ganache sits on top of the cheesecake.
- Thick and creamy. This Reese’s cheesecake is thick, but also still nice and creamy from the sour cream that breaks up the peanut butter and cream cheese a bit.
- Easy to decorate. This Reese’s cheesecake is topped with a simple chocolate ganache, peanut butter whipped cream, and more Reese’s. All you need is a piping bag with a tip and you’re good to go. No fancy decorating skills required!
- Great to make ahead. Cheesecakes hold up very well for about 4-5 days, making them a great option for making ahead. They even freeze well!

What You’ll Need
This Reese’s chocolate peanut butter cheesecake is loaded with chocolate and peanut butter. Scroll down to the recipe card below for the exact measurements.

Crust
- Oreos – I used about 31 Oreos to make the crumbs. There’s no need to remove the filling from the Oreos. The crust uses less butter to account for it.
- Unsalted butter – To bind the crumbs together. You could also use salted butter.
Filling
- Cream cheese – You want full-fat brick-style cream cheese when making a cheesecake. Low fat or the kind in a container will result in a too-soft cheesecake filling. Bring the cream cheese to room temperature for a smooth consistency.
- Sugar
- All-purpose flour – Flour helps to prevent cracking and create a creamy texture. You can also use cornstarch in half the amount for a gluten free option.
- Sour cream – Sour cream adds the classic tangy flavor to the cheesecake and also helps to break up the richness of the cream cheese.
- Peanut butter – I use JIF creamy. Don’t use a natural one since there is more oil separation and less consistency for baking.
- Vanilla extract
- Eggs – Not medium or extra large. Eggs should be at room temperature. To do that more quickly, set them in a bowl of warm water.
- Mini Reese’s peanut butter cups – I like the regular mini Reese’s for this. It really gives you the right balance of the chocolate. Using full sized ones is fine, but you’ll have less chocolate. If you used the already unwrapped minis, which are actually smaller than regular minis, you’ll have less of the peanut butter filling.
Chocolate Ganache
- Semi-sweet chocolate chips – Use a quality chocolate here for the best flavor.
- Heavy whipping cream – Helps to achieve the pourable ganache consistency.
Peanut Butter Whipped Cream
- Heavy whipping cream – Keep it cold until you need it so that it whips up properly.
- Powdered sugar – Sweetens and stabilizes the whipped cream, so it won’t ever wilt.
- Creamy peanut butter – Again, use a processed peanut butter. Natural peanut butter will leave a gritty texture in the whipped cream.
- Vanilla extract
- Reese’s peanut butter cups –I recommend full size peanut butter cups cut in half to decorate the top of the Reese’s cheesecake.
How To Make Reese’s Cheesecake
Making and decorating your Reese’s cheesecake is quite easy – even if you haven’t made a bunch of cheesecakes before. Just begin with plenty of time for the cheesecake to cool after. You can find the printable instructions in the recipe card below.
Make the crust
- Prep. Preheat the oven to 325F. Line the springform pan with parchment paper in the bottom and grease the sides.
- Make the crust. Combine the crust ingredients. Press into the bottom and up the sides of the pan. Bake for 8-10 minutes then set aside to cool.
- Prep for the water bath. Once cooled, cover the outside of the pan with foil so that the water from the water bath cannot get in.


Make the cheesecake filling
- Prep. Reduce the oven to 300F.
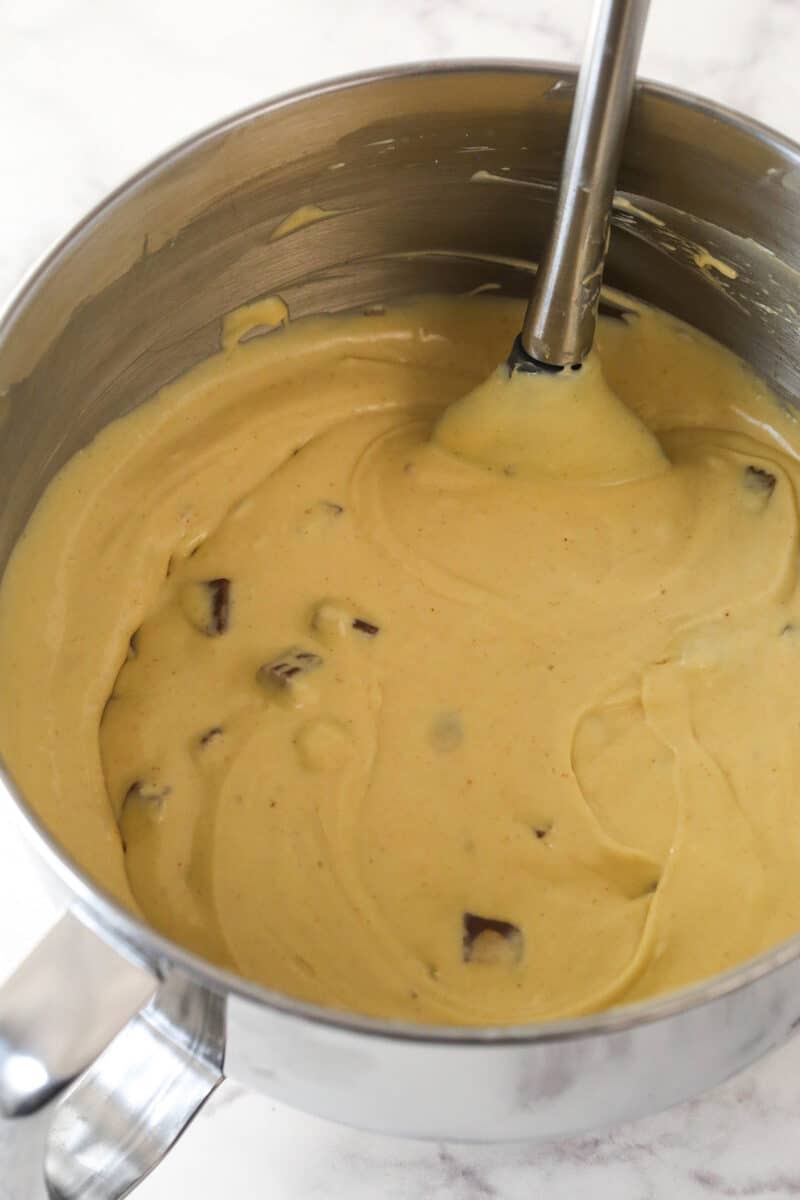
- Make the filling. Beat the cream cheese, sugar, and flour on low until combined and smooth. Add the sour cream, peanut butter, and vanilla. Add the eggs one at a time, mixing slowly after each one, then mix in the chopped Reese’s cups.
- Prep the water bath. Pour the cheesecake filling into the baked crust. Place the pan inside a silicone pan and then place both in another pan. Fill the outside pan with warm water halfway up the sides of the silicone pan.


- Bake. Bake in the center rack of the oven for 1 hour 25 minutes, until the center is set but still jiggly.
- Cool. Turn the oven off and leave the door closed for 30 minutes then crack the door and continue cooling for another 30 minutes. Remove from the oven and the water bath. Cool on the counter until no longer warm.
- Refrigerate. Once the cheesecake has cooled to room temperature, refrigerate for at least 5-6 hours. Once cool and firm, remove from the pan and place on a serving plate before decorating.


Decorate the cheesecake
- Make the ganache. Place the chocolate chips in a heat-proof bowl. Microwave the heavy whipping cream in another bowl until it begins to boil. Pour over the chocolate chips, let sit for 2-3 minutes, then whisk until smooth. Pour the ganache over the cheesecake and spread it into an even layer.
- Make the whipped cream. Whisk the powdered sugar, peanut butter, vanilla, and 3 tablespoons of heavy cream until thick and creamy. In a separate bowl, whip the remaining heavy cream into medium peaks. Add the peanut butter mixture to the whipped cream and whip until no streaks remain and stiff peaks form.
- Decorate the cake. Transfer the whipped cream to a piping bag. I used Ateco tip #847. Pipe shells around the edge of the cheesecake, leaving a bit of space between each one. Place half of a Reese’s cup between each mound.
- Chill. Refrigerate the cheesecake until ready to serve. Enjoy!

Do I NEED The Water Bath?
Yes! The water bath is a non-negotiable when baking a cheesecake and this Reese’s cheesecake is no exception. Using a water bath helps ensure that the cheesecake bakes evenly throughout and the steam helps prevent the top from drying out and cracking.
And it’s really not that hard! Check out all of my tips in this post on how to bake cheesecake in a water bath.
Tips For The Best Cheesecake
Here are some things to keep in mind to help you make the perfect Reese’s peanut butter cheesecake.
- Use room temperature ingredients. The cream cheese, sour cream, and eggs should all be room temperature when you begin the recipe. The only exception is the heavy cream for the whipped cream, which needs to be chilled.
- Scrape down the bowl. Be sure to scrape down the bowl frequently, especially after each new ingredient addition, to ensure everything is mixed properly.
- Beat on low speed. Keep the mixer on low when making the cheesecake filling, to prevent extra air from being added to the batter and causing cracks later.
- How do I know when my cheesecake is done? When you shut the oven off, the cheesecake should be jiggly but set. It will continue baking as it cools, so you do not want to overbake. See my full guide on how to tell when your cheesecake is done for more tips.
- Cool slowly. One of my biggest tips for cheesecake is to let it cool slowly, first in the oven with the door closed and then with the door open. This cooling process is key to finishing the cooking process and preventing cracks.
- Do not over-mix the whipped cream. When you add the peanut butter mixture to the whipped cream, you only need to mix it for about 10-15 seconds, or until it’s thick enough. Over-whipping will cause it to separate and thin instead of thicken into stiff peaks.
Proper Storage
- Refrigerator: Keep the Reese’s cheesecake well covered or in a cake carrier in the fridge. It is best if eaten within 4-5 days.
- Freezer: I recommend freezing without the whipped cream and Reese’s, if freezing ahead. Pop the cheesecake in the freezer for a couple of hours. Once it’s firmed up a bit, wrap it in a double layer of plastic wrap. Otherwise, arrange slices in a single layer in an airtight container. Either way, you can store this dessert in the freezer for up to 3 months. Allow it to thaw in the fridge before serving.
More Reese’s Desserts To Try
- Reese’s Peanut Butter Pie
- Reese’s Peanut Butter Chocolate Cake
- Reese’s Peanut Butter Fudge Brownies
- Mini Reese’s Chocolate Cheesecake Trifles
- Reese’s Peanut Butter Chocolate Cookie Sandwiches
- Reese’s Peanut Butter Cookie Cake
Watch How To Make It
Print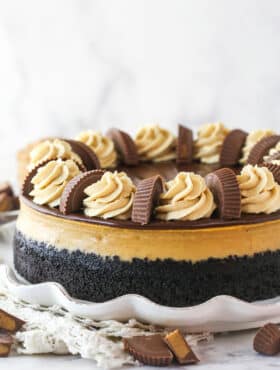
Reese’s Cheesecake
- Prep Time: 1 hour
- Chill Time: 5 hours
- Cook Time: 2 hours 25 minutes
- Total Time: 8 hours 25 minutes
- Yield: 12-14 Slices
- Category: Dessert
- Method: Baking
Description
With peanut butter and Reese’s cups in the filling and a chocolate ganache layer on top, this Reese’s Cheesecake recipe is full of chocolate-y peanut butter goodness. If you love Reese’s cups, you won’t be able to resist this cheesecake!
Ingredients
Crust
- 2 3/4 cups (369g) Oreo crumbs (about 31 Oreos)
- 5 tbsp (70g) unsalted butter, melted
Filling
- 24 oz (678g) cream cheese, room temperature
- 1 cup (207g) sugar
- 3 tbsp (24g) all-purpose flour
- 3/4 cup (173g) sour cream, room temperature
- 3/4 cup (210g) creamy peanut butter
- 2 tsp vanilla extract
- 4 large eggs, room temperature
- 34 (297g) mini Reese’s peanut butter cups, unwrapped, chopped*
Chocolate Ganache
- 4 oz (113g) semi-sweet chocolate chips
- 6 tbsp (90ml) heavy whipping cream
Peanut Butter Whipped Cream
- 3/4 cup (180ml) heavy whipping cream, cold
- 1/2 cup (58g) powdered sugar
- 3 tbsp (48 g) creamy peanut butter
- 1/2 tsp vanilla extract
- 7 full size Reese’s peanut butter cups, unwrapped and cut in half
Instructions
Make the crust
- Preheat oven to 325°F (163°C). Line a 9-inch (23cm) springform pan with parchment paper in the bottom and grease the sides.
- Combine the crust ingredients in a small bowl. Press the mixture into the bottom and up the sides of the springform pan.
- Bake the crust for 8-10 minutes, then set aside to cool.
- Cover the outsides of the pan with aluminum foil so that water from the water bath cannot get in (see how I prepare my pan for a water bath). Set prepared pan aside.
Make the cheesecake filling
- Reduce oven temperature to 300°F (148°C).
- In a large bowl, beat the cream cheese, sugar and flour on low speed until well combined and completely smooth. Be sure to use low speed to reduce the amount of air added to the batter, which can cause cracks. Scrape down the sides of the bowl.
- Add the sour cream, peanut butter and vanilla extract and mix on low speed until well combined.
- Add the eggs one at a time, mixing slowly to combine after each addition. Scrape down the sides of the bowl as needed to make sure everything is well combined.
- Mix in chopped Reese’s just until combined.
- Pour the cheesecake batter evenly into the crust.
- Place the springform pan inside another larger silicone pan. Then, place the inset pans into a larger pan and fill the outside pan with enough warm water to go about halfway up the sides of the silicone pan.
- Bake in the center rack of the oven for 1 hour 25 minutes. The center should be set, but still jiggly. See how to tell when your cheesecake is done baking.
- Turn off the oven and leave the door closed for 30 minutes. The cheesecake will continue to cook, but slowly begin to cool as well.
- Crack the door of the oven for 30 minutes to allow the cheesecake to continue to cool slowly. This process helps prevent cracking.
- Remove the cheesecake from the oven and water bath wrapping. Let cool on the counter until the cheesecake is no longer warm.
- Refrigerate until firm, 5-6 hours or overnight.
- When the cheesecake is cool and firm, remove from the springform pan and set on a serving plate.
Decorate the cheesecake
- Make the chocolate ganache by putting the chocolate chips in a heat proof bowl and set them aside.
Pour the heavy whipping cream into another heat proof bowl and microwave it until it just begins to boil, then pour it over the chocolate chips. - Allow chocolate and cream to sit for 2-3 minutes, then whisk until smooth.
- Pour the ganache onto the cheesecake and spread into an even layer.
- Next make the whipped cream. Add the powdered sugar, peanut butter, vanilla extract and 3 tablespoons of the heavy cream to a medium bowl and whisk until thick and creamy.
- In a separate larger bowl, whip the remaining heavy cream until medium peaks form, about 1-2 minutes.
- Add the peanut butter mixture to the whipped cream and whip until no streaks remain and it forms stiff peaks, about 10-15 seconds. Be careful not to over whip during this step or it’ll separate and thin out, rather than thicken. Use a rubber spatula to fold everything together to ensure everything is evenly distributed.
- Fill a piping bag fitted with a piping tip with whipped cream. I used Ateco tip #847. Pipe shells of whipped cream around the edge of the cheesecake, leaving a bit of space between each mound of cream. Place a half of a large Reese’s between each mound of whipped cream.
- Refrigerate cheesecake until ready to serve. Best when stored well-covered and eaten within 3-4 days.
Notes
- Flour: For a gluten free alternative, try cornstarch. You’ll need half the amount.
- Cream cheese: You’ll need brick-style, full-fat cream cheese. Avoid tubs, low-fat and whipped varieties of cream cheese.
- Mini Reese’s peanut butter cups: You’ll need most of the mini Reese’s in a 10.5-ounce package. I like the regular mini Reese’s for this. Using full sized ones is fine, but you’ll have less chocolate. If you used the already unwrapped minis, which are actually smaller than regular minis, you’ll have less of the peanut butter filling.
- Refrigerator: Keep the Reese’s cheesecake well covered or in a cake carrier in the fridge. It is best if eaten within 4-5 days.
- Freezer: I recommend freezing without the whipped cream and Reese’s, if freezing ahead. Pop the cheesecake in the freezer for a couple of hours. Once it’s firmed up a bit, wrap it in a double layer of plastic wrap. Otherwise, arrange slices in a single layer in an airtight container. Either way, you can store this dessert in the freezer for up to 3 months. Allow it to thaw in the fridge before serving.
Nutrition
- Serving Size:
- Calories: 694
- Sugar: 44.1 g
- Sodium: 399.8 mg
- Fat: 48.2 g
- Carbohydrates: 56.6 g
- Protein: 13.6 g
- Cholesterol: 129.6 mg


Hi there. I’ve made several of your recipes and they all have bean so good. I made your chocolate peppermint cake for Xmas and it was a major hit. Anyways, this is my first time making a cheesecake. For the Oreo crust, do I crumble just the crunchy part of the Oreo for the crust or including the filling also? Thanks!