This post may contain affiliate sales links. Please read my disclosure policy.
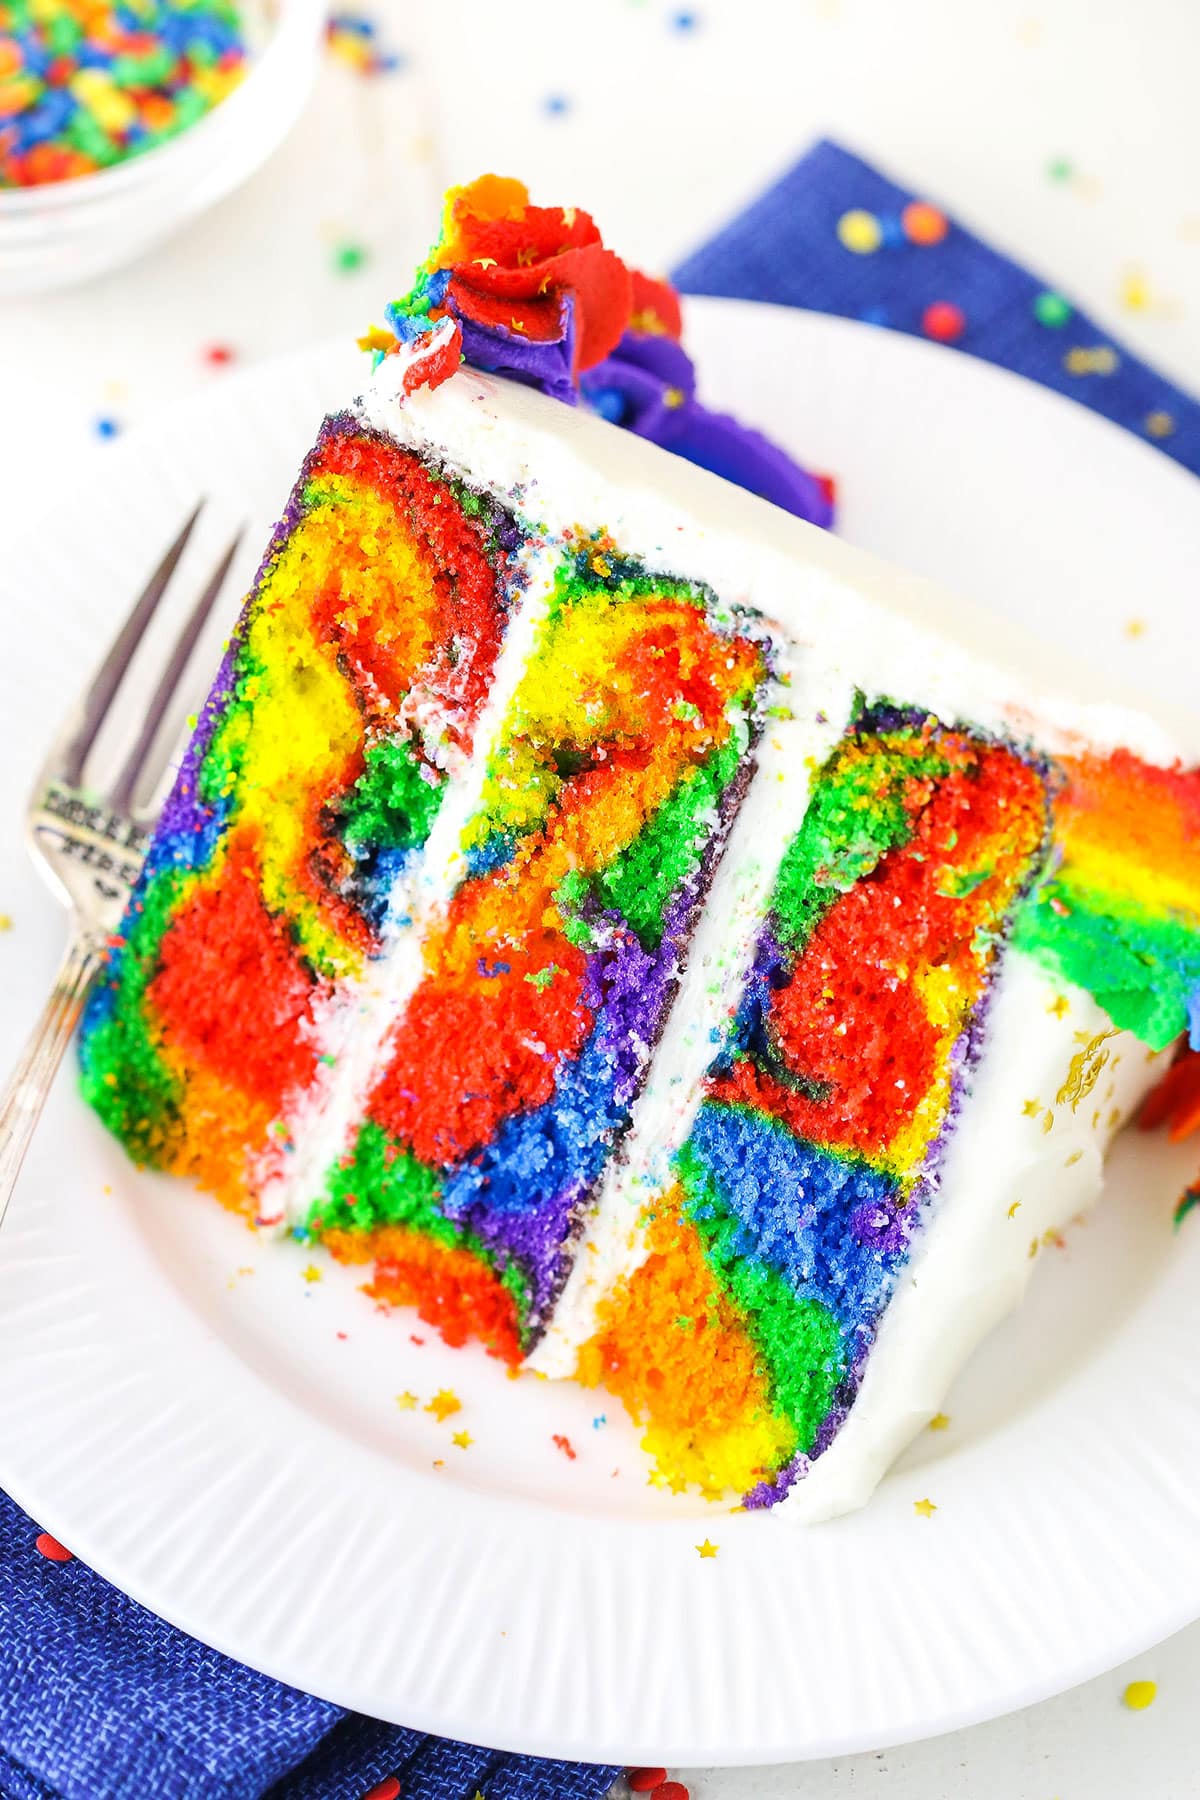
This Rainbow Swirl Cake is made with three layers of homemade rainbow cake, then decorated with rainbow swirl frosting around the edges! It’s a moist, delicious cake that’s easy to make and perfect for a celebration, kids birthday party cake or even St. Patrick’s Day!
This post is sponsored by Challenge Butter, but all opinions are my own.
Moist & Fluffy Rainbow Cake
I’ve had so much fun making and sharing some rainbow treats lately. Between this Rainbow Swirl Cake and these Mini Rainbow Cheesecakes, I’ve fallen in love with using all the colors in a cake. It can’t help but make you happy!
And this cake is fairly straight forward to make, though it takes a little time. The time is primarily from dividing the cake batter and frosting and then dying everything six different colors. Time consuming, but easy to put together, and so worth it in the end!
How to Make a Rainbow Layer Cake
To get started making this cake, you’ll make the vanilla cake batter. After combining your dry ingredients – all purpose flour, baking powder and salt – and setting those aside, you’ll cream your butter, oil and sugar together. This can be one of the most overlooked steps when making cakes. I know because back when I first started baking, I didn’t really get it myself. Then one day I saw the difference and it clicked!
Beat the butter, oil and sugar together until you notice a very clear difference in the texture and color of the mixture. It’ll lighten in color and become light and fluffy in texture. This step adds air to batter that helps it rise and makes it lighter.
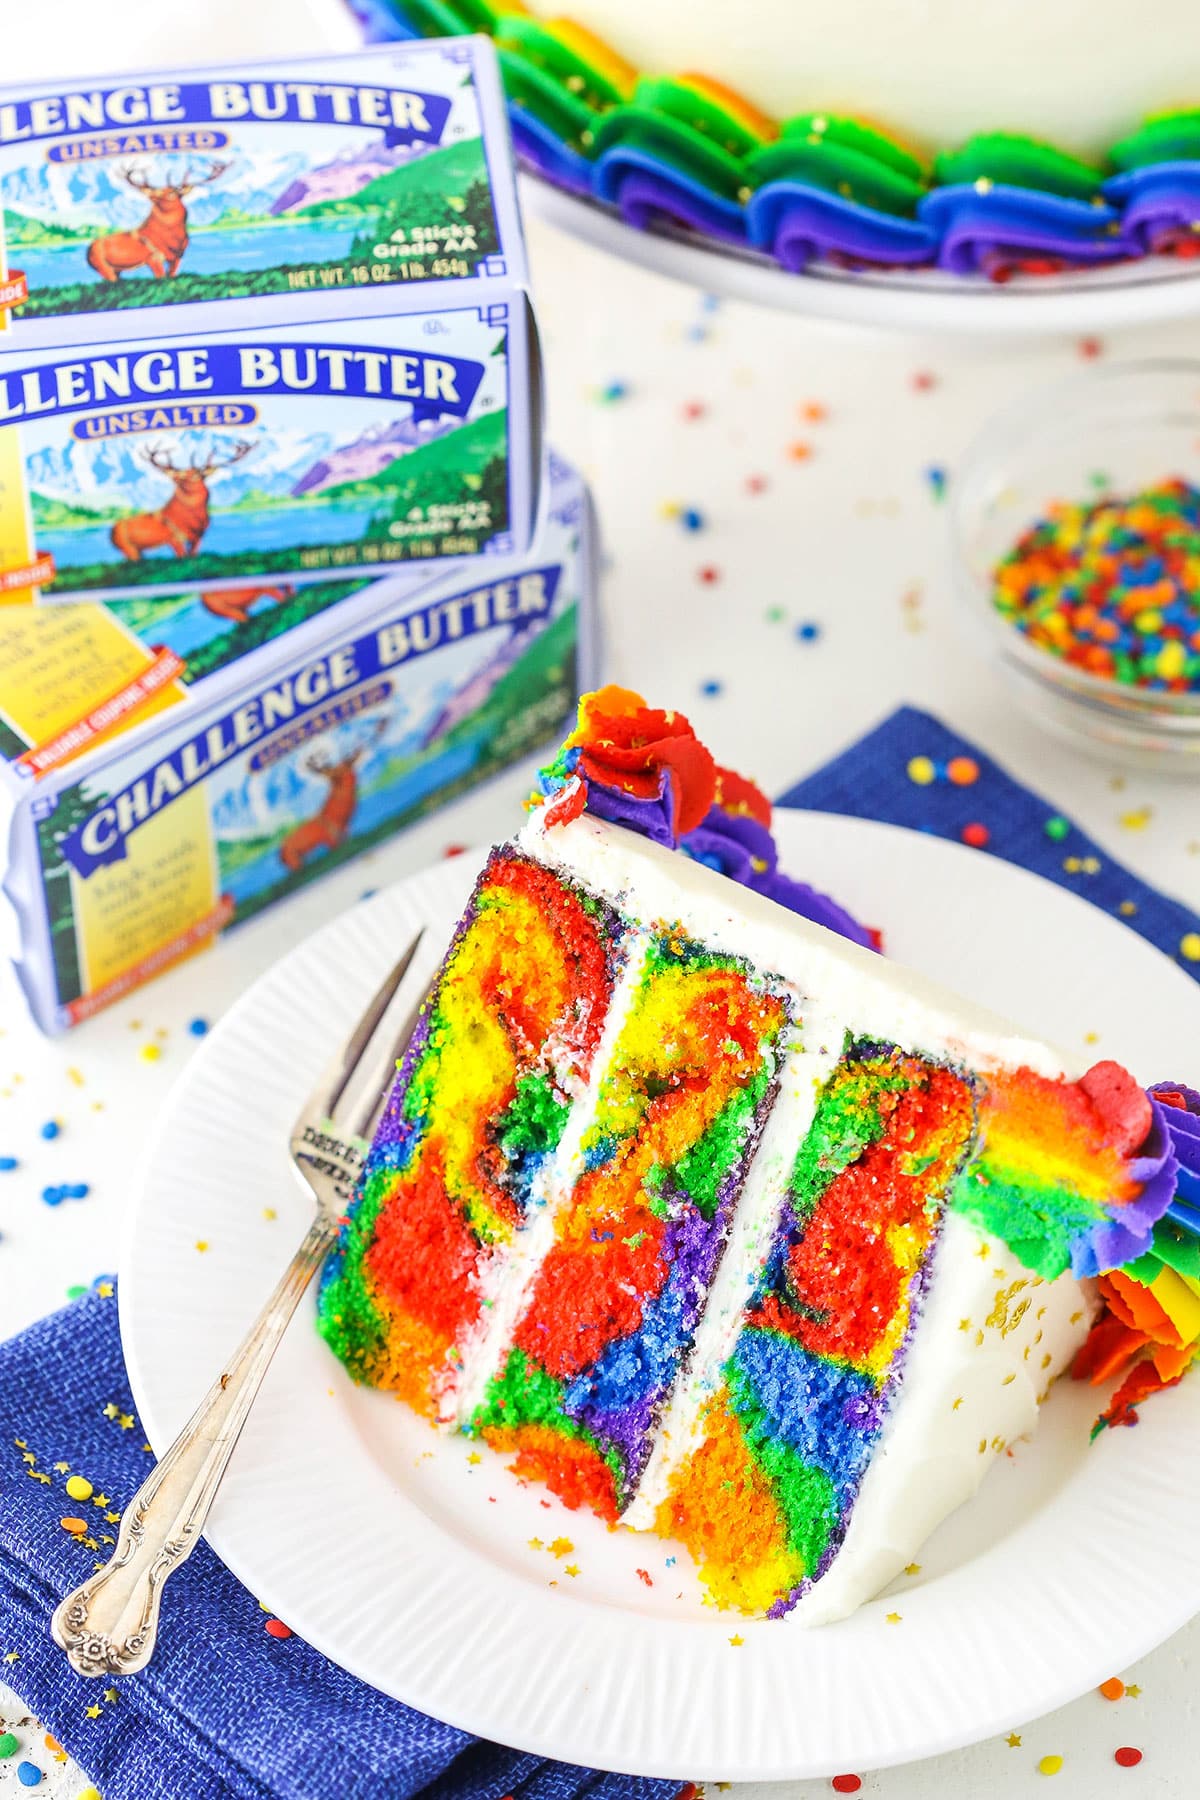
Speaking of the importance of this step, you also want to use a great quality butter. As you may already know, I’m a big fan of Challenge Butter. It’s such a creamy butter made from the freshest milk and goes from farm to fridge in just two days. Plus, there aren’t any growth hormones, nor do they use any artificial preservatives, fillers or dyes. You know you’re getting a high quality butter when you get Challenge and it shows in it’s creamy texture.
Once things are creamed, add your eggs and vanilla extract. Finally, add your dry ingredients and buttermilk by alternating adding them to the batter. Be sure not to over mix the batter. It can over develop the gluten in the flour and you end up with a tough cake. No fun!
As for the milk in this cake, I use buttermilk. It really lends a more tender cake in this instance, so I 100% recommend it. I know it’s a pain to buy a whole container of buttermilk, so do what I do and buy powdered buttermilk. It’s brilliant! You add a little of the powder to your dry ingredients, then add water when it’s time to add the liquid. The powdered buttermilk stays good for months in the fridge, so you can use it in later recipes without having to waste anything.
Rainbow Swirl Technique
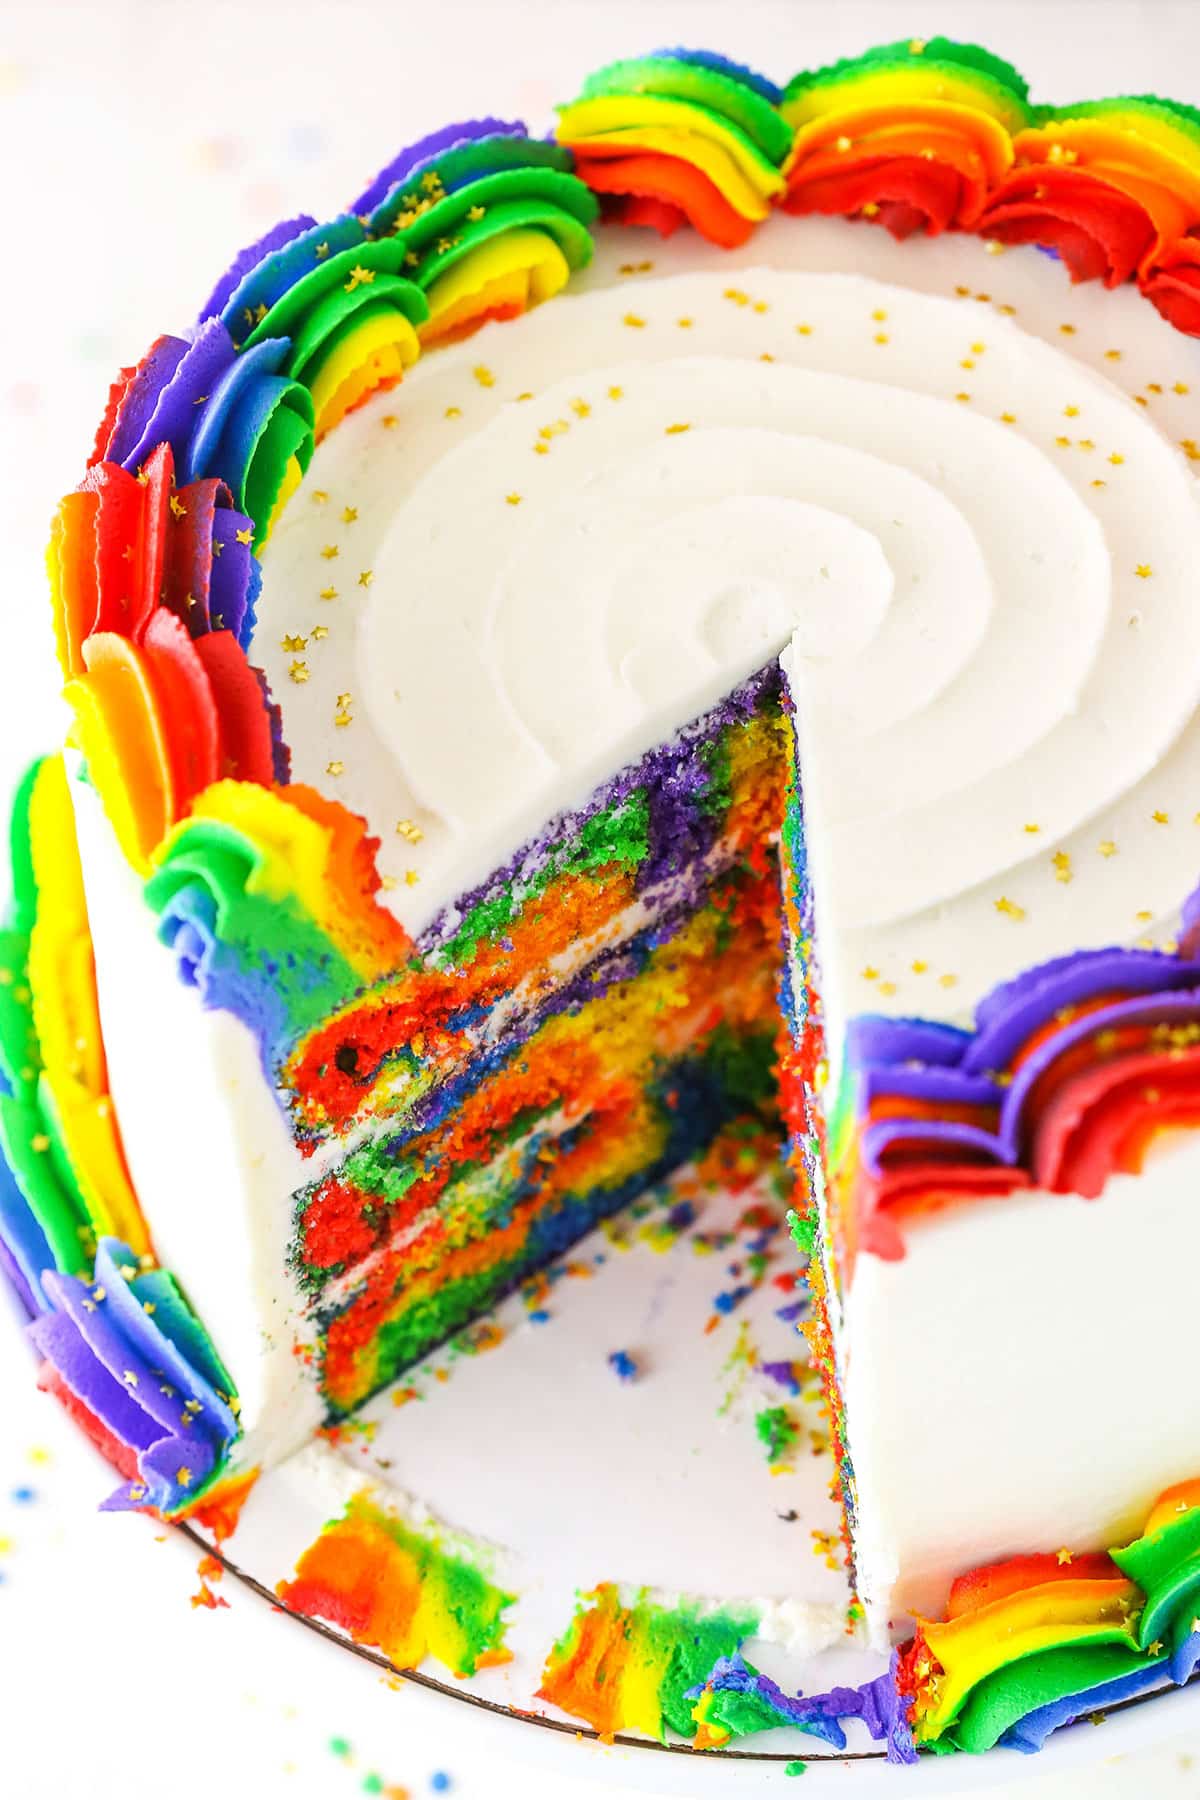
When it comes to the swirl, I spent a lot of time getting the batter for the swirl of this cake just right. You don’t want to use a batter that’s too thin or the colors will mix together, rather than staying separated. And even a batter that seems thick enough can sometimes end up with things not turning out quite right. This cake batter is great – the colors stay in place and bake up just right so that when you cut into your cake, you get a nice cross section of color.
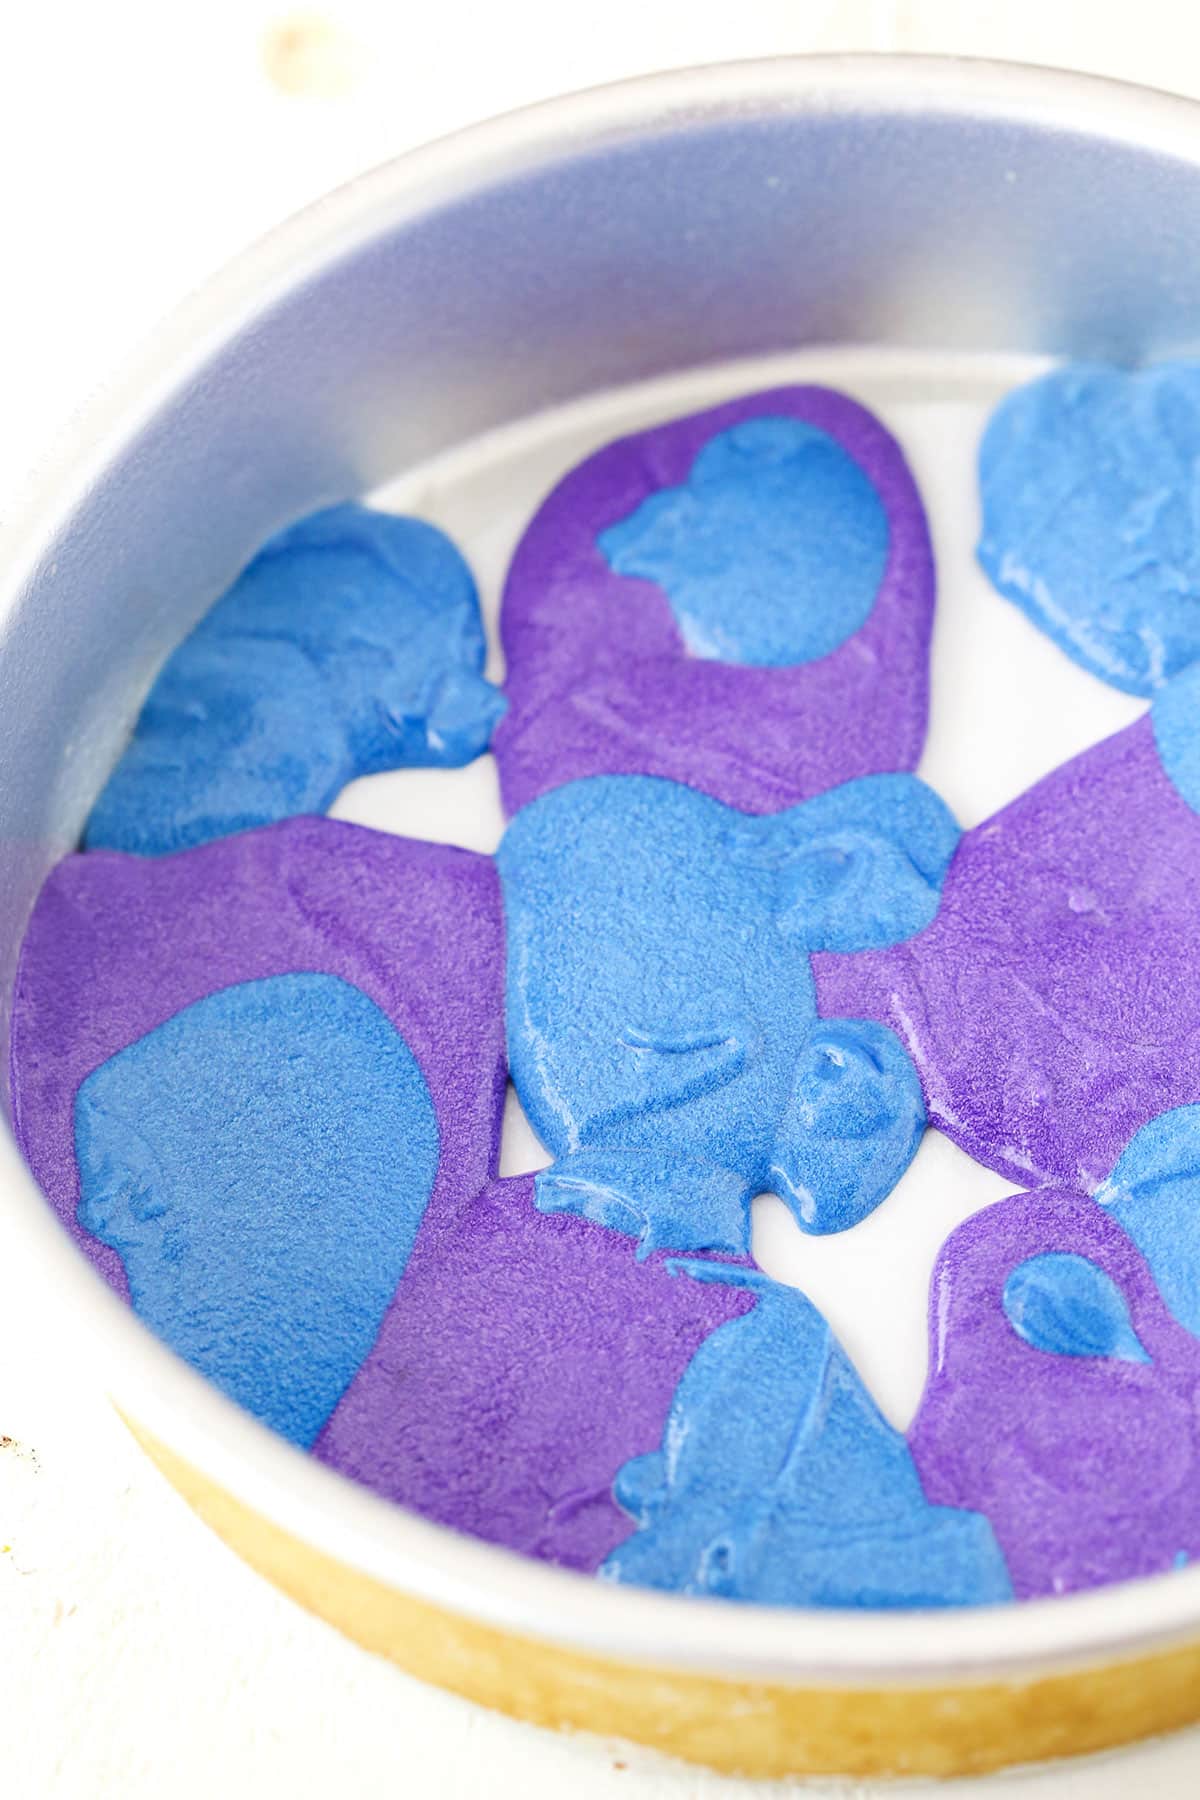
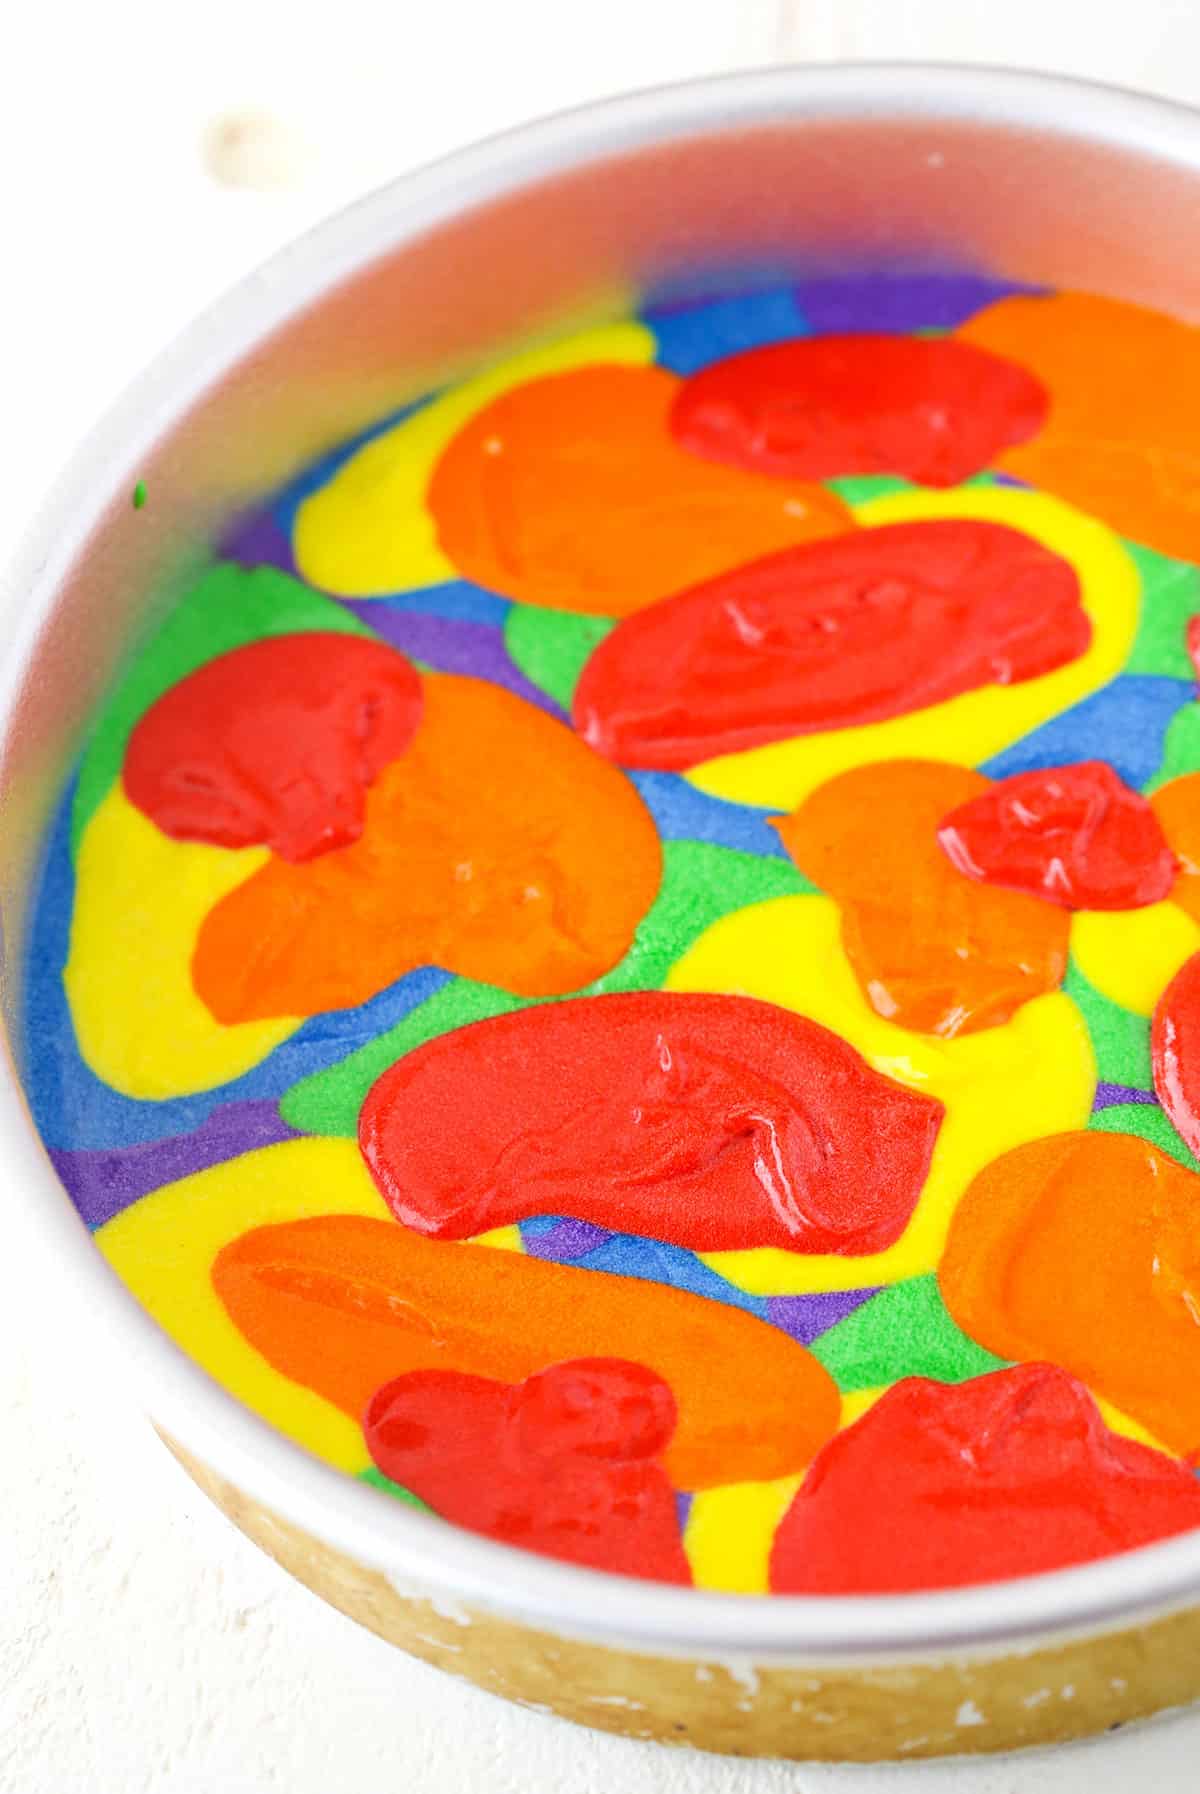
Once your batter is made, divide it evenly between 6 bowls. I used my scale to make sure everything was even, but if you don’t have a scale, it should be a little more than one cup per color.
As far as technique goes, there’s really no wrong way to do it. It’s all about the look you want. For the cake you see in the photos, I dropped spoonfuls of color at a time, shaking the pan from side-to-side between each color to help the batter spread out a bit and color more area. You end up layering the colors on top of each other a little more, giving more of a “swirled” appearance.
But you could also drop larger spoonfuls around, more like in the video below, and have them be a little more pronounced. Totally up to you. Given the nature of the cake, you could make it 10 times and it’d be a little different every time. Part of the fun!
Once the cakes bake, let them cool completely before frosting them.
Rainbow Cake Frosting
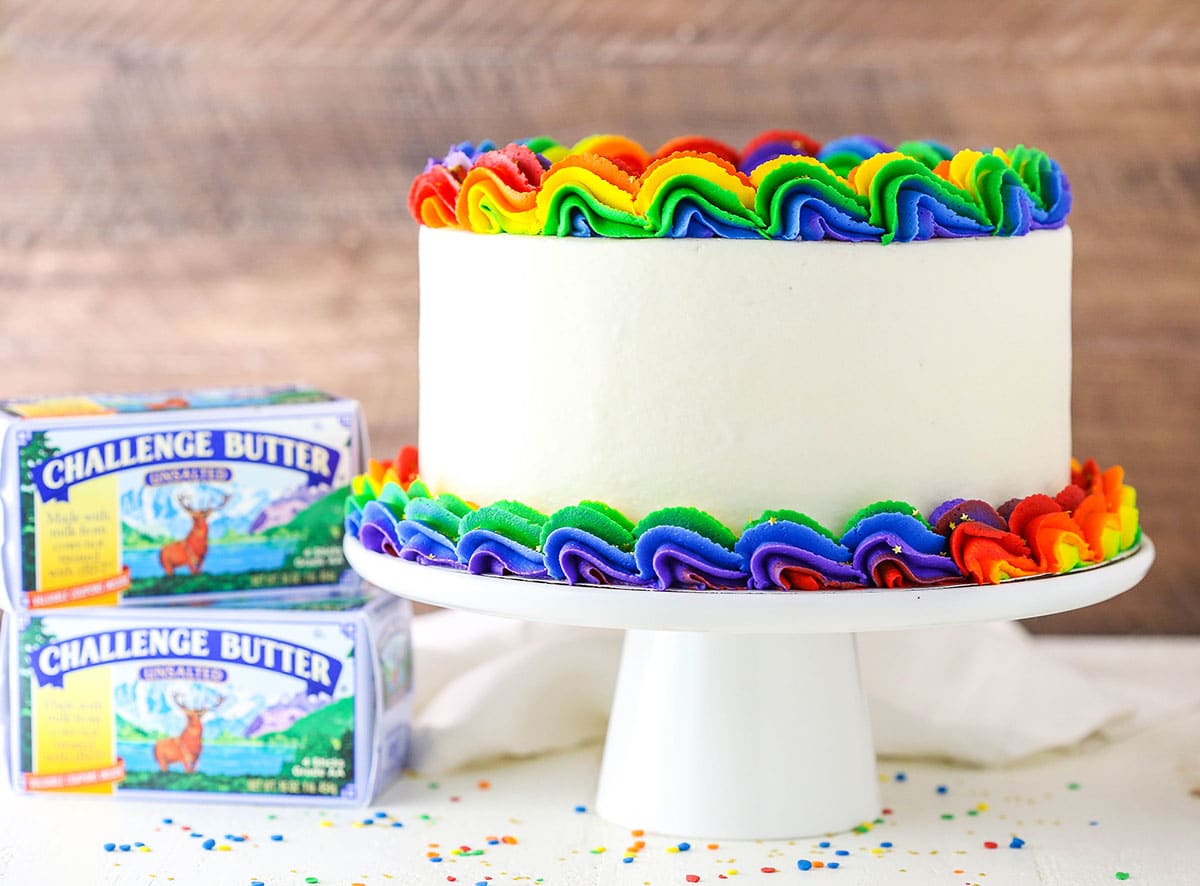
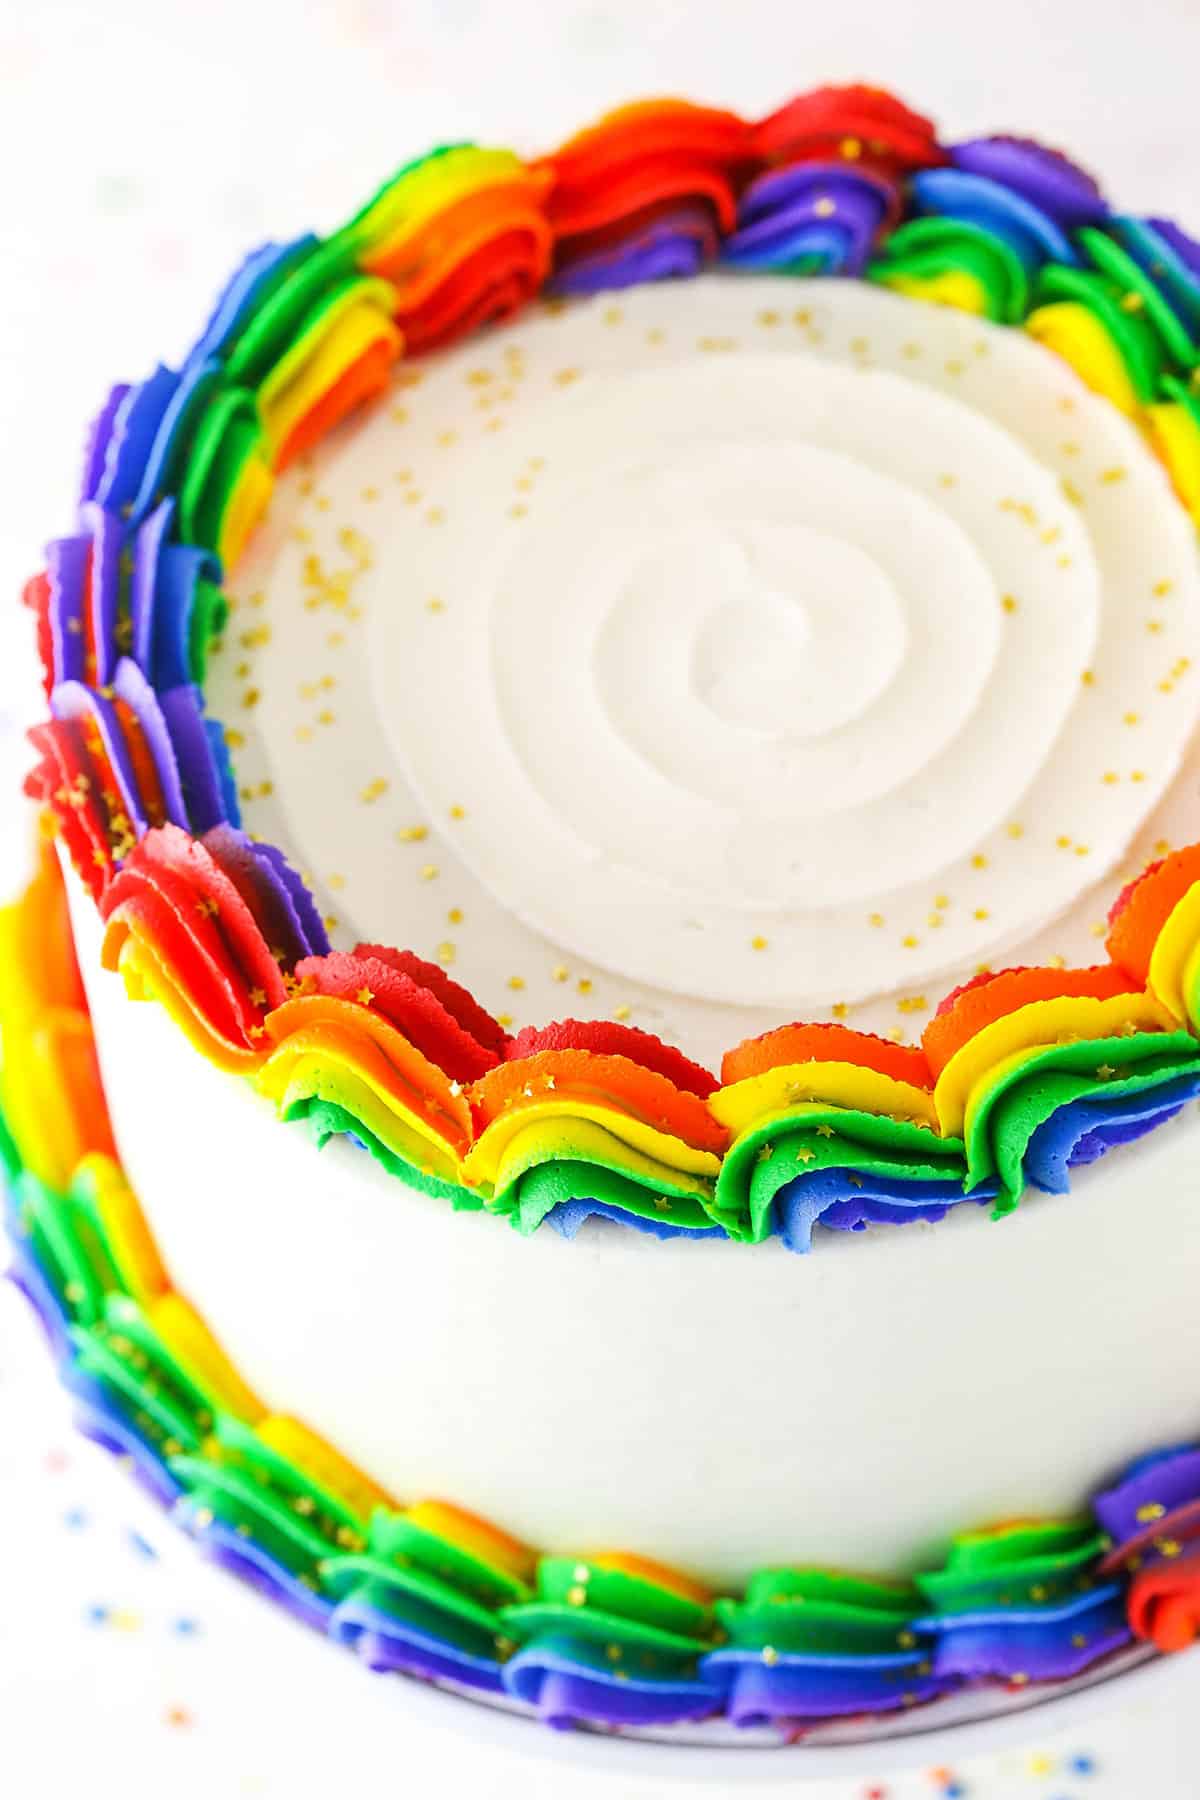
When it comes to frosting the cake, I really wanted to use white for the main color. It gives the colorful cake a bit of a “blank” background to stand out against. But of course you need to know what beauty is waiting for you inside so the rainbow piping is the perfect little hint.
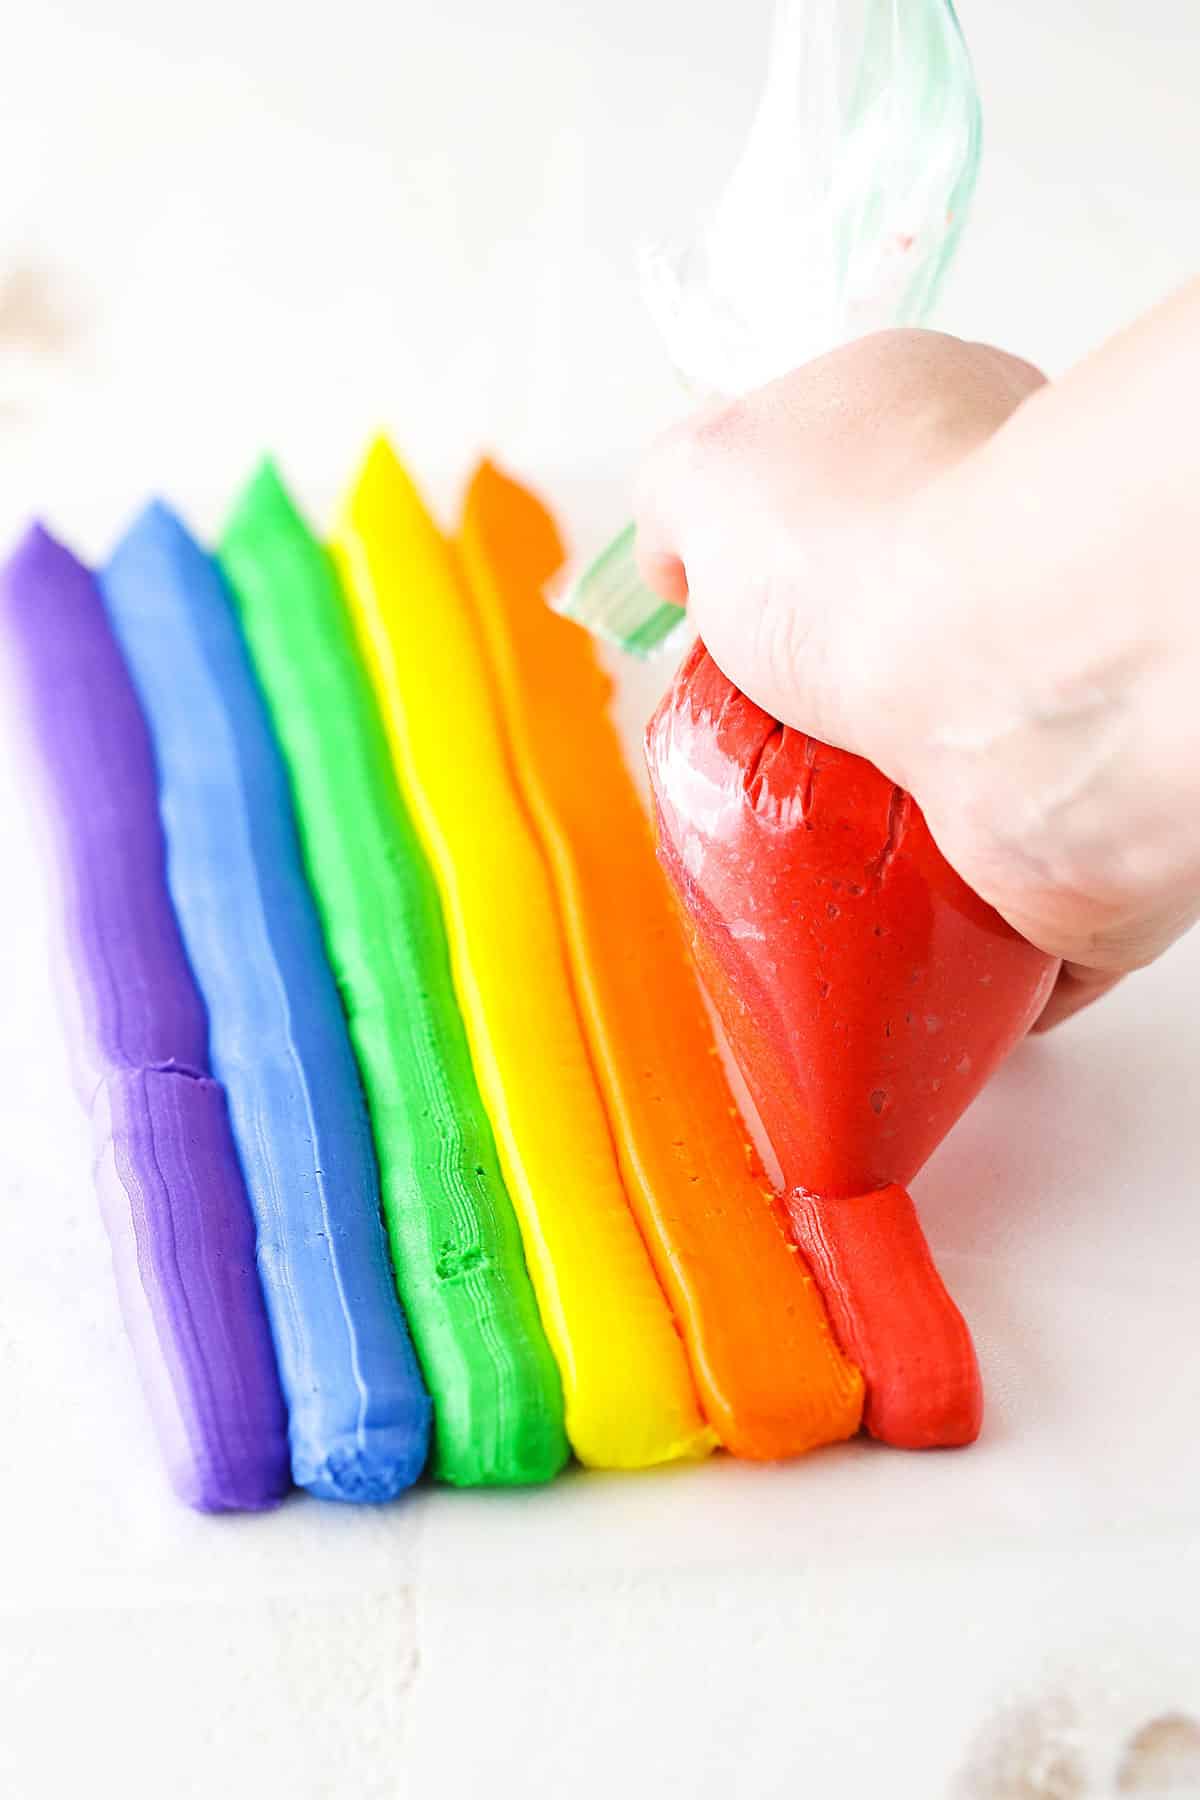
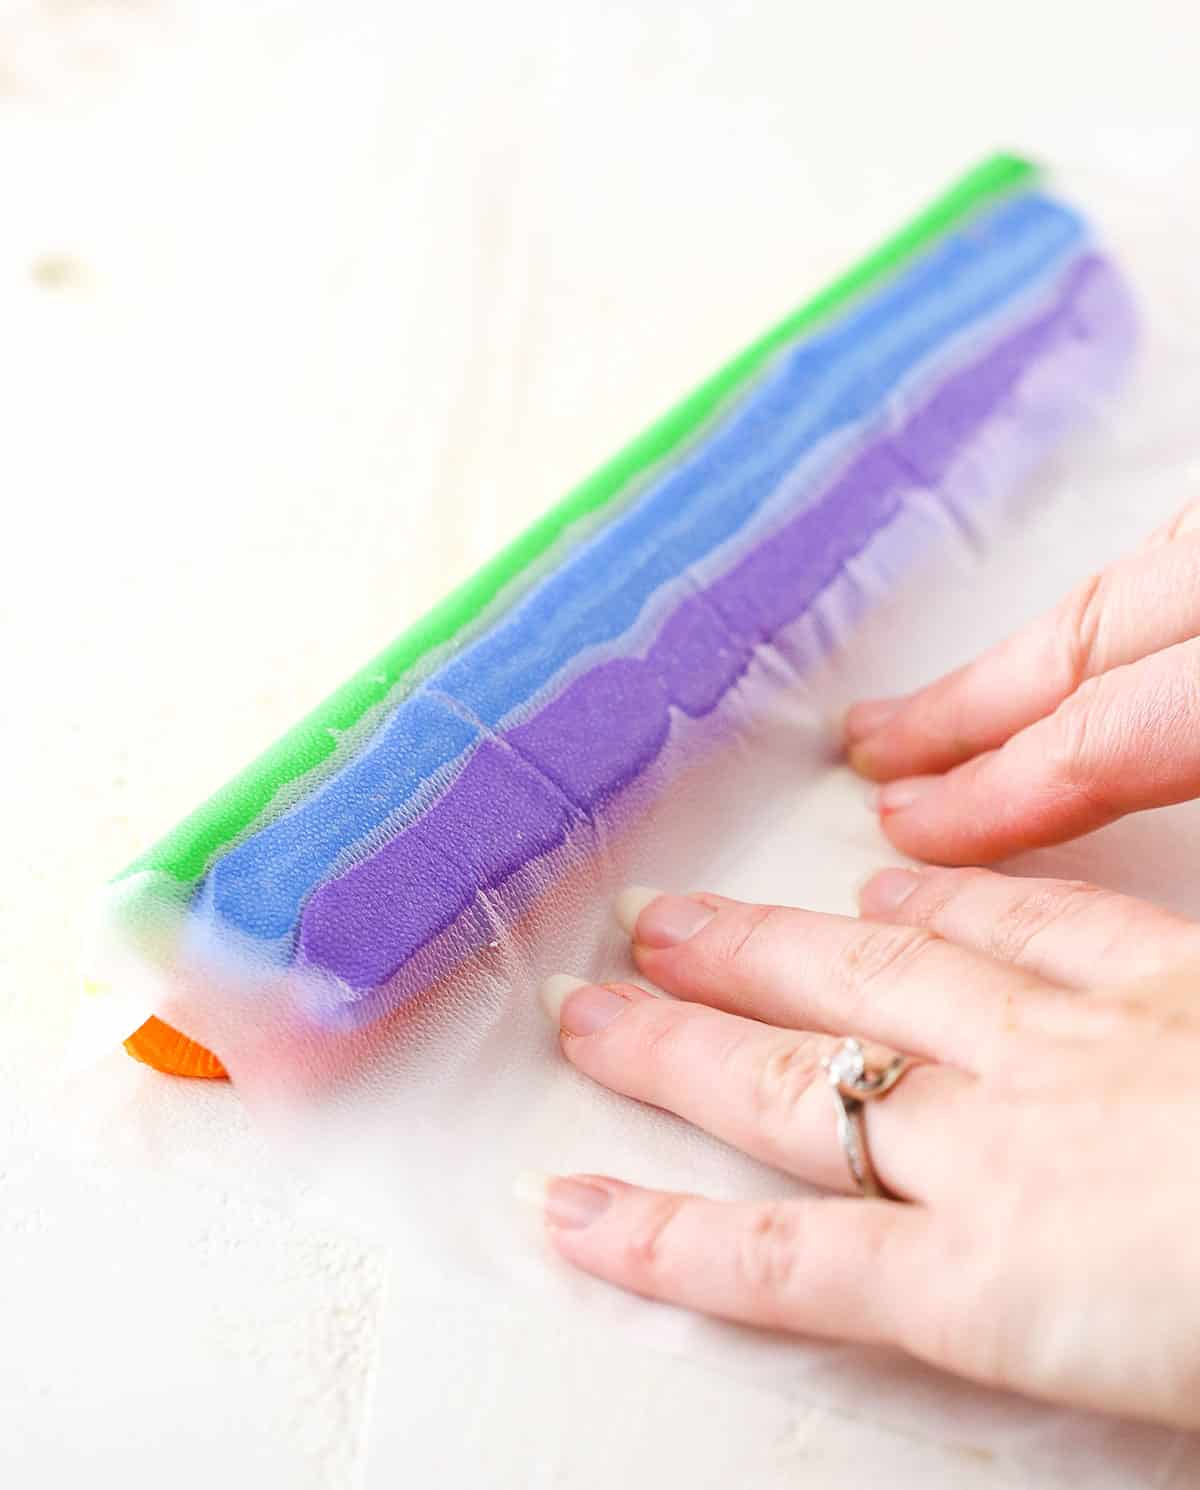
To create the effect, you’ll need to add all the colors to your piping bag. To do this, grab some clear wrap and pipe a line of each color right next to each other. Roll it up and place it into a large piping bag. Pipe the frosting shells around the cake and after each shell, give the piping bag a slight turn. That little turn gives the little rotating look of the colors in the piping. One of my favorite parts of the cake!
The final Rainbow Swirl Cake is moist, delicious and so happy! It would make the perfect birthday cake, celebration cake or St. Patrick’s Day Cake! Make it your own and have fun!
Watch How To Make It
Print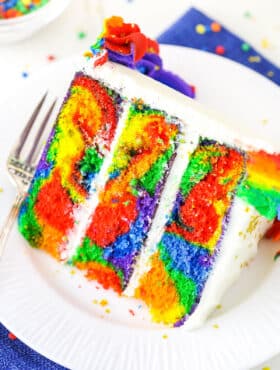
Rainbow Swirl Cake
- Prep Time: 2 hours 30 minutes
- Cook Time: 30 minutes
- Total Time: 3 hours
- Yield: 12-14 slices
- Category: Dessert
- Method: Oven
- Cuisine: American
Description
This Rainbow Swirl Cake is made with three layers of homemade cake with rainbow swirl frosting decorating the cake around the edges!
Ingredients
Vanilla Rainbow Cake
- 3 cups (390g) all purpose flour
- 3 tsp baking powder
- 1 tsp salt
- 3/4 cup (168g) unsalted Challenge butter, room temperature
- 1/4 cup (60ml) vegetable oil
- 2 cups (414g) sugar
- 4 eggs
- 1 tbsp vanilla extract
- 1 1/3 cups (400ml) buttermilk*
- Violet gel icing color
- Royal Blue gel icing color
- Leaf Green gel icing color
- Lemon Yellow gel icing color
- Orange gel icing color
- Red gel icing color
Vanilla Rainbow Buttercream
- 2 cups (448g) salted Challenge butter, room temperature
- 1 cup (189g) shortening
- 11–12 cups (1265g-1380g) powdered sugar
- 1 tbsp vanilla extract*
- 4–5 tbsp (60-75ml) water or milk
- Violet gel icing color
- Royal Blue gel icing color
- Leaf Green gel icing color
- Lemon Yellow gel icing color
- Orange gel icing color
- Red gel icing color
Instructions
Make the Cake Layers
- Prepare three 8 inch cake pans with parchment paper circles in the bottom and grease the sides. Preheat oven to 350°F (176°C).
- Combine the flour, baking powder and salt in a medium sized bowl and set aside.
- Add the butter, vegetable oil and sugar to a large mixer bowl and beat together until light in color and fluffy, about 3-4 minutes. Do not skimp on the creaming time. You should be able to see the change in the color and texture of the mixture.
- Add the eggs two at a time, mixing until well combined after each. Add the vanilla extract with the second round of eggs. Scrape down the sides and bottom of the bowl as needed to be sure all ingredients are well incorporated.
- Add half of the dry ingredients to the batter and mix until combined.
- Add the buttermilk and mix until well combined.
- Add the remaining dry ingredients and mix until well combined and smooth. Scrape down the sides of the bowl as needed to be sure all ingredients are well incorporated. Do not over mix the batter.
- Divide the batter evenly between 6 bowls. It should be a little more than a cup per bowl.
- Add gel icing color to the bowls (one color per bowl) and gently fold until the color is mixed throughout. You should have one bowl each of purple, blue, green, yellow, orange and red.
- Add the colored cake batter to the cake pans. Starting with the purple batter, add spoonfuls of batter around the bottom of the pan. Divide each color evenly between the three pans. Give the pan a little side-to-side shake to distribute the batter around a bit between each color. After the purple, add the blue, then green, then yellow, then orange and finally red.
- Bake for 28-33 minutes, or until a toothpick inserted comes out clean.
- Remove the cakes from the oven and allow to cool for about 2-3 minutes, then remove to cooling racks to cool completely.
Make the Frosting
- To make the frosting, add the butter and shortening to a large mixer bowl and beat until smooth.
- Add about half of the powdered sugar and mix until well combined and smooth.
- Add the vanilla extract and 2 tablespoons of water or milk and mix until well combined.
- Add the remaining powdered sugar and mix until well combined and smooth.
- Add additional water or milk as needed to get the right consistency.
Assemble the Cake
- To put the cake together, first remove the domes from the top of the cakes so they are level.
- Place the first layer of cake on a cake plate or cardboard cake circle, then top it with about 1 cup of frosting and spread into an even layer.
- Add the second layer of cake another layer of frosting.
- Add the final layer of cake on top, the frost the outside of the cake. Feel free to use my tutorial for frosting a smooth cake, if you like.
- Divide the remaining frosting between 6 bowls. I had about 1/3 cup of frosting per bowl, but you may have a little more or less, depending on how much you use to frost the cake.
- Use the gel icing colors to color each bowl of frosting, using one color per bowl.
- To make the rainbow swirl frosting border, add each color of frosting to a ziplock bag. Lay a piece of clear wrap out on the table. Trim the corner off of each ziplock bag. Pipe a thick row of each color of frosting in this order – purple, blue, green, yellow, orange, red – side-by-side onto the clear wrap.
- Fold the clear wrap over into a long log (see photos above for guidance). Twist one end closed and trim the other end, if needed, so that the frosting is right at the end.
- Put the log into a piping bag with the open end of the log going into the piping tip. I used piping tip Ateco 849.
- Begin piping shells of frosting around the top edge of the cake. After each shell is piped, turn the piping bag just a little bit before piping the next shell. As you continue piping and turning the piping bag, you’ll get a rainbow that rotates around so you see all the colors.
- To pipe shells around the bottom of the cake, create another log of rainbow frosting, add it to the piping bag and pipe shells around the bottom in the cake manner – turning the bag slightly after each shell.
- Store cake in an airtight container until ready to serve. Cake is best for 2-3 days.
Notes
* I recommend powdered buttermilk, so you don’t have to waste any leftovers.
* Use clear vanilla extract to get bright white frosting.
Nutrition
- Serving Size: 1 Slice
- Calories: 1096
- Sugar: 122 g
- Sodium: 215.1 mg
- Fat: 56.9 g
- Carbohydrates: 145.3 g
- Protein: 5.5 g
- Cholesterol: 150.9 mg
Categories
Enjoy!







My daughter requested a rainbow cake for her 12th birthday. I dreaded baking 6 layers in different colors so I showed her your picture, and she preferred your swirl cake. We call it rainbow camo cake. LOL! The cake is moist and delicious. American buttercream isn’t my favorite, but the very vanilla flavor is good. Your directions were well written, and my cake turned out just like the picture. Your trick of making the sausage roll for the rainbow frosting works great! Thank you for a great recipe and instructions!
Awesome! So glad it was a hit!
Hi there! I was wondering if the cake batter would be enough for a 9×13 pan? And if so would I decrease cooking time?
Yes, it would be enough. You would actually need to increase the baking time. I would reduce the oven temperature to 325 and bake for probably 25 to 30 minutes or so, depending on your oven.
Yo! The batter recipe is fire. It’s really moist and tasty. Making it a second time now, I’m sure I’ll make it more even if its not rainbow theme.
Suggest me replacement for the buttermilk please???
Do i need to add all the sugar amount to the frosting as I don’t need it to be very sweet
You can use regular milk, but the buttermilk does make the cake a little more tender. As for the sugar in the frosting, it’s there to add volume to the frosting as well. You can reduce it, but you won’t have as much frosting. That may be ok for you, but just want you to be aware.
Hi just wanted to know if the Sponges could hold fondant or not?
I would think this cake should be fine, but I don’t work with fondant a lot.
Hi, I’m going to make these but some of your measurements in grams aren’t accurate. 1 cup of flour is 120 grams and you have 3 cups as 390 grams. Should I use your measurements or the accurate ones?
The weight measurements used vary everywhere unfortunately. The ones I use are not wrong, but they may differ from another source. I’d suggest using mine for my recipes, since I use those.
Thank you for all your added details, Your measurements were PERFECTO!!!
I took my time, I followed, I did have to make my own buttermilk, (the one thing I forgot at the store).
Lindsay this recipe saved the day for my daughters 9th birthday! The bakery we ordered her cake from had to cancel our order last minute. Totally out of their control but left us in a bind the morning of her birthday. This rainbow marble look is what my daughter requested for her birthday and I was going to try my best. This recipe was so easy to follow and it turned out amazing! Every kid said it tasted like donuts! They loved it! It’s definitely the best homemade cake I’ve ever had. Wish I could post a picture for you to see. Thank you so much for posting this!
So glad you enjoyed it!
Hi, can I use 5 egg whites instead of 4 whole eggs,if yes should l add them after creaming butter,oil and sugar or should l wisk them to softpeak and them fold it at the end?(do the colors stay nice like yours in this case or they will mix if l use only egg whites?)and why don’t you use baking soda to activate the buttermilk?isn’t it necessary?thx alot
Egg whites and egg yolks do not act the same in cakes. I don’t believe you’d get good results with that substitution.
Hi just did this recipe. I’m European so I thought sugar content was high for a cake that size. So I reduced by 50 g. Not much but the cake is sweet enough even with less sugar.
I have not yet cut in the middle but removed the dome and color are lovely and tried the top dome and it is so yummy.
Can’t wait to decorate it and see my daughters face for her birthday cake.
I used pins colada flavour and passion fruit flavour as I did not have vanilla.
And replaced the buttermilk by keffir.
I made this cake for my boys birthday yesterday it’s the first birthday cake I have ever made I usually just get some one to make one for me. I have to say it was so good easy to follow recipe and it came out perfect thank you so
Much
So glad you enjoyed it!
Can you use water instead of buttermilk for the cake batter? My mom is lactose intolerant but I would love to make your cake for my daughter’s 5th birthday – just trying to accommodate my mom! Thanks!
I’m really not sure how that would turn out without trying it. I’m sure it would bake, but it may affect the texture of the cake a bit since you will lose the fat from the milk.
I made this for my son’s TMNT party, but with cream cheese frosting and got so many compliments. I used the Betty Crocker hel colors and a few drops of neon purple liquid food coloring for purple. The colors weren’t as saturated, but lighter and more neon, which I actually prefer. Because I have cheap dollar store pans, I actually ended up with thinner layers and a 4 layer cake. I love the technique because I’ve never gotten swirl cakes to actually swirl.
I’m so glad you were happy with it!
Emmy I used the Betty Crocker gels too and I was surprised how well they worked! Really is a great recipe.
Hello..I need to use a 12×18 pan how many recipes would I need to make up? I’m a number 2 cake.
I meant I’m making a 2 number cake.
I haven’t made this cake in that size pan, so I’m not sure. I think you could probably just do one to get a fairly thin sheet cake layer. So I guess it depends also on how thick you want the cake or how many layers.
Could you please give tips for making cupcakes instead.
I haven’t tried this as cupcakes, but you should be able to follow the same procedure. Just drop spoonfuls of the colored batter into cupcake liners and reduce the baking time to between 15 and 17 minutes.
Curious if you can use 9 in pans, and if so, what adjustments should be made? Thanks!
You can, you’ll just reduce the baking time a bit.
My daughter’s 2nd grade bucket list includes “learning to make a cake”, so we came across this recipe and decided to make it. Ours isn’t quite as vibrant as yours, and parts of the swirled icing look like “unicorn poop” according to my daughter, but it was a blast to make and a great way to spend the afternoon together. Thanks for the fun recipe!!
So fun! I’m glad you both enjoyed making it!
An amazing cake which I managed to copy today. Could you advise how to adjust the ingredients in order to make it with less sugar? It was delicious but too sweet for some of my taste testers! Many thanks.
I don’t have any specific advice on reducing the sugar. I didn’t try it with less sugar but you certainly can. Just keep in mind that sugar not only adds sweetness but also moisture so reducing it too much may affect the texture of the cake.
I made this cake and substituted gluten free Cup 4 Cup flour. Disappointing results. It looked good in the pans while baking but turned out gummy instead of yummy.