This post may contain affiliate sales links. Please read my disclosure policy.
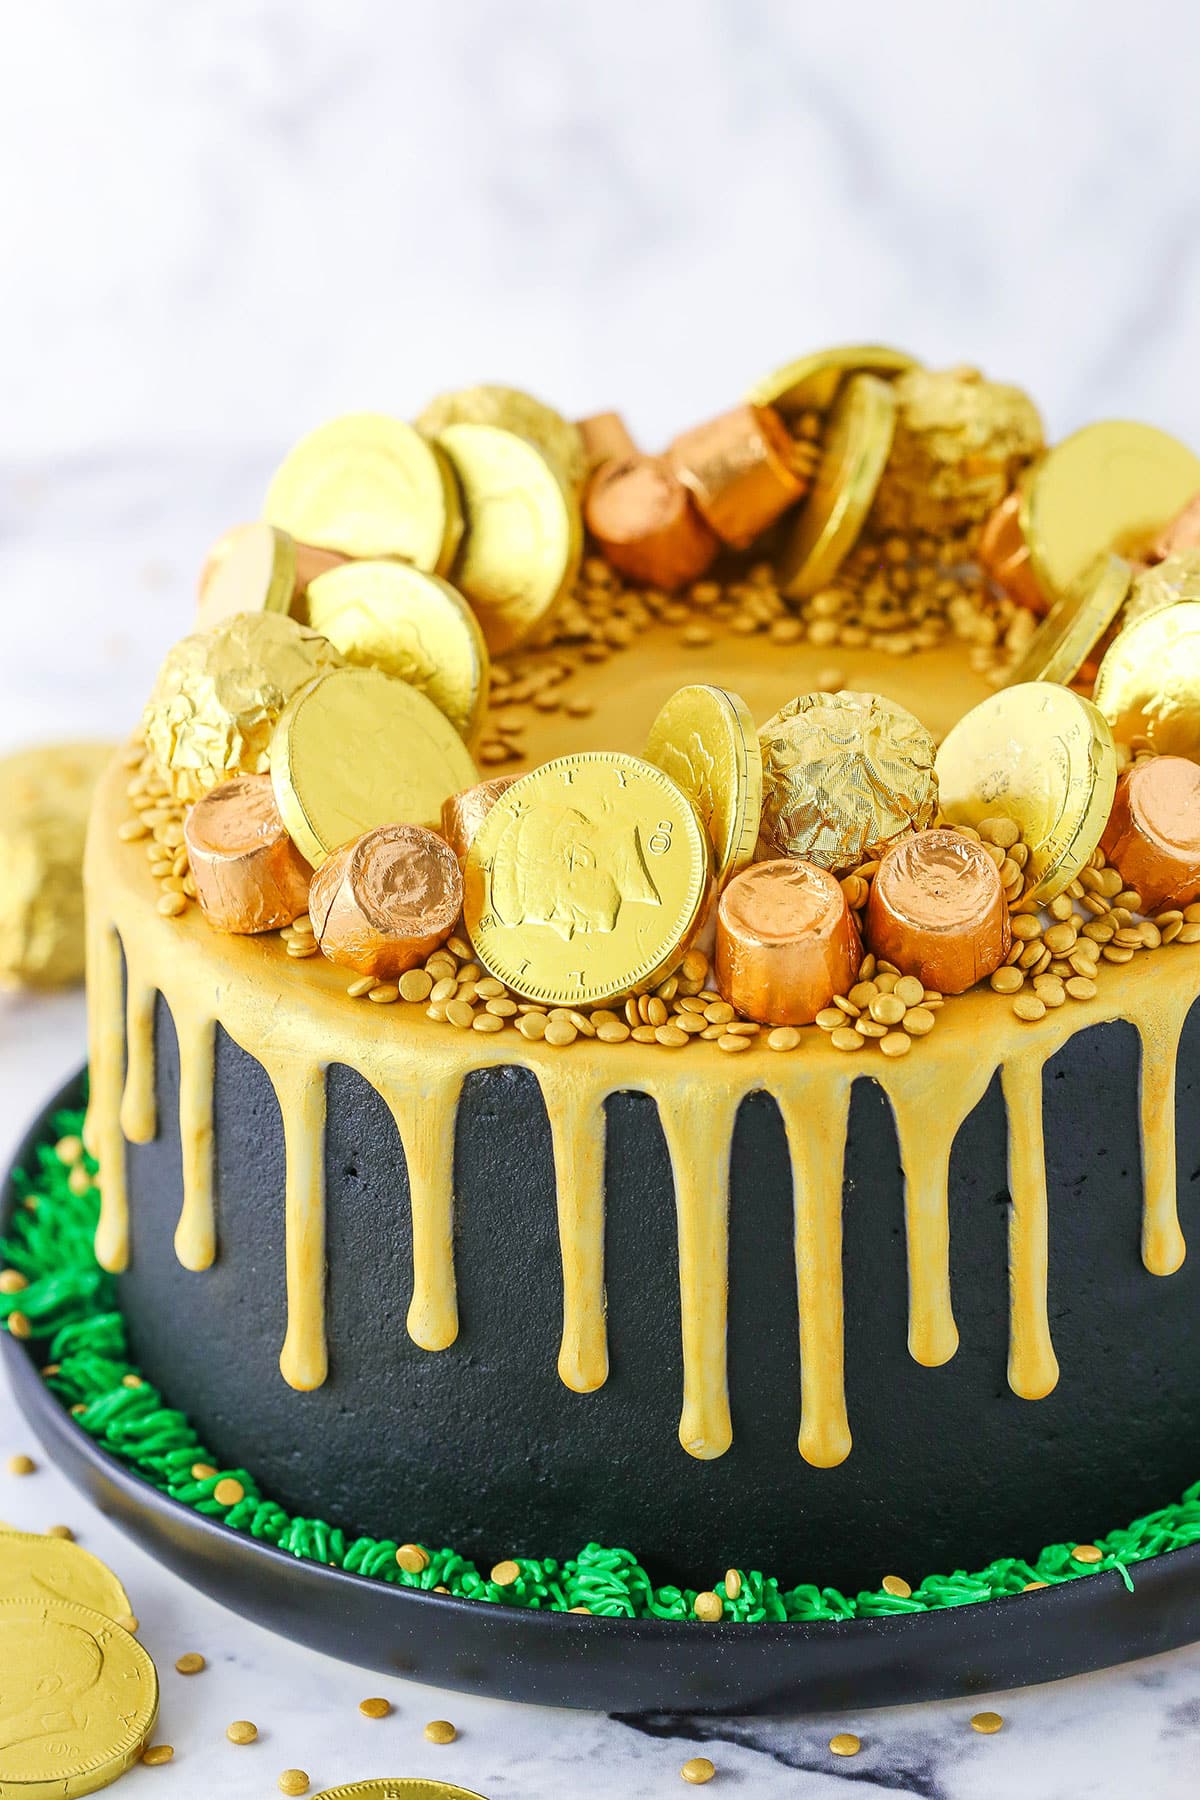
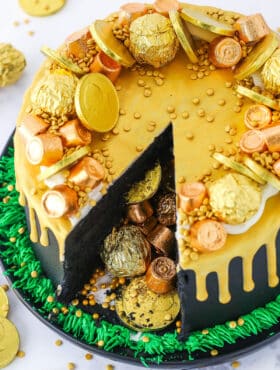
This Pot of Gold Cake is such a fun cake for St. Patrick’s Day! Lots of chocolate and all the “gold” you could want! Cut into it and see all the “gold” fall out!
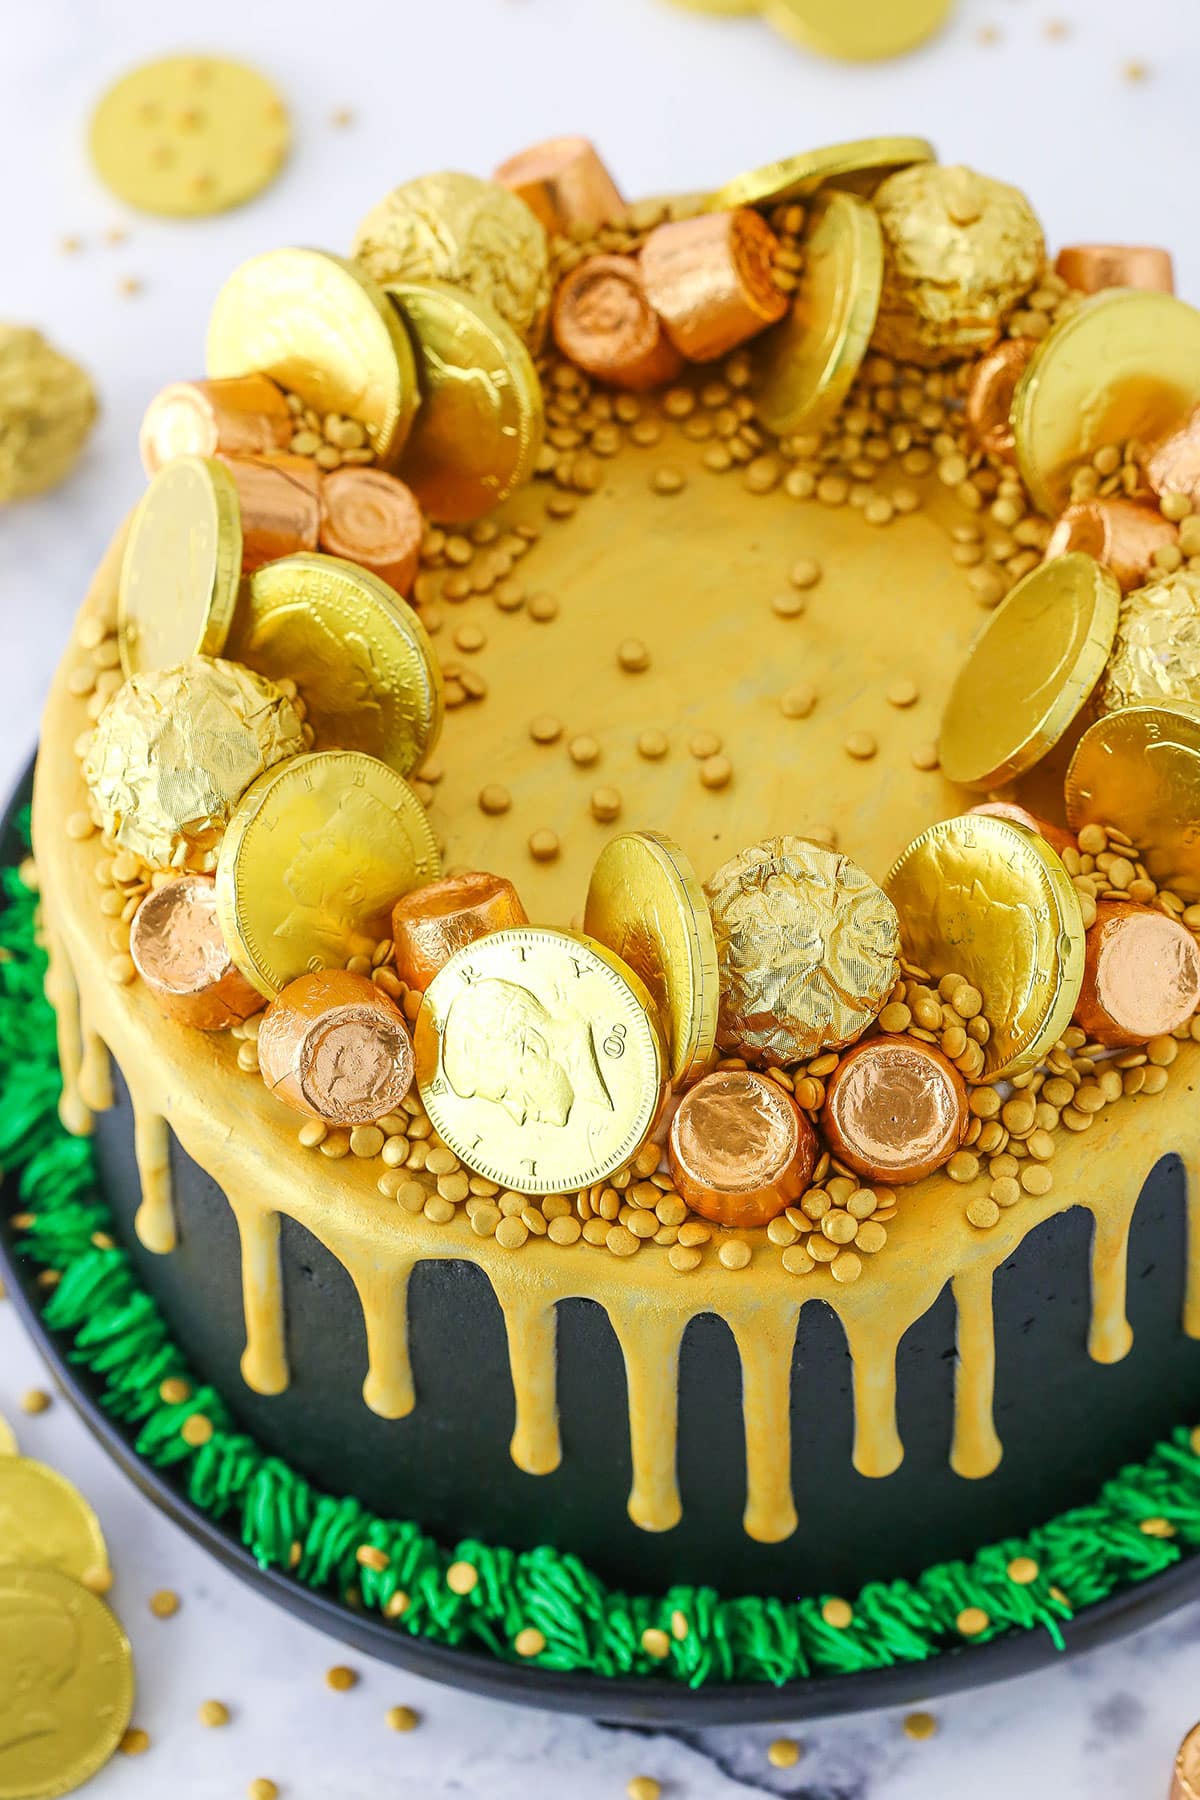
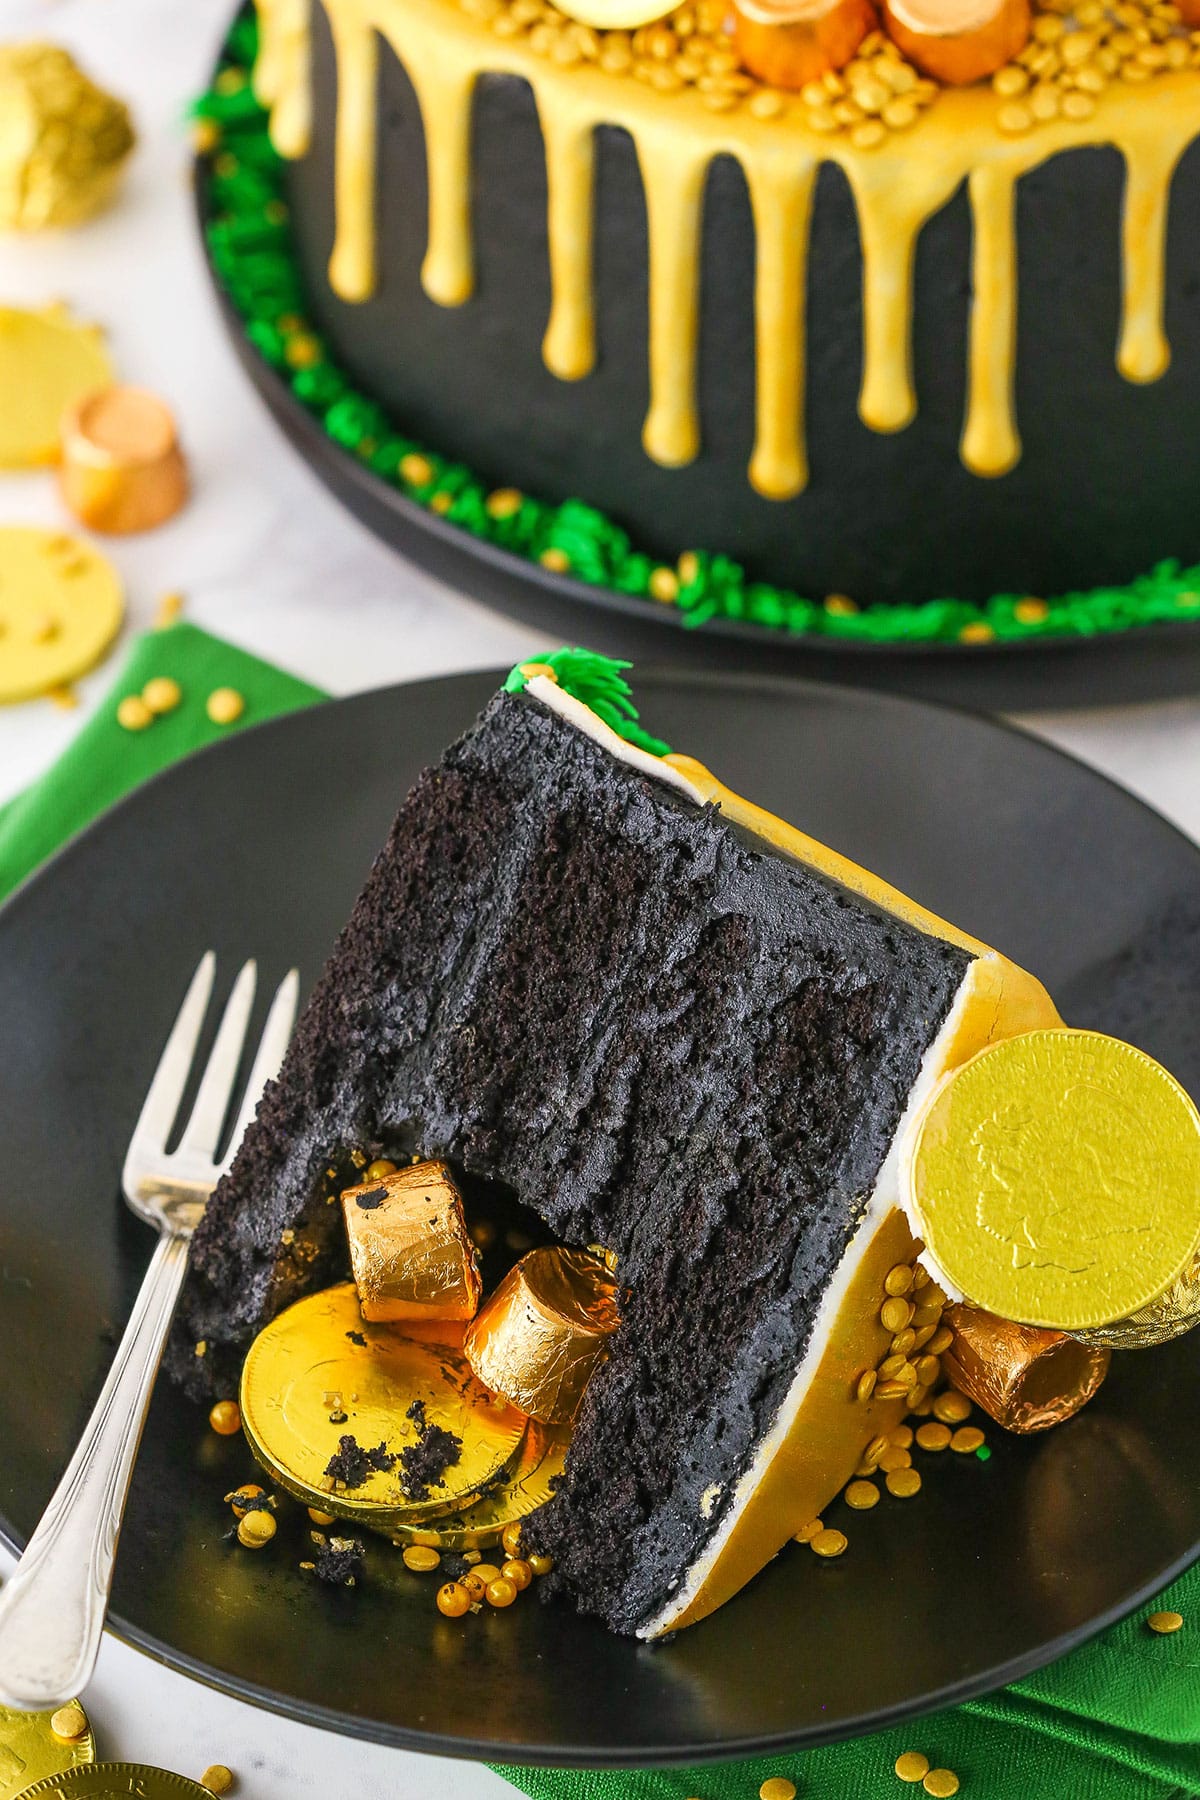
I’ve been looking forward to sharing this cake since I made it. It’s a little crazy and yet so fun. I love the concept of a cake that’s like a pot of gold and when you cut into it, all the golden goodies fall out. It takes a little time to make, but it’s totally worth it for a special cake.
How to make a Pot of Gold Cake
Chocolate Cake
To start, you’ll make the chocolate cake. It’s fairly simple to make and uses the traditional creaming method. To help get the dark color of the cake layers, I used Hershey’s Special Dark cocoa powder.
A quick note about the cocoa – it would seem that Hershey’s has changed their dark cocoa from being a blend of natural and dutched cocoa to being all dutched cocoa. It makes a good bit of difference in the way things bake. With the change, the cake ends up being fairly dense and almost fudgy, but also very tender. I personally loved the cake’s texture, but it’s something to be aware of.
In addition to the dark cocoa, black gel icing color is used to get a fully black cake. I wanted it to be like the inside of a black cauldron, but you could certainly leave out the black color if that doesn’t matter to you.
Once the cakes are baked and cooled (four layers total), you’ll want to remove the centers of two of the cake layers so that you’ll be able to fill them. I used 3 inch biscuit cutters, but round cookie cutters would work, as well as a sharp knife. Just be sure that the holes are in the center of the cake and that they are in the same place in both layers. I used a ruler to measure and make sure it was centered.
Build the Cake
To build the cake, first make the chocolate buttercream frosting. Layer the cake layers with the frosting, with one full layer on top and one full layer on bottom. The two layers with the holes in the center will be the middle layers of the cake. For more help with building a layer cake, check out my tutorial and tips.
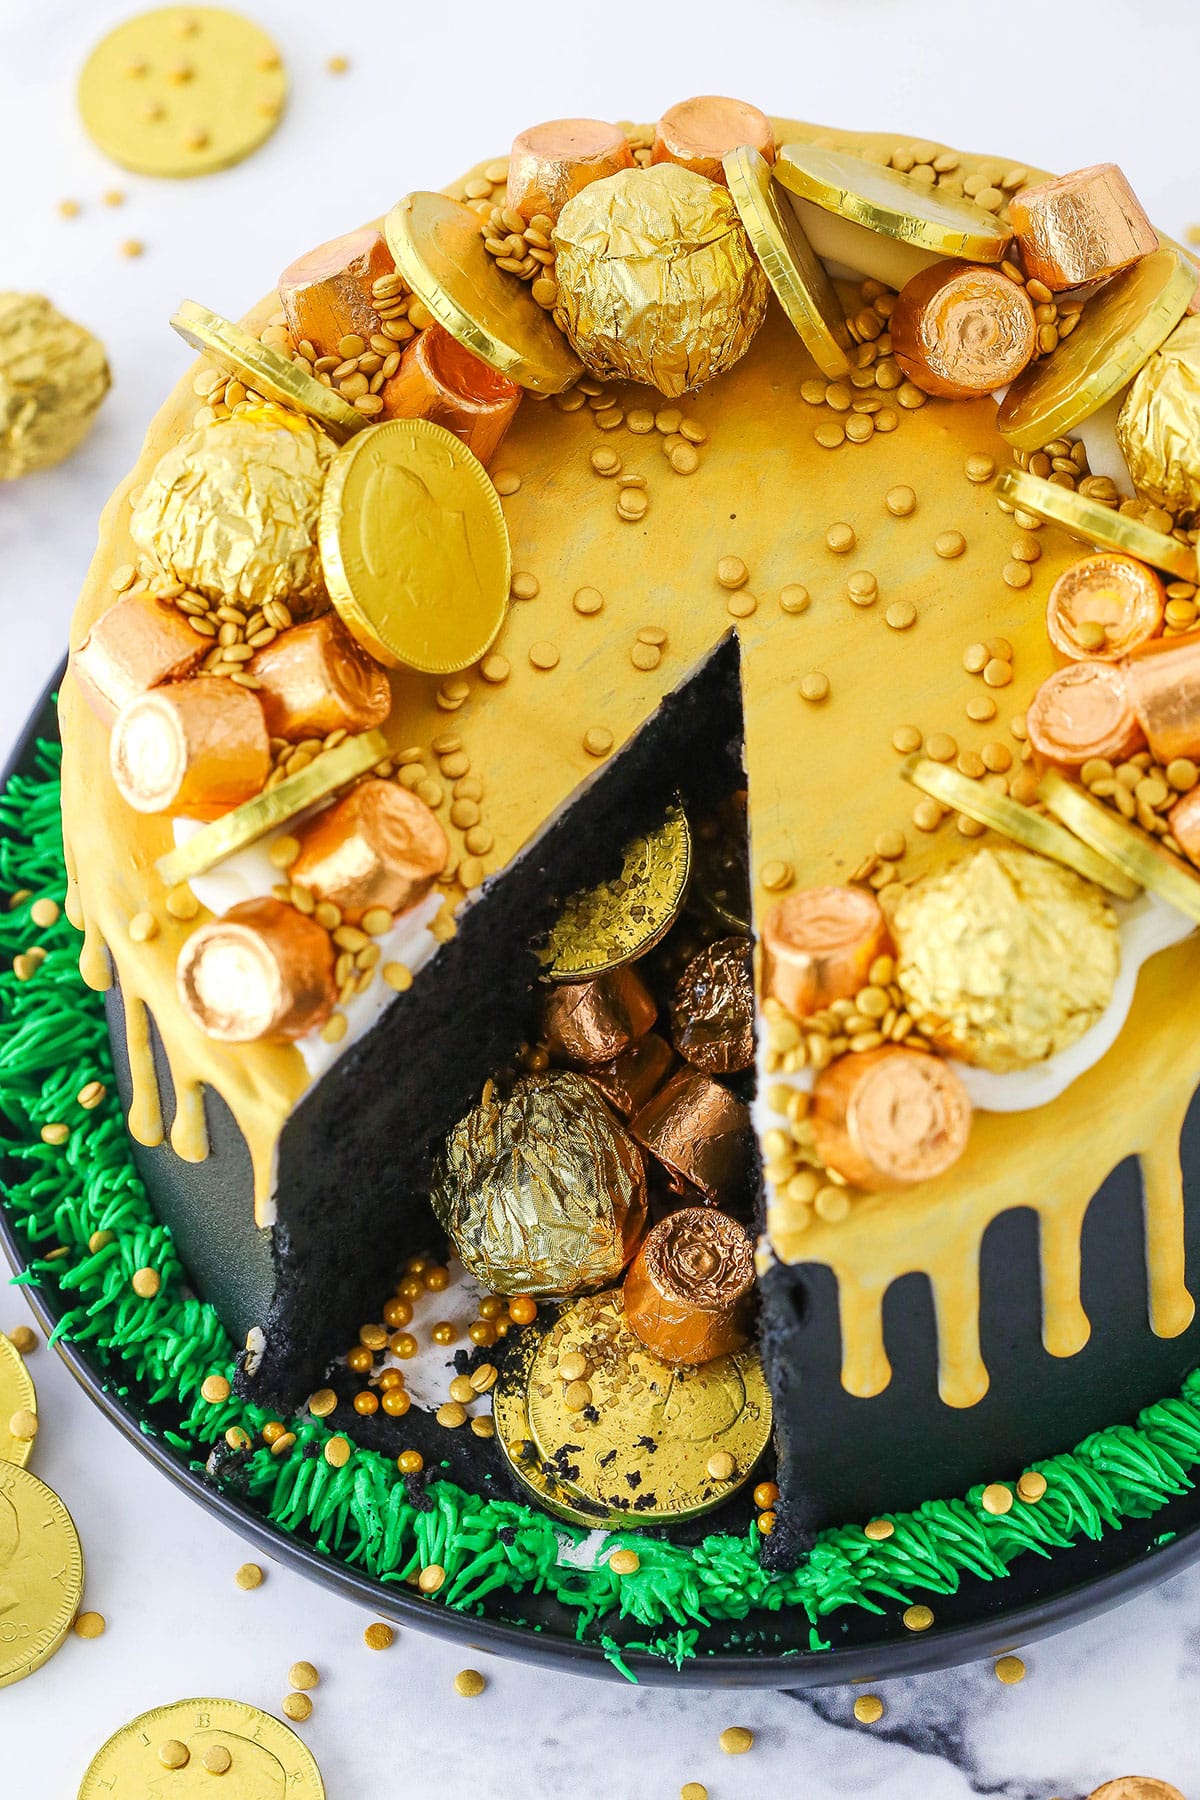
Prior to adding the top layer of cake, fill in the center of the cake with the “gold”. I used a combination of Rolos, Ferrero Rocher, gold coins and gold confetti. Fill the hole all the way to the top, but not higher. You want there to be candies that reach high enough that the center of the top layer of cake has something to rest on for support.
Gold Ganache Drip
For the ganache drip, you’ll make a white chocolate ganache and drizzle that around the edge of the cake, then fill in the center. To paint it gold, use gold luster dust. To make the paint, I use a little bit of vodka and pour it onto a plate, then add the luster dust next to it, so that I can mix them but they remain separate. Use a food paint brush to combine a little bit of dust with the vodka and get a nice thickness for painting.
Instead of vodka, you could also use a clear extract. Vanilla isn’t clear, so I’d suggest something like almond. You can also find clear vanilla extract.
Paint the gold onto the ganache and allow it to dry. The alcohol will evaporate and leave a nice gold finish. It takes a while to paint the whole drip, but it’s such a pretty result.
Decorating the cake
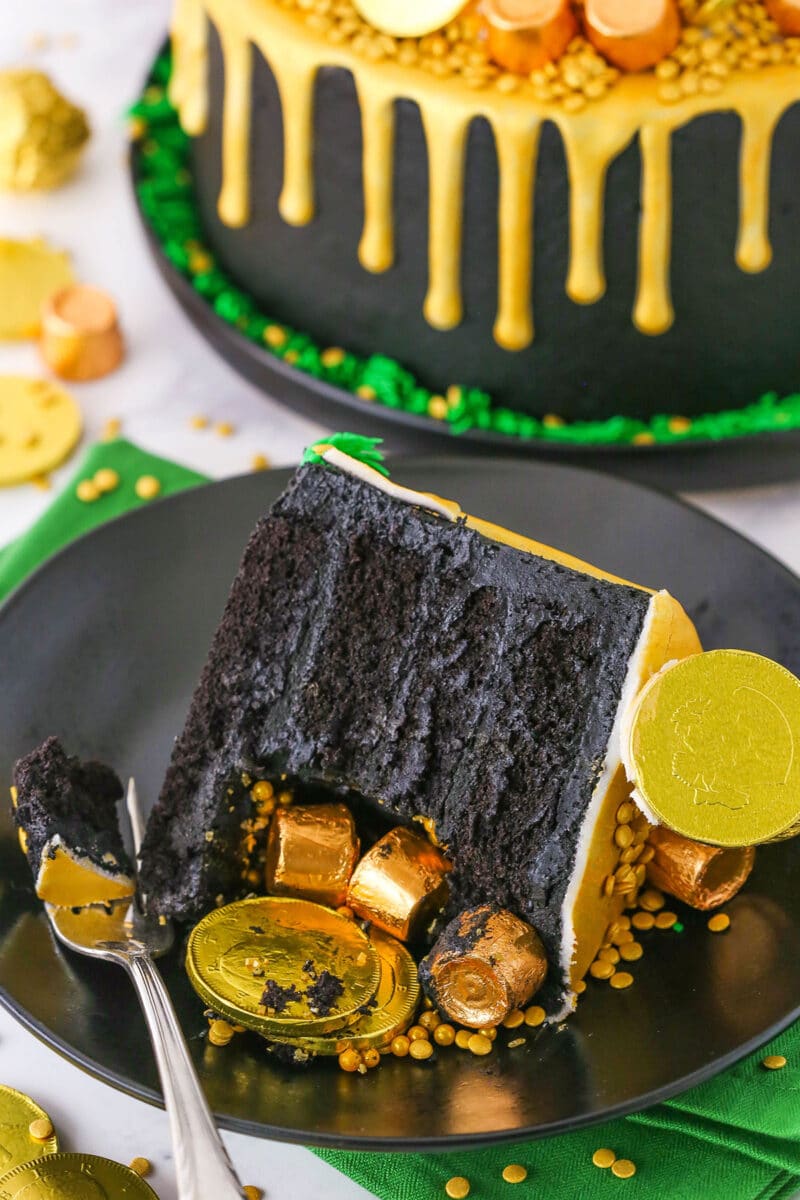
The final decorations on the top of the cake begin with some additional vanilla frosting. Use the frosting to pipe a ring of frosting around the outer edge of the cake, about an inch in from the edge. This frosting will be what you stick the candies to so they have a place to rest and stay in place.
Place the gold candies around the cake as you like, then use gold confetti to fill in where the candy doesn’t cover the vanilla frosting.
The final step is to color the remaining vanilla frosting with green gel icing color and use it to pipe grass around the bottom edge of the cake. You can add a few more pieces of gold confetti around the grass, if you like.
Perfect St. Patrick’s Day Cake
While a little bit of work, this cake is so darn fun! It’s colorful and full of surprises when you cut into it! Not to mention that it’s delicious and super chocolatey. I’m kind of in love with it and I hope you’ll enjoy it to. It’s perfect for St. Patrick’s Day and would be a hit at any party!
More Great St. Patrick’s Day Desserts
No Bake Baileys Irish Cream Cookie Balls
Rainbow Swirl Cake
Guinness Chocolate Cheesecake
Lucky Charms Cupcakes with Cereal Milk
Baileys Chocolate Poke Cake
Guinness Chocolate Brownies
Mini Rainbow Cheesecakes
No Bake Baileys Chocolate Cheesecake
Pot of Gold Cake
- Prep Time: 3 hours
- Cook Time: 20 minutes
- Total Time: 3 hours 20 minutes
- Yield: 10-12 slices
- Category: Dessert
- Method: Oven
- Cuisine: American
Description
This Pot of Gold Cake is such a fun cake for St. Patrick’s Day! Lots of chocolate and all the “gold” you could want! Cut into it and see all the “gold” fall out!
Ingredients
Chocolate Cake Layers
- 2 cups (260g) all purpose flour
- 1 tsp baking soda
- 1/2 tsp salt
- 1 cup (224g) unsalted butter, room temperature
- 2 cups (414g) sugar
- 4 large eggs
- 3/4 cup (85g) Hershey’s Special Dark cocoa powder
- 1 tsp vanilla extract
- 3/4 cup (180ml) warm water
- 3/4 cup (180ml) milk
- Black gel icing color
- Gold coins
- Rolos
- Gold confetti
- Ferrero Rocher
Chocolate Frosting
- 1 1/4 cups (280g) unsalted butter, room temperature
- 1 1/4 cups (237g) shortening
- 3/4 tsp salt
- 9 cups (1035g) powdered sugar
- 2 tsp vanilla extract
- 1 cup (114g) Hershey’s Special Dark cocoa powder
- 4–5 tbsp (60-75ml) water/milk
Ganache Drip
- 6 oz (1 cup) white chocolate chips
- 3 tbsp (45ml) heavy whipping cream
- Gold luster dust
- Touch of vodka or clear extract
Additional, for decorating
- 1/2 cup (112g) unsalted butter, room temperature
- 2 cups (230g) powdered sugar
- 1/2 tsp vanilla extract
- 2–3 tbsp heavy whipping cream
- Green gel icing color
- Gold coins
- Rolos
- Gold confetti
- Ferrero Rocher
Instructions
1. Preheat the oven to 350°F (176°C). Line the bottom of four 8-inch (20cm) cake pans with parchment paper and grease the sides.
2. Combine the flour, baking soda and salt in a medium sized bowl. Set aside.
3. Cream the butter and sugar together until light in color and fluffy, about 3-4 minutes.
4. Add the eggs one at a time, beating until combined after each addition.
5. Combine the cocoa, vanilla extract and water. Stir until combined, then add to cake batter and mix until well combined.
6. Alternate adding the flour mixture and milk to the batter. Begin by adding half of the dry mix, then mix well. Add the milk and mix well, scraping down the sides as needed. Add the remaining flour mixture and mix until smooth.
7. Add black gel icing color to turn the cake batter black. Keep in mind that the color will darken when the cakes bake. If the batter has a slightly grey-ish look, it’ll likely darken just fine when it bakes. No need to add even more color at that point.
8. Divide the batter evenly between the cake pans. Bake for 20 minutes, or until a toothpick inserted comes out with a few crumbs.
9. Remove cakes from the oven and allow to cool for 2-3 minutes, then remove from pans to a cooling rack to finish cooling.
To make the frosting:
10. Beat together the butter, shortening and salt until well combined and smooth.
11. Slowly add 4 cups (460g) of powdered sugar and mix until well combined and smooth.
12. Add the vanilla extract and half of the water or milk and mix until well combined.
13. Add the other 5 cups (575g) of powdered sugar and mix until well combined and smooth.
14. Add the cocoa and mix until well combined and smooth.
15. Add the remaining water or milk until the frosting is the right consistency.
To build the cake:
16. To build the cake, you’ll need something to be able to cut through the cake layers with. I used a 3 inch biscuit cutter, but a round cookie cutter, something similar, or a sharp knife would be fine too. Use your cutter to cut a hole all the way through two of the cake layers. You want the hole to be in the center of the cake. Leave the other two layers as-is.
17. Place one of the full cake layers onto a cake plate or cardboard cake circle and spread about a cup of frosting in an even layer on top of the cake.
18. Place the next cake layer on top – one with a full hole removed – then add another layer of frosting (about 1/2 a cup) just on the part of the cake layer that remains.
19. Add the second layer of cake that has a hole removed and another layer of frosting. Spread a thin layer of frosting around the inside of the hole.
20. Fill the cake with your choice of gold candies and treats. I used gold coins, rolos, gold confetti and Ferrero Rocher You should fill the hole so that nothing sticks up above the sides of the hole, but reaches to the top so that there’s something there for the top layer of cake to rest on.
21. Add the final layer of cake on top, then frost the outside of the cake. Feel free to use my tutorial for frosting a smooth cake.
To add the ganache drip:
22. To make the ganache, add the white chocolate chips to a medium sized bowl.
23. Add the heavy whipping cream to a microwave-safe measuring cup and microwave until it just begins to boil.
24. Pour the hot cream mixture over the white chocolate chips and let it sit for 2-3 minutes, then whisk until smooth. If it doesn’t melt really well, pop it back in the microwave for about 10 seconds, then whisk until smooth.
25. Drizzle the white chocolate ganache around the edges of the cake, then fill in the center/top of the cake. See my tips on making a chocolate drip cake.
26. To paint the drip gold, add some gold luster dust to a plate along with a little vodka or clear extract, such as almond. Use a food paint brush to mix a small amount of the liquid with the luster dust to create a paint and paint the drip gold.
To decorate the cake:
27. Make some additional vanilla frosting. Add the butter to a mixer bowl and beat until smooth.
28. Add one cup of powdered sugar and mix until well combined and smooth.
29. Add the vanilla extract and 1-2 tablespoons of cream and mix until well combined.
30. Add the remaining powdered sugar and mix until well combined and smooth.
31. Add additional cream, as needed to get the right consistency frosting.
32. Pipe a ring of frosting around the outer edge of the cake, about an inch in from the edge.
33. Use the ring of frosting to stick more candies and sprinkles to the top of the cake. I added the candies first, then filled in the gaps with the gold confetti sprinkles.
34. Color the remaining frosting with green and use the grass icing tip to add grass around the bottom edge of the cake.
35. Store the cake in an air tight container. Cake is best if eaten within 2-3 days. The cake should be fine at room temperature for about a day, but any longer and it should be refrigerated.
Nutrition
- Serving Size: 1 slice
- Calories: 1492
- Sugar: 167.3 g
- Sodium: 428.7 mg
- Fat: 81.5 g
- Carbohydrates: 192.6 g
- Protein: 10 g
- Cholesterol: 185.9 mg









I haven’t tried this but it looks amazing! I’m definitely going to! So inspiring!
This looks stunning! I’ve tried many times to make a blackout cake to no avail. Which brand of black food coloring gel did you use?
I used Wilton brand for this cake.
Wow! Jack Pot!!!
That looks like the type of fudgey cake I’d be happy and lucky to eat! Yum! And I love hershey’s dark cocoa powder, so I’ll definitely have to try this recipe! Thanks!
What a Gorgeous Cake! thank you for the links to get the Gold coins and confetti to decorate it!