This post may contain affiliate sales links. Please read my disclosure policy.
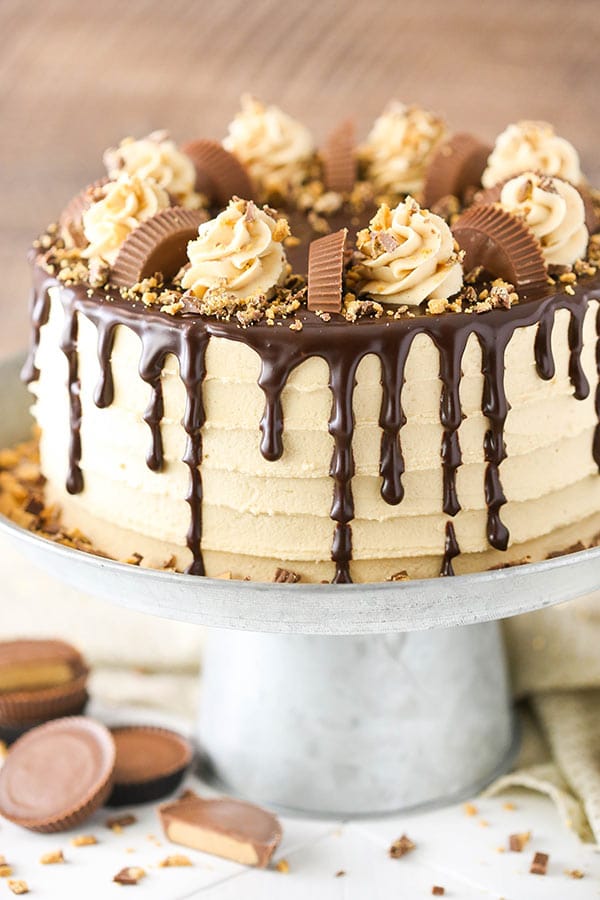
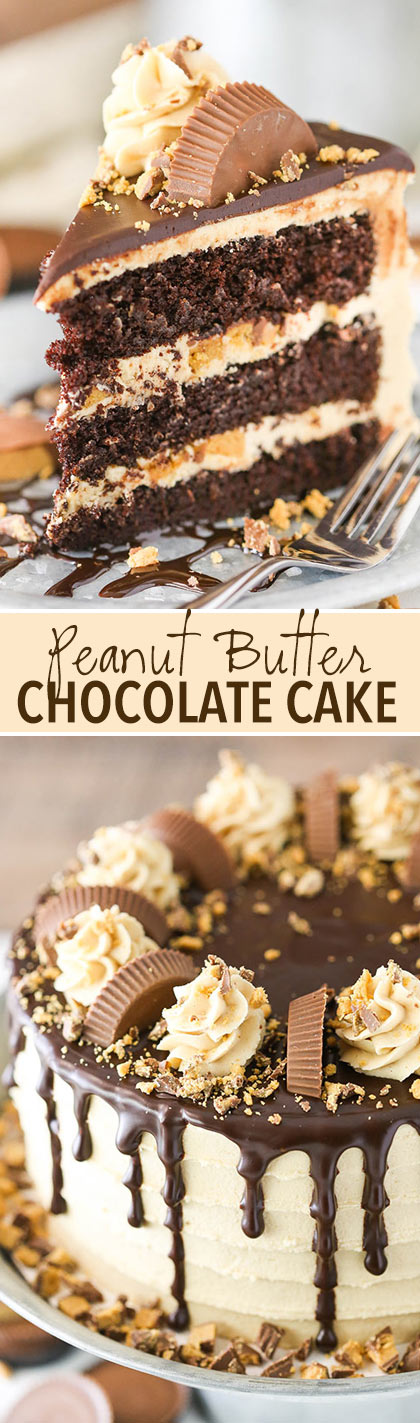
This Peanut Butter Chocolate Layer Cake recipe is made with layers of moist chocolate cake, peanut butter frosting and chopped Reese’s peanut butter cups! It’s rich, delicious and so fun!
Peanut Butter & Chocolate Layer Cake
While taking some photos yesterday of a cake, I was reminded of something that the hubs regularly tells me and demonstrates through fearful looks my way – I am one photo away from seriously injuring myself. One of the tables, counters or chairs I stand on to get just the right angle will one day not cooperate the way I want and I will fall and either break the camera I’m holding or some part of my body. It’s bound to happen.
I have a three step stool that I use all the time for overhead shots or something that’s at a more dramatic angle than I can achieve just by standing. Yesterday, I was standing on that stool taking photos and teetered and tottered a bit while stepping down from the top stair. Then I was in the kitchen taking some photos and didn’t feel like walking to the other room to grab the step stool so I grabbed a chair. I stood on the seat and started to sit back on the back rest to get the angle I wanted and suddenly realized I was starting to tip backwards. Luckily I realized it before it was too late and caught my balance. I was dangerously close to falling back into the wall and onto the dog bowl stand (with sharp corners).
Who knew food blogging carried such job hazards?! Not to mention the extra calories that come along with it. 😉 I suppose it’s worth it when I share cakes like this one. I’m so in love with it!
How to Make Peanut Butter & Chocolate Layer Cake
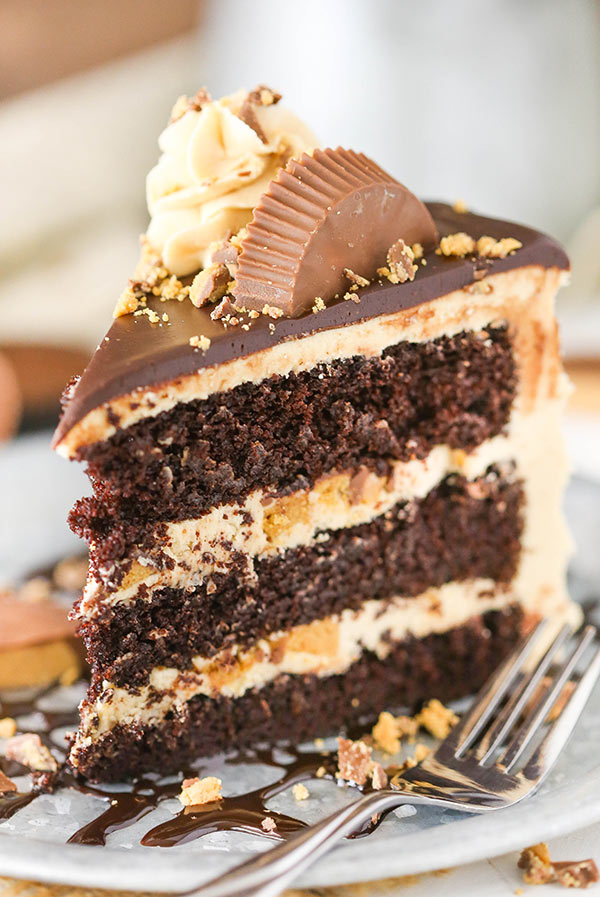
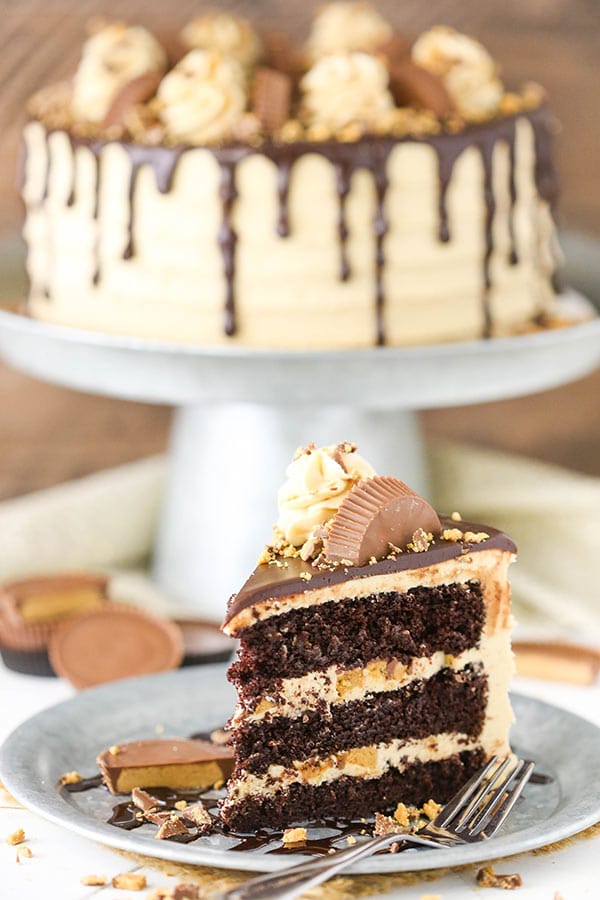
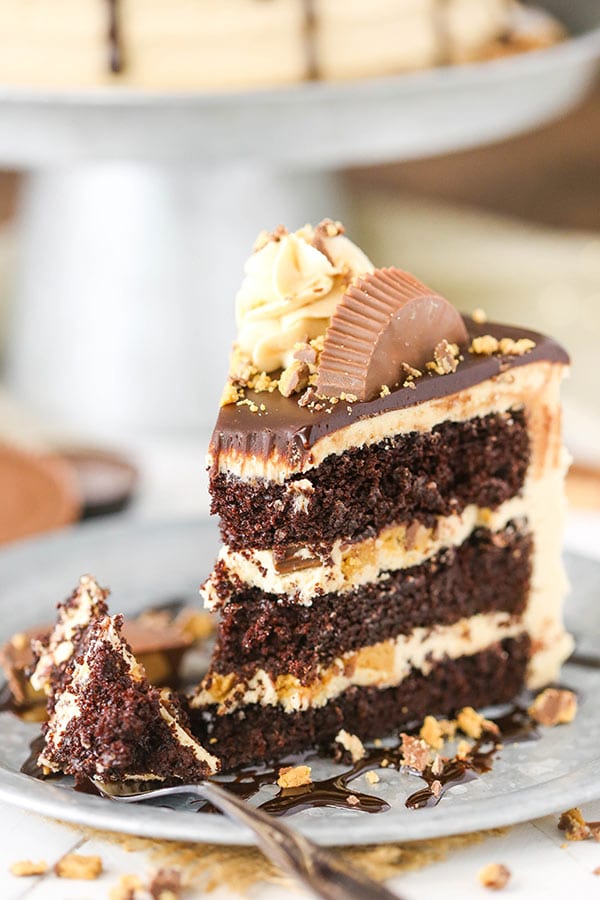
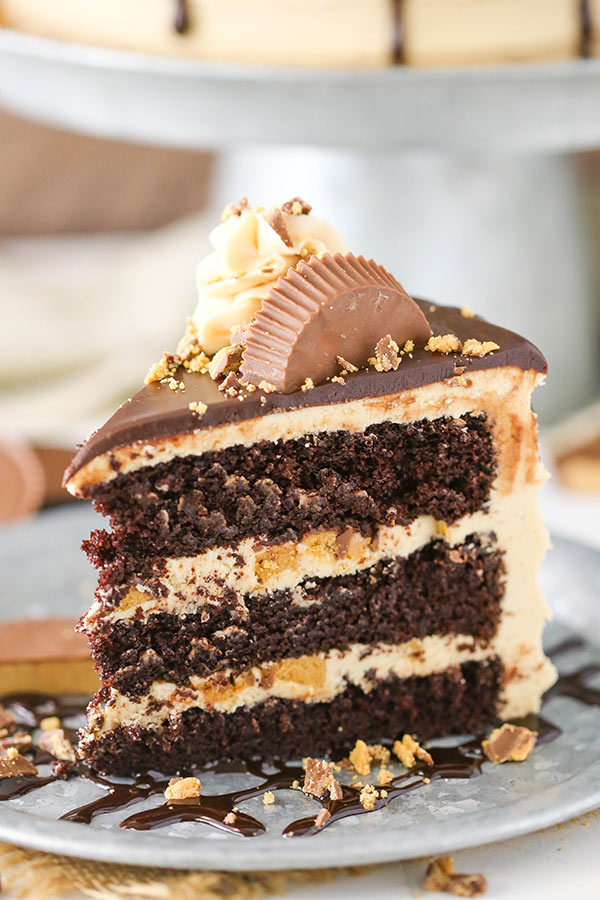
The cake starts with moist, delicious layers of chocolate cake. I used my Easy Moist Chocolate Cake from a couple weeks ago in layered cake form. It truly is such a moist cake and so easy! You basically mix the dry ingredients, then wet ingredients, add them together, then add the hot water at the end. One of the quickest cake batters to make and hard to mess up.
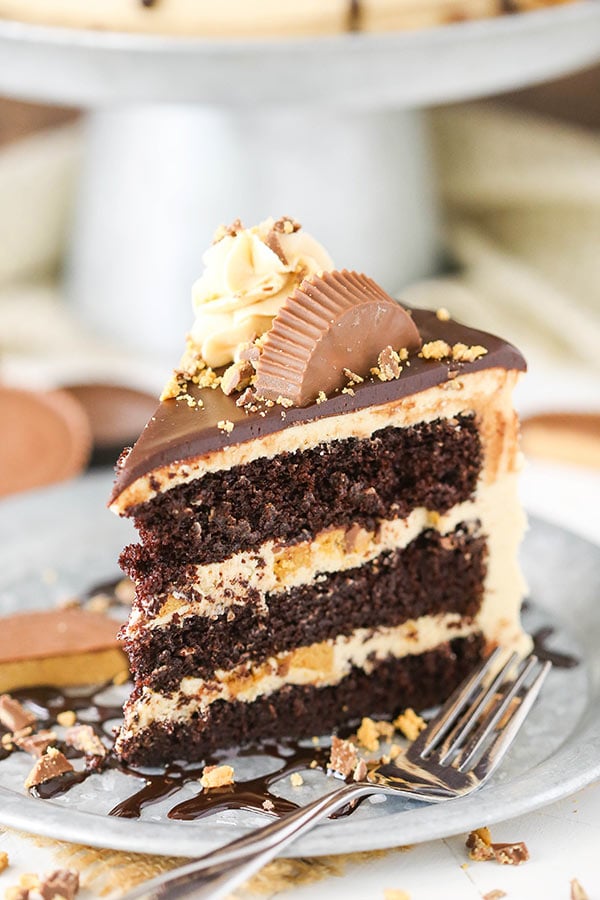
Between the layers and covering the outside of the cake is a peanut butter frosting. On top of the frosting between the cake layers are also chopped Reese’s – every peanut butter and chocolate lovers favorite, am I right? They take the peanut butter flavor up a notch and I’m a fan.
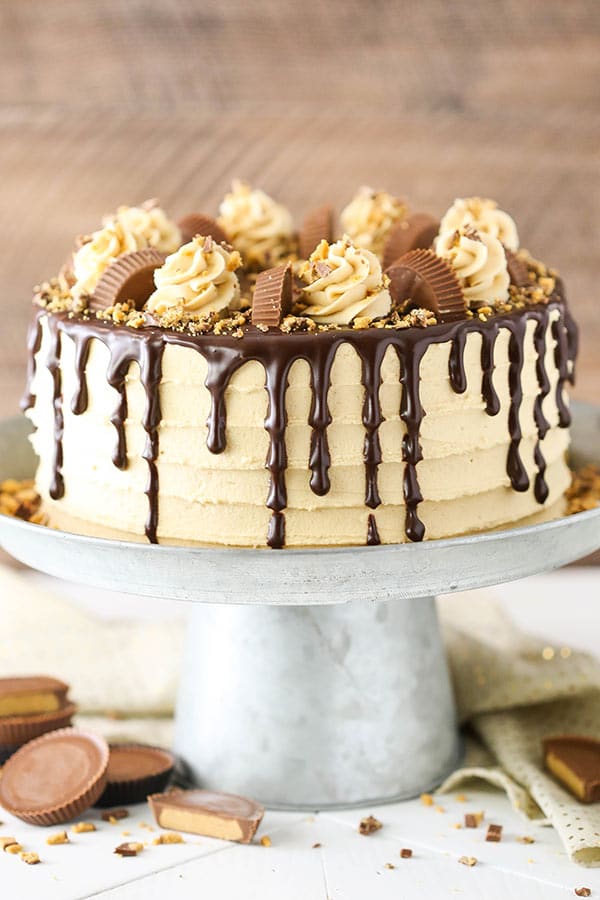
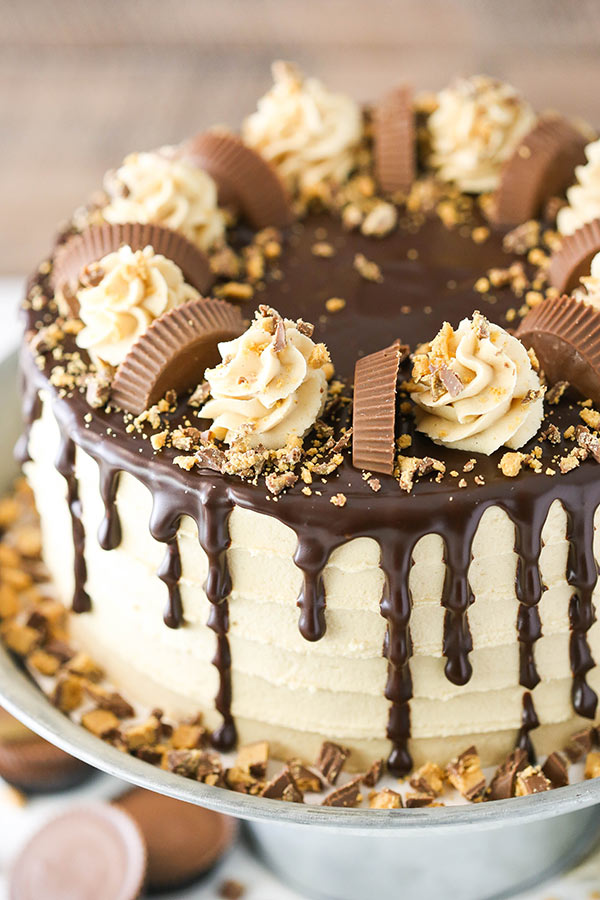
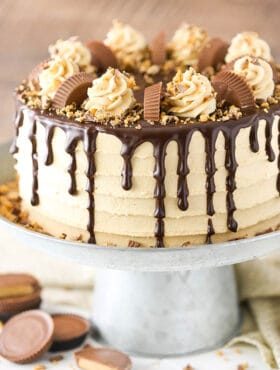
After the cake is covered with frosting, ganache is drizzled down the sides and covers the top. The stripe pattern on the sides of the frosting creates a neat ripple effect in the drizzled ganache. Then I added more Reese’s and frosting – for good measure. 🙂 The final cake is not only delicious, it’s SO fun! I was in love with the look of it! If you’d like to recreate the same thing, check out the video just above the recipe to watch what I did.
You might also like:
Peanut Butter Chocolate Buckeye Cupcakes
Mini Reese’s Peanut Butter Cheesecakes
Reese’s Peanut Butter Chocolate Icebox Cake
Peanut Butter Truffle Chocolate Cake
Peanut Butter Chocolate Mousse Cake
Peanut Butter Cookie Dough Brownie Layer Cake
Watch How To Make It
Peanut Butter Chocolate Layer Cake
- Prep Time: 25 minutes
- Cook Time: 22 minutes
- Total Time: 47 minutes
- Yield: 12-14 Slices
- Category: Dessert
- Method: Oven
- Cuisine: American
Description
This Peanut Butter Chocolate Layer Cake recipe is made with layers of moist chocolate cake, peanut butter frosting and chopped Reese’s peanut butter cups! It’s rich, delicious and so fun!
Ingredients
Chocolate cake
- 1 3/4 cups (228g) all purpose flour
- 2 cups (414g) sugar
- 3/4 cup (85g) natural unsweetened cocoa powder
- 2 1/4 tsp baking soda
- 1/2 tsp baking powder
- 1 tsp salt
- 1 cup (240ml) milk
- 1/2 cup (120ml) vegetable oil
- 1 1/2 tsp vanilla extract
- 2 large eggs
- 1 cup (240ml) hot water
Peanut butter frosting
- 2 cups (448g) salted butter, room temperature
- 1 1/4 cups (350g) peanut butter
- 9 cups (1035g) powdered sugar
- 6–7 tbsp (90-105ml) water or milk
- 6 reeses, chopped
Chocolate ganache and topping
- 6 oz (1 cup) semi-sweet chocolate chips
- 1/2 cup (120ml) heavy whipping cream
- 8 reeses, cut in half
- Crumbled reeses
Instructions
For the chocolate cake layers
- Preheat oven to 350°F (176°C) and prepare three 8 inch cake pans with non-stick baking spray and parchment paper in the bottom.
- Add the flour, sugar, cocoa, baking soda, baking powder and salt to a large mixer bowl and combine. Set aside.
- Add the milk, vegetable oil, vanilla extract and eggs to a medium sized bowl and combine.
- Add the wet ingredients to the dry ingredients and beat until well combined.
- Slowly add the hot water to the batter and mix on low speed until well combined. Scrape down the sides of the bowl as needed to make sure everything is well combined.
- Divide the batter evenly between the prepared cake pans and bake for 22-25 minutes, or until a toothpick comes out with a few moist crumbs.
- Remove cakes from oven and allow to cool for 2-3 minutes, then remove to a cooling rack to finish cooling.
To make the frosting
- Combine the butter and peanut butter in a large mixer bowl and mix until well combined.
- Add about half of the powdered sugar and mix until smooth.
- Add 3 tablespoons of water or milk and mix until smooth.
- Add remaining powdered sugar and mix until smooth.
- Add remaining water or milk and mix until smooth, keeping an eye on the consistency of the frosting so it doesn’t get too thin.
To build the cake
- Use a large serrated knife to remove the tops of the cake layers so that they’re flat. See my tips on how to level a cake and how to stack a cake.
- Place the first cake layer on a serving plate or cardboard cake circle and top with about 1 cup of frosting. Smooth frosting into an even layer.
- Add about half of the chopped Reese’s on top of the frosting and press into the frosting. Spread a small amount of frosting on top of the Reese’s so that it’s sticky on top for the next cake layer.
- Add the next cake layer and top with about 1 cup of frosting. Smooth frosting into an even layer.
- Add remaining half of the chopped Reese’s on top of the frosting and press into the frosting. Spread a small amount of frosting on top of the Reese’s so that it’s sticky on top for the next cake layer.
- Add the final cake layer to the top of the cake.
- Smooth out the frosting on the sides of the cake, creating a thin crumb coat.
- Add about 1 cup of frosting to the top of the cake and smooth into an even layer.
- Frost the cake using my tutorial for a smooth cake. Stop just before using the paper towel, which won’t be necessary with the pattern on the sides of this cake.
- Use an offset spatula to create the stripes around the cake. For guidance, see the video above starting at about 1:40.
- Set the cake aside and make the chocolate ganache (see my tips for making chocolate ganache).
Make the ganache and decorate
- Put the chocolate chips in a heat proof bowl.
- Microwave the heavy whipping cream until it just begins to boil, then pour it over the chocolate chips. Allow it to sit for 2-3 minutes, then whisk until smooth.
- Use a squeeze bottle or a spoon to drizzle the chocolate around the edges of the cake, then fill in the top of the cake and smooth it with an offset spatula. See my tips for making a chocolate drip cake.
- Allow the ganache to firm a bit, about 10 minutes, then top with swirls of the remaining frosting. Use a piping bag fitted with a closed star tip. I used Ateco tip 844, but Wilton 2D or 1M would work as well. Then top with additional Reese’s chopped in half, and Reese’s crumbles.
- Refrigerate the cake until ready to serve. Serve at room temperature. Cake is best for 3-4 days.
Nutrition
- Serving Size: 1 Slice
- Calories: 1097
- Sugar: 112.1 g
- Sodium: 774 mg
- Fat: 61.5 g
- Carbohydrates: 133.4 g
- Protein: 13.9 g
- Cholesterol: 109.8 mg
Enjoy!
Other Recipes You Might Like


This recipe was easy to follow and turned out amazing.
So glad you enjoyed it!
I made this cake last weekend! It was great and a crowd pleaser, even for those who are not big peanut butter fans. The chocolate crumb was very moist and the peanut butter frosting was great but not overpower. Great cake!
So glad it was a hit!
I love this recipe! I’ve made it for my niece and my mother in law, both very successful cakes! How could I convert this to a cupcake recipe?
Glad to hear it! Sometimes I have a little trouble with these baking well as cupcakes, but you could try it. These homemade chocolate cupcakes are also very similar and my favorite.
Hey! I’m about to try this in the UK, is this a fan or conventional oven temperature please?
I have a convection oven that I use the bake setting on.
I only have two 9 inch pans. How can I make that work?
You could bake two cake layers, or you could make 1 1/2 recipes worth and do 3 layers.
Is it better to make the cake and frosting all in one day? Or make the cake and stick in the freezer over night than do the frosting?
It’s a very moist cake, so it would hold up well to baking it one day and frosting it the next. But you don’t need to freeze it.
I made this for my son’s 17th birthday and everyone loved it however, I only used around 2 1/2 cups of powdered sugar and that was almost too sweet. I couldn’t imagine using 9 cups as the recipes says.
I’m glad you enjoyed it and that the frosting worked for you that way. I can’t imagine how you had enough, but glad you did.
Just in case anyone wants to know..a single cake batter recipe makes the perfect amount for a 10x10x1.5″ layer. Double for a beautiful 2 layer cake. Also double the ganache and frosting! Amazing cake!!
Thanks for sharing! Glad you enjoyed it!
I need to use 10″ square pans. Will this recipe yeild enough batter be enough for two 10″ layers instead of three 8″ layers?
No, I’d probably double the recipe or so.
I have made this cake for my bestie who is obsessed with pb chocolate. I am going to try and make this cake on a rectangle baking sheet instead of round. Do you know what the best temp and time would be?
For a 9×13? It’s about 30 minutes.
I have made this recipe twice now. I used whole milk the 2nd time vs 1% and my guests “died and went to heaven”. I use 8 cups of powdered sugar vs 9 and it doesn’t make the frosting overly sweet-but still super buttery and delicious. This recipe is now in the books for every birthday celebration!
Awesome! So glad it’s a hit!
I’ve made this cake multiple times & it’s PERFECT every time! I love all your recipes-you’re my go-to for any special cake.
That’s so great to hear! Glad you enjoy everything!
Delicious!!!! This cake was perfect! Thank you!
So glad you enjoyed it!
Am I the only one who had issues with the frosting? I followed recipe to a T but my frosting is super runny.
Hmm, that seems strange. Peanut butter frosting often is thicker than regular vanilla buttercream. Did you use a natural peanut butter that separates?
I’ve made this cake before and can’t remember if I kept it in the fridge or not. Will it be okay in a cake plate left out or should it be refrigerated?
It would be fine at room temperature for about 24 hours, after that you could refrigerate it. Just bring it back to room temperature to serve it.
This is my absolute favorite chocolate cake recipe for both layer cakes and cupcakes! I have tried the other chocolate cake and cupcake recipes on this site, but this one continues to be my favorite paired with all different frosting flavors. It has a delicious, rich, chocolatey flavor and perfectly soft texture. It is moist without being gummy. For anyone wondering about cupcakes with this batter recipe, I filled standard liners about 3/4 full and baked them at 350 F for 15-17 minutes until toothpick came out clean. This recipe yielded 25-26 standard-sized cupcakes. Lindsey, thank you for sharing your passion; I have learned a lot about cake baking from your site and it has inspired a new creative outlet for me. This was the first recipe of yours that I tried over 4 years ago and I keep coming back to it!
Awesome! So glad to hear that! Glad you enjoy this recipe!
This recipe is AMAZING!!! I have made it numerous times and every time I have had people go crazy over it!
I’m so glad to hear that!