This post may contain affiliate sales links. Please read my disclosure policy.
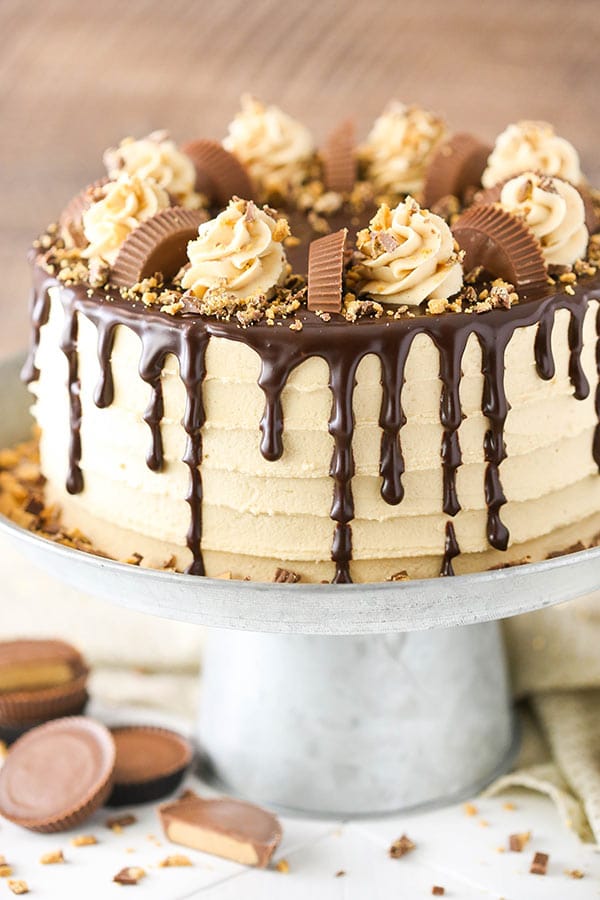
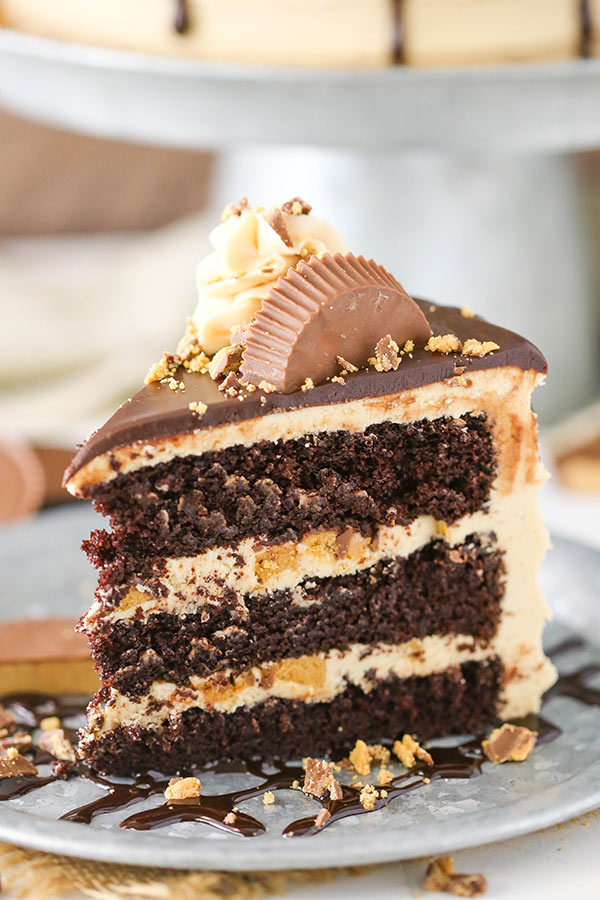
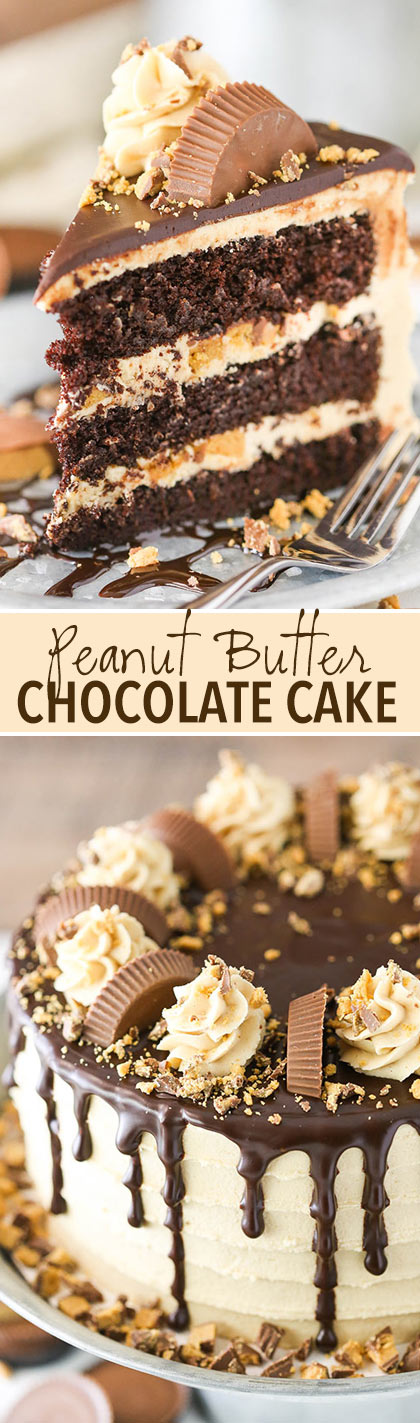
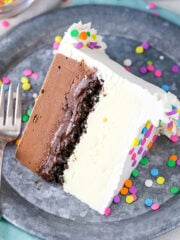
This Peanut Butter Chocolate Layer Cake recipe is made with layers of moist chocolate cake, peanut butter frosting and chopped Reese’s peanut butter cups! It’s rich, delicious and so fun!
Peanut Butter & Chocolate Layer Cake
While taking some photos yesterday of a cake, I was reminded of something that the hubs regularly tells me and demonstrates through fearful looks my way – I am one photo away from seriously injuring myself. One of the tables, counters or chairs I stand on to get just the right angle will one day not cooperate the way I want and I will fall and either break the camera I’m holding or some part of my body. It’s bound to happen.
I have a three step stool that I use all the time for overhead shots or something that’s at a more dramatic angle than I can achieve just by standing. Yesterday, I was standing on that stool taking photos and teetered and tottered a bit while stepping down from the top stair. Then I was in the kitchen taking some photos and didn’t feel like walking to the other room to grab the step stool so I grabbed a chair. I stood on the seat and started to sit back on the back rest to get the angle I wanted and suddenly realized I was starting to tip backwards. Luckily I realized it before it was too late and caught my balance. I was dangerously close to falling back into the wall and onto the dog bowl stand (with sharp corners).
Who knew food blogging carried such job hazards?! Not to mention the extra calories that come along with it. 😉 I suppose it’s worth it when I share cakes like this one. I’m so in love with it!
How to Make Peanut Butter & Chocolate Layer Cake
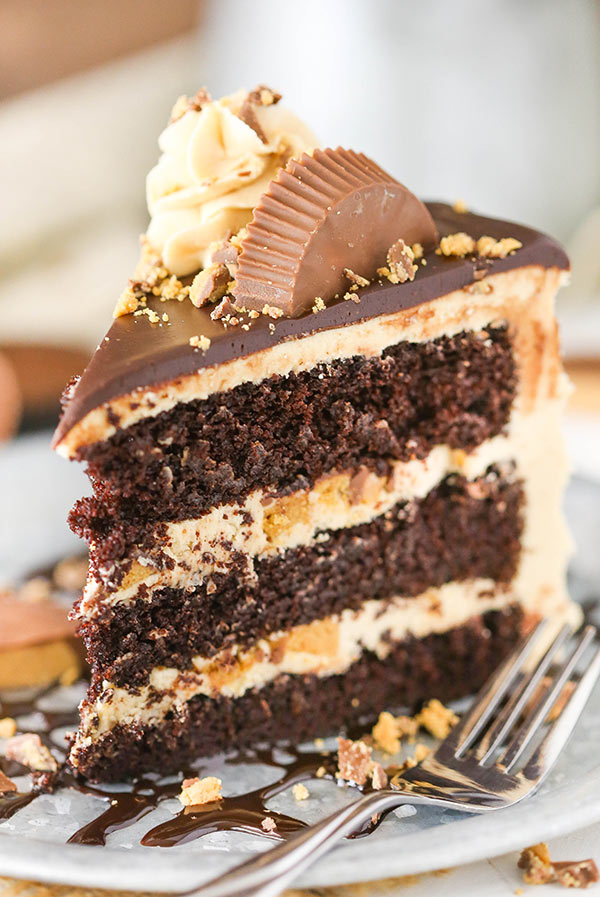
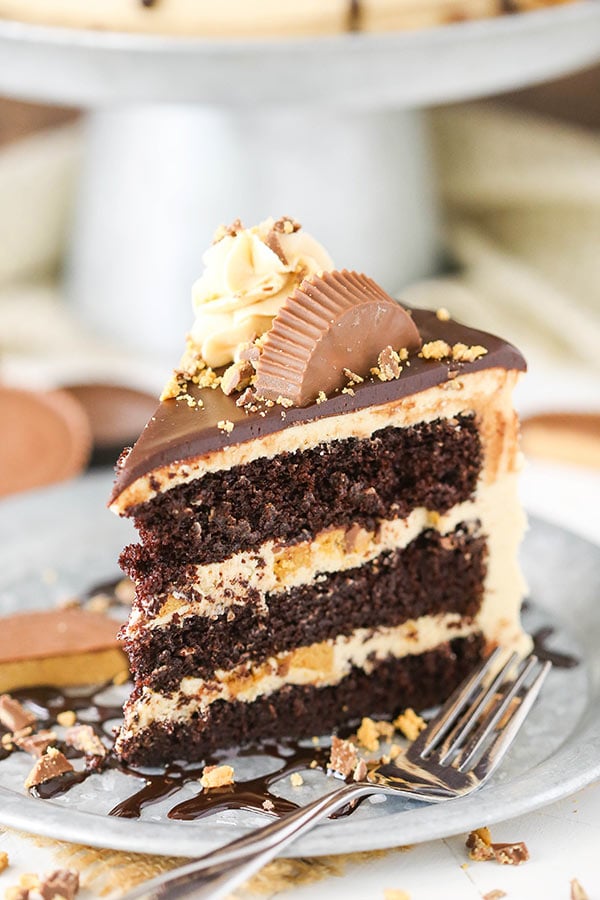
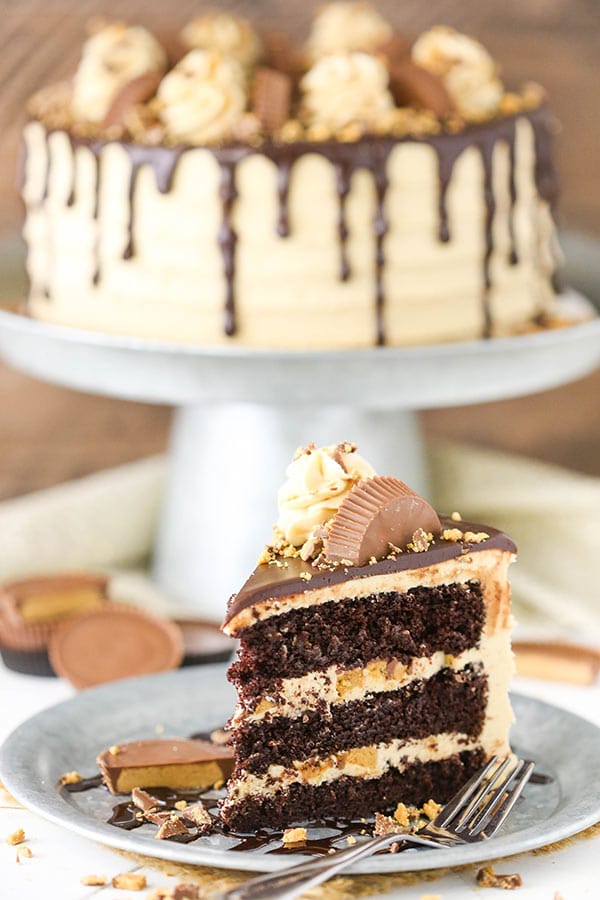
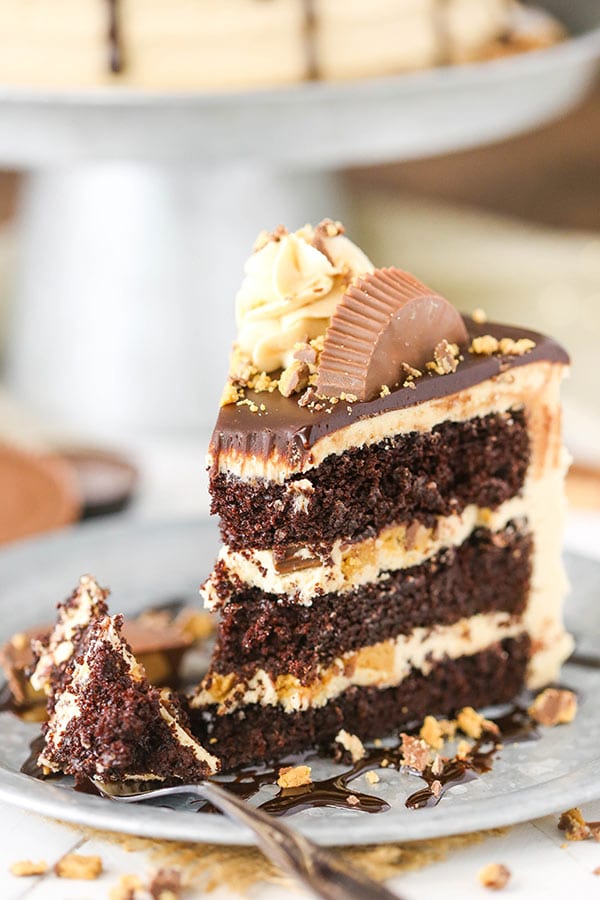
The cake starts with moist, delicious layers of chocolate cake. I used my Easy Moist Chocolate Cake from a couple weeks ago in layered cake form. It truly is such a moist cake and so easy! You basically mix the dry ingredients, then wet ingredients, add them together, then add the hot water at the end. One of the quickest cake batters to make and hard to mess up.
Between the layers and covering the outside of the cake is a peanut butter frosting. On top of the frosting between the cake layers are also chopped Reese’s – every peanut butter and chocolate lovers favorite, am I right? They take the peanut butter flavor up a notch and I’m a fan.
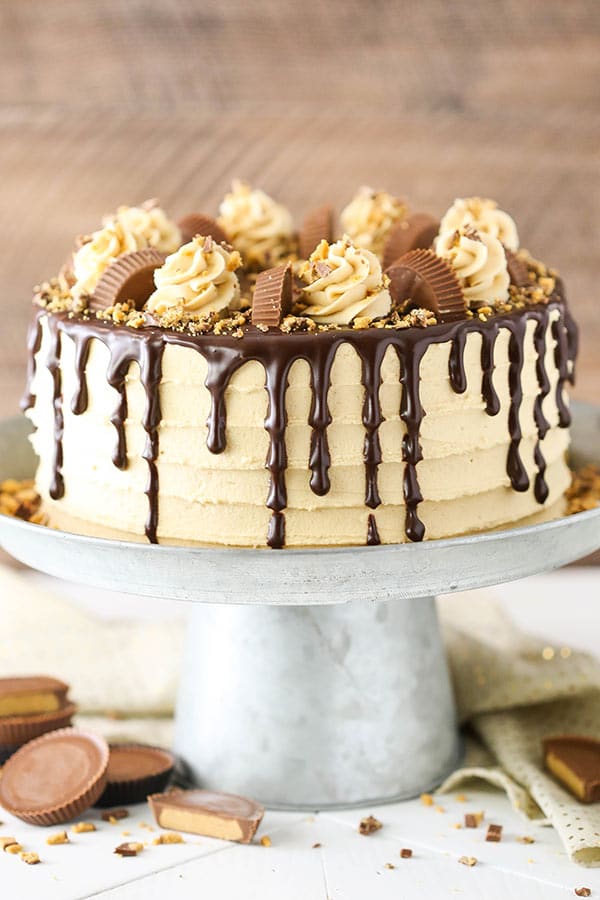
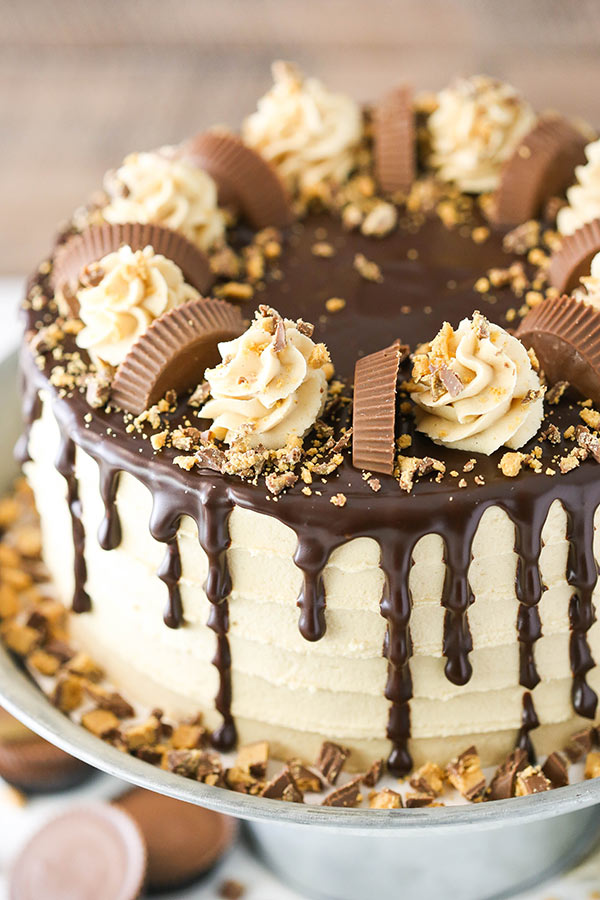
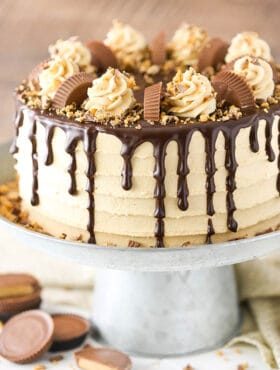
After the cake is covered with frosting, ganache is drizzled down the sides and covers the top. The stripe pattern on the sides of the frosting creates a neat ripple effect in the drizzled ganache. Then I added more Reese’s and frosting – for good measure. 🙂 The final cake is not only delicious, it’s SO fun! I was in love with the look of it! If you’d like to recreate the same thing, check out the video just above the recipe to watch what I did.
You might also like:
Peanut Butter Chocolate Buckeye Cupcakes
Mini Reese’s Peanut Butter Cheesecakes
Reese’s Peanut Butter Chocolate Icebox Cake
Peanut Butter Truffle Chocolate Cake
Peanut Butter Chocolate Mousse Cake
Peanut Butter Cookie Dough Brownie Layer Cake
Watch How To Make It
Peanut Butter Chocolate Layer Cake
- Prep Time: 25 minutes
- Cook Time: 22 minutes
- Total Time: 47 minutes
- Yield: 12-14 Slices
- Category: Dessert
- Method: Oven
- Cuisine: American
Description
This Peanut Butter Chocolate Layer Cake recipe is made with layers of moist chocolate cake, peanut butter frosting and chopped Reese’s peanut butter cups! It’s rich, delicious and so fun!
Ingredients
Chocolate cake
- 1 3/4 cups (228g) all purpose flour
- 2 cups (414g) sugar
- 3/4 cup (85g) natural unsweetened cocoa powder
- 2 1/4 tsp baking soda
- 1/2 tsp baking powder
- 1 tsp salt
- 1 cup (240ml) milk
- 1/2 cup (120ml) vegetable oil
- 1 1/2 tsp vanilla extract
- 2 large eggs
- 1 cup (240ml) hot water
Peanut butter frosting
- 2 cups (448g) salted butter, room temperature
- 1 1/4 cups (350g) peanut butter
- 9 cups (1035g) powdered sugar
- 6–7 tbsp (90-105ml) water or milk
- 6 reeses, chopped
Chocolate ganache and topping
- 6 oz (1 cup) semi-sweet chocolate chips
- 1/2 cup (120ml) heavy whipping cream
- 8 reeses, cut in half
- Crumbled reeses
Instructions
For the chocolate cake layers
- Preheat oven to 350°F (176°C) and prepare three 8 inch cake pans with non-stick baking spray and parchment paper in the bottom.
- Add the flour, sugar, cocoa, baking soda, baking powder and salt to a large mixer bowl and combine. Set aside.
- Add the milk, vegetable oil, vanilla extract and eggs to a medium sized bowl and combine.
- Add the wet ingredients to the dry ingredients and beat until well combined.
- Slowly add the hot water to the batter and mix on low speed until well combined. Scrape down the sides of the bowl as needed to make sure everything is well combined.
- Divide the batter evenly between the prepared cake pans and bake for 22-25 minutes, or until a toothpick comes out with a few moist crumbs.
- Remove cakes from oven and allow to cool for 2-3 minutes, then remove to a cooling rack to finish cooling.
To make the frosting
- Combine the butter and peanut butter in a large mixer bowl and mix until well combined.
- Add about half of the powdered sugar and mix until smooth.
- Add 3 tablespoons of water or milk and mix until smooth.
- Add remaining powdered sugar and mix until smooth.
- Add remaining water or milk and mix until smooth, keeping an eye on the consistency of the frosting so it doesn’t get too thin.
To build the cake
- Use a large serrated knife to remove the tops of the cake layers so that they’re flat. See my tips on how to level a cake and how to stack a cake.
- Place the first cake layer on a serving plate or cardboard cake circle and top with about 1 cup of frosting. Smooth frosting into an even layer.
- Add about half of the chopped Reese’s on top of the frosting and press into the frosting. Spread a small amount of frosting on top of the Reese’s so that it’s sticky on top for the next cake layer.
- Add the next cake layer and top with about 1 cup of frosting. Smooth frosting into an even layer.
- Add remaining half of the chopped Reese’s on top of the frosting and press into the frosting. Spread a small amount of frosting on top of the Reese’s so that it’s sticky on top for the next cake layer.
- Add the final cake layer to the top of the cake.
- Smooth out the frosting on the sides of the cake, creating a thin crumb coat.
- Add about 1 cup of frosting to the top of the cake and smooth into an even layer.
- Frost the cake using my tutorial for a smooth cake. Stop just before using the paper towel, which won’t be necessary with the pattern on the sides of this cake.
- Use an offset spatula to create the stripes around the cake. For guidance, see the video above starting at about 1:40.
- Set the cake aside and make the chocolate ganache (see my tips for making chocolate ganache).
Make the ganache and decorate
- Put the chocolate chips in a heat proof bowl.
- Microwave the heavy whipping cream until it just begins to boil, then pour it over the chocolate chips. Allow it to sit for 2-3 minutes, then whisk until smooth.
- Use a squeeze bottle or a spoon to drizzle the chocolate around the edges of the cake, then fill in the top of the cake and smooth it with an offset spatula. See my tips for making a chocolate drip cake.
- Allow the ganache to firm a bit, about 10 minutes, then top with swirls of the remaining frosting. Use a piping bag fitted with a closed star tip. I used Ateco tip 844, but Wilton 2D or 1M would work as well. Then top with additional Reese’s chopped in half, and Reese’s crumbles.
- Refrigerate the cake until ready to serve. Serve at room temperature. Cake is best for 3-4 days.
Nutrition
- Serving Size: 1 Slice
- Calories: 1097
- Sugar: 112.1 g
- Sodium: 774 mg
- Fat: 61.5 g
- Carbohydrates: 133.4 g
- Protein: 13.9 g
- Cholesterol: 109.8 mg
Enjoy!
Other Recipes You Might Like


I made this cake yesterday ! It looks and tastes amazing 😊
I am making this cake this weekend for my dad’s birthday. Do you have to do the design on the side or is it just for decoration? I prefer a smoother look but will this mess it up?
You can have it smooth on the sides. That was just for decoration sake.
I’ve made this cake last year for my boyfriend’s birthday. I’ve been requested to do it again for his birthday again, it seems like it became a new tradition. 🙂 Thank you for your YouTube video full of instructions, my cake turned exactly like yours and it stole the show 🙂
Wonderful! So glad it’s been a hit!
Thank you for this perfect cake recipe. I’ve made it for several parties now and it’s always been impressive and enjoyed by all kids & adults! Trust the measurements, everyone. They work just as is 🙂
So glad it’s a hit!
This was a good cake. I chose to omit the ganache as I felt the cake was rich enough and everyone loved it. The batter was quite runny and took an extra 15 minutes to bake but was exceptionally moist with good crumb. Easy to put together and ice for the final finished product.
My daughter made it for our birthdays and Mother’s Day—OMG—unbelievably delicious and decadent. I’m still thinking about it!
So glad you enjoyed it!
I’m not certain how you could say this recipe makes 3 layers when it truthfully only makes 2? I seriously believe if you meant 3 layers, you might have wanted to increase the flour, sugar, egg ratios. Not to mention how watery the batter is. Seriously… Flavour is pretty good but recipe needs reconstruction to get it to be good enough to fill 3 cake pans.
I’ve made this two years in a row for my son’s birthday and it’s always a hit. Not only is is beautiful, it’s delicious. The batter being runny doesn’t have any bearing on the incredible flavor or moisture. The only thing I change is half the water is replaced with coffee— it really brings out the flavor!
So glad it’s been a hit!
I just made this for my son-in-law’s birthday and his comment was “I think this is the best cake I’ve ever tasted!” Thank you for sharing this delicious recipe. I had to tweak a bit as I didn’t have 8 inch pans. The batter filled two 9 inch pans and because I wanted a taller cake I cut each in half and made a four layer cake. I then flipped the cake on its side in a kind of “cake top forward” fashion. It looked beautiful (as does yours)!
This is definitely my favorite peanut butter chocolate cake recipe! I just reduce the sugar by a cup or 2, and it’s plenty sweet!
Glad you’ve enjoyed it!
This cake is seriously AMAZING!!! It’s very rich, so not one to have often, but it is a special treat that everyone enjoyed for 13yo’s birthday! So moist and delicious. I halved the amount of powdered sugar in the icing, as many had suggested. Wouldn’t change a thing otherwise! AND, for this baking novice, the directions were clear and relatively easy! Thank you for this incredible recipe!
So glad you enjoyed it!
This recipe came out fabulous! I followed all the tutorials on frosting! I can’t thank you enough! My grandson loved his birthday cake!
So glad you enjoyed it!
The frosting didn’t have nearly enough peanut butter flavor for me. I ended up doubling the amount of peanut butter and also decreased the powdered sugar by half.
I had so much frosting that, before adding too much milk, I saved half of the frosting for truffles (forming the thick frosting into balls and dipping the balls in tempered dark chocolate). Then for the frosting half, I added enough milk for spreading consistency.
Next time, I’ll use half the butter and the full amount of peanut butter. I’d need to increase this ratio enough to make enough to frost the entire cake – increase by one fourth.
I am getting ready to make this for my daughter’s birthday. This will be the first time I’ve ever tried making this cake – but it looks wonderful! I just want to make sure that 9 cups of powdered sugar is correct for the frosting.
It is correct, but people often reduce it. I prefer thicker, decorators-style buttercream. But if you don’t mind it being thinner and having less frosting, then you can certainly reduce it or just reduce the overall amount of frosting.
Very delicious and my family loved it!
So glad to hear that!
Hi I just made this cake for my daughter’s birthday, we both love chocolate and peanut butter. I wanted to know if the leftover frosting can be frozen? Thanks for this great cake recipe. Can’t wait to try it.
Yes, it should be able to be frozen for up to three months.
Thank you! This is my first cake from scratch made for my friends birthday. She loves peanut butter and chocolate and this cake was chocolaty peanut butter goodness! It turned out great and so pretty too! So moist and good! The video was very helpful for this first timer. I will definitely make this cake again and I may try and substitute the coffee for the hot water for a coffee chocolate flavor (my favorite) . Any chance you have a coffee frosting as good as the peanut butter frosting?
So glad you enjoyed it! I used a coffee and kahlua frosting on this chocolate cake. You could try that or leave out the kahlua and add in some more coffee/espresso.
Flavor is great, but there is waayyyy too much moisture in this cake. If you live at higher altitudes, either don’t add the hot water or add more flour. This cake got huge, overflowed (filled about halfway up the pan, if that) and then sank. I baked it for at least 35 mins, and it was still extremely moist and has no structural integrity. It’s been three days and the cake is still collapsing. Frosting is amazing, chocolate flavor is great, but I should have listened to my gut with the texture/density.
This cake was not made to be done at high altitude. Typically takes need adjustments for high altitude. When you aren’t at high altitude, the amount of moisture in the cake is perfect.