This post may contain affiliate sales links. Please read my disclosure policy.
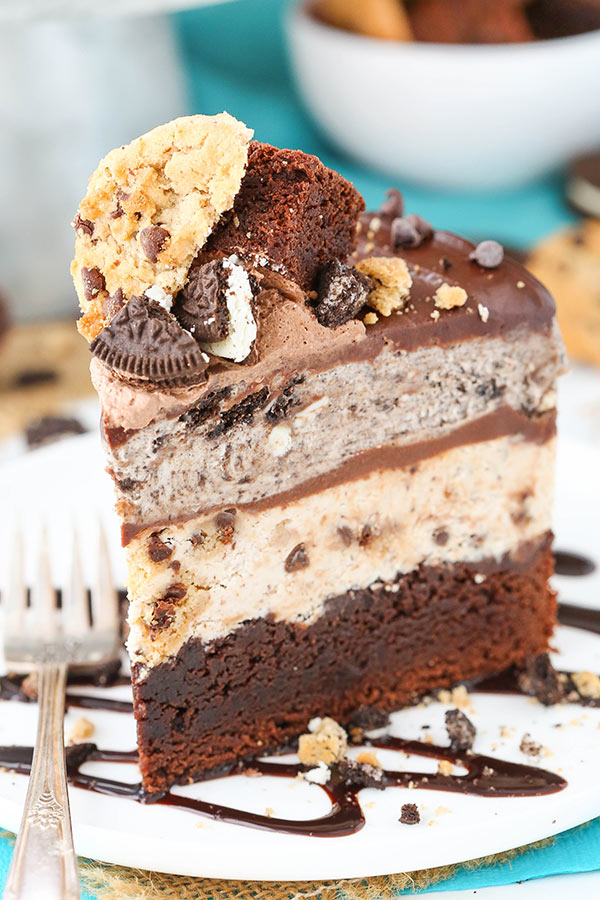
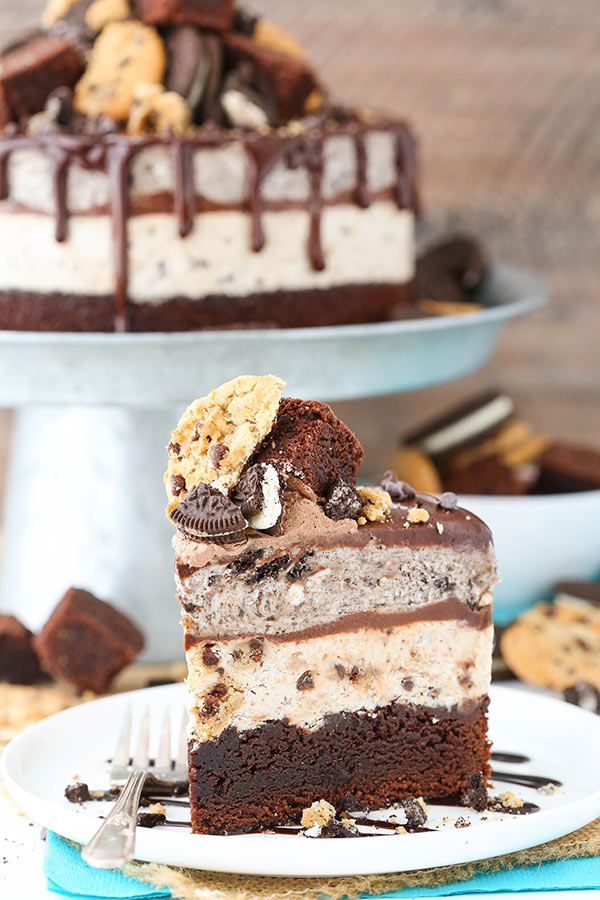
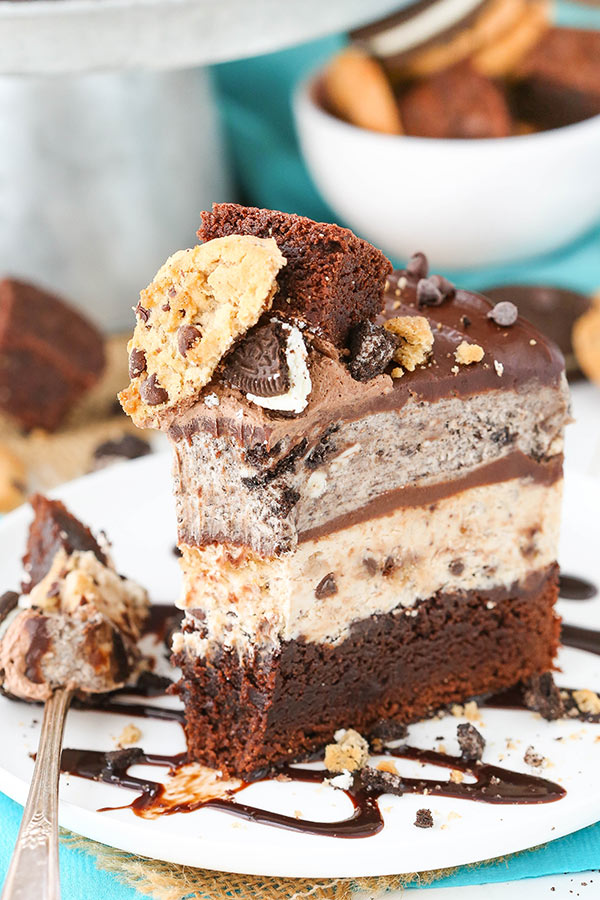
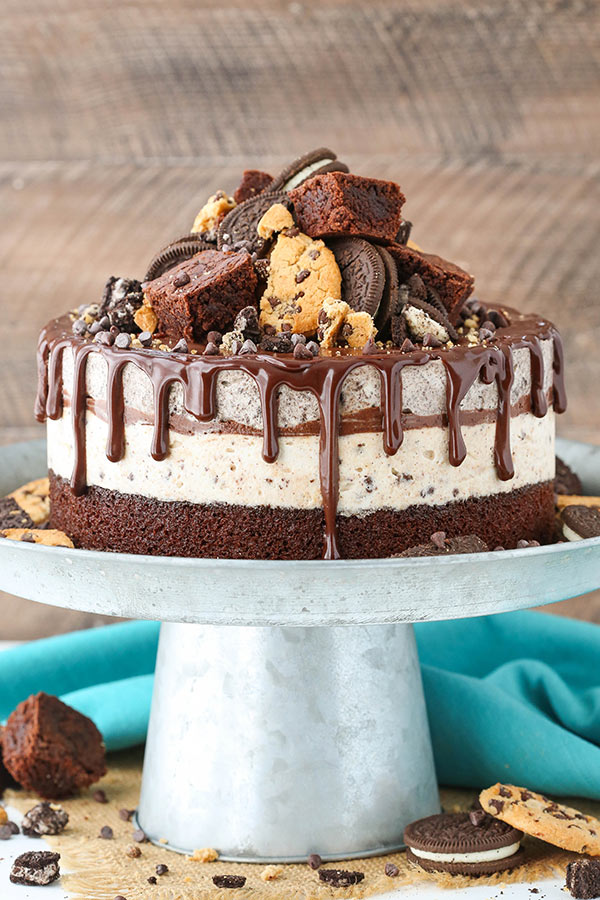
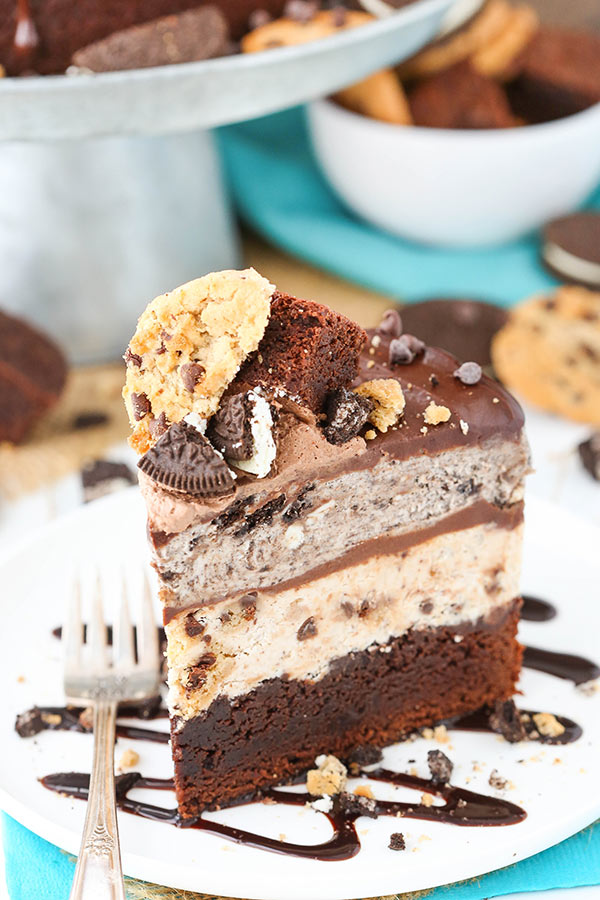
This Oreo Brookie Ice Cream Cake is made with layers of fudgy brownie, chocolate chip cookie ice cream, chocolate ganache and Oreo ice cream. It’s so awesome I’m in love!
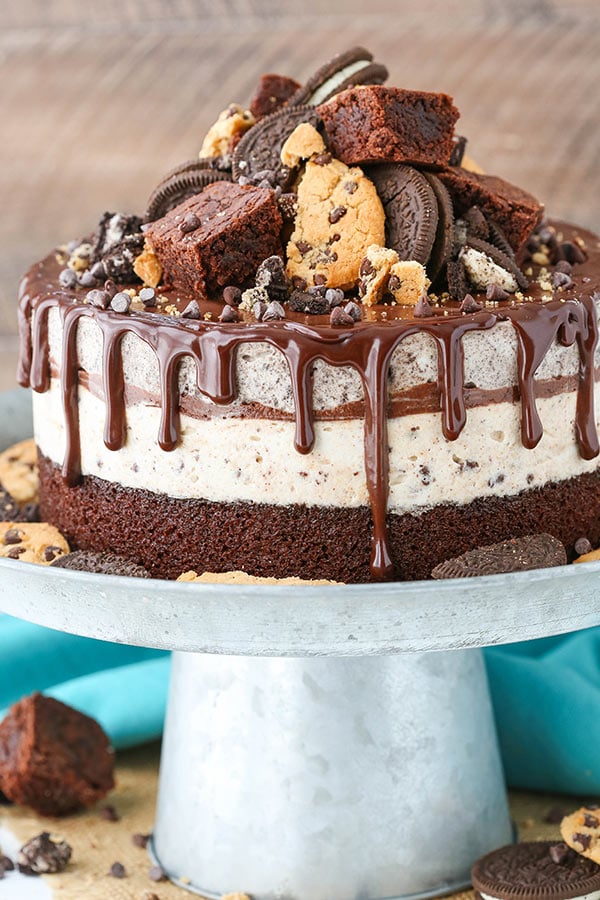
Table of Contents
Oreo Brookie Ice Cream Cake
So yesterday was totally one of those days that it felt like nothing could go right. It started off with me accidentally burning one of my photography backgrounds. Yep, a nice ring of burn mark. Kind of like a coffee stain that I can’t wipe up but bigger.
Then I had a cake totally not work the way I wanted it to. Lots of ingredients and time gone. The burn mark? Yep, for that cake it didn’t even end up the way I wanted it. So sad. 🙁
It was one of those days that gets me down, but hopefully today will turn it all around and I’ll nail a new version of that cake (and figure out a solution to my burn mark). Certainly today is at least a little bit better because I’m sharing this ice cream cake – and I’ve been so excited to share it with you!
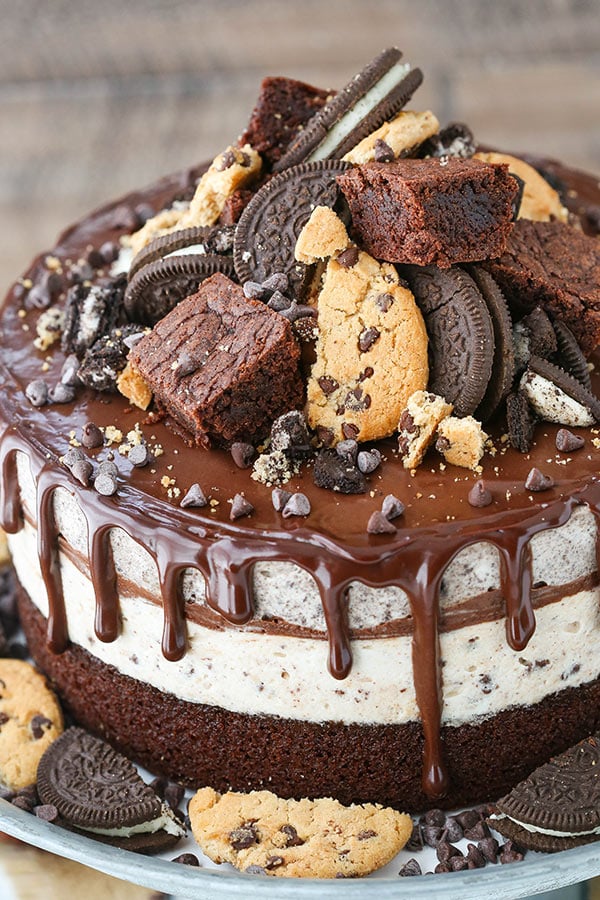
Oreo brookie is basically one of the best flavor combos out there, let’s be real. Brownies + chocolate chip cookies + Oreos = everything that’s good in life and dessert. Between my Oreo Brookie Layer Cake, Oreo Brookie Tiramisu and now this ice cream cake, there are so many fun ways to enjoy it. And this one is perfect for summer!
It starts with a brownie on the bottom. I used a box mix just to keep it simple, but feel free to use this brownie from scratch recipe if you like. It might not be quite as thick as the box, but it’d still be great. On top of that is no churn ice cream filled with chocolate chip cookie crumbs, chopped cookies and mini chocolate chips. SO good! To get the crumbs I just popped some crunchy cookies into a food processor and let it grind ’em up!
Next is a layer of chocolate ganache topped with no churn Oreo ice cream full of Oreo crumbs and chopped Oreos. Love it! The no churn ice cream is super easy to make, with a primary base of cream cheese and whipped cream. Once made, divide it into two bowls and add your cookies!
I layered everything with a cake collar because I find it to be the easiest to work with. You could also build the cake inside a cake pan (more on that in the instructions below). Once built, you’ll want to freeze the cake. I usually let it sit overnight.
To decorate it, there’s more chocolate ganache drizzled down the sides and chocolate whipped cream topped with more brownies, chocolate chip cookies and Oreos. I bought the brownies on top at the store just to make it easy, but you could make those too if you want.
This cake is seriously heavenly! So much chocolate and cookie and Oreo flavor – I couldn’t get enough! It’s a dangerous cake that is totally work every bite!
Watch How To Make It
You might also like:
Oreo Brookie Cheesecake
Oreo Brookie Layer Cake
Ultimate Oreo Cheesecake
Oreo Brookie Tiramisu
Oreo Chocolate Cupcakes
Oreo Brookie Ice Cream Cake
- Prep Time: 1 hour 30 minutes
- Cook Time: 20 minutes
- Total Time: 1 hour 50 minutes
- Yield: 12-14 Slices
- Category: Dessert
- Method: Oven
- Cuisine: American
Description
This Oreo Brookie Ice Cream Cake is made with layers of fudgy brownie, chocolate chip cookie ice cream, chocolate ganache and Oreo ice cream. It’s so awesome I’m in love!
Ingredients
Brownie Base
- 1 (18.4 oz) brownie mix, plus ingredients on box
No Churn Ice Cream
- 12 oz (339g) cream cheese, room temperature
- 1/4 cup (56g) sugar
- 1/2 cup (72g) brown sugar
- 3 tbsp (45ml) milk
- 1 tbsp vanilla extract
- 1 1/2 cups (420ml) heavy whipping cream, cold
- 3/4 cup (86g) powdered sugar
- 3/4 cup (100g) chocolate chip cookie crumbs
- 6 chocolate chip cookies, chopped
- 1/4 cup (45g) mini chocolate chips
- 3/4 cup (90) Oreo crumbs
- 6 Oreos, chopped
Chocolate Ganache
- 9 oz (254g) semi sweet chocolate chips, divided
- 3/4 cup (180ml) heavy whipping cream, divided
Chocolate Whipped Cream and Additional Toppings
- 1/2 cup (120ml) heavy whipping cream, cold
- 2 tbsp (15g) powdered sugar
- 2 tbsp (14g) natural unsweetened cocoa powder
- Brownies
- Oreos
- Chocolate Chip Cookies
Instructions
Make the Brownie Base:
- Grease an 8×3 inch springform cake pan and line the bottom of it with parchment paper to allow for easy removal. (See note below if you don’t have a springform pan.)
- Make brownie batter according to instructions on back of box and bake in prepared pan.
- When brownie is done baking, allow to completely cool.
- Once cool, remove the brownie base from the pan.
- NOTE: When it’s time to assemble the cake, you’ll be using the same 8 inch springform cake pan you used to bake the brownie in. Take the time to wash and dry it now so that the pan is ready when you begin assembling the cake.
Make the Ice Cream Layers:
- When the brownie base is cool, make the ice cream. In a large mixer bowl, combine the softened cream cheese, sugar and brown sugar and mix until smooth.
- Add the milk and vanilla extract and mix until smooth. Set aside.
- In another mixer bowl, add the cold heavy whipping cream and powdered sugar and whip on high speed until stiff peaks form.
- Gently fold about 1/3 of the whipped cream into the cream cheese mixture until combined, then fold in the remaining whipped cream.
- Divide the ice cream mixture evenly between two bowls.
- To one bowl, add the chocolate chip cookie crumbs, chopped chocolate chip cookies and mini chocolate chips. Fold to combine. Set aside.
- To the other bowl, add the Oreo crumbs and chopped Oreos. Fold to combine. Set aside.
Make the First Batch of Ganache:
- Make a small batch of chocolate ganache to use as a layer between the different flavors of ice cream. Add 3 oz of the chocolate chips to a small bowl (see my tips for making chocolate ganache).
- Then heat 1/4 cup of the heavy whipping cream in a small microwave safe bowl until it begins to boil. Pour the hot cream over the chocolate chips and allow the mixture to sit undisturbed for 3-4 minutes. Whisk until smooth and set aside.
Build the Cake:
- Line the sides of your clean, dry 8 inch springform pan with parchment paper. The parchment paper should stick up above the top edge of the pan, since the cake will probably be a little taller than your pan (see example). If you want, put a cardboard cake circle in the bottom of the pan. (See note below for directions of how to prep a standard 8 inch cake pan or use a cake collar.)
- Place the cooled brownie base back into the prepared pan.
- Add the chocolate chip cookie ice cream to the top of the brownie and spread into an even layer.
- Cover with a layer of chocolate ganache and spread into an even layer.
- Add the Oreo ice cream to the top of the ganache and spread into an even layer.
- Freeze the cake for 6-8 hours or overnight until frozen through.
To Finish the Cake:
- Once the cake is fully set and frozen, prepare the toppings for the cake. Chop or crumble brownies, Oreos and chocolate chip cookies. Set aside.
- Make the second larger batch of chocolate ganache by placing the remaining 6 oz of chocolate chips into a small bowl.
- Heat the remaining 1/2 cup of heavy whipping cream in a small microwave safe bowl until it begins to boil, then pour it over the chocolate chips. Allow the mixture to sit undisturbed for 3-4 minutes, then whisk until smooth. Set aside.
- Make the chocolate whipped cream by adding the heavy whipping cream, powdered sugar and cocoa powder to a large mixer bowl. Whip on high speed until stiff peaks form.
- Place the chocolate whipped cream into a piping bag and set aside.
- Now you can remove the frozen cake from the pan and peel away the outer wrapping of parchment paper (or plastic wrap or cake collar, if used).
- Drizzle the ganache around the edge of the cake. I used a squeeze bottle, but you could also use a spoon. See my Chocolate Drip Cake post for tips on how to drizzle ganache.
- Once you have a ring of drizzled ganache around the outside of the top of the cake, fill in the center of this ring with ganache until the top of the cake is fully covered. Use an offset spatula to smooth out the ganache into an even layer.
- Pipe a small dome of chocolate whipped cream onto the center of the top of the cake. The whipped cream will act as a sort of glue to help fix your other toppings in place.
- Cover the dome of chocolate whipped cream with additional brownie chunks, Oreos, chocolate chip cookies and chocolate chips.
- Place cake in the freezer and keep well covered until ready to serve. Allow it to sit out at room temperature and soften for about 30 minutes before cutting slices. Then serve promptly and return leftovers to the freezer as soon as possible. Best if eaten with 4-6 days.
Notes
- Why do I need a springform pan? An 8×3 inch springform pan is ideal for building this cake. The sides of the pan detach from the bottom of the pan making it easy to remove the cake once it’s been assembled and frozen.
- Can I use a different 8 inch cake pan? If you do not have an 8×3 inch springform pan, you can use a standard 8 inch cake pan. In order to be able to remove the assembled cake from the pan, you’ll need to line it with clear wrap that extends out past the edges of the cake pan. Next, add a lining of parchment paper and a cake board as described above for a springform pan. (You’ll place them right on top of the plastic wrap that’s already inside the pan). Now you are ready to continue building the cake. Once it has been assembled and frozen, you’ll be able to use the clear wrap like handles to lift the cake out of the pan. Just remove the plastic wrap and parchment paper before decorating and serving the cake.
- Can I use a cake collar to build the cake? Yes! In lieu of using a parchment paper lined springform pan or standard cake pan to build the cake, you can also use a cake collar as I did. Place the brownie base on a cake board and then on a serving plate. Wrap the cake collar around the brownie and secure in place. Now you are ready to continue building the cake. Once it has been assembled and frozen, you’ll need to remove the cake collar before decorating and serving the cake.
- Storage information. This cake must be stored in the freezer. It can be stored in the freezer for up to 6 days. You’ll want to make sure the cake is fully frozen before wrapping it in a double layer of plastic wrap or placing it in a cake carrier. It tastes best when eaten within 4-6 days.
Nutrition
- Serving Size: 1 Slice
- Calories: 678
- Sugar: 37.2 g
- Sodium: 317.4 mg
- Fat: 38.3 g
- Carbohydrates: 81.6 g
- Protein: 8.1 g
- Cholesterol: 68.7 mg
Categories
Enjoy!
This post contains affiliate links.





Greetings from Russia. I made this cake for my son’s birthday. We celebrated it on December 31. We all liked him very much. Thanks for the great recipe.
I sent it to my friends from Russia. We all liked him very much.
Hi Lindsay!
Soud I put the cake, when its ready, in the refrigerator or in the freeze?
In the freezer
Amazing recipe and I am going to make this tomorrow night!!
Silly question – once it is assembled and frozen 6-8 hours will the brownie base be frozen rock hard? I don’t see this defrosting in time to be a “brownie” texture ??
Thank you !
I don’t find the brownie to be too hard. It certainly is firm, but I’ve used them in ice cream cakes many times.
Yep turned out totally fine! Thank you!
When assembling the cake in a spring form pan, do I leave the brown cake in the bottom and build on top or do I take it out and build the ice cream part and stack it later?
You leave the brownie in the bottom and build the ice cream layers on top of it.
Hey Lindsay, This cake is so pure indulgence. I can’t imagine if it’s on my plate and I get to taste it. Very amazing picture.
Is there anything I need to do differently if I want to make the brownies in a 9″ springform pan? Also, do you recommend soft or crispy cookies? I was thinking soft (like entenmenn’s) but not sure if that wouldn’t be as good. Please let me know! Planning to make this for my hubby’s birthday but I also want to add a layer of actual cookie that I plan to bake in the same 9″ pan.
You’ll just reduce the baking time a bit, since it’s a larger pan. As for the cookies, it doesn’t matter a ton. The moisture from the ice cream would soften up crispy cookies anyway. 🙂
Oh boy, if I wasn’t on a healthy diet, I would be munching on this one every night.
I’ll still make this one next weekend for my brother’s birthday, such a good find!
Thanks Lindsay! Also, this is my first time on this amazing blog!!
I hope you enjoy it! Thanks Melissa!
IFirat, thank you for bringing this into my life!! It looks amazing!! I’m making this for my son’s birthday this weekend. Have you ever tried using regular ice cream instead of making your own? I thought that as long as it was soft enough it could be layered similarly but without the trouble of making my own. Will this cause the ice cream to melt too quickly and turn the cake to mush? Because that would be heartbreaking!!
You might want to freeze each ice cream layer before adding the next if you want defined layers. Otherwise, it would probably be ok. It’ll melt faster than this homemade ice cream, but that’s kind of normal, right? 🙂
I made this for my daughter’s 20th birthday today and it was a major hit! I was a little worried when she picked this out, but it’s a wonderfully written recipe! Thanks so much for sharing and making my daughter’s birthday extra special!
Wonderful to hear! So glad you enjoyed it!
For the no churn ice cream, why does it require cream cheese? Does the ice cream melt easily? How do you make the ganache drip using a spoon?
Sorry for bombarding you with questions. I hope you don’t mind.
Cream cheese is just part of the base I use. Some people use sweetened condensed milk, but it’s thinner and doesn’t layer as well. The ice cream doesn’t melt as easily as regular ice cream.
You can find a video with me using a spoon for the ganache in this post.
I hope that helps!
Hello ,
A friend of mines sent me this cake recipe to make for her this weekend ! , She wants Icing around the cake , what type of flavor icing would you recommend for this cake ? Thanks in advance !
I would suggest the chocolate whipped cream that I used on this ice cream cake.
Whoa. This cake is like….amazing. 😀
Thanks Katherine!
This looks so good!!! I loved the cake version so I am very excited about this ice cream cake!!
Quick question, in step #20, it says to add 1/3 of the chocolate ganahce but doesn’t say when to use the other 2/3 of it. By the looks of the video, it seems that you use the entire 3oz of chocolate ganache for step #20 instead of just 1/3 of it – is that correct?
Thanks so much!!
You are correct – you add the full 3 oz. Thanks for letting me know – it’s been updated.
I hope you enjoy it!
Thank you so much for putting the measurements in gram as well – makes it so much easier for sugarholics outside of the US…
Hi, when I have to serve it, should the cake stand at room temperature??
Thank you
It can. It’ll be easier to cut if you let it sit for about 30 minutes or so.
Ohooo ! It looks seriously delicious ! Chocolate and oreo ice cream, I love it, in fact most of the people love it.
Thanks Lindsay for the recipe.