This post may contain affiliate sales links. Please read my disclosure policy.
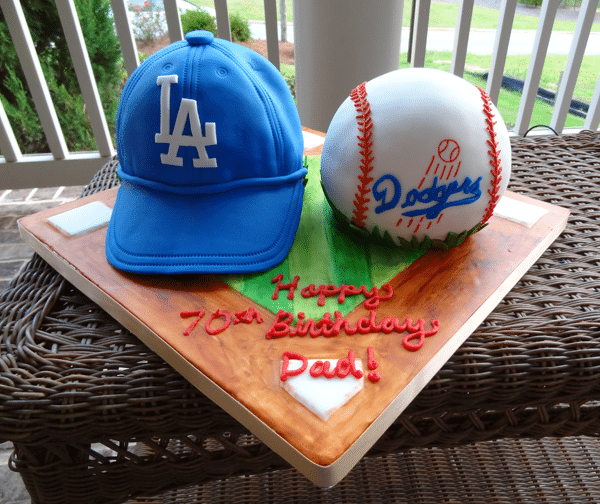
My family had an amazing time celebrating my father’s 70th birthday! We threw him a Dodgers themed party and made him the most epic Baseball Cake ever! You have to check out how I made the cake what else we did to celebrate.
Dodgers Themed Birthday Party & Realistic Hat Cake
I can’t believe I’m just now posting this. My dad’s birthday was in August. Better late than never though, right? At least I’m posting it in the same year. I figured it had to go up before we reached 2013. 🙂
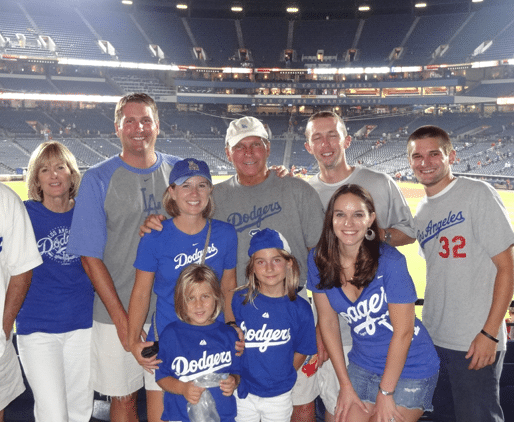
Anyways, for my dad’s big 70th birthday my parents and siblings (minus one who couldn’t come) got together in Atlanta. It just so happened that the weekend of his birthday the LA Dodgers were coming to Atlanta to play the Braves. My dad has been an LA Dodgers fan for as long as I can remember. He’s been a fan since they were the Brooklyn Dodgers. He said all he wanted for his birthday was for everyone to go to the game together all wearing Dodgers gear. So we did.
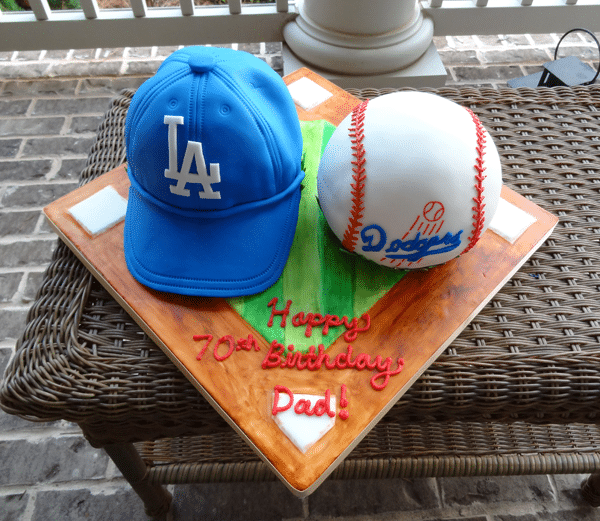
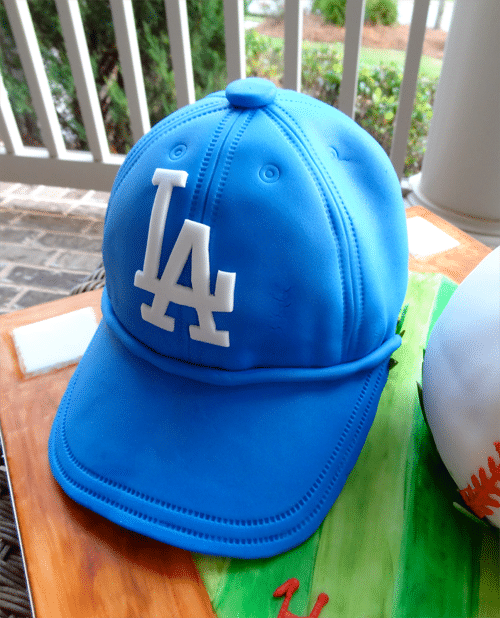
So naturally, that became the theme for the weekend. The night before the game, we had a dinner with some of our other family (we have a lot of family in Atlanta) and I made an LA Dodgers cake. I thought it turned out pretty well. It was my first attempt at a hat and a ball. I used the Wilton ball pan for the baseball and I’ll show you how I did the hat below. Probably the biggest complement for the cake was that when I grabbed it to cut into after we ate, everyone was like “Oh, that’s a cake! I thought it was an actual hat and really big ball just sitting over on the table!” Sweet! 🙂
Every cake has a story though and this one was no different. There were a few times I thought about throwing it against the wall, but I didn’t. I prevailed. And in the end my dad loved it, which was what really mattered.
How to Make a Baseball Cap Cake
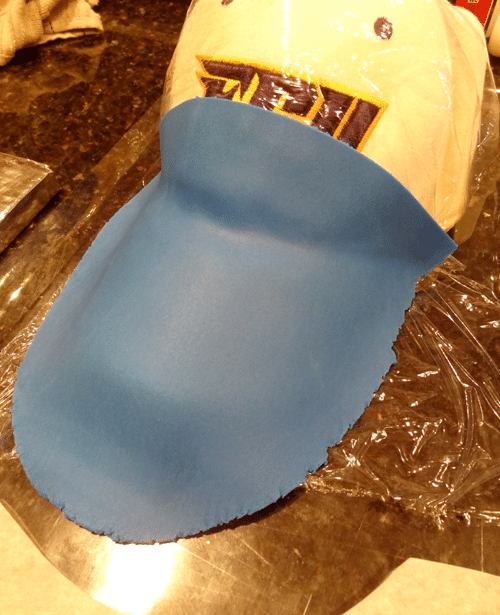
1. First thing to do is make the brim of the hat cake about 3-4 days before actually needing it so that it has plenty of time to dry. I used an actual hat to do this because the size of the cake is pretty much is the size of a real hat.
2. To start, place saran wrap over the hood of the hat to keep the fondant clean.
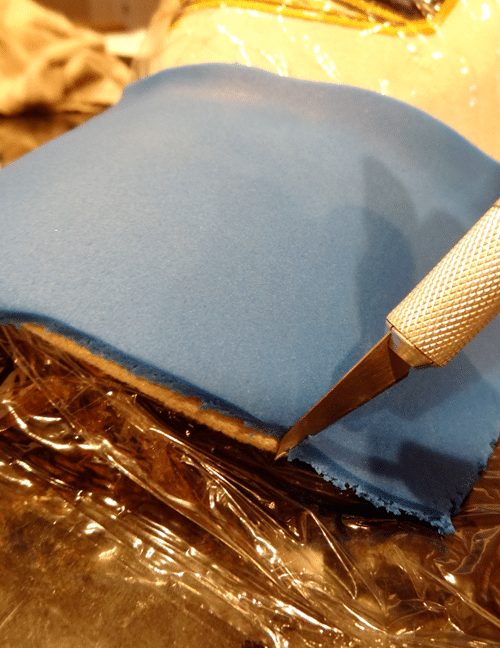
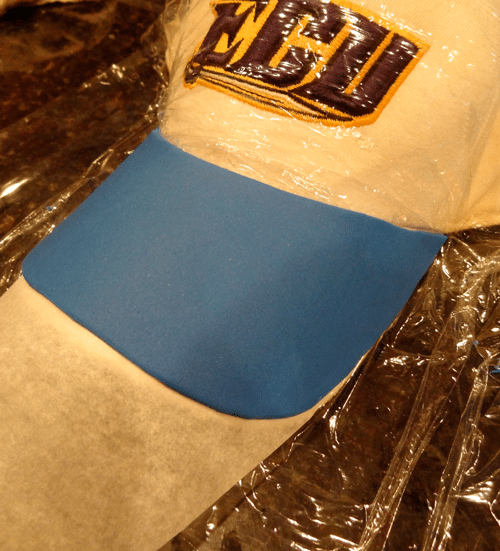
3. Roll out your fondant so that it is big enough to cover the whole brim with plenty to cut off. Place the fondant over the brim of the hat. Cut off any general excess so that the fondant doesn’t pull and rip.
4. Using your favorite cutting tool (mine is an exacto knife) cut around the brim of the hat to get the right shape.
5. When your done trimming the fondant to the right shape, put parchment paper between the fondant and the saran wrap so there’s no sticking as it dries.
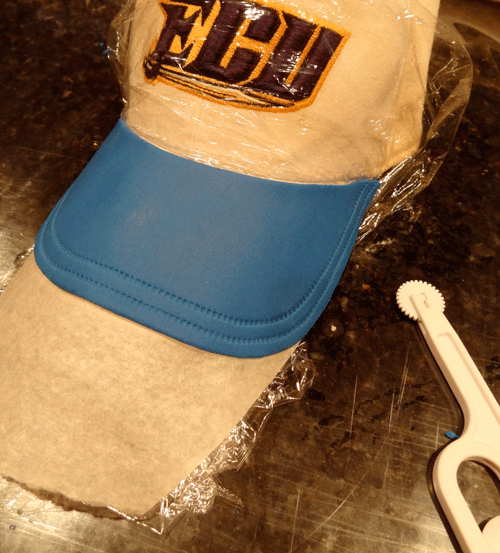
6. Using the Wilton Cutter/Embosser, add stitching to the brim of the hat. Set it aside to dry over the next few days.
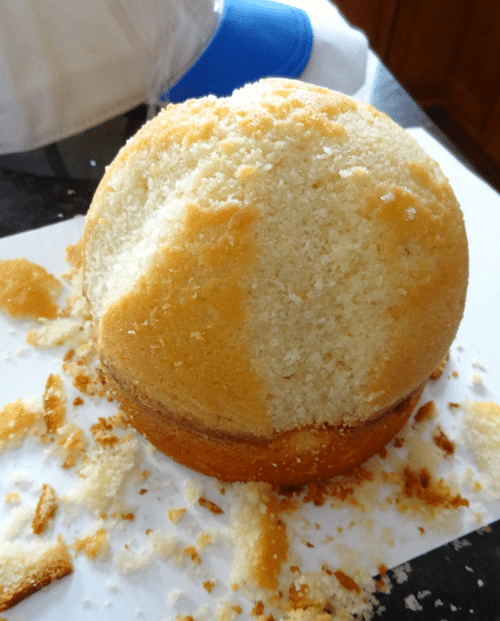
7. When you are ready to make the cake part of the hat, bake one half of the Wilton ball pan and one 6 inch round layer of cake.
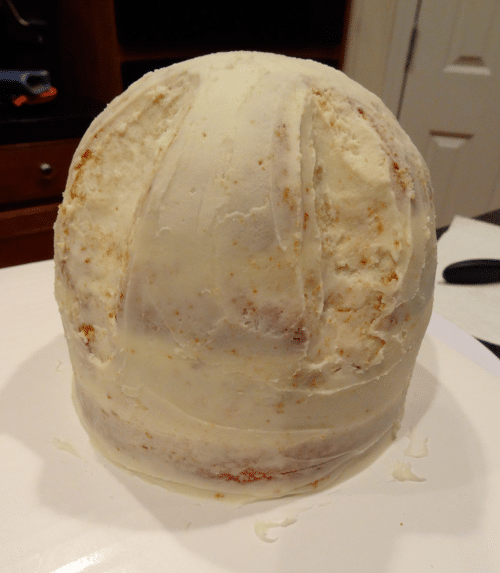
8. Stack the two cakes and carve out the ridges on the sides. Most hats don’t have a perfect dome when just sitting there, so I added those indentions. At this point you also want to make sure that the size of the brim of the hat is correct. If it doesn’t fit well onto the front of the hat, with a little extra space for the fondant (if you cut your fondant to about 1/8 inch thick, then you’ll want to make sure there’s space or your brim won’t fit once the fondant has been applied), then you will want to cut down your cake a little to fit. I didn’t need to do that.
9. Add the fillings to your cake (I only filled the cake after carving it, though you could fill it first, then do the previous step). Then crumb coat the cake with a thin layer of icing.
10. Cover with fondant.
11. Use the same stitching tool to add stitching across the top of the hat. I used my husband’s hat as the model to see how many lines I needed. I then used a round tool tip to get the circles that are near the top of the hat in between the stitching.
12. Add the little top circle of fondant to the top of the hat and if you want, add a little fondant rope to cover up where the brim and the hat come together.
You’re done! You can add any other decorations you’d like!
If you are wondering about the field that the cake is sitting on, it’s just a regular cake drum board covered with fondant and hand painted with a mixture of vodka and icing color. I also did that a day or so in advance so that it could dry.
I hope this tutorial is helpful! If you have any questions, feel free to leave them in the comments, use the contact form on the contact page or send me an email at lifeloveandsugar@gmail.com.





I’m starting a business with my bff and we needed some help on frosting…(we suck at it) thank you! You helped me with frosting so much!
Do you have a good fondant recipe to share?
I’m sorry, I don’t. I’ve never made it myself.
What did you use to stick the emblem to the front?
It’s a sugar water. I put some fondant is water to dissolve and then paint that lightly onto the back of them emblem and stick it on.
Love that you used a real hat as a guide. Thanks for the instructions!
Thanks Missy! I figure what better, right? I’m glad the instructions helped!
Love that you used a real hat as a guide. Thanks for the instructions!
Thanks Missy! I figure what better, right? I’m glad the instructions helped!
This is so wonderful – good job!
This is so wonderful – good job!
Thank you!
Amazing! I have this irrational fear of sculpting cakes…I will do almost anything to avoid it! lol Great job though! It’s awesome! (Ps: I finally made the pumpkin french toast casserole, it was insane! So delicious!)
Amazing! I have this irrational fear of sculpting cakes…I will do almost anything to avoid it! lol Great job though! It’s awesome! (Ps: I finally made the pumpkin french toast casserole, it was insane! So delicious!)