This post may contain affiliate sales links. Please read my disclosure policy.
This Moist Yellow Cake recipe is moist and tender with a soft crumb! It’s made completely from-scratch and is way better than any cake mix. The cake pairs perfectly with the chocolate buttercream frosting for the perfect classic yellow cake!
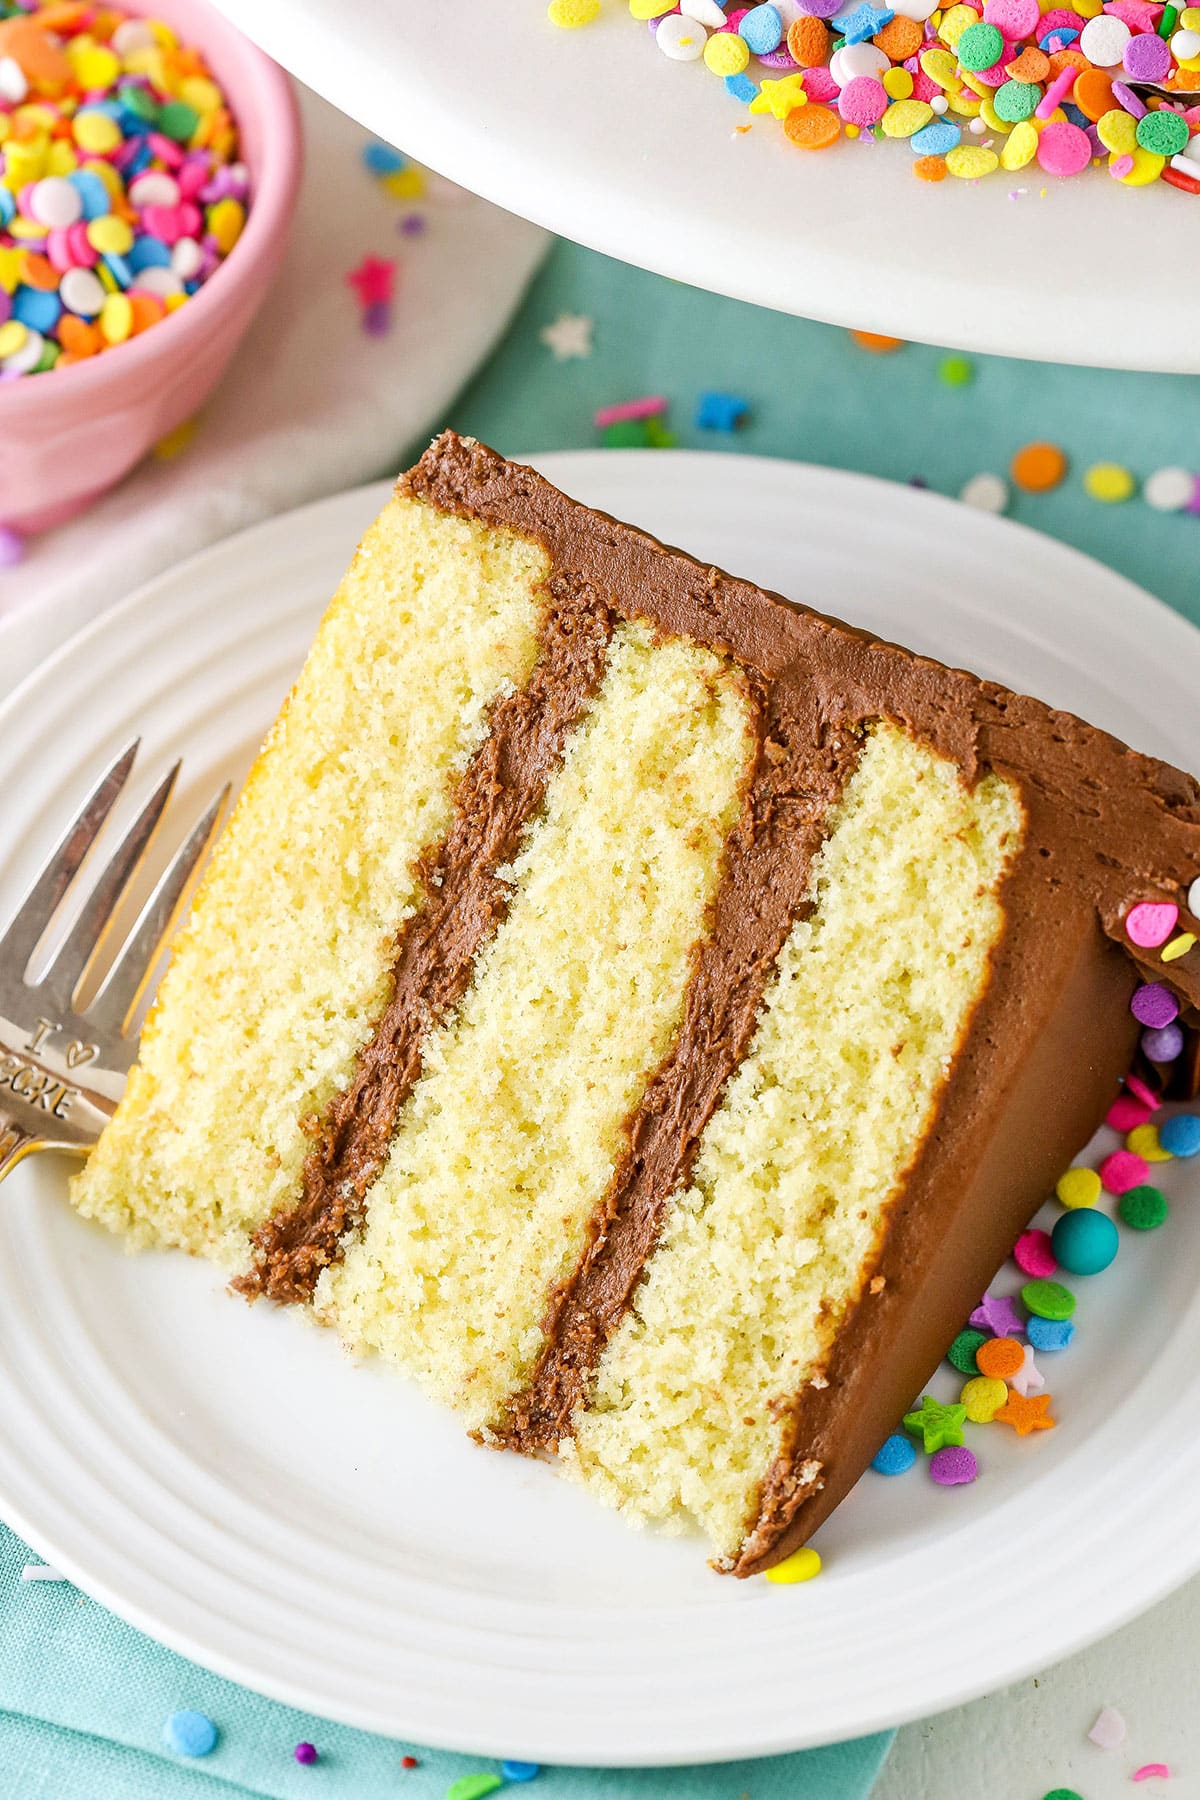
Why You’ll Love This Yellow Cake With Chocolate Frosting
Yellow cakes made from scratch can often be dry and flavorless. That’s a bummer for anyone looking for a tasty cake and such a shame for yellow cake, which should be moist and full of flavor. This yellow cake recipe is everything you need in your cake, and here’s why.
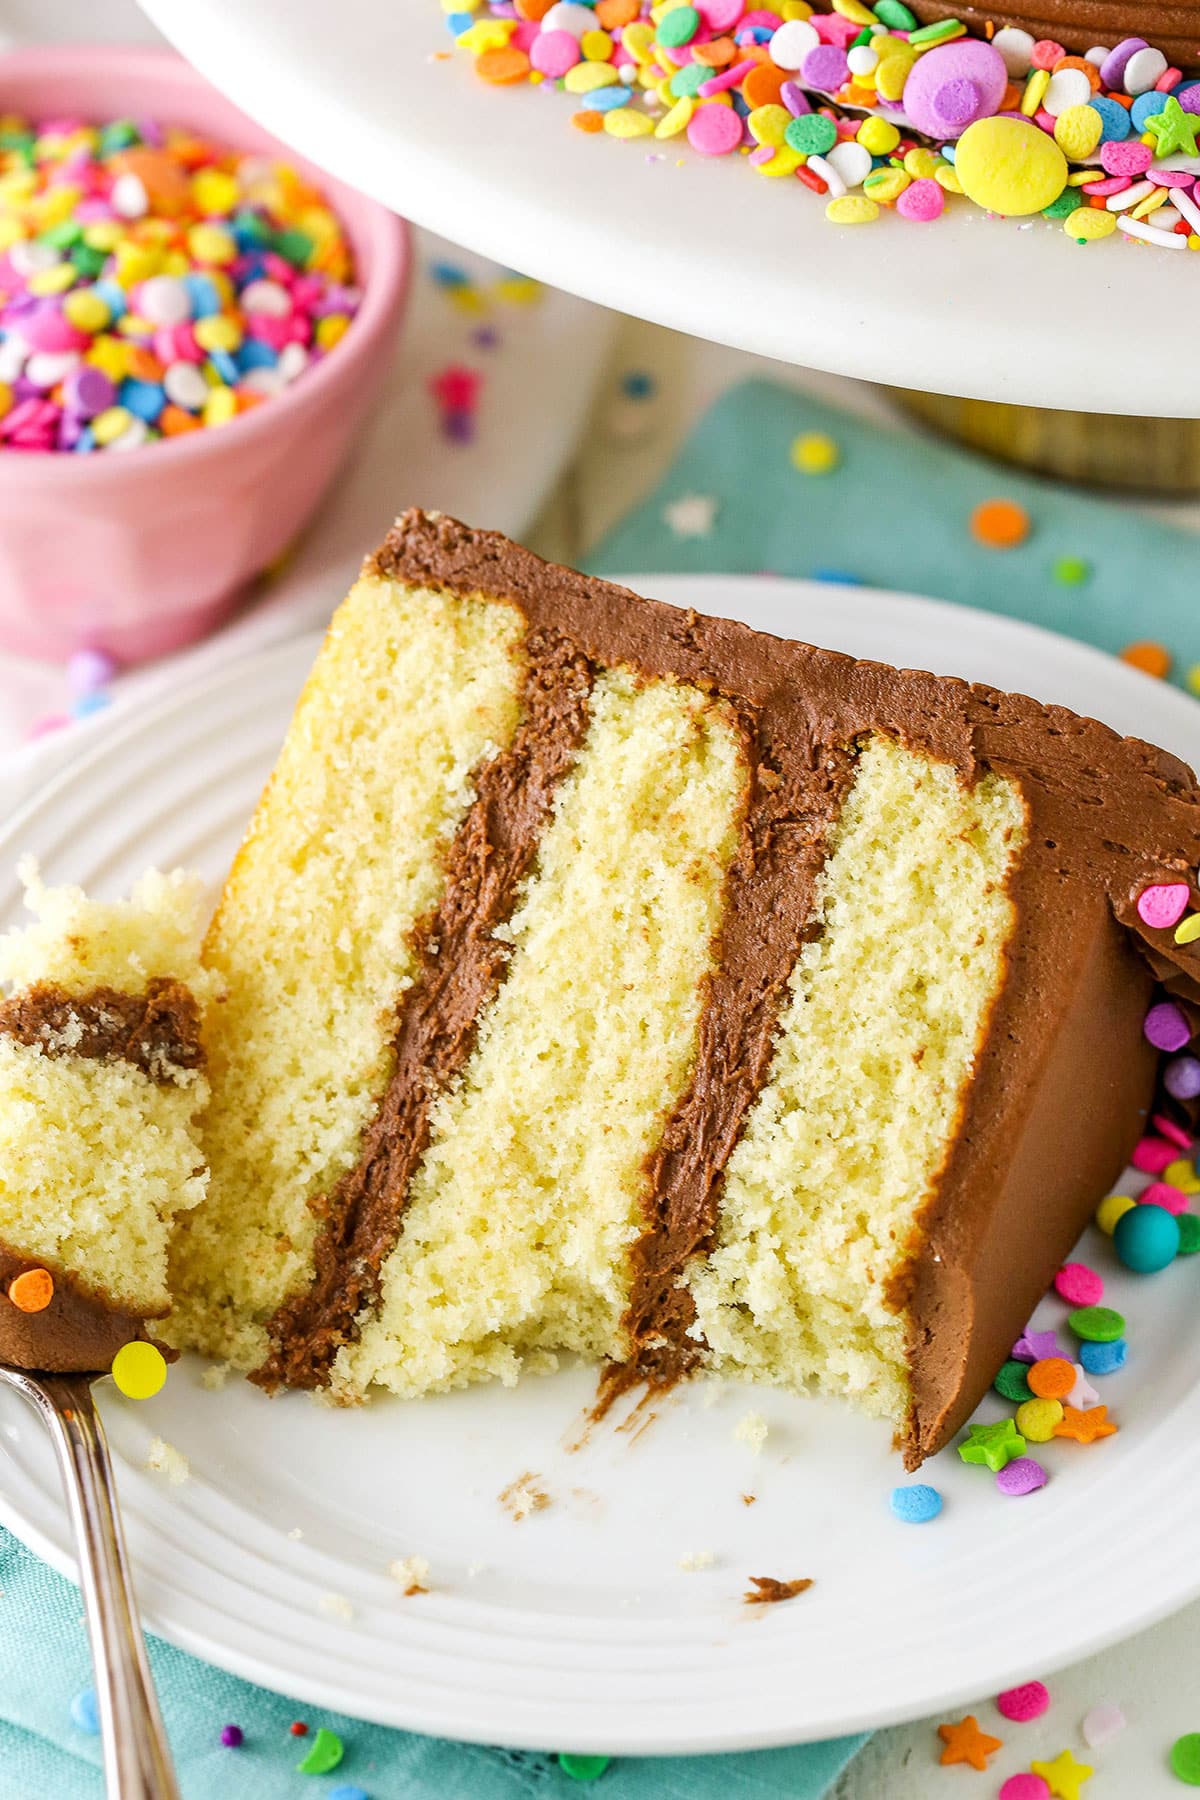
- Great texture. I use the reverse creaming method in this yellow cake recipe. For this method, you add the butter to the dry ingredients, and then add the wet ingredients last. The butter coats the flour, minimizing gluten development during mixing. It makes the cake so tender! That said, cakes made with this method tend to rise a little less (since you don’t add as much air to the batter through creaming) and be a little more dense (and feel more moist), which I think goes perfectly with this cake.
- Rich buttery flavor. The star ingredients in a yellow cake are eggs and butter. The cake crumb is rich and buttery without being overpowering.
- Paired with chocolate frosting. No classic Yellow Cake is complete without Chocolate Frosting. There is just something magical about the taste of yellow cake and chocolate frosting together. This chocolate buttercream is fudgy and delicious!
- Perfect for ANY occasion. I love yellow layer cakes because they are perfect for birthdays, showers, small gatherings or big parties. Keep it simple or dress it up; it’s like the little black dress of the dessert world!
What is Yellow Cake?
Yellow cake is basically a variation on a vanilla cake. Generally there are 3 buckets of vanilla cakes – white cake, yellow cake and vanilla cake. The difference between them relies heavily on the eggs used. A regular vanilla cake will typically use just whole eggs, while white cakes tend to use egg whites and yellow cakes tend to use a combination of whole eggs and egg yolks. In yellow cake, the egg yolks add even more flavor and the yellow color of them shows in the finished cake. I’d describe the general flavor of yellow cakes to be a little more “egg-y” and buttery. I have chosen to use a combination of whole eggs and egg yolks to properly tenderize the cake and add color.
Ingredient Notes and Substitutions
- Buttermilk – The buttermilk contributes to this cake’s wonderfully tender texture and moisture. The acid in the buttermilk also activates the baking soda in the cake, so if you don’t have any on hand, I recommend making your own. Swap out 2 tablespoons of your regular milk (preferably whole milk) for 2 tablespoons of either white vinegar or lemon juice.
- Whole eggs & egg yolks – You can’t make a yellow cake without lots of eggs and egg yolks. They provide richness to the batter and the classic yellow color of the cake. Using all egg yolks would make the cake a little heavy, so there’s 3 whole eggs and 2 added yolks. It’s just enough yolks to add the color and flavor you want without sacrificing the texture of the cake.
- Flour – This recipe uses all-purpose flour. For the best taste and texture, I recommend measuring accurately with a food scale. If you don’t have one, you can also use the spoon and level method.
- Sugar – Sugar adds both sweetness and moisture to cake, which affects the texture. Be sure to use the amount called for in the recipe.
- Baking powder & baking soda – I like to use both baking powder and baking soda for this cake recipe. The combination of both will aid in creating a light, fluffy cake crumb.
- Salt – Without a little salt, your cake will be bland.
- Unsalted butter – When baking, it’s best to use unsalted butter because it allows you to control the salt more precisely. If all you have is salted butter, just leave out the extra salt in the recipe. Bring the butter to room temperature before adding it to the batter (or using it in the buttercream). You’ll know your butter is soft enough when you can leave an imprint after pressing on the outside gently.
- Powdered sugar – Powdered sugar gives the buttercream volume and affects the consistency. I tend to use a good bit because I like a thicker buttercream that I know will stay in place and pipes well. Feel free to reduce it, if you aren’t concerned about that. You can also just reduce the overall amount of buttercream, if you tend to just add a thin layer of frosting to your cakes.
- Heavy cream – You’ll only need a little to help adjust the final thickness of the chocolate buttercream. If you don’t have any on hand, you can use milk, or even water.
How to Make Yellow Cake from Scratch
Here is a step-by-step list of instructions for how to make the cake and frosting. Remember, we are using a reverse creaming method for the cake batter. You’ll want to read thoroughly to get a good feel for the flow of how to add the ingredients. For more comprehensive instructions, check the recipe card at the end of the post.
To Make The Cake Batter
- Prepare to bake. Preheat the oven and prepare three 8-inch cake pans with parchment paper in the bottom and baking spray on the sides.
- Combine wet ingredients. The first thing you want to do is combine your wet ingredients. That’s going to be your buttermilk, eggs and vanilla extract. Pour about 3/4 cup of the wet ingredients into another measuring cup. You should have approximately 1 1/4 cups remaining. Set both containers aside.
- Combine dry ingredients. Next, combine your dry ingredients. In a large mixer bowl, combine the flour, sugar, baking powder, baking soda and salt.
- Add butter to dry ingredients. From there, begin adding the butter to the dry ingredients. Keep your mixer on its lowest speed and slowly add the butter about a tablespoon at a time. Allow it to combine before adding the next bit of butter. As you continue adding butter, the mixture should start to resemble damp sand.
- Slowly begin adding more wet ingredients. Once your butter is all incorporated, you’ll add the larger amount of wet ingredients (1 1/4 cups) and stir until all of the dry ingredients are wet. Then, turn the mixer up to medium-high speed for about 45-60 seconds until the batter is light and fluffy.
- Mix until well combined. Add the remaining wet ingredients (3/4 cup) and mix until well combined.
- Bake. Divide the cake batter between the cake pans and bake away!
- Cool. Remove cakes from the oven and allow to cool for 2-3 minutes, then turn out onto a cooling rack to cool completely.
Chocolate Buttercream Frosting
- Cream the butter. Add the butter to a large mixer bowl and beat until smooth.
- Add half of the powdered sugar. Slowly add half of the powdered sugar and mix until smooth.
- Mix in the cocoa and vanilla. Add the cocoa powder and vanilla extract and mix until well combined and smooth.
- Pour in the cream. Add 3-4 tablespoons of heavy cream and mix until well combined and smooth.
- Add the rest of the powdered sugar and salt. Slowly add the remaining powdered sugar and salt and mix until smooth.
- Adjust the thickness. Add additional cream, as needed to get the right consistency of frosting. You don’t want it too thick or it won’t stay on your cake, but if it’s too thin, your cake layers will slide around and you won’t be able to pipe the frosting.
To Assemble The Cake
- Trim your cakes. Use a large serrated knife to remove the domes from the top of the cakes so that they’re flat. Refer to my tutorial, if needed.
- Alternate cake layers and frosting. Place the first cake on a serving plate or a cardboard cake round. Spread about 1 cup of frosting evenly on top of the cake. Add the second layer of cake and another cup of frosting.
- Place the top cake layer and frost the outside. Top the cake with the remaining layer and frost the outside of the cake. Refer to my tutorial for frosting a smooth cake, if needed.
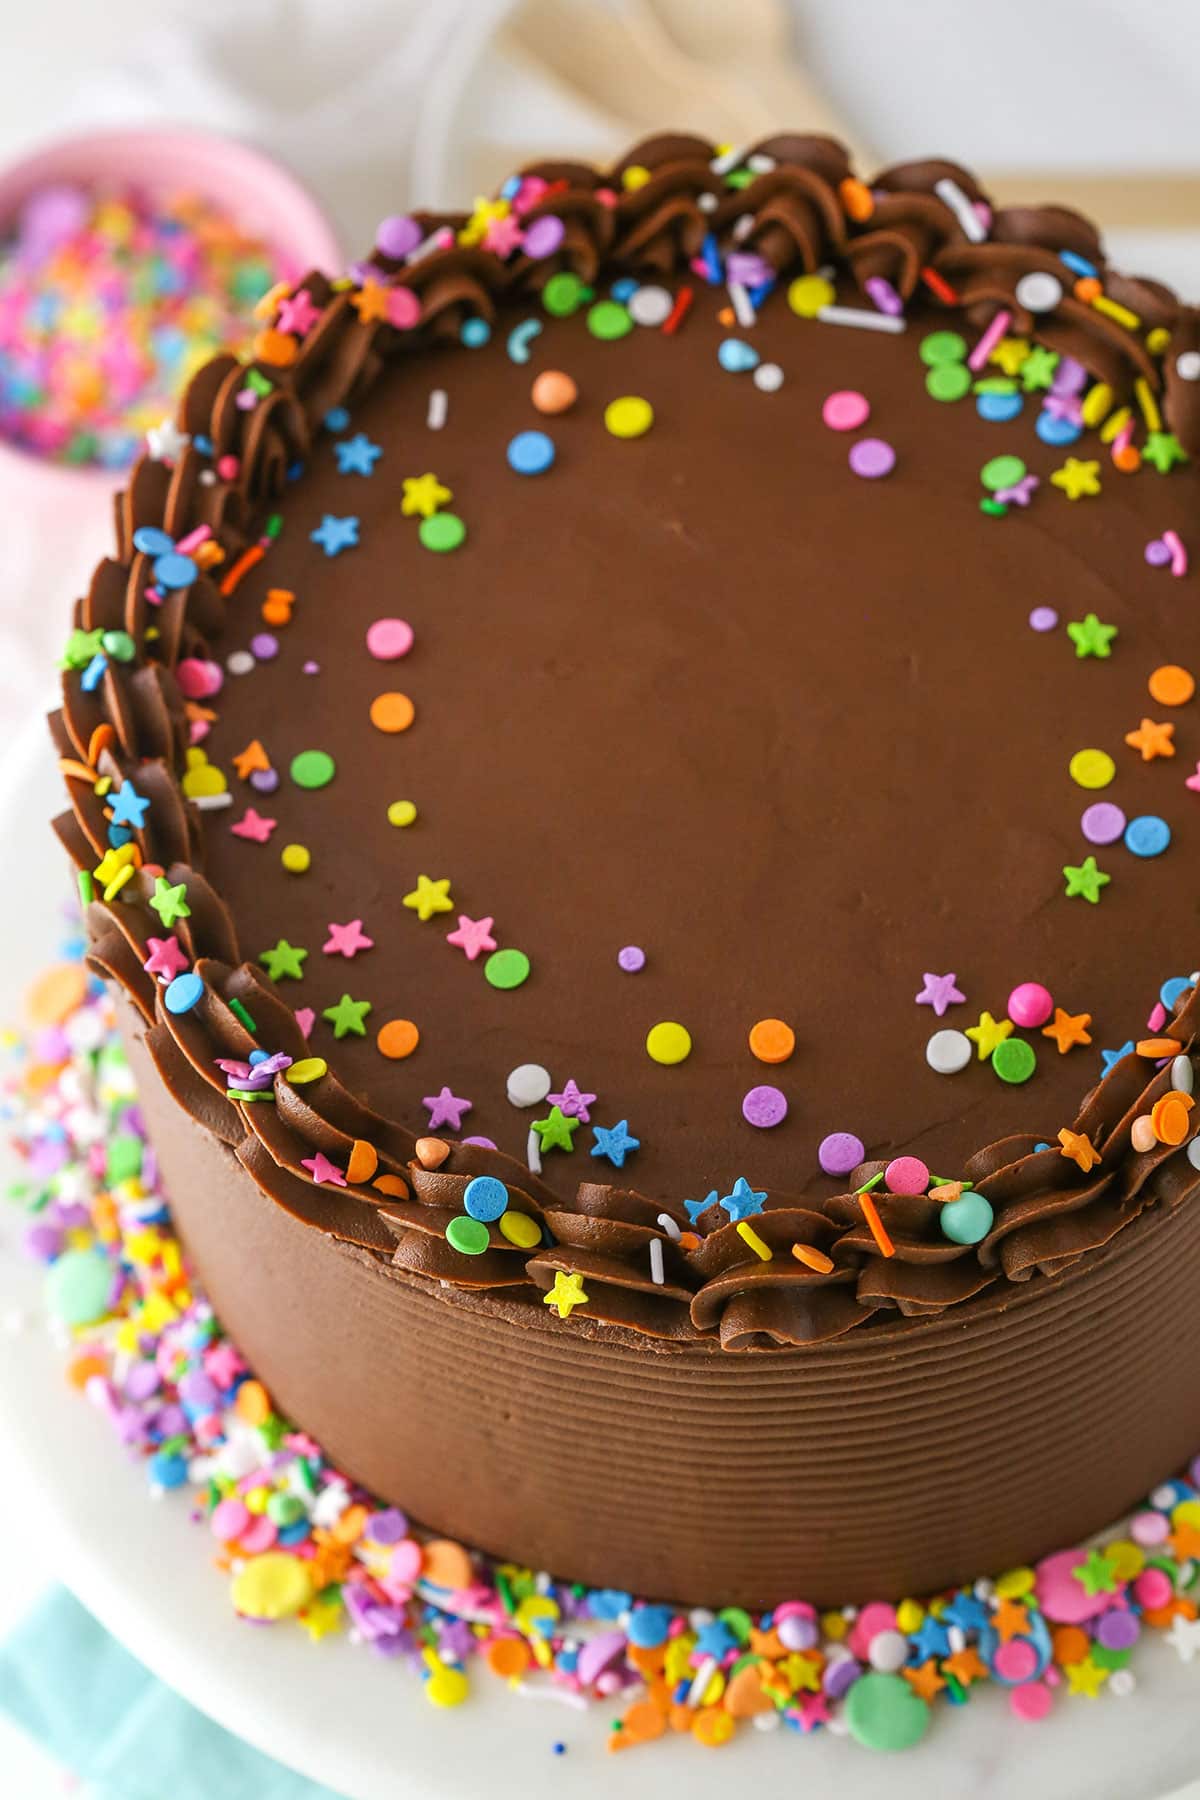
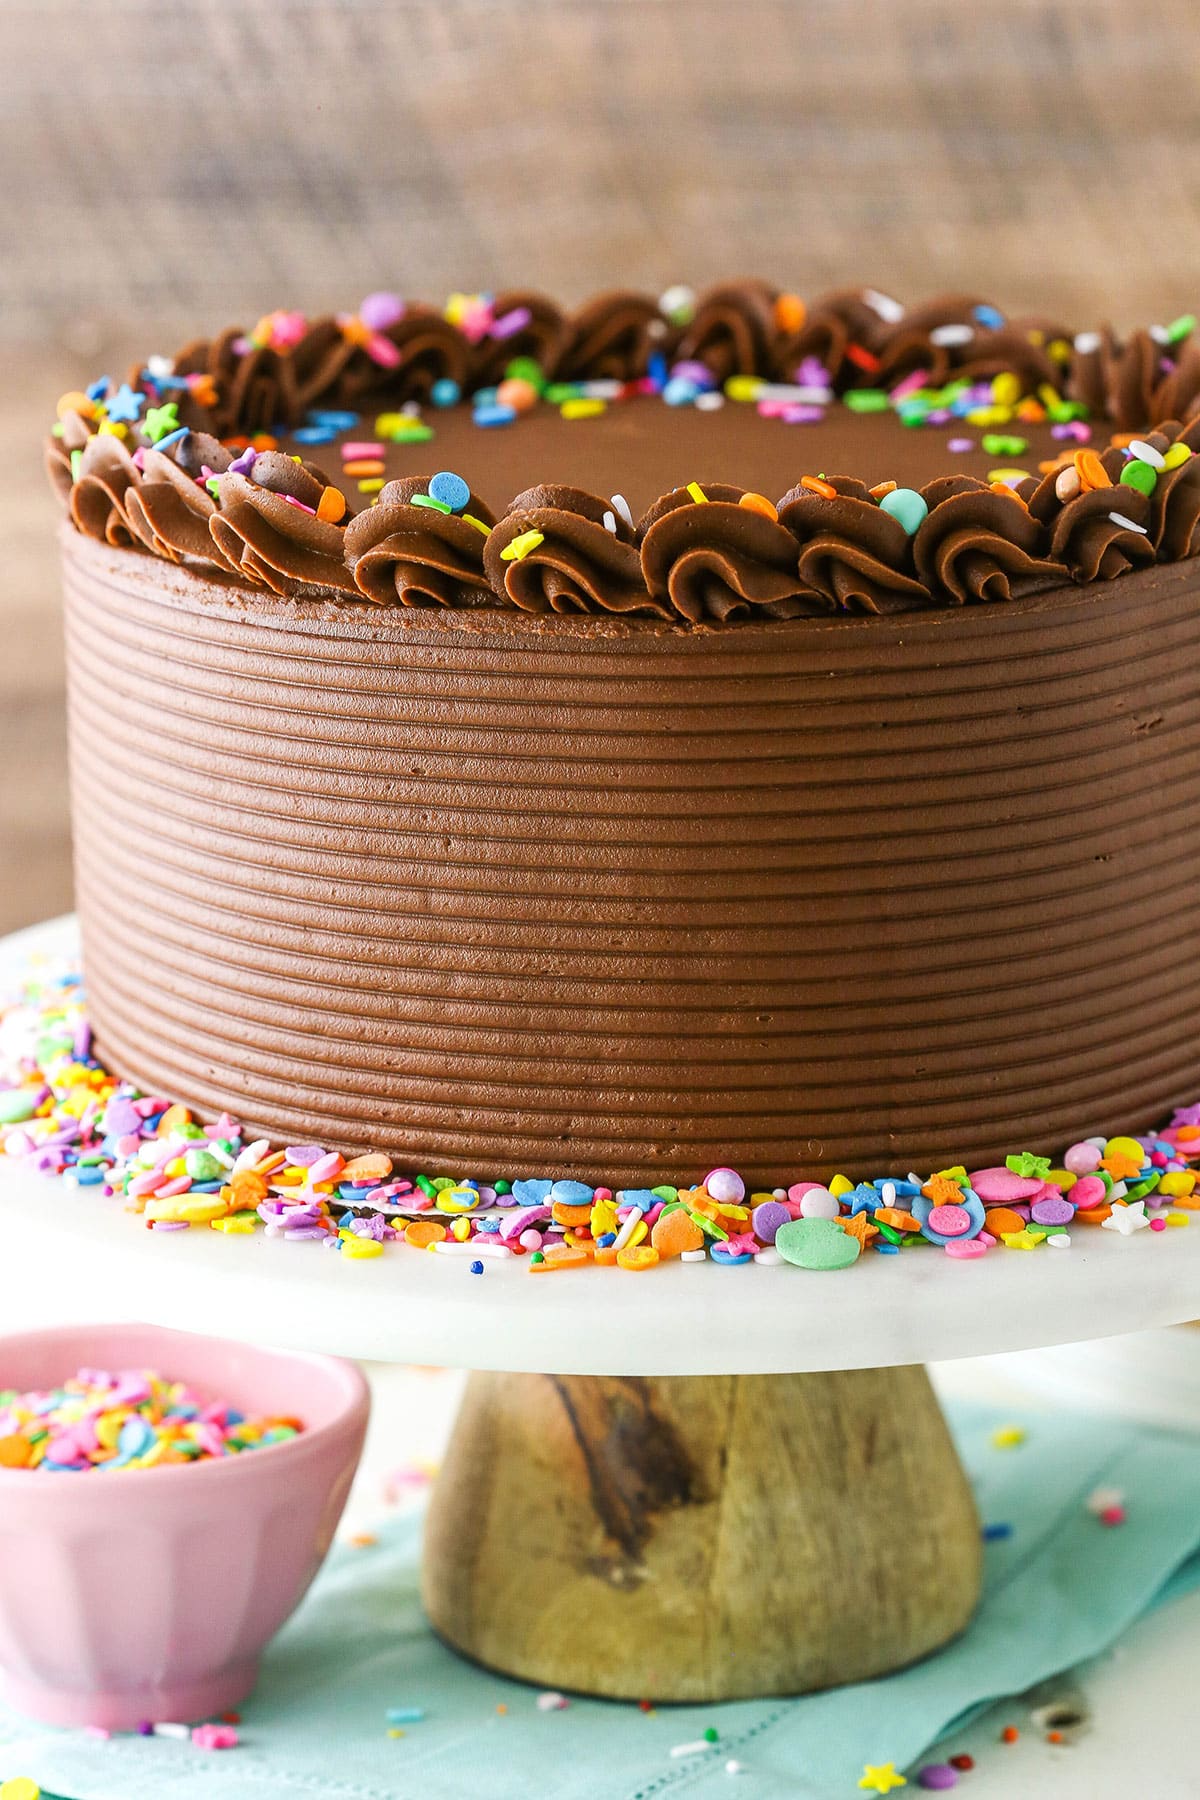
- Decorate the cake. Use a decorating comb to add pattern to the sides of the cake, if desired. Pipe shells of frosting around the top edge of the cake. I used Ateco tip 844. Add a few sprinkles to the top of the cake. Enjoy!
Tips for Success
- Measure Your Flour Correctly. I always recommend using a food scale to ensure accuracy when measuring flour. If you add too much flour, your cake will be dry and dense. If you don’t have a food scale, you can also use the spoon and level method. Read more about measuring your flour accurately here.
- Make Sure Your Butter Is At The Right Temperature. Finding the correct temperature for butter can be tricky because room temperature can vary from room to room in the same house. You’ll know your butter is just right if you press on it gently and are able to make a slight imprint.
- Allow The Cake To Cool Before Decorating. Trying to frost your cake before the layers are completely cool will result in melted buttercream. It would be a shame to ruin your buttercream and waste your time and money. Trust me, it’s worth waiting to decorate until you are sure the cake is cool.
- Use A Great Chocolate Frosting. The chocolate frosting recipe provided on the recipe card below is flavorful and easy to work with. However, if you are a true chocolate lover, try my Fudgy Chocolate Buttercream Frosting. It’s got melted chocolate in it for an even deeper chocolate flavor!
More Amazing Cake Recipes
- Best Moist Chocolate Cake
- Moist Vanilla Cake
- Homemade Strawberry Cake
- Best Angel Food Cake
- Best Carrot Cake Recipe
- Red Velvet Layer Cake
- German Chocolate Cake
Watch How to Make it
Print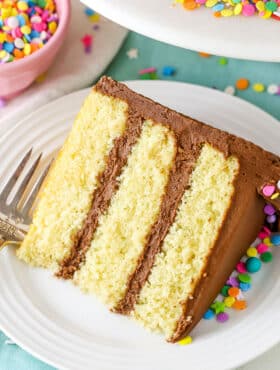
Moist Yellow Cake with Chocolate Frosting
- Prep Time: 1 hour 15 minutes
- Cook Time: 25 minutes
- Total Time: 1 hour 40 minutes
- Yield: 12-14 slices
- Category: Dessert
- Method: Oven
- Cuisine: American
Description
This Moist Yellow Cake recipe is moist and tender with a soft crumb! It’s made completely from-scratch and is way better than any cake mix. The cake pairs perfectly with the chocolate buttercream frosting for the perfect classic yellow cake!
Ingredients
Yellow Cake
- 1 1/4 cups (300ml) buttermilk
- 3 large eggs
- 2 large egg yolks
- 1 tbsp vanilla extract
- 2 1/2 cups (325g) all purpose flour
- 1 1/2 cups (310g) sugar
- 1 1/4 tsp baking powder
- 1/2 tsp baking soda
- 1/2 tsp salt
- 1 cup (224g) unsalted butter, room temperature
Chocolate Buttercream
- 2 1/2 cups (560g) unsalted butter, room temperature
- 9 cups (1035g) powdered sugar
- 1 cup (114g) natural unsweetened cocoa powder
- 2 tsp vanilla extract
- 4–5 tbsp (60-75ml) heavy cream
- 1/4–1/2 tsp salt
- Sprinkles, optional
Instructions
1. Preheat oven to 350°F (176°C) and prepare three 8 inch cake pans with parchment paper in the bottom and baking spray on the sides.
2. Combine the buttermilk, eggs, egg yolks and vanilla extract in a large bowl, then separate about 3/4 cup of the mixture into another bowl or measuring cup. About 1 1/4 cups should remain in the other bowl. Set both aside.
3. In a large mixer bowl, combine the flour, sugar, baking powder, baking soda and salt.
4. With the mixer on the lowest speed, add the butter about a tablespoon at a time, allowing it to incorporate before adding the next tablespoon. As you add more butter, the mixture will start to clump together a bit a should end up resembling wet sand.
5. Add the larger of the reserved egg mixture (about 1 1/4 cups) to the dry ingredients/butter mixture. Stir on the lowest speed until it’s incorporated, then scrape down the sides of the bowl.
6. Increase the speed to medium high and beat until light and fluffy, about 45 seconds to a minute. Scrape down the sides of the bowl.
7. Turn the speed down to low and slowly add the remaining egg mixture in a slow stream until incorporated.
8. Scrape the sides of the bowl, then turn speed back up and mix until well combined, about 10-15 seconds.
9. Divide the batter evenly between the three cake pans and bake 20-25 minutes or until a toothpick inserted comes out clean.
10. Remove cakes from the oven and allow to cool for 2-3 minutes, then turn out onto a cooling rack to cool completely.
Make the buttercream
11. Add the butter to a large mixing bowl and beat until smooth.
12. Slowly add half of the powdered sugar and mix until smooth and well combined.
13. Add the cocoa powder and vanilla extract and mix until well combined and smooth. Add 3-4 tablespoons of heavy cream and mix until well combined and smooth.
14. Slowly add the remaining powdered sugar and salt and mix until smooth. Add additional heavy cream, as needed to get the right consistency of frosting.
Assemble the cake
15. Use a large serrated knife to remove the domes from the top of the cakes so that they’re flat. Refer to my tutorial, if needed.
16. Place the first cake on a serving plate or a cardboard cake round.
17. Spread about 1 cup of frosting evenly on top of the cake.
18. Add the second layer of cake and another cup of frosting.
19. Top the cake with the remaining layer and frost the outside of the cake. Refer to my tutorial for frosting a smooth cake, if needed.
20. Use a decorating comb to add pattern to the sides of the cake, if desired.
21. Pipe shells of frosting around the top edge of the cake. I used Ateco tip 844.
22. Add a few sprinkles to the top of the cake. I used this sprinkle mix. Store in an air-tight container until ready to serve. Cake is best if eaten within 3-4 days
Nutrition
- Serving Size: 1 slice
- Calories: 877
- Sugar: 85.8 g
- Sodium: 94.7 mg
- Fat: 49.5 g
- Carbohydrates: 108 g
- Protein: 6.4 g
- Cholesterol: 190.6 mg




Wonderful recipe, we loved it at home.
I have been searching for the perfect yellow cake recipe for 2 years. I have tried your other yellow cake recipes and I thought those were the best… and then I tried this one. This is hands down the most wonderfully moist yellow cake I have ever had or made!! Delicious!!!!!
Awesome! I’m so glad to hear that!
Hi. If I wanted to make this into a smash cake for my almost-one-year-old’s birthday how would I reduce the cooking time and temperature?
Thanks!
I’m guessing that you’re wanting to make a 6 inch cake. I haven’t made this as a 6 inch so I’m not really sure how to advise. I’m sorry.
There are two of us, do I refrigerate left overs?
If you are only going to have it out for a day or so, it should be fine at room temperature. After that you may want to refrigerate it. I recommend serving at room temperature though.
Cake turned out great, as did the frosting. I didn’t use all of the frosting, but that’s just a reference.
Two questions:
What would be the recommended baking time if done in a 13x9x2 pan?
Have you tried this recipe using a different flavor extract in the cake? Curious how it would turn out with lemon extract.
So glad you enjoyed it!
I haven’t baked it in a 9×13, but generally it’s like 25-30 minutes. You might also consider reducing the temperature to 325, which could mean it bakes a little longer.
I haven’t tried a different extract.
Can this be done in a rectangular pan instead? If so, do the ingredients need any adjustments?
I haven’t tried it, but that should be fine. You might consider reducing the baking temperature to 325 degrees, but the ingredients shouldn’t need adjusting.
Cake was perfect. I struggled with the frosting some. It seemed dry even after 7 tbsp of milk. Any advice?
So glad you enjoyed it! As for the frosting, you just want to add more milk. If you didn’t weigh the powdered sugar, it’s possible you just added a little more than I did and it needed more liquid to thin it out a bit.
Hello! I’d like to try a slightly larger version of this case any advice for how to scale it to be a 9 inch 3 layer cake?
You could try doing 1 1/2 recipes worth. It can be hard to scale up by small amounts and have everything adjust evenly.
I am using powdered buttermilk and I am confused how to bake with it. Can anyone help?
There should be instructions on the packaging. Typically the powder goes in with your dry ingredients and you use water for the liquid.
What is the brand of sprinkles that you use. So many have a bad aftetaste. Thanks!
These were from Sweetapolita.
You need a total of 2 egg yokes & 3 Regular eggs. Do you need water if you’re using butter milk instead of powder milk.
For the cake, if you’re using regular liquid buttermilk rather than the powder, you don’t need the water.
Hello! First timer to your blog. I did a search for a “yummy, moist yellow cake” for a very special birthday a few days ago. I came across this recipe & I wasn’t sure about it. I’ve never done the reverse-creaming method. But, it shouldn’t be a big deal, right?! I’ve been a looooong time baker…so, I gathered & measured & greased my rectangular pan. I followed the steps exactly. The end result is a moist & delicious cake. The recipient was very pleased with this cake! Thank you for sharing this recipe & showing us a different way to make a simple cake. 🙂
So glad you were happy with it!
Hello, what can I use to cover the cake with the frosting?
Thank you
Do mean like how to frost it? I have a tutorial for frosting cakes, if you’d like to check that out.
The cake was great one of the best recipes ever. The frosting had way too much sugar I would go for half and then add sugar from there it sort of ruined the cake.
This cake is delicious! I forced myself to make it last night, even though I was tired from studying all day! I hesitated since I’d never made a cake where you mix the butter so gradually! It’s moist and delicious! I’d post pics here if I could! Maybe I’ll email them to you! Have a blessed Sunday!
Wonderful! So glad to hear you enjoyed it!
Would you recommend any alterations for high altitude? I live at 10, 000 feet and want to make this for my Bday in a few weeks. I usually add an extra 1/4 cup of flour. Any advice would be great!
I’m guessing there are adjustments you could make, I’m just not familiar with high altitude baking. I’m sorry.
Just saw your comment, Jacki. I live at about 7,000 feet. I usually add an extra tablespoon of flour per cup and decrease sugar by one tablespoon per cup. Results are great!
This was delicious! I also found that the backwards method went faster for me. Even my mom looked up and said, “You’re done?”
My only question is: Why is there so much frosting? I cut the frosting recipe in half and still had about 2 cups left over.
Great recipe! This will be my go to for 3 layer yellow cake! Yum!
I’m so glad you enjoyed it! As for the frosting, it really depends on the person and how you like to frost your cake. I have a tutorial that shows how I frost my cake and it uses a fair amount of frosting. If you cut it in half and still had that much left over, then you really must not use much frosting. It’s really just a preference.