This post may contain affiliate sales links. Please read my disclosure policy.
If you’ve ever wanted to know How to Properly Level and Torte a Cake without a leveler so that it’s easier to stack and fill, this tutorial is for you!
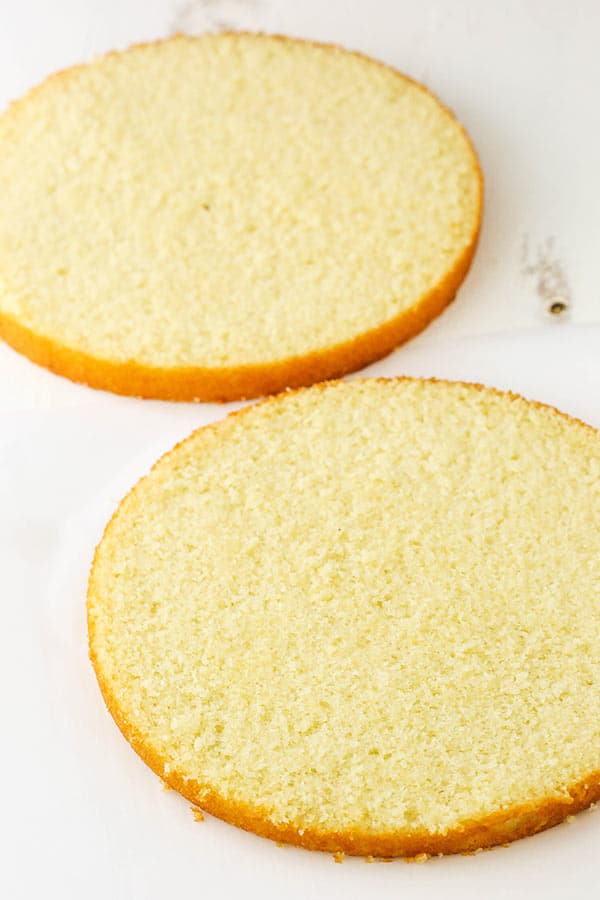
What is Leveling and Torting a Cake? Why Do You Do It?
A dome typically forms on top of a cake when it’s baked. Leveling the cake refers to removing that dome so that the top of the cake is flat.
Torting the cake is when you divide the cake horizontally into layers so that you can add a filling and stack the layers evenly.
While it may seem like an unnecessary step, it’s important to have level cake layers to ensure the stability of your cake. A domed cake that is stacked with another domed cake can eventually put too much pressure on the center of the cake, causing it to crack right down the middle.
Tools You’ll Need:
Cake
Turntable
Long serrated knife
Ruler, optional
Cake lifter, optional
How to Level and Torte a Cake Without a Leveler
There are many ways to do level and torte a cake. When I first started making cakes, I used a leveler. But ultimately I found that they tend to be flimsy and not really give me a nice, level layer. So today I’ll show you how to level/torte a cake without a leveler.
You’ll want to start by leveling your cake, then torting it. Leveling it first allows you to be accurate when you gauge where the middle of the cake is when you begin torting it. I’m showing the steps with torting, rather than leveling, because it’s a little easier to show.
So to get started, place your cake on a turntable and have a large serrated knife ready. Place the blade of the knife where you’re going to want to make the cut. In this case, that’s the middle of the cake so that it can be split into two layers. Make a little mark with the blade of the knife. I usually just eye it to make sure it’s in the middle, but you could also use a ruler.
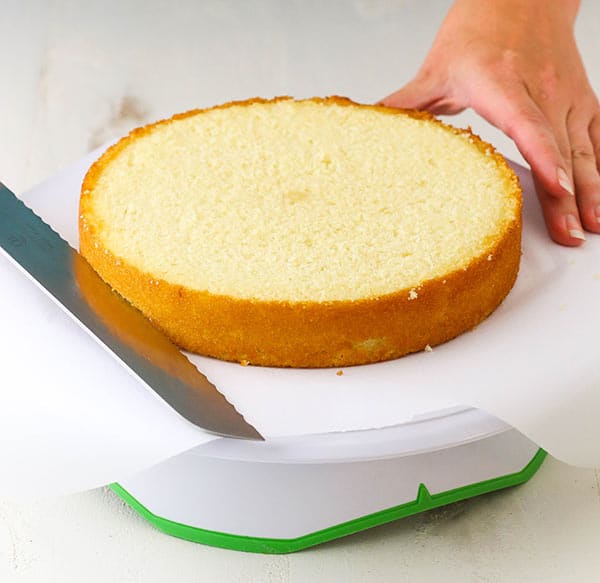
Next, keep your knife in place and slowly turn the turntable so that your knife makes a shallow cut all the way around, marking where you’ll cut. Do this slowly, keeping an eye on the position of the knife. Again, you could use a ruler if you prefer and work your way around the cake by measuring and creating marks.
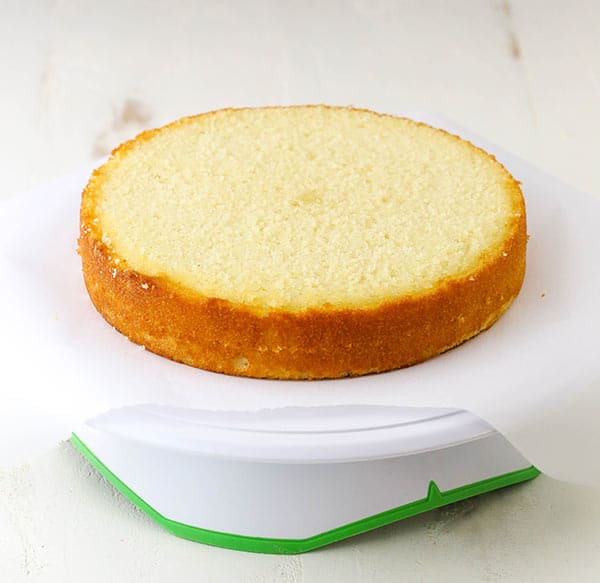
Once you have your markings around the outside of the cake, keep your knife in place and use a slow, careful sawing motion to divide the cake. Be sure to go slowly and keep an eye on the position of the knife, making sure it lines up with the markings. You could also continue turning the cake on the turntable, slowly moving the knife inward as you cut in towards the center of the cake. I’ve just found that I prefer the sawing motion.
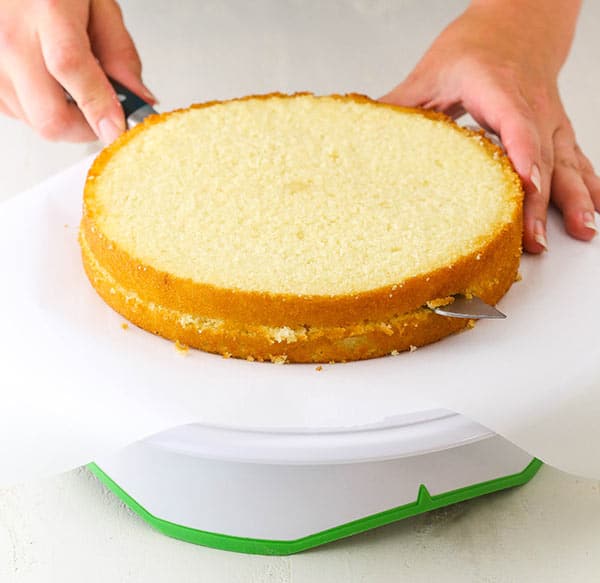
Once the cut is made, remove the top layer so that you have the two layers. I have a cake lifter that I like to use. It makes it really easy to handle thin, tender cake layers.
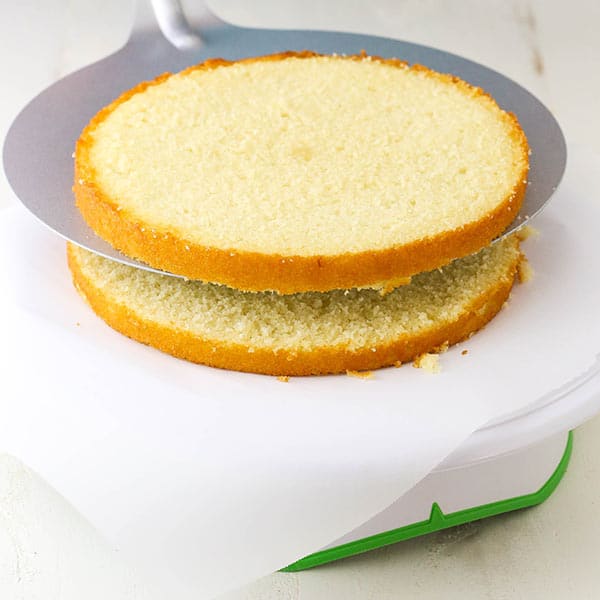
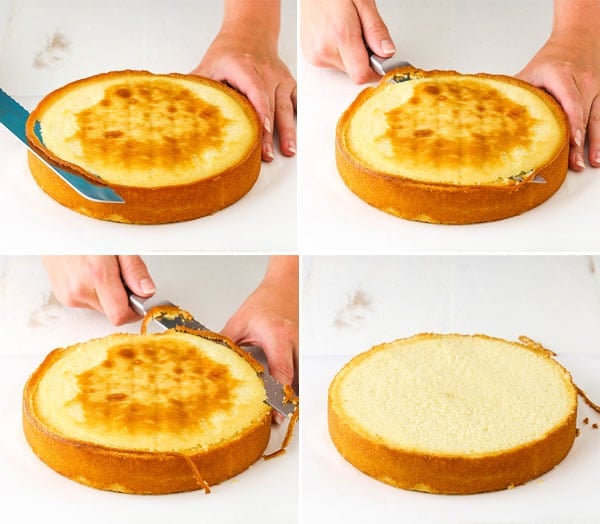
The above method can be used for both leveling the top of the cake and torting the layers. However when it comes to leveling the cake, I often find it’s not entirely necessary to make the markings. It depends on the way your cake has baked, but I tend to use the little outer edge of the cake as my “mark” when leveling it. It’s even simpler than the method above, if you are comfortable free handing it. You can see in the photos below that those top edges (my “marks”) come off with the dome, but not much else. I like to make sure I leave as much cake on top as I can. However, if your cake has a more serious dome to be removed, feel free to make the markings as shown above.
How to Level and Torte a Cake with a Leveler Alternative
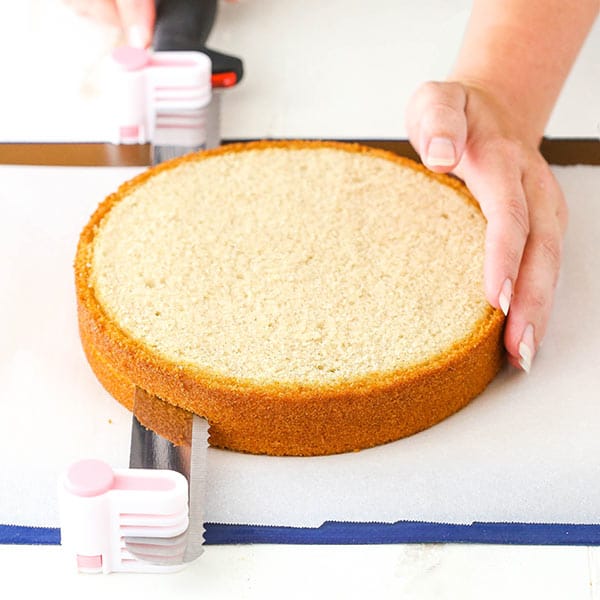
Now if you really are new to this and want to start with a leveler, I’ll suggest this option. They are little clips that you can attach to the ends of your knife and basically have it act as a leveler. The thing that I like about this is that your knife is what’s making the cut, so you know it’s sturdy and won’t slip around. You will need to make sure you have a long knife though. If you’re going to use it on cakes larger than 8 inches, I’d suggest the one I linked to above (and show in the photos below). It’s quite long, but you do need that length. While I still prefer the method without a leveler, this is the best option I’ve found if you’d prefer the comfort of a leveler when getting started.
So there you have it! A quick and easy tutorial for leveling and torting your cakes! I hope you found it helpful. And be sure to check out my post on how to stack and fill your cakes!
This post contains affiliate links.


