This post may contain affiliate sales links. Please read my disclosure policy.
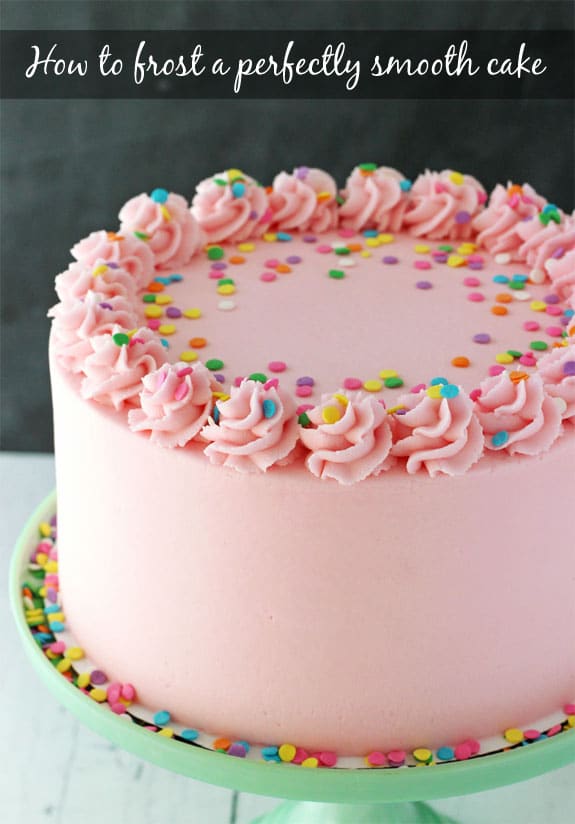
Today’s tutorial is all about how to frost a smooth cake. Getting that nice, smooth finish when icing a cake can take some practice, but I have been asked so many times about how I get my icing so smooth, I’ve finally put together some instructions that I hope will be helpful. Just remember you have to be patient. My first cake did not look like my current cakes. It took practice – and the right tools.
Want to frost cupcakes? See my post on how to beautifully frost your cupcakes!
Watch How To Do It
So to start, let’s talk about the tools you’ll need:
Icing tips (Wilton #789 for icing the sides and Ateco 844 for piping the border)
Icing bags
Turntable (I use Wilton Trim-N-Turn Ultra Cake Decorating Turntable)
Icing smoother (I 100% recommend Ateco Decorating Comb over any other)
9 inch offset spatula (I use Wilton Angled Spatula)
Fondant smoother (I use Wilton Easy Glide Fondant Smoother)
Viva paper towels (Viva brand specifically)
Let’s talk about that icing smoother for a second. I linked to it above, but it’s an Ateco smoother that costs less than $5. It is the best money I have ever spent on a tool. I used to use another one, but it was big and clunky and I had no idea how much it hindered my ability to get a nice, smooth cake until I tried this one. It’s lightweight, small and easy to use.
In addition to those tools, you’ll obviously need a cake and some icing. I used regular American Buttercream (American Buttercream recipe here). For my cakes that are about this size, I go through about 2 1/2 recipes worth.
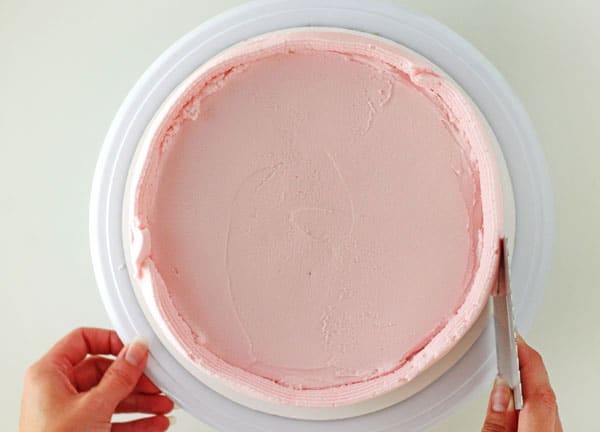
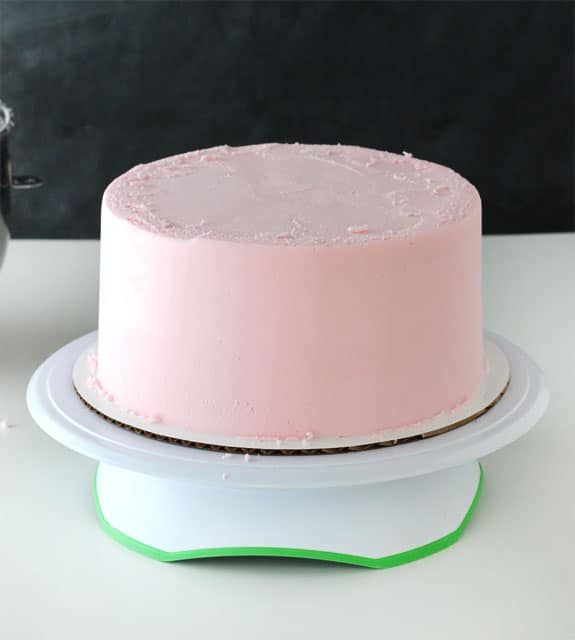
For this tutorial, I started with a cake that was already crumb coated and had a layer of icing on the top of the cake. It’s important to already have the top layer on the cake and get it as smooth as you can with your offset spatula. It’ll get further smoothed later, but it’s best to have it smooth now too.
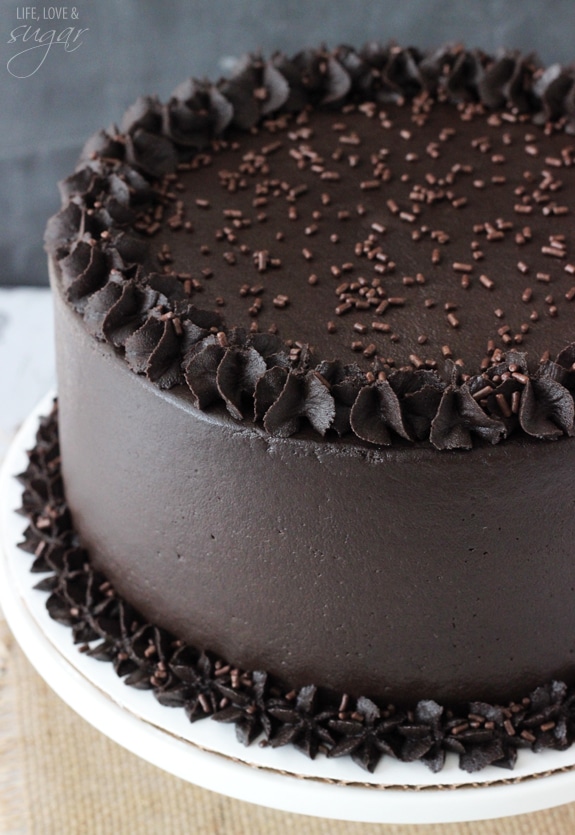
The crumb coat isn’t entirely necessary for every cake. Typically chocolate cakes are more likely to need them, since they tend to have more crumbs. But because of the way I add my icing, it’s not always necessary. I use an icing tip and bag, which reduces crumbs mixing into the icing.

How to Frost a Cake
So to get started from here, you’ll want your icing bag fitted with the Wilton #789 icing tip and filled with icing. Starting from the bottom of the cake, pipe icing around the edge, trying to keep even pressure on the bag so that the layer of icing is even.
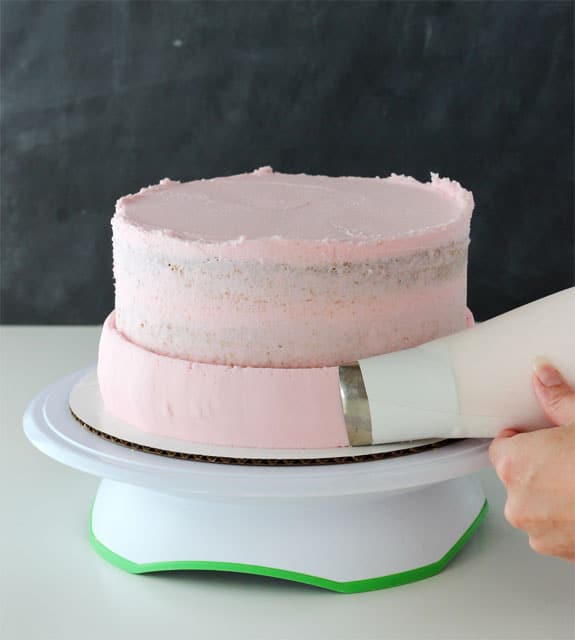
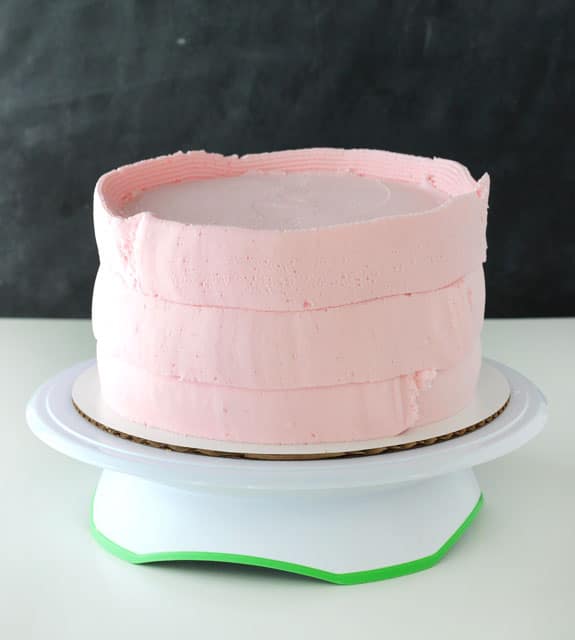
You’ll have multiple layers of piped icing, depending on the height of your cake. The top layer needs to stick above the top edge of the cake. This will be important later for smoothing the top edges/corners of the cake.

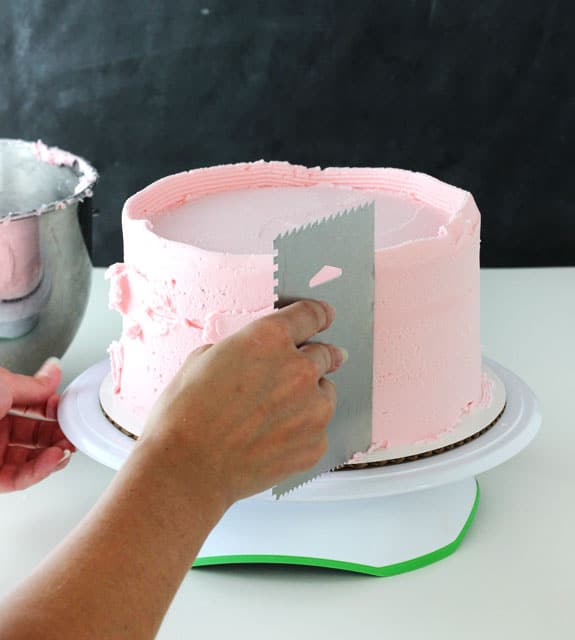
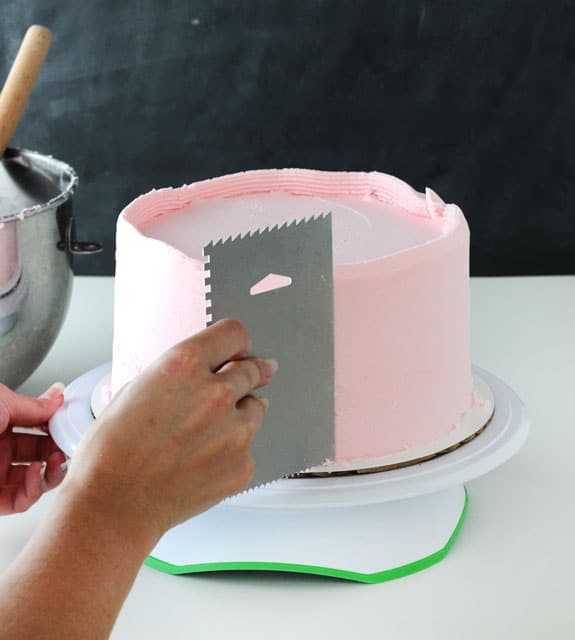
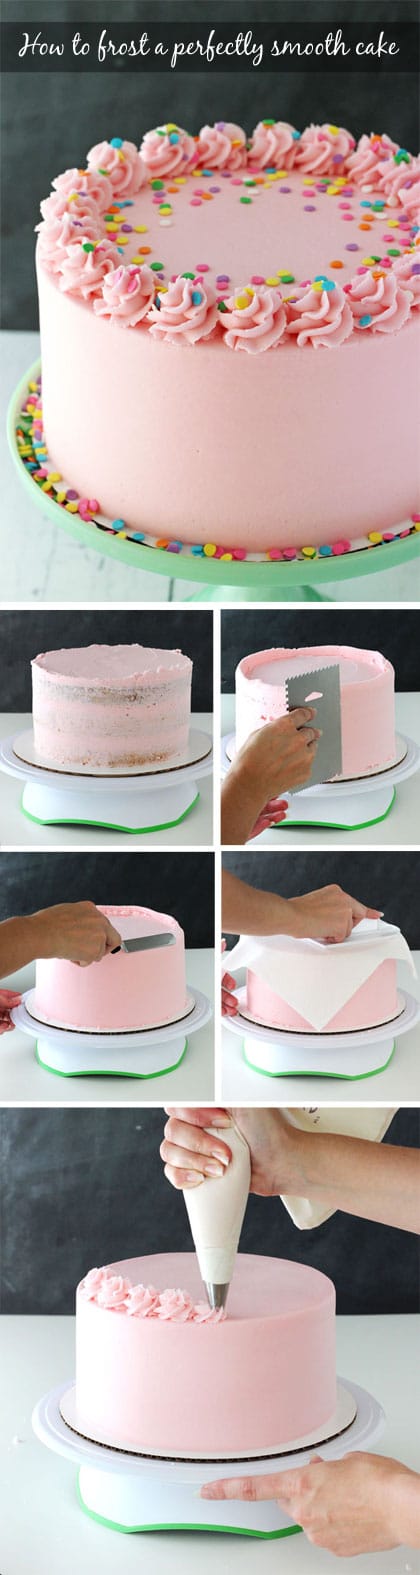
When you are done applying the icing to the sides of the cake, it’s time to smooth it. This is where the icing smoother comes in. Place it against the side of the cake. You want to hold it straight up and down, as straight as possible. Hold your icing smoother in the same place and use your other hand to turn the turntable. Continue to turn the turntable, scraping the icing off of the smoother occasionally so that there isn’t too much buildup. I clean off my smoother regularly and when I scrape the excess icing off of it, I usually also wipe it with a paper towel, so that there isn’t anything left on there that will mess up the icing once I place it back on the side of the cake.
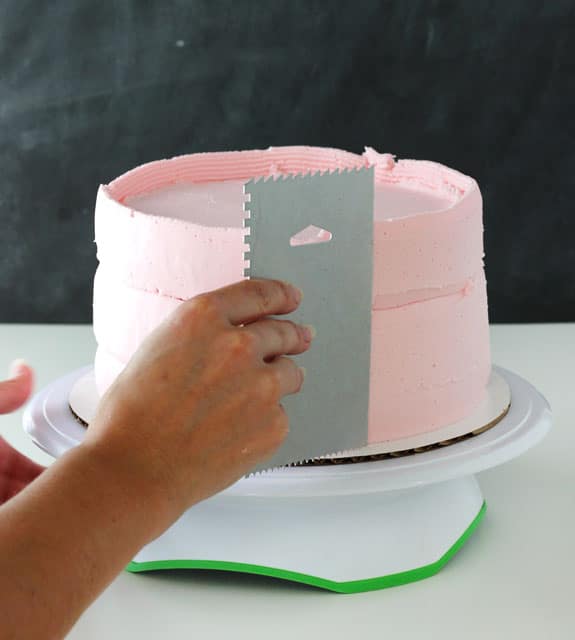
Here is an image showing the angle at which I hold the smoother. I really believe the angle makes a big difference in the way the icing smooths. Do not hold it at 90 degrees. The tighter the angle (like shown), the better the excess icing pulls around the cake and fills in gaps.
After doing a few turns of the turntable, you’ll notice some gaps that are deeper and should probably be filled in. I usually notice it at the “seems” where the three layers of icing were piped on. At this point, use your offset spatula to add some icing to the gaps. You’ll want to have a little excess icing, rather than too little.
Begin smoothing the sides again, pulling the excess icing around the cake to fill in gaps, then wiping off the icing smoother as needed.
Continue working around the outside of the cake, pulling the icing, then scraping it off of the icing smoother. You can fill in more gaps if needed, just keep working the sides until you are happy with it.
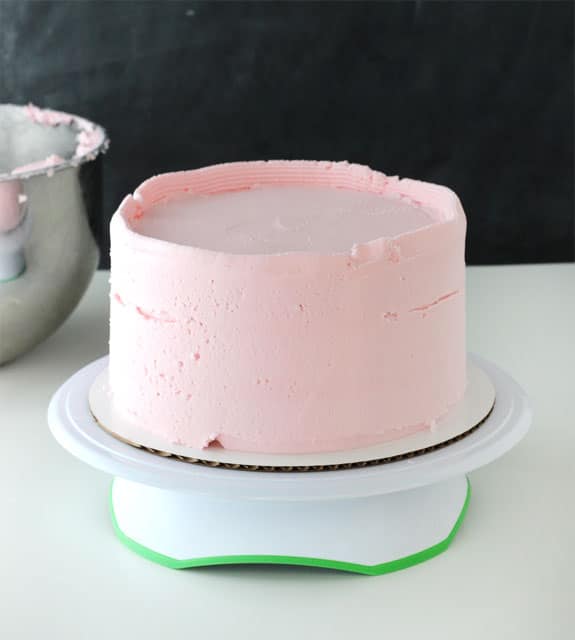
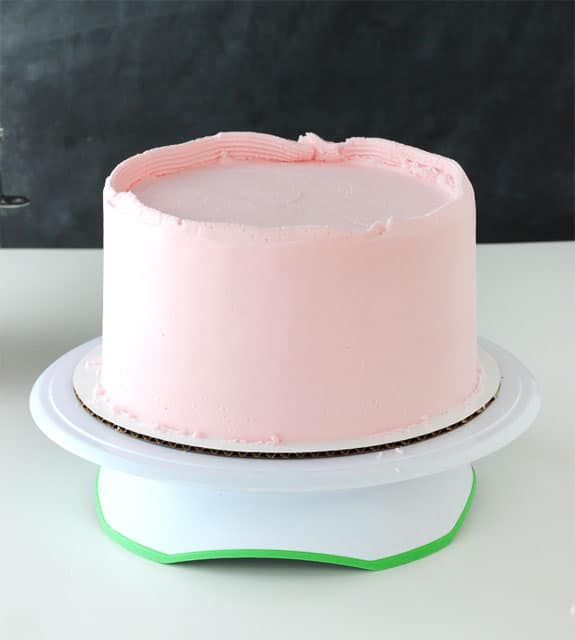
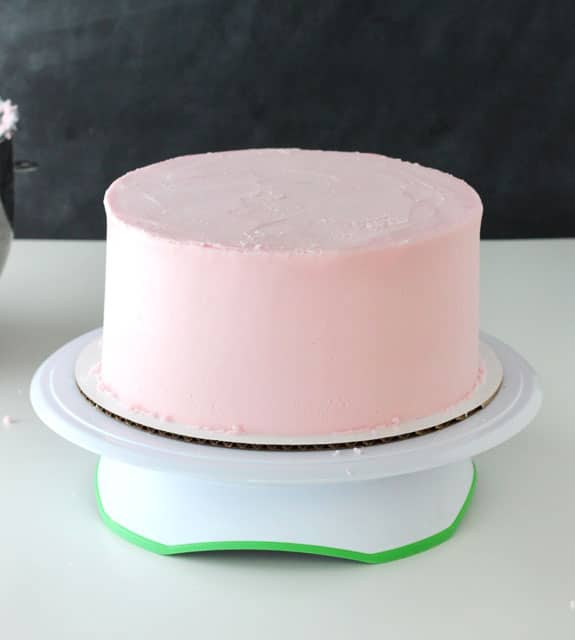
You should end up with a cake that looks like this. The sides are mostly smooth and the excess icing from the top is still sticking up above the cake. In some places you may have tiny little holes from the air in the icing. The angle that you hold the icing smoother can make a difference in how many of those you end up with. Again, tighter angle is better. Also, some of those will fill in as we smooth the sides again later with a paper towel.
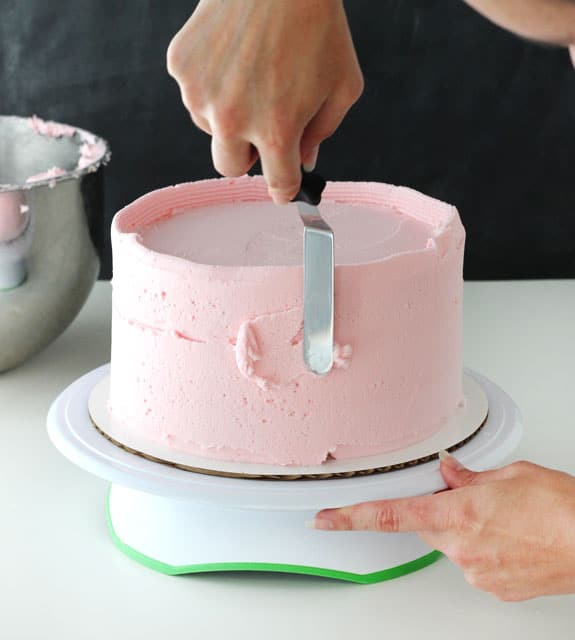
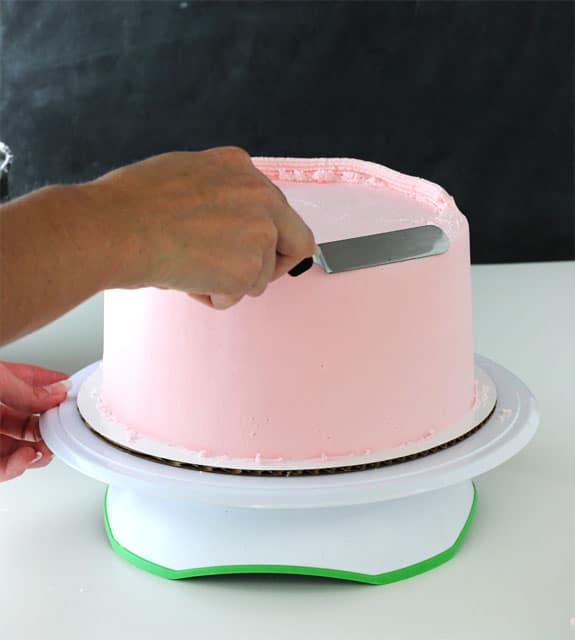
Next is always the scariest part! The top edges/corners. It was even harder to do these while taking photos. 🙂 The whole icing process took longer than normal, so my icing started to crust a bit and so it’s a little drier in the photos than yours should be at this point. You want to work as quickly as you can. If the icing starts to crust, it’s harder to work with.
To do the edges, you can use the icing smoother or the offset spatula. I use either, depending on my mood, though often I do feel like the offset spatula gives me more control. Pull the icing in towards the middle of the cake, making the corner level with the top of the cake. The spatula should be at about a 45 degree angle. The excess icing should help fill in any uneven-ness on those top corners as you pull it in.
Go all the way around the cake, until it looks like the one below. Again, my icing is a bit drier than yours should be. Hopefully, your cake top is a bit smoother.
Use your offset spatula to continue to work the icing on the top of the cake and smooth the top edges. Do not mess with the sides or side part of the corners yet. Just try to get the top as smooth as you can, the sides should already be smooth.
Next, we use the paper towel to finish smoothing any imperfections that are left from the offset spatula. Like I said above, I ONLY use Viva paper towels for this. They are the only paper towel I know of that doesn’t have raised patterns on it. You’ll notice that one side is smoother than the other – that’s the side you want against the cake.
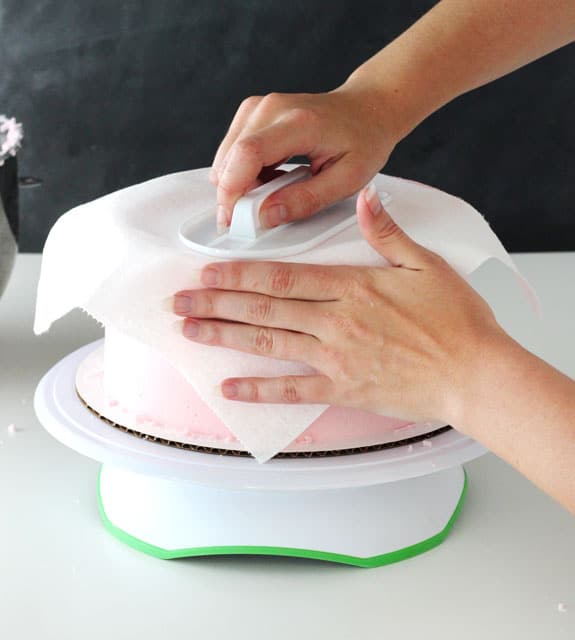
I usually start with the top of the cake, since it tends to be rougher and need more work. Along with your paper towel, you’ll need the fondant smoother. Place the paper towel on the cake, smoothest side down, and rub in small circular motions with the fondant smoother to smooth out the icing. Press firmly and evenly, but not hard.
Do the same with the sides of the cake, evening out any bumps or air holes.
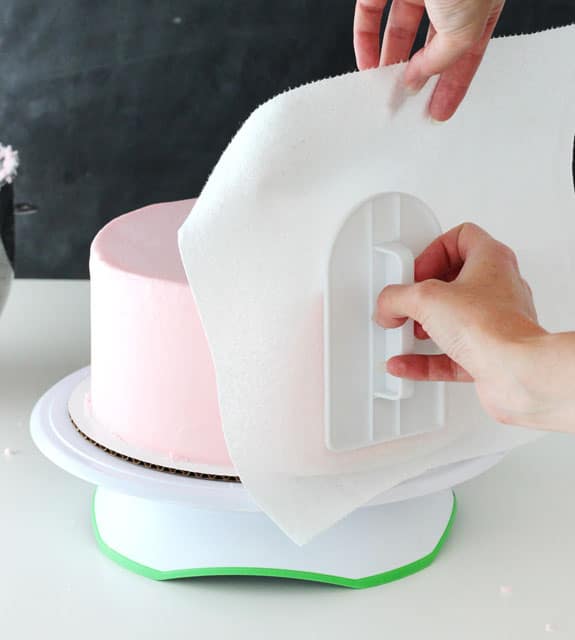
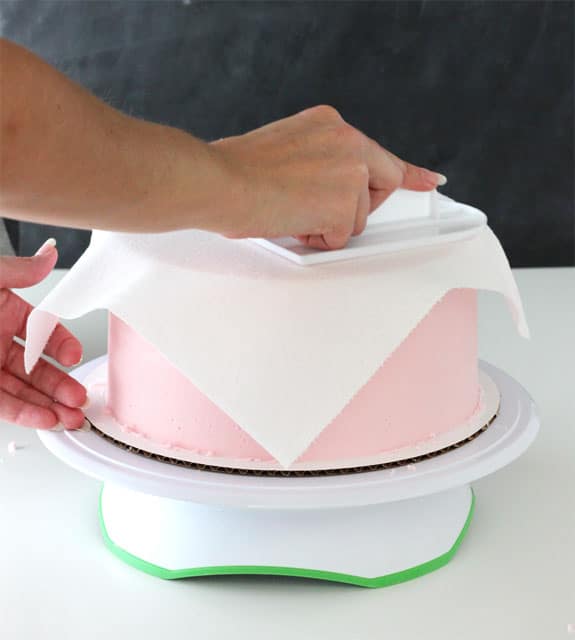
To help make sharper corners, place the paper towel on the top of cake, letting it hang over the edge and down the side. Placing your fingers against the side of the cake to keep the icing in place, use the fondant smoother to gently push the icing out towards to edge to help make that corner sharp. Do that anywhere you think the edges could use it.
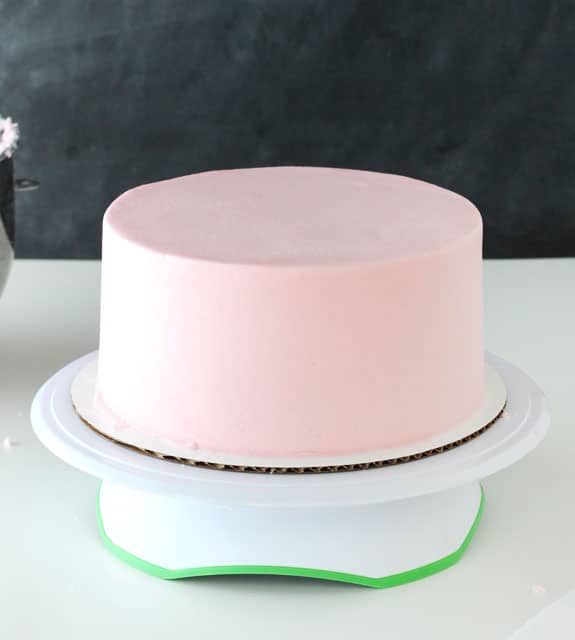
Keep working that paper towel and fondant smoother until you are happy with your cake.
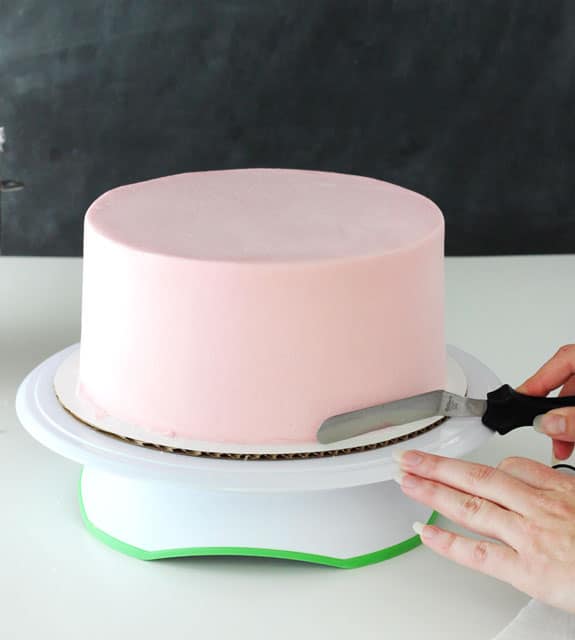
Next, I like to take my offset spatula and remove excess icing at the bottom of the cake and give it a clean edge. The spatula is placed at an angle so that nothing is actually touching the side of the cake, but just the bottom of the spatula side is grabbing the excess icing. Then pull the excess towards you and away from the cake.
Use your other icing tip to pipe on your border. I used Ateco tip 844, but you could also use Wilton 1M, which is similar, or any other tip you prefer.
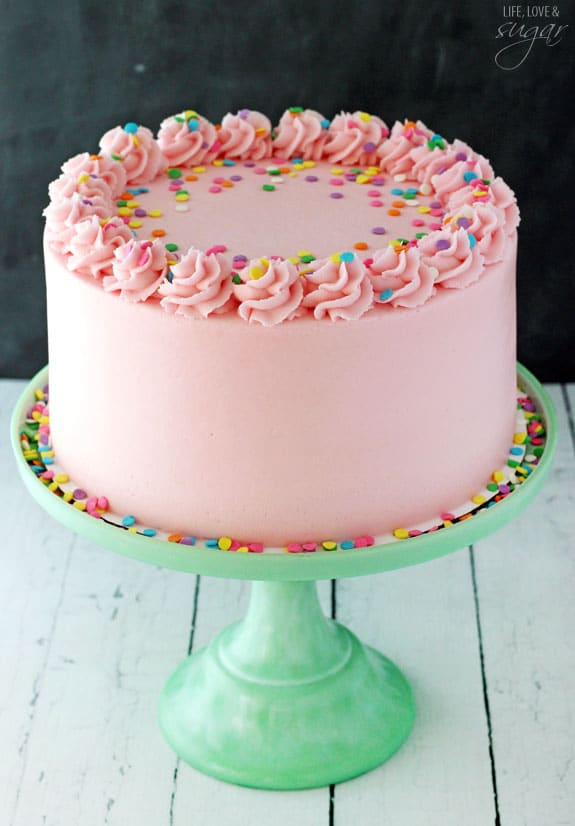
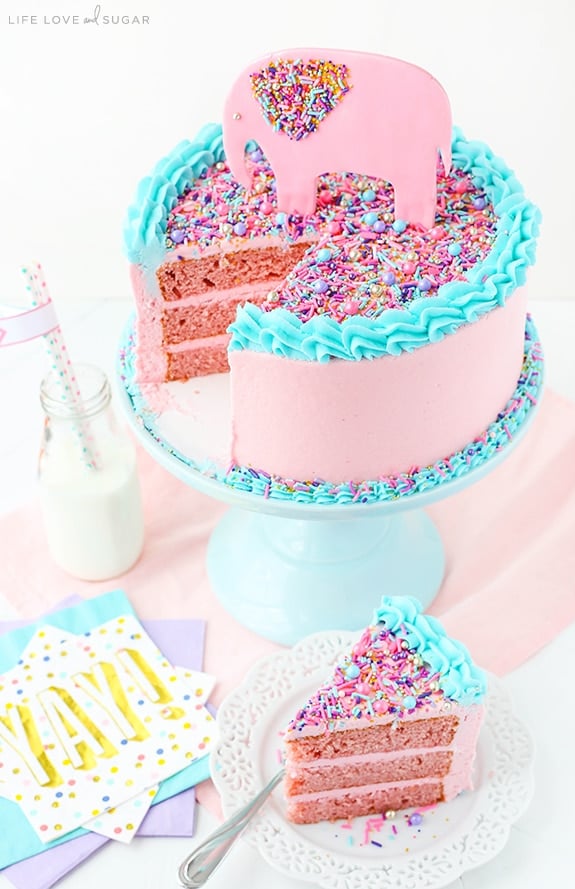
Sprinkle with some spraaaankles (I used Wilton Spring Confetti Sprinkles!

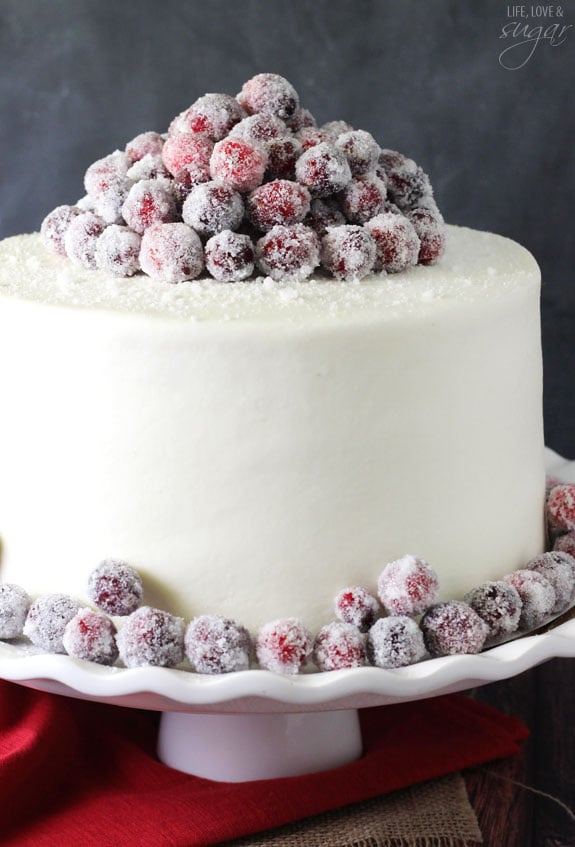
And you’re done! Put your cake on your favorite cake stand, add a few more sprinkles and dig in!! It’s time to eat all that hard work. 😉
*Update* For some help with getting the right frosting consistency, check out my new post, How to Get the Right Frosting Consistency, on how I like to do it.
This page includes affiliate links.
Learn how to decorate Sugar Cookies with Royal Icing
Practice your smoothing technique on some of these delicious cakes:
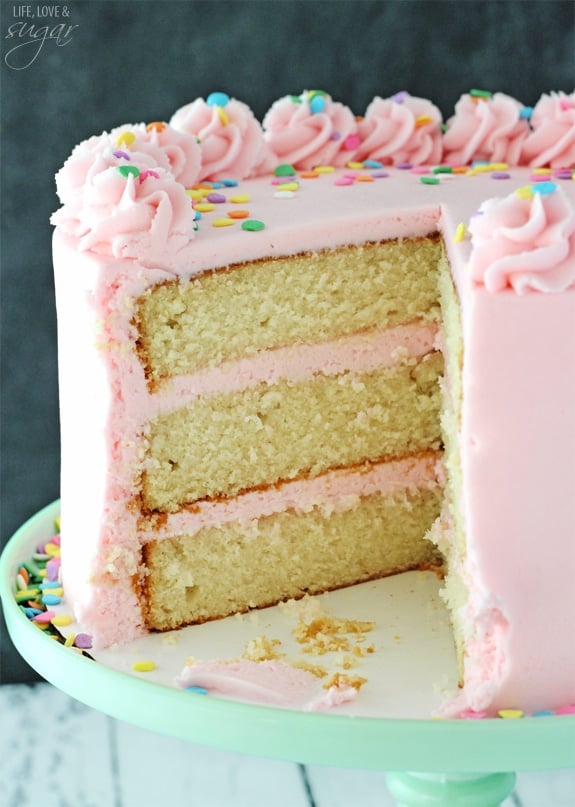
Moist and Fluffy Vanilla Cake
(the recipe for the cake in the tutorial above!)


Hi, do you have a crumb coat tutorial?
I don’t, I’m sorry.
What type of icing bags do you recommend? Are there different bags for different tips?
I typically use Wilton brand piping bags, which are easy to find in Michaels, Hobby Lobby or Walmart. The 12 inch bags are good for smaller piping things (like little borders or decorations) and 16 inch bags are best for piping onto cupcakes or frosting the side of the cake, as shown in this tutorial. I often get reusable bags, but disposable ones are also available.
“Thank You” doesn’t begin to convey my gratitude for this tutorial. Working slowly with explanation as you go is a priceless gift to bakers. I needed to learn to slow down. The cake won’t age by me taking my time and with your guidance, I take control, the cake doesn’t! You’re a gem…. with a lifetime follower. And thank you for the most awesome recipes!
Thanks Marian! I’m so glad the tutorials are helpful and that you are enjoying the recipes!
Hi there–
2 questions: 1) does this work as well with meringue buttercreams? I strongly prefer something less sweet, and would love to find a way to get the same texture on something a little lighter.
2) do you have any advice about the temperature of either the icing or the cake? I’ve had to mess with both in the past to get decent smoothness.
Thanks!
This method will work with meringue buttercream up until the paper towel part. Meringue buttercream is probably going to stick to the paper towel. I typically frost a room temperature cake with room temperature buttercream. I’ll occasionally refrigerate the cake after the crumb coat but only if there is a thin filling between the layers, like lemon curd.
The best tutorial ever! Your a natural teacher!
It helped me a lot! Well done!!
Thank you Beth! I’m so glad the tutorials are helpful!
do you have to put the cake in the fridge before using the paper towel? everytime i have done this, my icing peels off?
No, I actually wouldn’t refrigerate it or let it sit first or the buttercream will crust and then you won’t be able to use the paper towel to fix imperfections without actually creating more imperfections. If the paper towel is sticking, it’s because of the frosting consistency. It it’s too thin or sticky, it will stick a bit. Feel free to check out my post on frosting consistency.
Great tutorial! This is a valuable information for newbies like me…Thanks!
I just wonder if I really need to use the tips you suggested (the Ateco 844 and Wilton 789)? I already have a high quality decorating tip set (Chefast brand) that I just bought on Amazon. I think the tips 47 and 17 included in the set are similar to those tips you mentioned… Can you tell me if those tips I mentioned are ok to use for smoothing a cake?
If you have other similar tips, they should be fine. I did a quick google search of those tips, but couldn’t find a picture of them. I’d check out the Wilton ones and see if they look similar to yours.
Can’t but smile at the lively pink cake.Thanks for the effort and time.Many love.Mary
That’s a lot of work and time. With acrylic icing guides you can skip the crumb coat and paper towel smoothing, which is unhygienic, and create flawlessly smooth iced cakes in 5 mins.
Food safety and hygiene mandates the only tools that come in direct contact with food are tools that can be sterilized.
wow nice one ………how come your butter icing sugar is thick ?
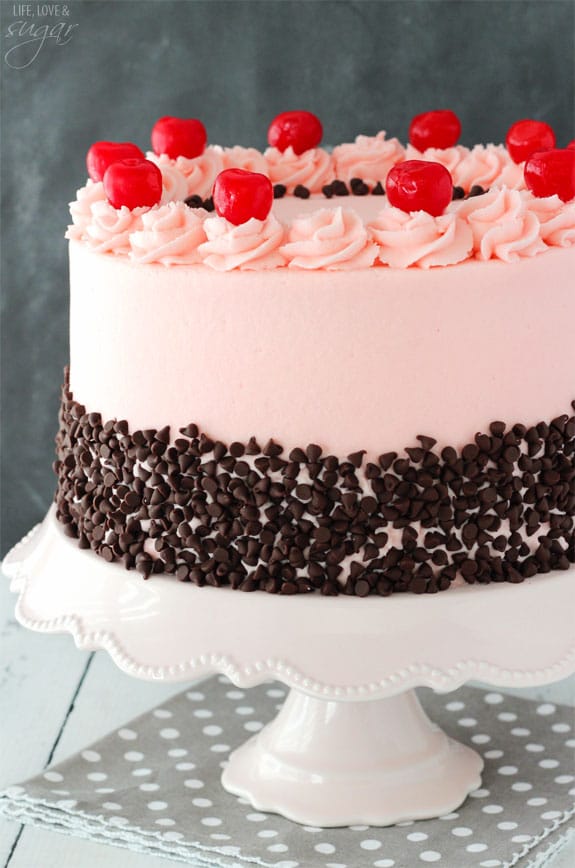
Thank you so much for this! I made your cherry chocolate chip cake yesterday and was so frustrated with my lack of frosting abilities… blah. All in all it was fine but I want to be able to achieve a nice, smooth cake. I never have seen these tips before so thanks so much!! Looks beautiful.
Awesome! I’m so glad you found it to be helpful!
Wonderful tutorial, Im just curious as to why a paper towel instead of parchment paper?
It’s a very specific paper towel – the Viva. It’s the only smooth paper towel that I’m aware of. Parchment paper becomes an issue if it wrinkles up and transfers those wrinkles onto the cake.
Ok that makes sense 🙂 I already have all the tools except the fondant smoother which I ordered yesterday (Its an add on only item on Amazon) with a few other supplies I was running low on. Anxious to give this a try sometime soon 🙂
I hope it’s helpful!
how many batches of cake recipe did u make for a tall cake like that?
It’s just one cake recipe of this cake.
Lindsay I found you website today when I was looking for Easter egg recipes for my grandchildren I am always looking for something new and today I hit the best thing ever it was so nice to see a young person so passionate about their baking skills but I also enjoy the words you have to inspire others I am 73 years old always liked baking and cooking and making things for the tea and snacks we have at our Church
Thanks so much Faye! I hope you continue to enjoy the site and recipes!
Hi Lindsay, Thanks so much for these instructions on the perfectly iced cake. But, I do have a question also my family love swiss buttercream which works great under fondant that I never use. But it isn’t a crusting recipe can you use the paper towel with it? Also I bought all the tools from your link and was wondering how you put that large tip into a bag and what size bag, and do you have to use a disposal bag for it? If so, how much would you trim it off so the icing doesn’t come out the sides of the bag, I seem to always cut the disposable bags to much with larger tips and my frosting comes out of the sides of the tip. Your cakes look beautiful by the way. I am doing my grandsons cake tomorrow for his 21st birthday so it has to be perfect. I hope you read comments still from older post so I can use this method on his cake tomorrow. And he has specifically requested your best chocolate cake that I made for my daughter in Nov. He said after eating a slice of hers. That I should open a bakery lol. She loved the frosting he couldn’t stop talking about your cake how great it tasted and I have to agree.
Thank you so much for this tutorial Lindsay. I have added a link to it on my baking blog so that readers can learn from you!
https://youcanbakethis.com
all the best
Laurel