This post may contain affiliate sales links. Please read my disclosure policy.
Today’s tutorial is all about how to frost a smooth cake. Getting that nice, smooth finish when icing a cake can take some practice, but I have been asked so many times about how I get my icing so smooth, I’ve finally put together some instructions that I hope will be helpful. Just remember you have to be patient. My first cake did not look like my current cakes. It took practice – and the right tools.
Want to frost cupcakes? See my post on how to beautifully frost your cupcakes!
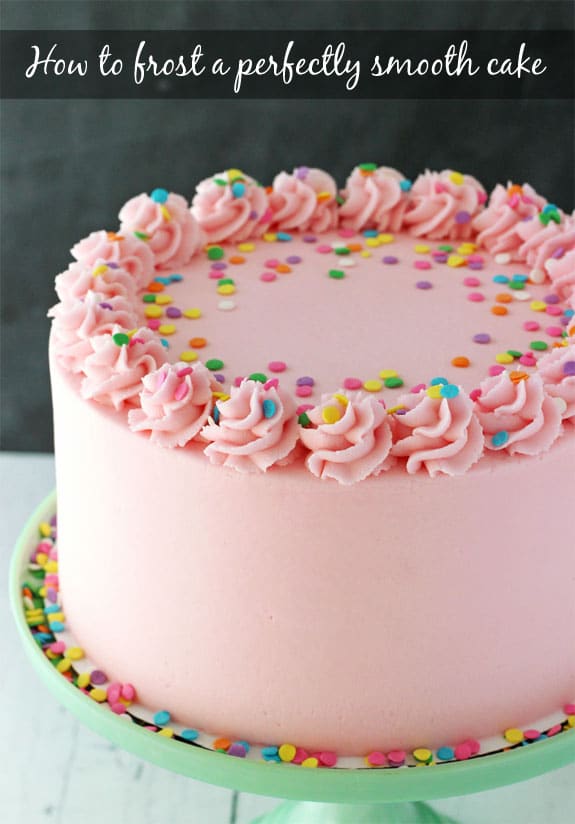
Watch How To Do It
So to start, let’s talk about the tools you’ll need:
Icing tips (Wilton #789 for icing the sides and Ateco 844 for piping the border)
Icing bags
Turntable (I use Wilton Trim-N-Turn Ultra Cake Decorating Turntable)
Icing smoother (I 100% recommend Ateco Decorating Comb over any other)
9 inch offset spatula (I use Wilton Angled Spatula)
Fondant smoother (I use Wilton Easy Glide Fondant Smoother)
Viva paper towels (Viva brand specifically)
Let’s talk about that icing smoother for a second. I linked to it above, but it’s an Ateco smoother that costs less than $5. It is the best money I have ever spent on a tool. I used to use another one, but it was big and clunky and I had no idea how much it hindered my ability to get a nice, smooth cake until I tried this one. It’s lightweight, small and easy to use.
In addition to those tools, you’ll obviously need a cake and some icing. I used regular American Buttercream (American Buttercream recipe here). For my cakes that are about this size, I go through about 2 1/2 recipes worth.
For this tutorial, I started with a cake that was already crumb coated and had a layer of icing on the top of the cake. It’s important to already have the top layer on the cake and get it as smooth as you can with your offset spatula. It’ll get further smoothed later, but it’s best to have it smooth now too.
The crumb coat isn’t entirely necessary for every cake. Typically chocolate cakes are more likely to need them, since they tend to have more crumbs. But because of the way I add my icing, it’s not always necessary. I use an icing tip and bag, which reduces crumbs mixing into the icing.
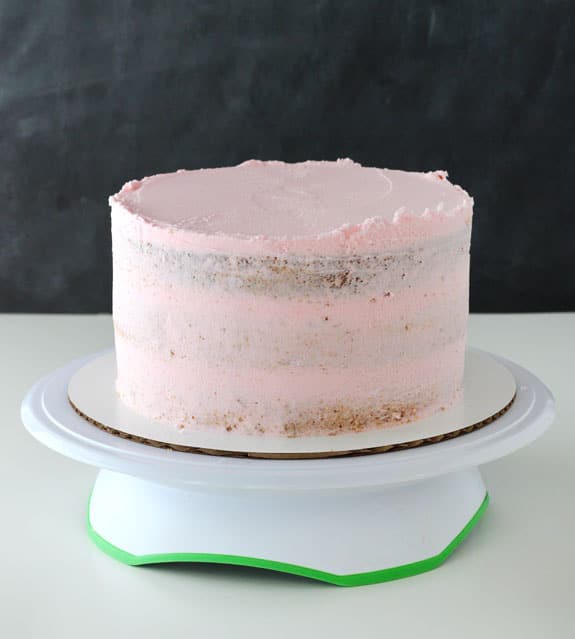
How to Frost a Cake
So to get started from here, you’ll want your icing bag fitted with the Wilton #789 icing tip and filled with icing. Starting from the bottom of the cake, pipe icing around the edge, trying to keep even pressure on the bag so that the layer of icing is even.
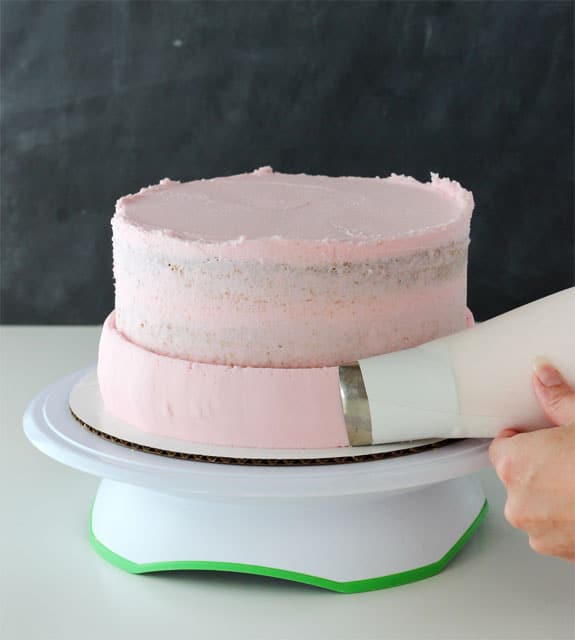
You’ll have multiple layers of piped icing, depending on the height of your cake. The top layer needs to stick above the top edge of the cake. This will be important later for smoothing the top edges/corners of the cake.
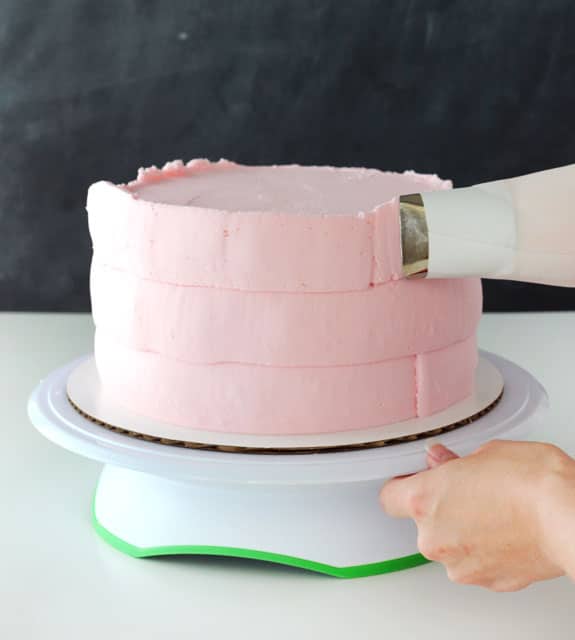
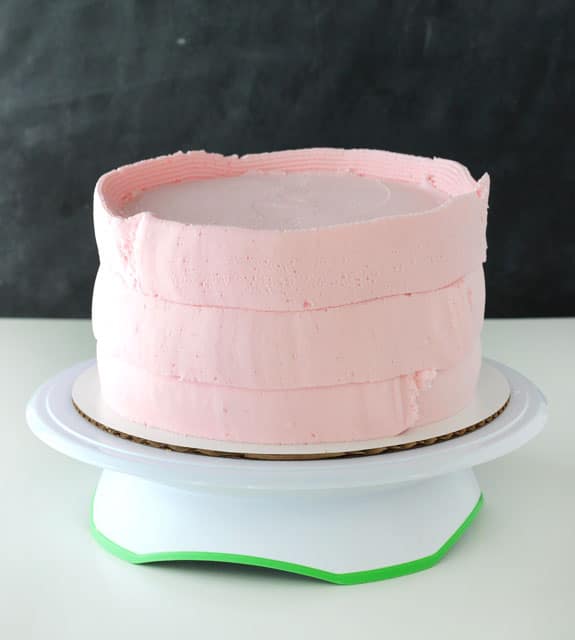
When you are done applying the icing to the sides of the cake, it’s time to smooth it. This is where the icing smoother comes in. Place it against the side of the cake. You want to hold it straight up and down, as straight as possible. Hold your icing smoother in the same place and use your other hand to turn the turntable. Continue to turn the turntable, scraping the icing off of the smoother occasionally so that there isn’t too much buildup. I clean off my smoother regularly and when I scrape the excess icing off of it, I usually also wipe it with a paper towel, so that there isn’t anything left on there that will mess up the icing once I place it back on the side of the cake.
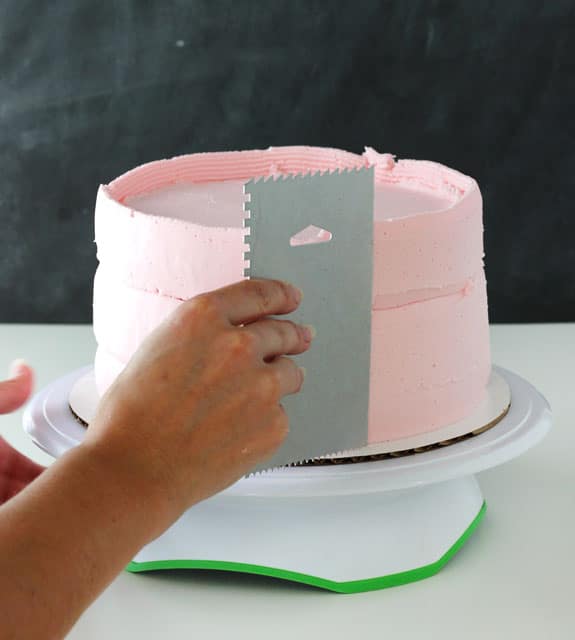
Here is an image showing the angle at which I hold the smoother. I really believe the angle makes a big difference in the way the icing smooths. Do not hold it at 90 degrees. The tighter the angle (like shown), the better the excess icing pulls around the cake and fills in gaps.
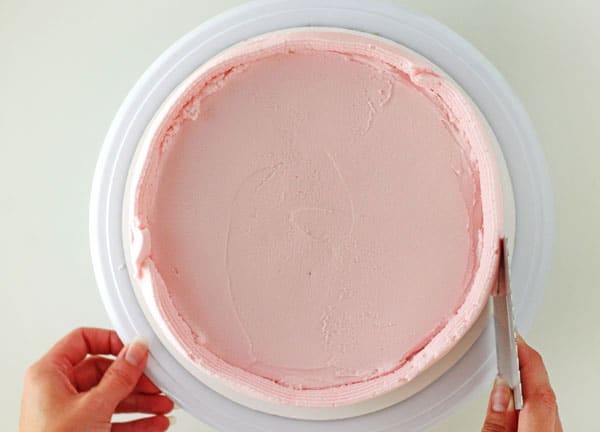
After doing a few turns of the turntable, you’ll notice some gaps that are deeper and should probably be filled in. I usually notice it at the “seems” where the three layers of icing were piped on. At this point, use your offset spatula to add some icing to the gaps. You’ll want to have a little excess icing, rather than too little.
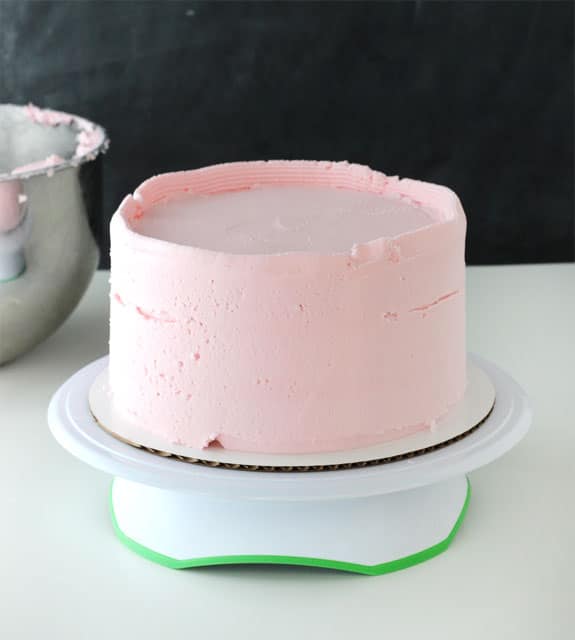
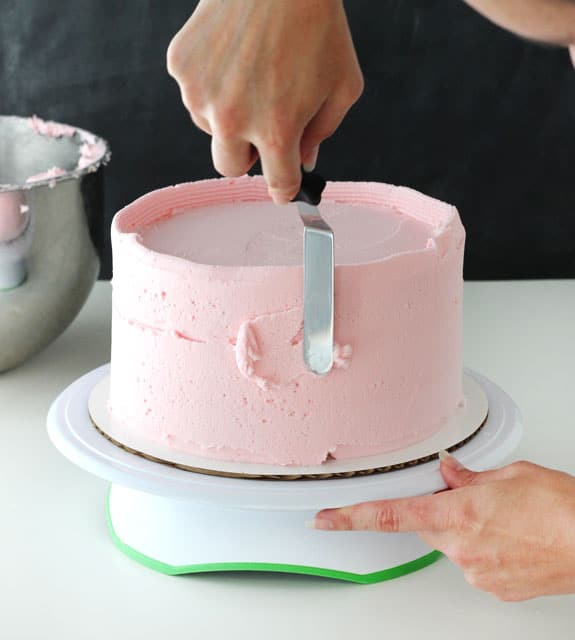
Begin smoothing the sides again, pulling the excess icing around the cake to fill in gaps, then wiping off the icing smoother as needed.
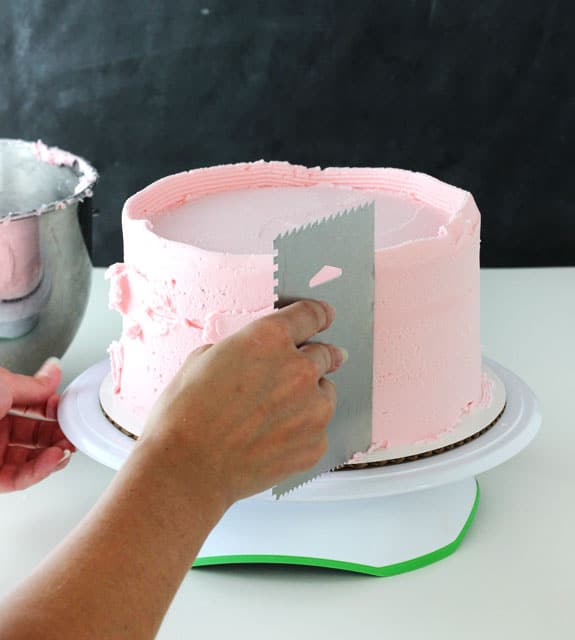
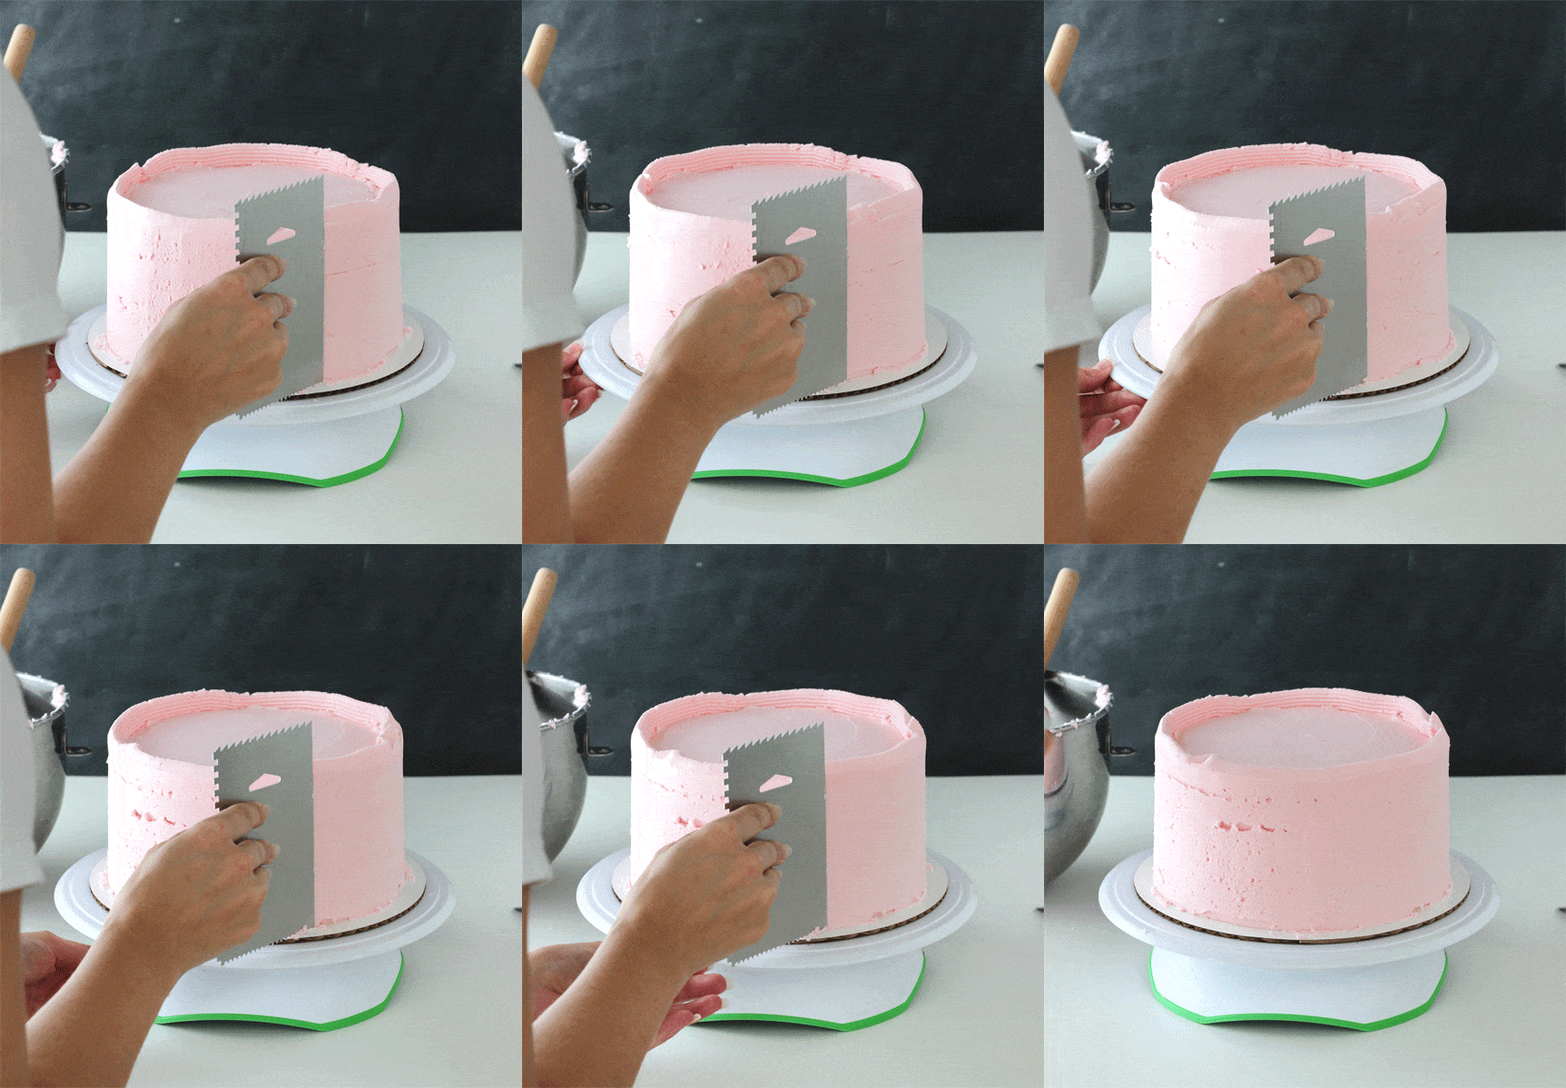
Continue working around the outside of the cake, pulling the icing, then scraping it off of the icing smoother. You can fill in more gaps if needed, just keep working the sides until you are happy with it.
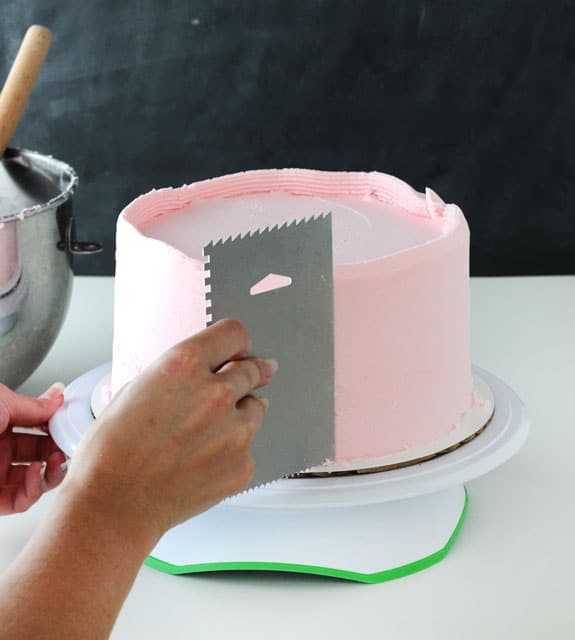
You should end up with a cake that looks like this. The sides are mostly smooth and the excess icing from the top is still sticking up above the cake. In some places you may have tiny little holes from the air in the icing. The angle that you hold the icing smoother can make a difference in how many of those you end up with. Again, tighter angle is better. Also, some of those will fill in as we smooth the sides again later with a paper towel.
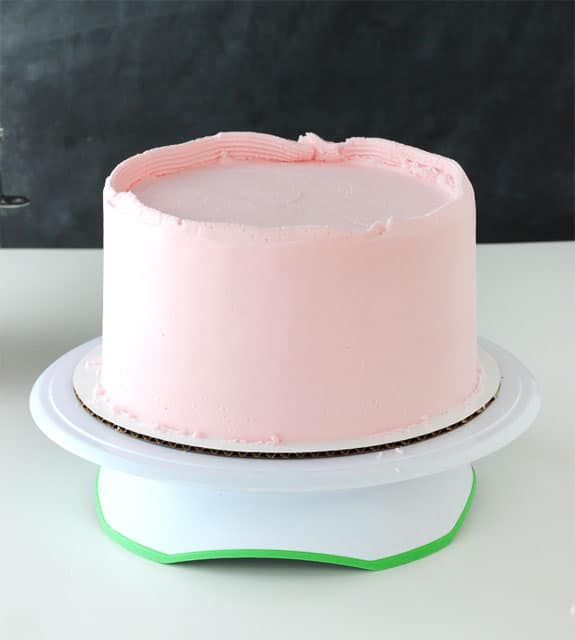
Next is always the scariest part! The top edges/corners. It was even harder to do these while taking photos. 🙂 The whole icing process took longer than normal, so my icing started to crust a bit and so it’s a little drier in the photos than yours should be at this point. You want to work as quickly as you can. If the icing starts to crust, it’s harder to work with.
To do the edges, you can use the icing smoother or the offset spatula. I use either, depending on my mood, though often I do feel like the offset spatula gives me more control. Pull the icing in towards the middle of the cake, making the corner level with the top of the cake. The spatula should be at about a 45 degree angle. The excess icing should help fill in any uneven-ness on those top corners as you pull it in.
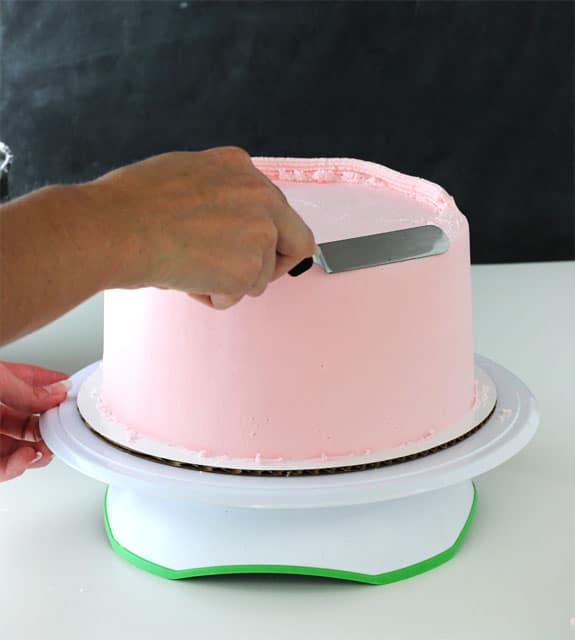
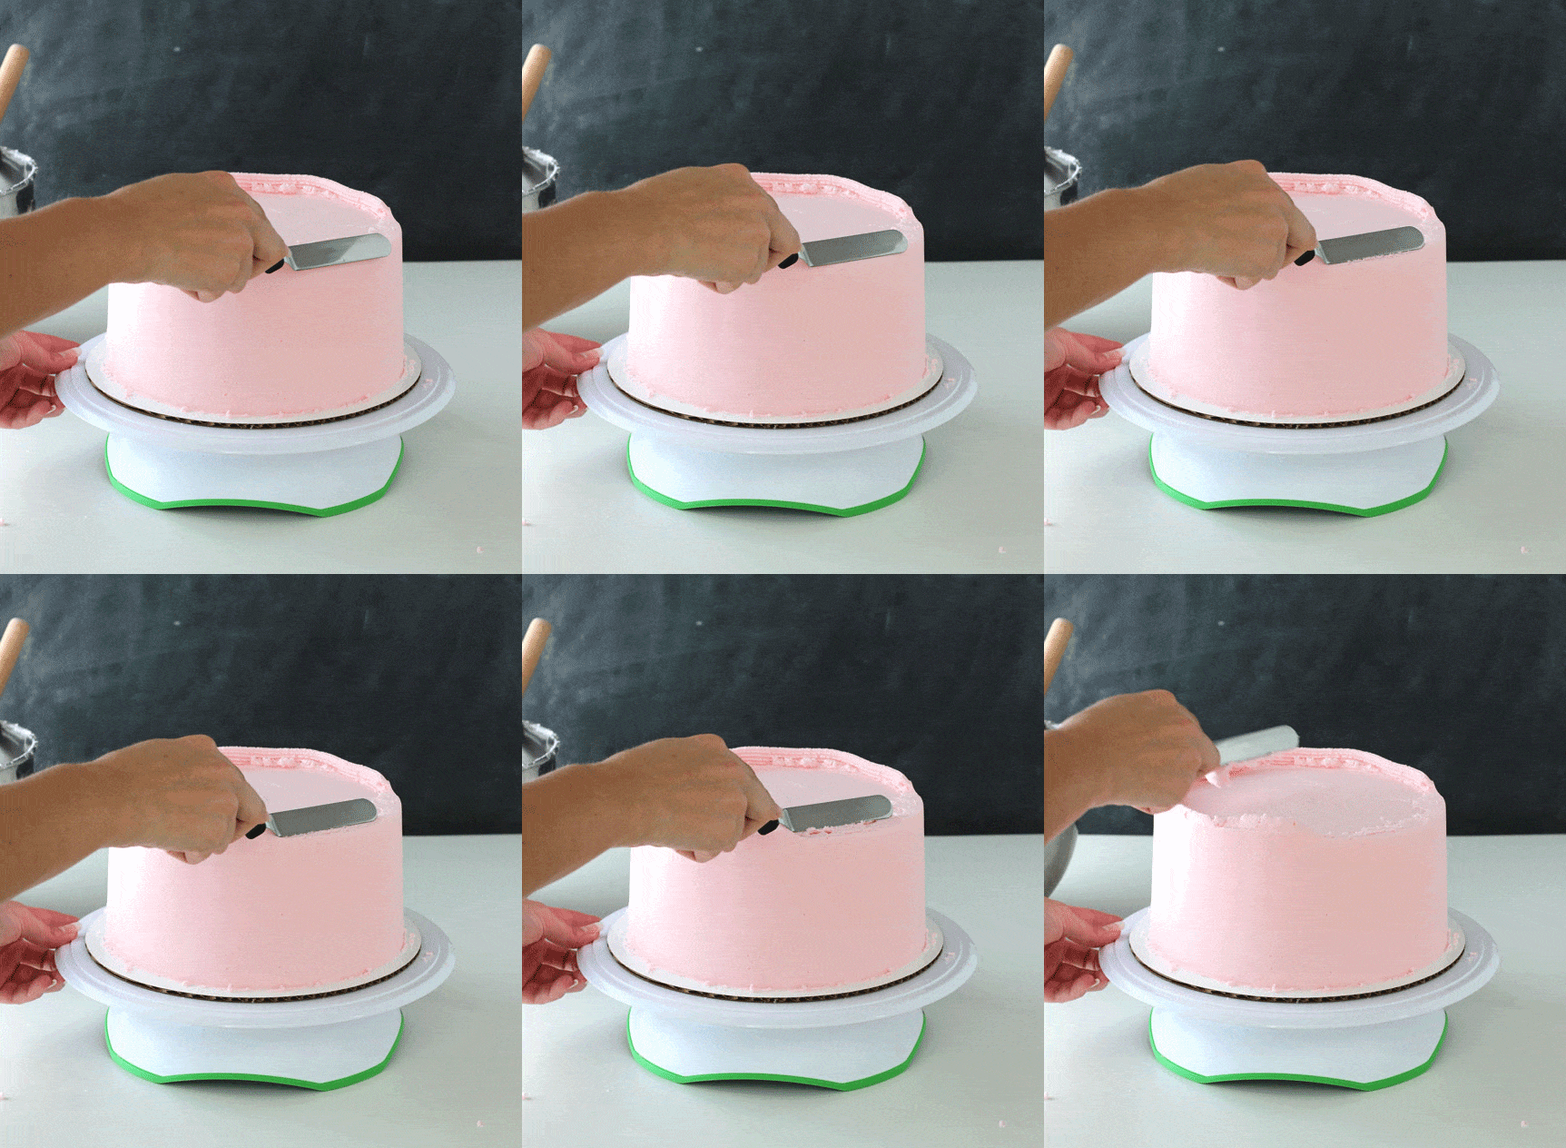
Go all the way around the cake, until it looks like the one below. Again, my icing is a bit drier than yours should be. Hopefully, your cake top is a bit smoother.
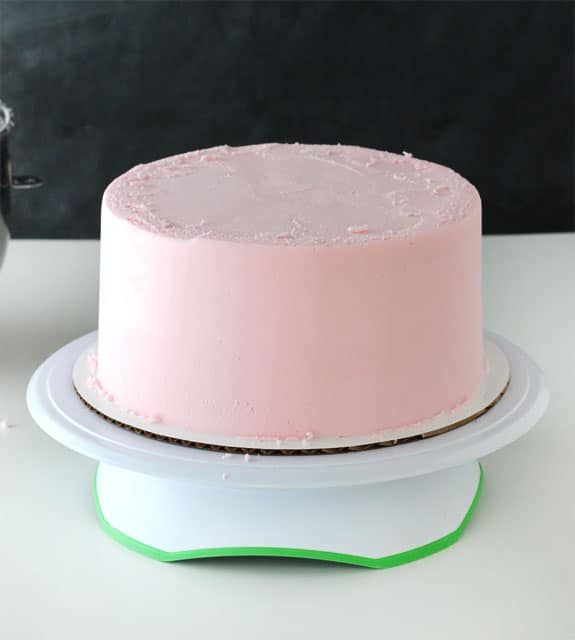
Use your offset spatula to continue to work the icing on the top of the cake and smooth the top edges. Do not mess with the sides or side part of the corners yet. Just try to get the top as smooth as you can, the sides should already be smooth.
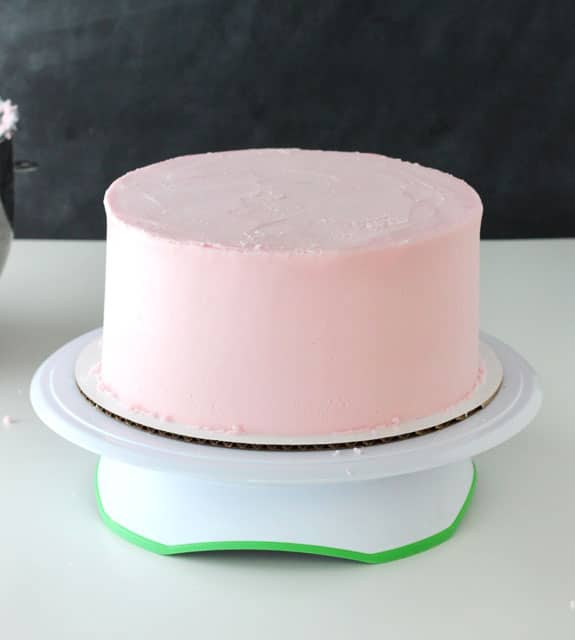
Next, we use the paper towel to finish smoothing any imperfections that are left from the offset spatula. Like I said above, I ONLY use Viva paper towels for this. They are the only paper towel I know of that doesn’t have raised patterns on it. You’ll notice that one side is smoother than the other – that’s the side you want against the cake.
I usually start with the top of the cake, since it tends to be rougher and need more work. Along with your paper towel, you’ll need the fondant smoother. Place the paper towel on the cake, smoothest side down, and rub in small circular motions with the fondant smoother to smooth out the icing. Press firmly and evenly, but not hard.
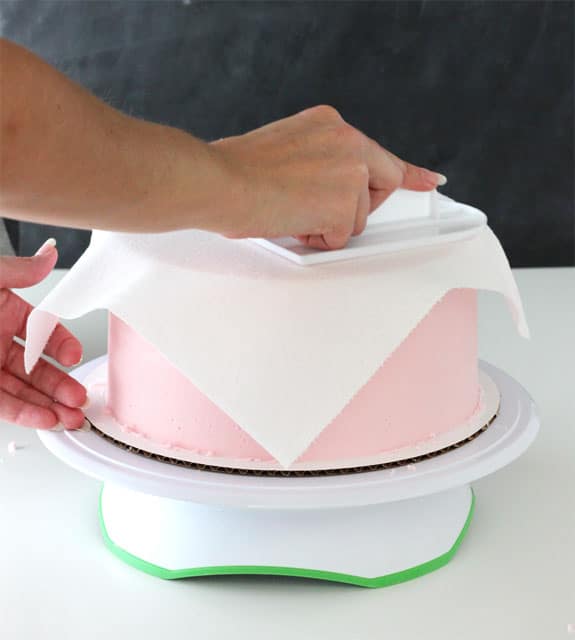
Do the same with the sides of the cake, evening out any bumps or air holes.
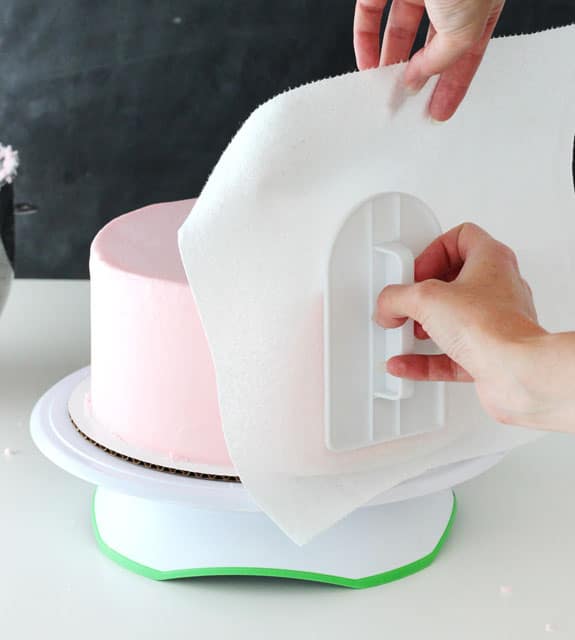
To help make sharper corners, place the paper towel on the top of cake, letting it hang over the edge and down the side. Placing your fingers against the side of the cake to keep the icing in place, use the fondant smoother to gently push the icing out towards to edge to help make that corner sharp. Do that anywhere you think the edges could use it.
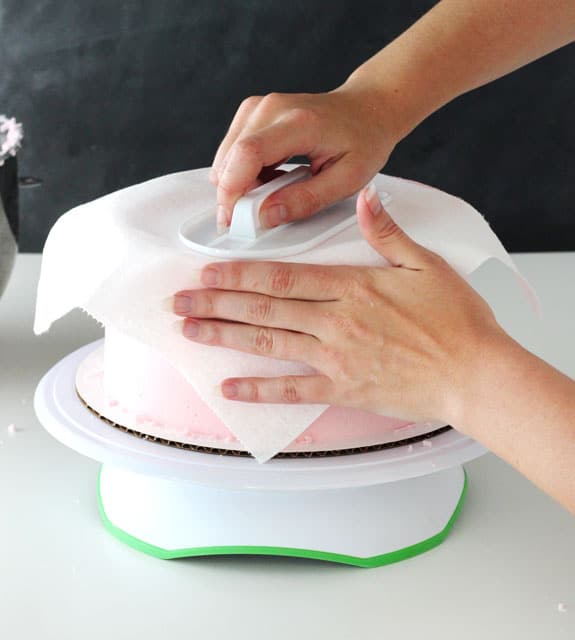
Keep working that paper towel and fondant smoother until you are happy with your cake.
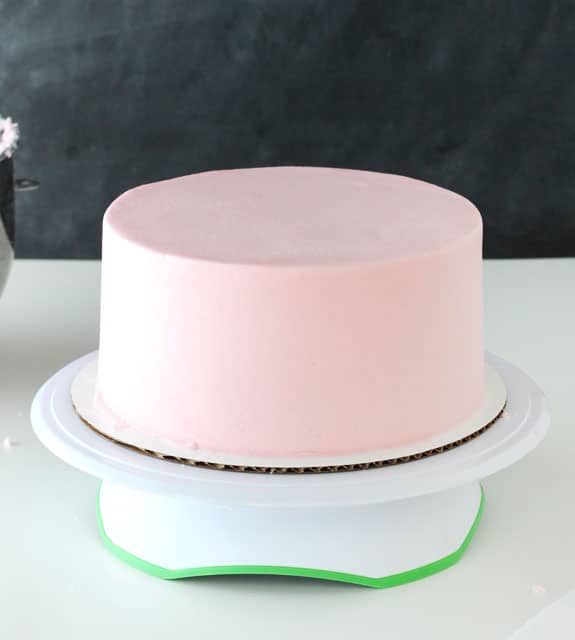
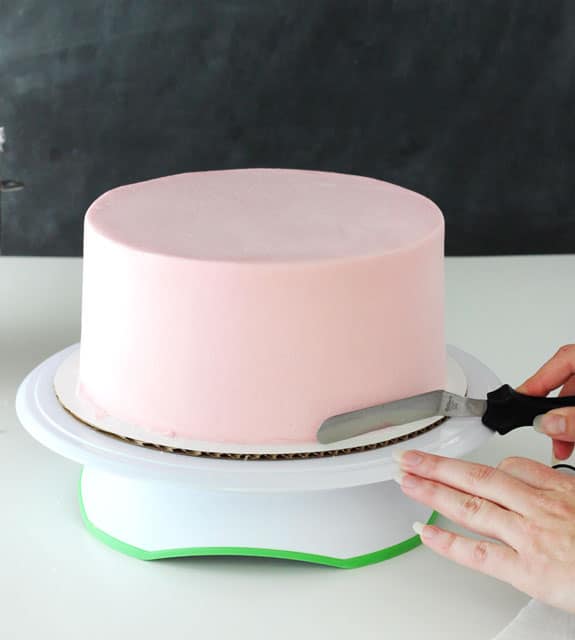
Next, I like to take my offset spatula and remove excess icing at the bottom of the cake and give it a clean edge. The spatula is placed at an angle so that nothing is actually touching the side of the cake, but just the bottom of the spatula side is grabbing the excess icing. Then pull the excess towards you and away from the cake.
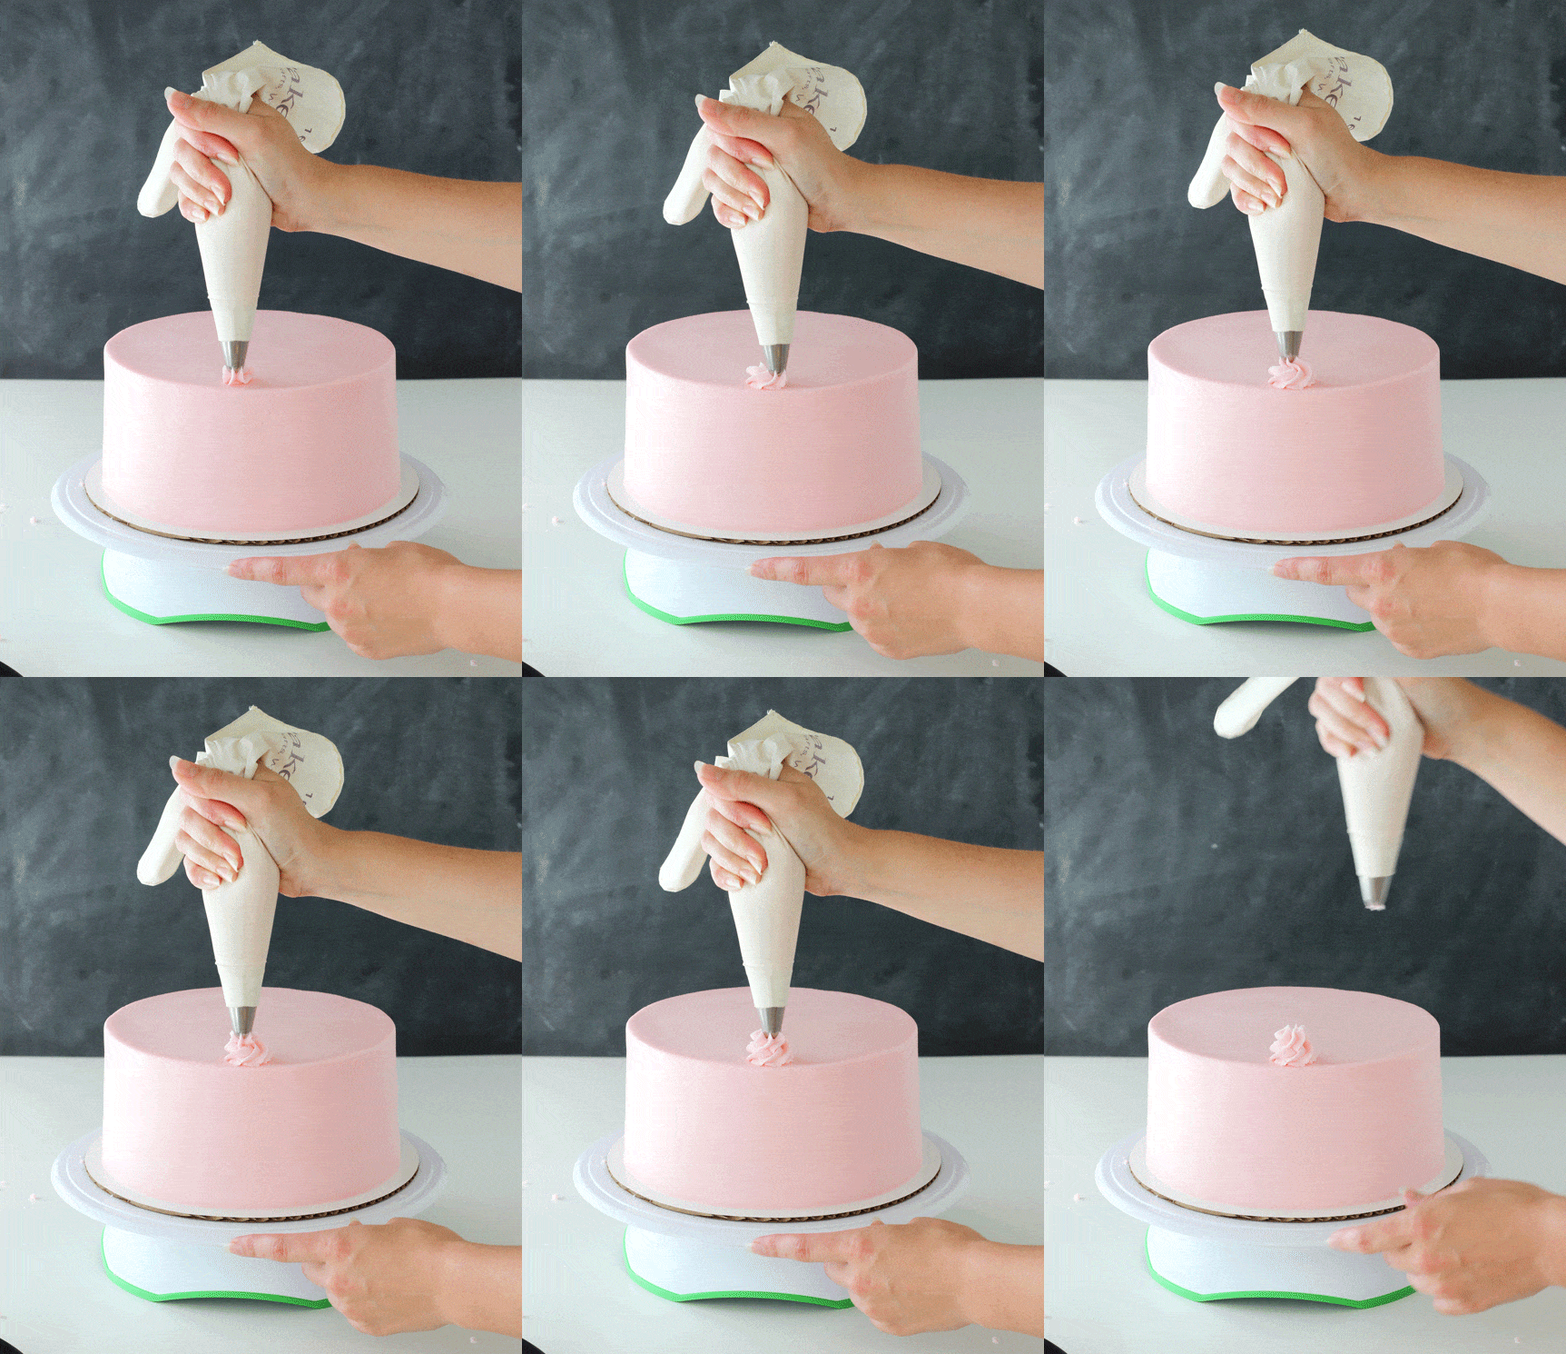
Use your other icing tip to pipe on your border. I used Ateco tip 844, but you could also use Wilton 1M, which is similar, or any other tip you prefer.
Sprinkle with some spraaaankles (I used Wilton Spring Confetti Sprinkles!
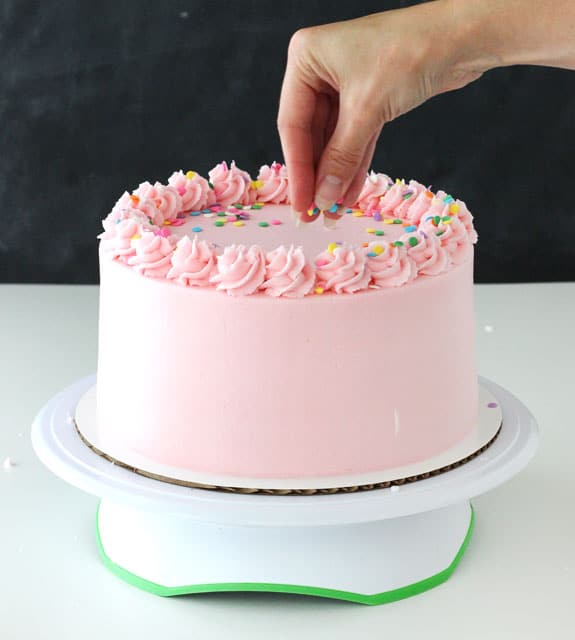
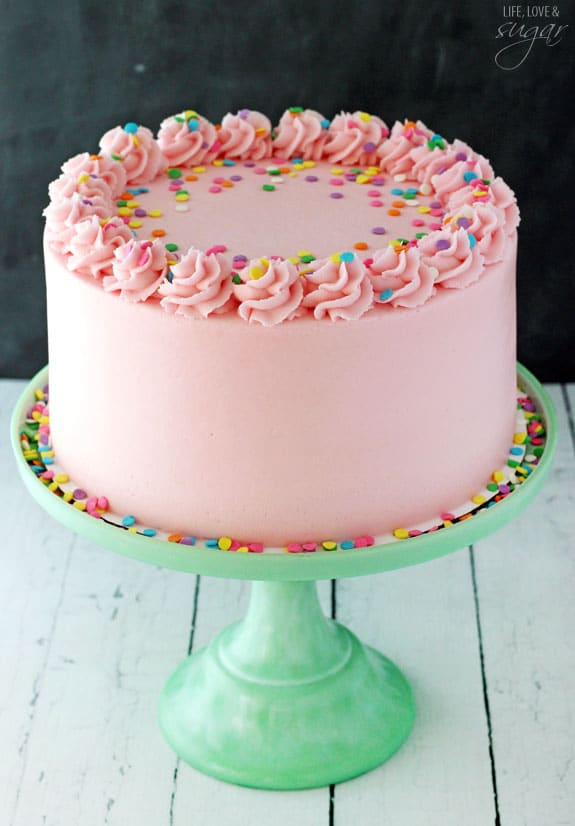
And you’re done! Put your cake on your favorite cake stand, add a few more sprinkles and dig in!! It’s time to eat all that hard work. 😉
*Update* For some help with getting the right frosting consistency, check out my new post, How to Get the Right Frosting Consistency, on how I like to do it.
This page includes affiliate links.

Learn how to decorate Sugar Cookies with Royal Icing
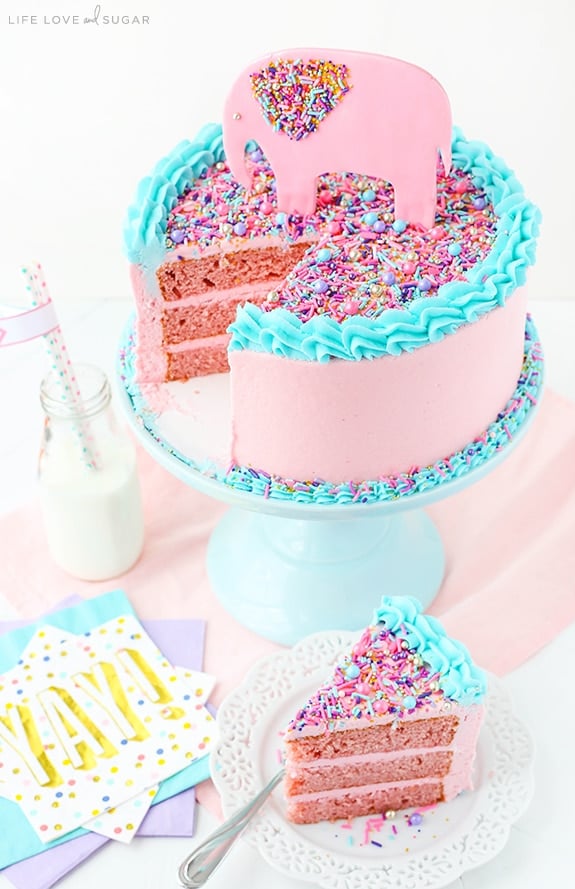
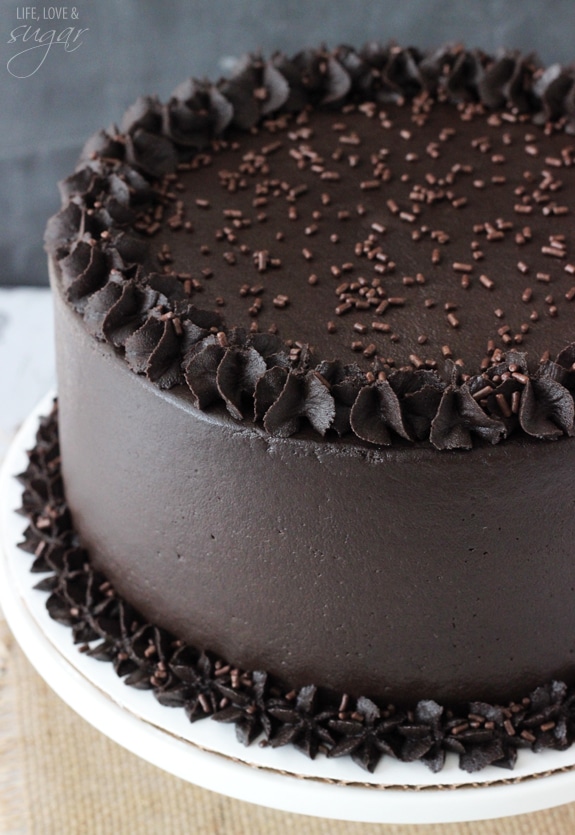
Practice your smoothing technique on some of these delicious cakes:
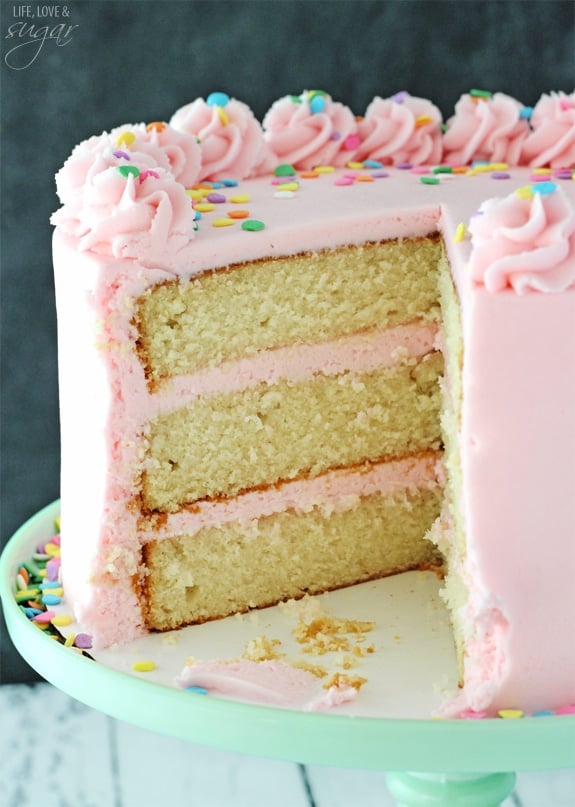
Moist and Fluffy Vanilla Cake
(the recipe for the cake in the tutorial above!)







This may be a silly question, but I’m not the biggest fan of fondant but I want the same look. So I was thinking instead of doing fondant over the entire cake I would try doing your smooth buttercream frosting tutorial, but then I got to thinking, would you still be able to stick fondant decorations onto the sides of the cake without the icing peeling away? For some reason I just get this horrible vision of doing all this work just to see it fall apart haha. Thanks again for your great tutorial!
Yes, you can still add fondant decorations. I use a sugar water made by dissolving some fondant in a little bit of water. Then I use a brush to add the sugar water to the fondant decoration (making it sticky) and press it lightly onto the cake. As long as they aren’t really big or heavy decorations, they should be fine.
Thank you a million times for this tutorial. It is by far the best one I’ve found on the interwebs. : )
I’ve already tried it once and my cake looked 150% better already. Love your site!
I’m so glad to hear it’s helping!! Thanks Chris!
I’ve used the Viva alone and it workedpretty well but it is so great to see your steps prior to the Viva. One little question though. What size piping bag are you using? I just fussed at myself for buying so much baking stuff but here I go again! Thanks for the great directions!
It’s a 16 inch bag I believe.
I have a question that may seem silly. How do you keep your cake from sliding around on a cake turntable and how do you you transfer the cake to a pretty cake stand after it has been frosted? Thanks! Btw, love your tutorial! DeeDee
My cake stand actually has a non-slide surface, but if yours is sliding around a great trick is to use the stuff that helps rugs not slip around on a hardwood floor. I use them all the time when transporting cakes and desserts to keep them from sliding around the car. Just cut it into small pieces. A small piece will work wonders. As for transferring the frosted cake to a stand, I frost cakes on cardboard cake circles. If you look in these photos of the cake on the stand, you can see it underneath the sprinkles. I trim it down so that it fits within the stand. I hope that helps! Thanks!
These cakes look so exquisite and the frosting is like art. I love making cakes and I consider my mixes to be super delicious. When it comes to frosting though, that is an art I have yet to perfect!
That’s so much for an amazing tutorial I’m so excited to try! I’m new to trying my own decorated cakes so is it best to freeze for a short time before icing it? Thanks so much!
I read a lot of tutorials that talk about refrigerating cakes first. Unless my cake has a filling that is supposed to be refrigerated and I want it to firm up before frosting (like a lemon curd), I don’t refrigerate or freeze it first. If you try it though and find that refrigerating helps, you certainly can.
Thank You So Much You Literally Saved My Life Today
THANK YOU
This is the MOST beautiful cake ever!! I love your tutorial. I want to try to make a cake as smooth as yours! I’ve dabbled in cake decorating in the past and I really love doing it, but I haven’t made a cake in years! I think I might dig out my pastry bags and give this cake a whirl! All of your cakes are gorgeous and look so wonderfully delicious! I don’t remember how I got to your blog, but I am so glad I did! 🙂
Thank you Nancy! I’m so glad you found the blog too. 🙂 I hope you give it a try!
Beautiful cake! How do you keep the seam between the layers from showing? I tend to have a line that i can never seem to hide. Also is the paper towel dry or damp? Thanks for your help!
The line you mention I’m guessing is from the filling between your cake layers. That usually is a frosting or filling consistency issue. You want any frosting between your layers to be thick enough that it isn’t going to squish out and create those lines or bulging. Check out my tutorial for filling and stacking cakes, if you’d like. And the paper towel is dry.
This is a beautiful cake and I appreciate your step by step tutorial with photos. I do have one question and it’s how do you avoid frosting sticking to the paper towel? Did the cake go into the the refrigerator for a bit?
No, I don’t refrigerate the cake. The buttercream is a crusting buttercream, so you actually need to use the paper towel right away. I linked to the buttercream recipe I use in the post above. Not all frostings will work with the paper towel.
I have alwaysed loved your frosting on your cakes! I am so glad you created this tutorial. I have used wax paper similarly to the paper towel. But there is a chance of wrinkles with the wax. I am going to try this method soon!
Thanks Chandra! Yes, I’d think wax paper could give wrinkles. The paper towels are great!
What kind of frosting is this that your paper towel doesn’t stick to the frosting is there a trick there?
I link to the recipe above, but here is the link as well. I talk a good bit about the recipe in that post.
really nice and helpful , but can i use something else ,like baking paper ,as i do not live in america and i can’t use the Viva paper towels , as not found where i live and i looked around and can’t find any smooth paper towels ,all the brands have paten , only the blue paper towel used on the kitchens restaurants or cafe do not have ant paten buy they blue and i am afraid not good enough or maybe the colour will transfer . Thank you and good luck with all you do.
You could try baking paper, but just be careful to not wrinkle it or that will transfer to the cake.
Great work! Thank you very much for helpful comment. You’re great!
You are a skilled woman. Will be back to your blog again and again. My house is filled with the lovely smell of the chocolate cakes from the Turtle Cake recipe. My friend is going to love this for her birthday cake. I am looking forward to trying your icing techniques.
Hi Lindsay! This isn’t really a comment- I didn’t know how to contact you. I just started reblogging after a long break and I made a cake utilizing your method. I have received some good feedback on it on IG and will be posting it on my blog. I would like to to put a link in my blog to send them to your page since I used your method/tools. I think your post was so well done that it inspired me to try it and I’d like to share it with my friends! I would be happy to send you a pic of the cake if you would like to review. Thanks! Have a great holiday!
Hi Kim! I’m so glad you found the tutorial helpful. I’d love for you to share it by linking back to me for the instructions – thank you!
Awesome tutorial! Thanks for including links for the tools you used! So helpful!