This post may contain affiliate sales links. Please read my disclosure policy.
Want to learn how to decorate cookies with royal icing? Today is the day! Follow this detailed guide to making delicious royal icing and learn how to frost with it!

Table of Contents
While decorating cookies with royal icing happens all year long, there’s no doubt that there’s an increase in cutout cookie making and cookie decorating around Christmas. It’s easily one of the most fun and festive Christmas cookies out there. I have some great cookie recipes you can use to get started, no matter the time of year. Gingerbread cookies are a great option, as are my cutout cookie recipes.
- Cutout Sugar Cookies – This was my first cutout cookie recipe and the one I made as a kid. It’s a great classic cutout. They puff up a decent bit when they bake, so I find it best to not cut them too thick, or they puff up even more.
- Soft Cut Out Sugar Cookies – This recipe uses cornstarch to make sure that the cookies don’t spread and hold their shape super well. The cornstarch also helps to tenderize the cookie. The recipe doesn’t include leavening, since that will make the cookie puff up a bit, which can alter the shape of the cookie a bit. That said, I recently tested them with a little leavening added, since it does add some nice chewiness to the cookies. That note is at the bottom of the recipe and they still hold their shape beautifully.
- Chocolate Cut Out Cookies – This is the recipe used for the chocolate cutouts in this post. It’s a classic chocolate cutout cookie. It holds its shape, but does use just a touch of leavening to add some chewiness to the cookies.
What is Royal Icing?
Royal icing is an icing that’s commonly used for decorating cookies. It’s super easy to make and only need a few ingredients – meringue powder, water and powdered sugar. It’s dries hard, so that you can stack your cookies, but not so hard that you can’t bite into it. It also insulates cookies well, so they last longer too.
When Should I Use Royal Icing?
Royal icing is going to be best when you want the most control over piping your designs and want to do things that are a little more intricate. It’s also ideal when you want it to dry nice and firm. There are cookie decorating alternatives, but royal icing is the traditional icing used for decorating cookies.


Ingredients You’ll Need
Alright, so now that you’ve chosen to use royal icing to decorate your sugar cookies, let’s talk about what you’ll need. First up is your ingredients. It’s a short list. Scroll down to the recipe card below for exact measurements.
Ingredients
- Meringue powder – This is added to the royal icing as a substitute for using actual raw egg whites. It provides stability, volume and sheen to the icing. And since it’s shelf stable, you don’t need to refrigerate royal icing. There are lots of options available. Wilton makes one that you could probably find locally at stores such as Walmart, Michael’s or Hobby Lobby. You can also find a lot of options online.
- Powdered sugar – Also adds volume to the icing and thickens it. It also dissolves easily in the icing.
- Water – You’ll need water to thin the icing a bit. Aside from the vanilla, it’s the only liquid used in royal icing.
- Vanilla extract – For flavor, of course. But feel free to swap it out for almond extract (or another flavor), or use a combination of the two.
- Gel icing colors – The gel colors are thicker and more intense than regular food coloring, so that you don’t have to use as much and it doesn’t thin the icing out as much. A common one is Wilton icing color, which can usually be found at stores like Michaels, Hobby Lobby, Walmart, or online. I also like Americolor gels and the little squeeze bottles they come in. They are sometimes a little easier to work with.
How to Make Royal Icing
Let’s get to it! Royal icing isn’t hard to make, but you do have to pay attention to it. You can find the printable version of the instructions in the recipe card below.
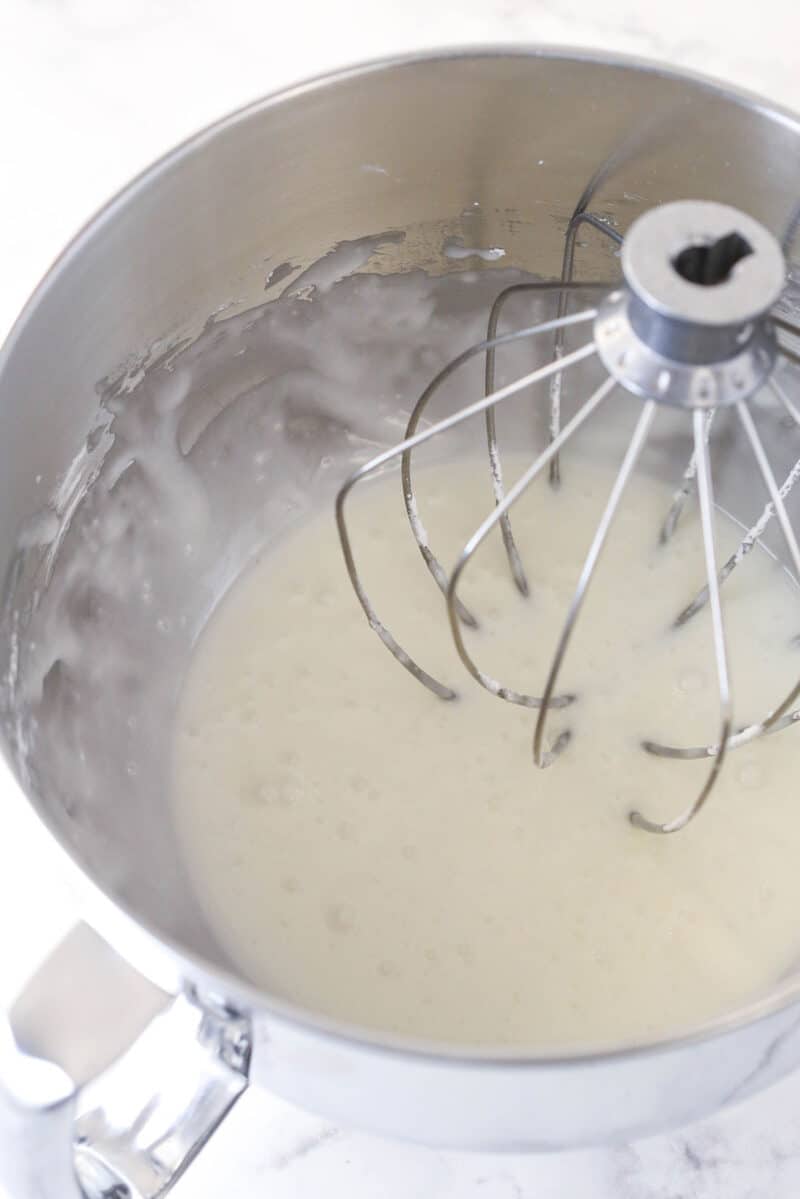
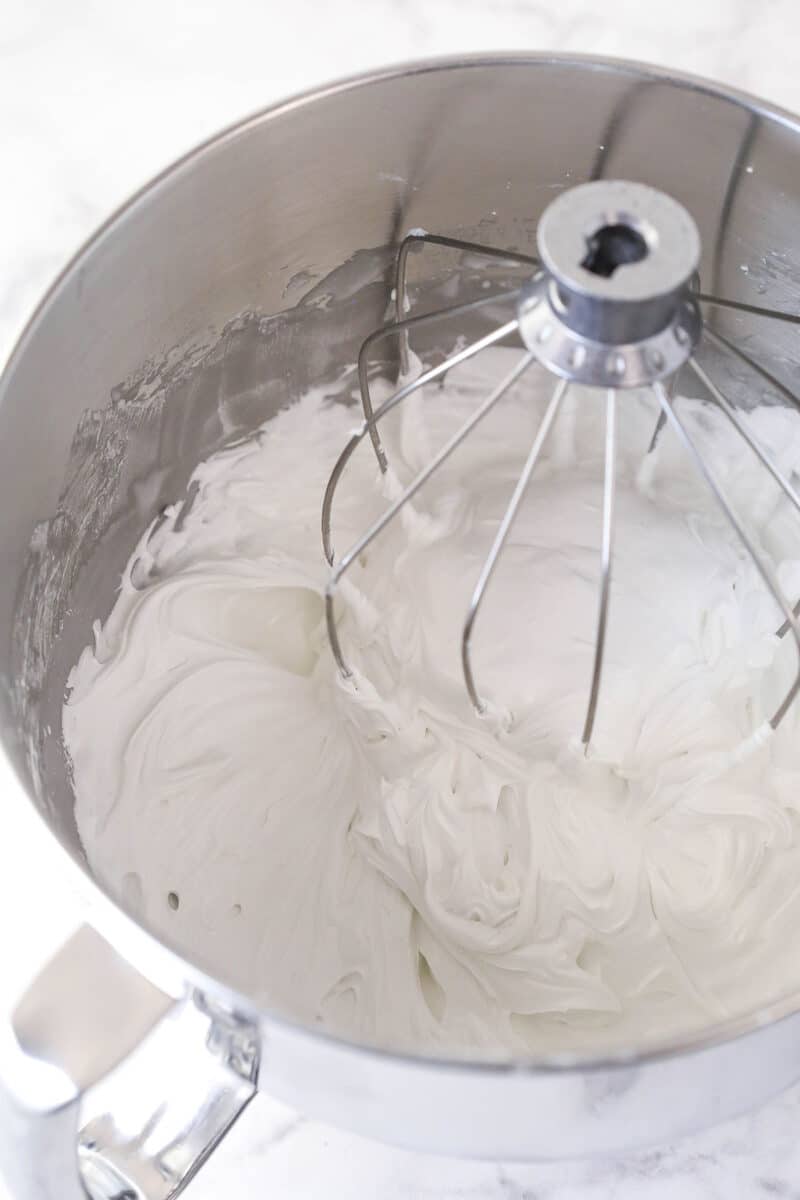
- Make the icing: To make the royal icing, you’ll combine the meringue powder and powdered sugar, then add water. I start with 6 tablespoons of water and then thin it out further afterwards. Mix together for 7-10 minutes on low to medium speed. I use my whisk attachment on my mixer. Keep mixing until the icing looses it’s sheen.
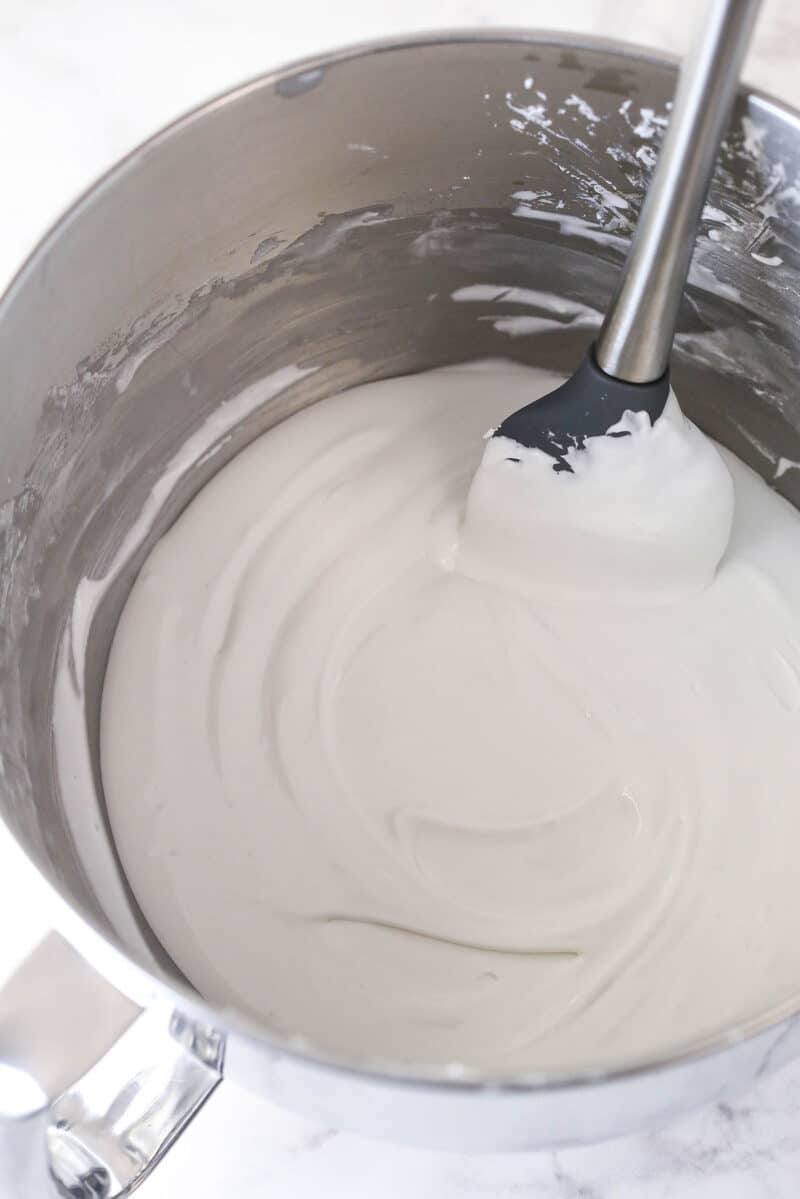
- Thin it out a bit: Once icing is ready, add the vanilla extract and additional water to get the right consistency for piping. You can thin it out before or after you add the coloring. I thin it out a bit before adding color, keeping in mind that it will thin out more as I add color. Then I can finish that process once the color has been added.
PRO TIP! Once the icing is made, be sure to keep a damp cloth over the bowl when you aren’t using it or it will dry quickly. I typically cover the bowls with a paper towel and sprinkle water over it. Just be sure to sprinkle more water on as it dries.
How To Color Royal Icing
Once you know how many colors of icing you’ll need, divide the icing between that number of bowls and color the icing. Keep in mind you may need more of one color than another and divide based on how much you think you’ll need of each color.
I use toothpicks to slowly add the amount of color I need, adding small amount at a time. There’s nothing worse than adding too much of a color and ruining your icing. Start with small amounts – it’s much easier to add more color than to remove it.
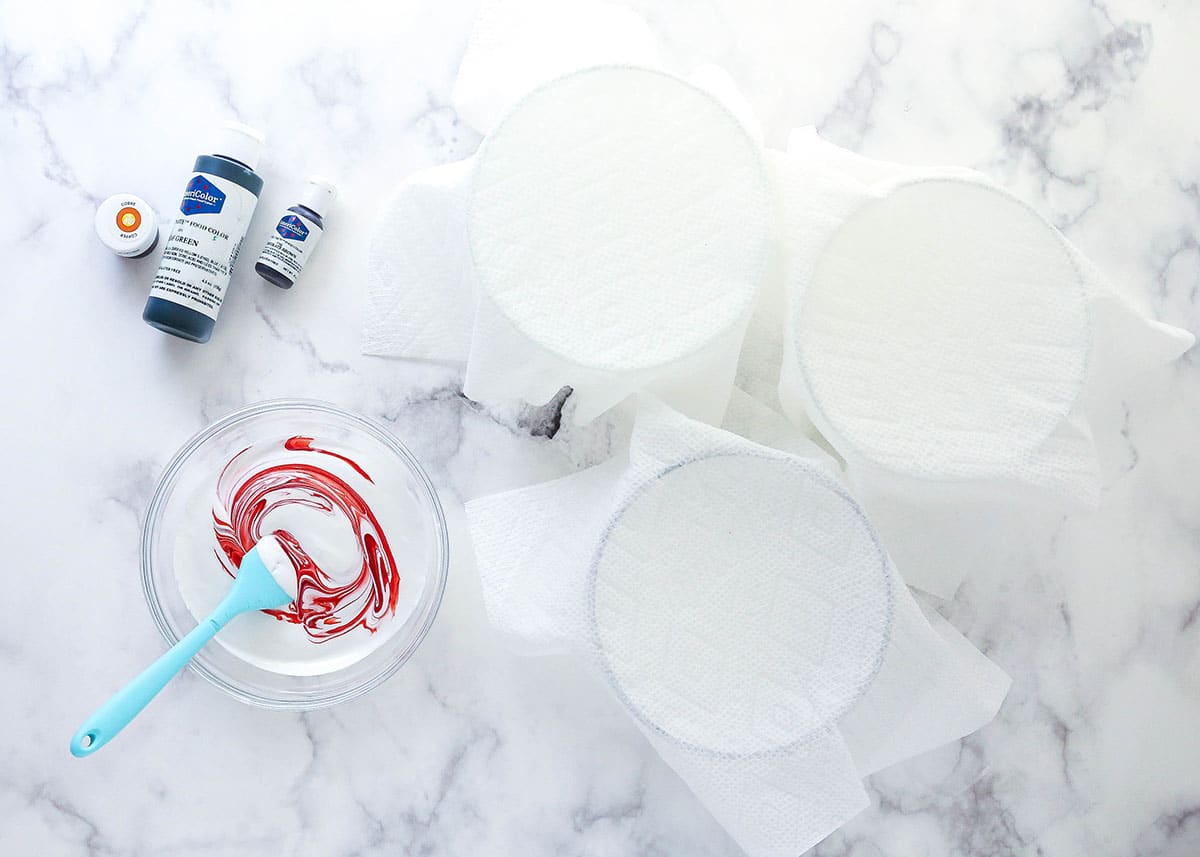
PRO TIP! Keep in mind that the color actually darkens as the icing sits. So black, for example, might look like a really dark grey at first, but as it dries on your cookie it’ll darken.
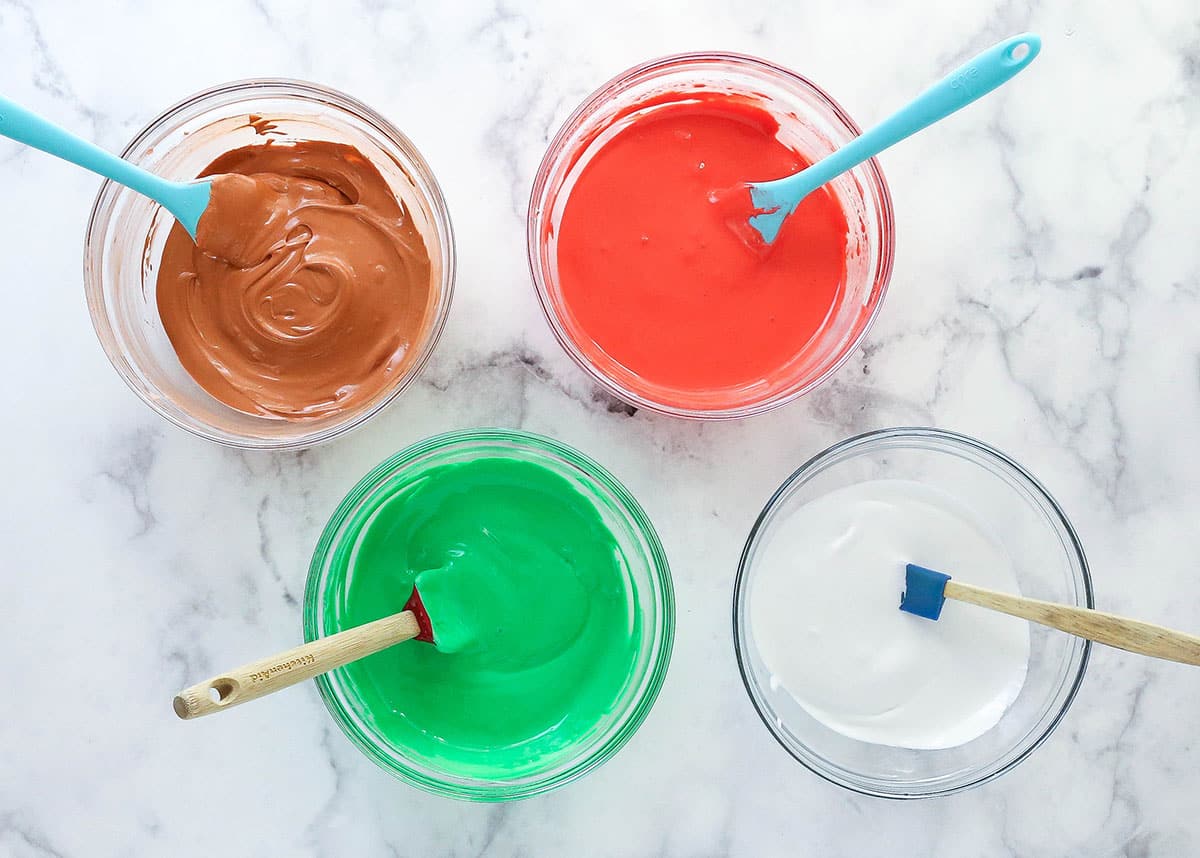
Testing Royal Icing Consistency
After you add the color to your icing, you can check the consistency and add more water if needed, to get the right icing consistency. You may want some a little thicker, for outlining, and some a little thinner for “flooding” and filling in the large areas. I find that it is a pain to have to make two consistencies of every icing color so I try to make one consistency that’s a little in the middle, but will work for everything.
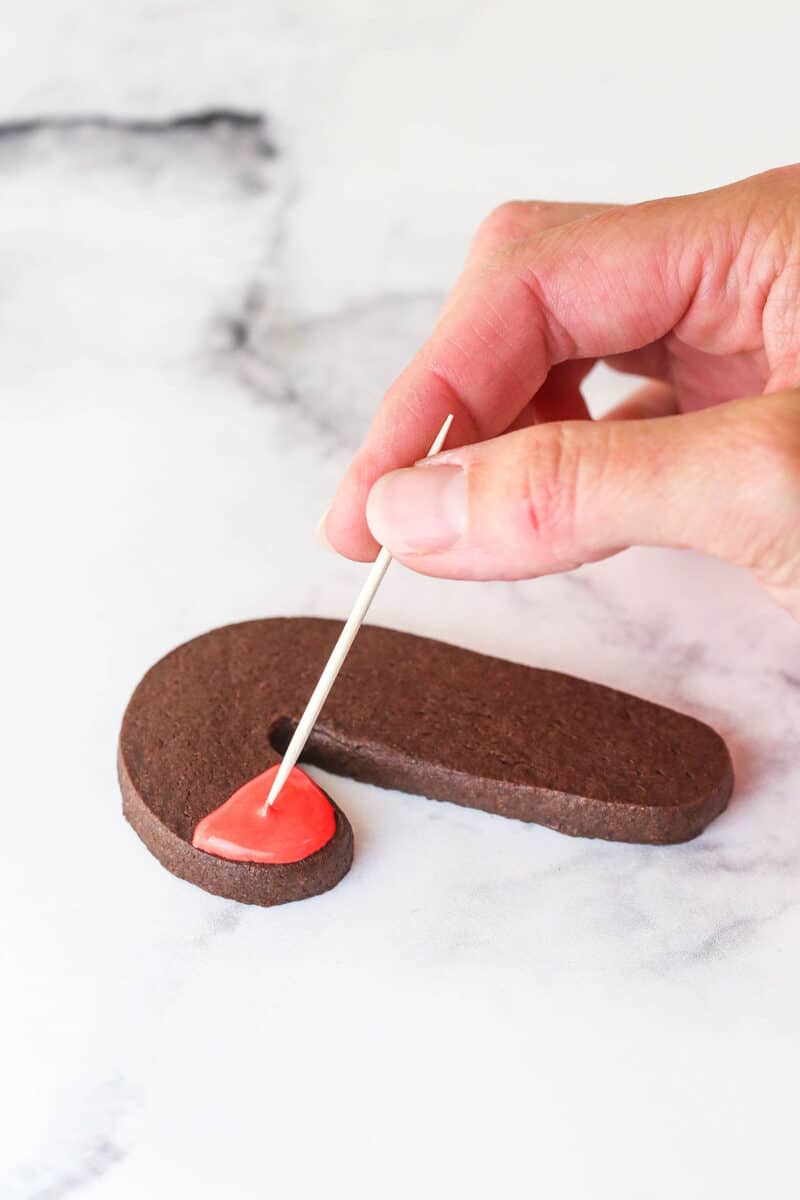
To test it, I run a toothpick through the center of the icing. You want to icing to naturally fill that line back in – but not too quickly. It should actually need some encouragement in the form of shaking from you to come completely back together. You’ll notice in the video that I let the icing sit for couple seconds, then shake it to come together completely. I do the same thing when icing the actually cookies. When I fill in the icing, it’ll mostly come together on it’s own but I shake it a little bit to help it come together completely. You can also use a toothpick to move the icing around and help it come together.
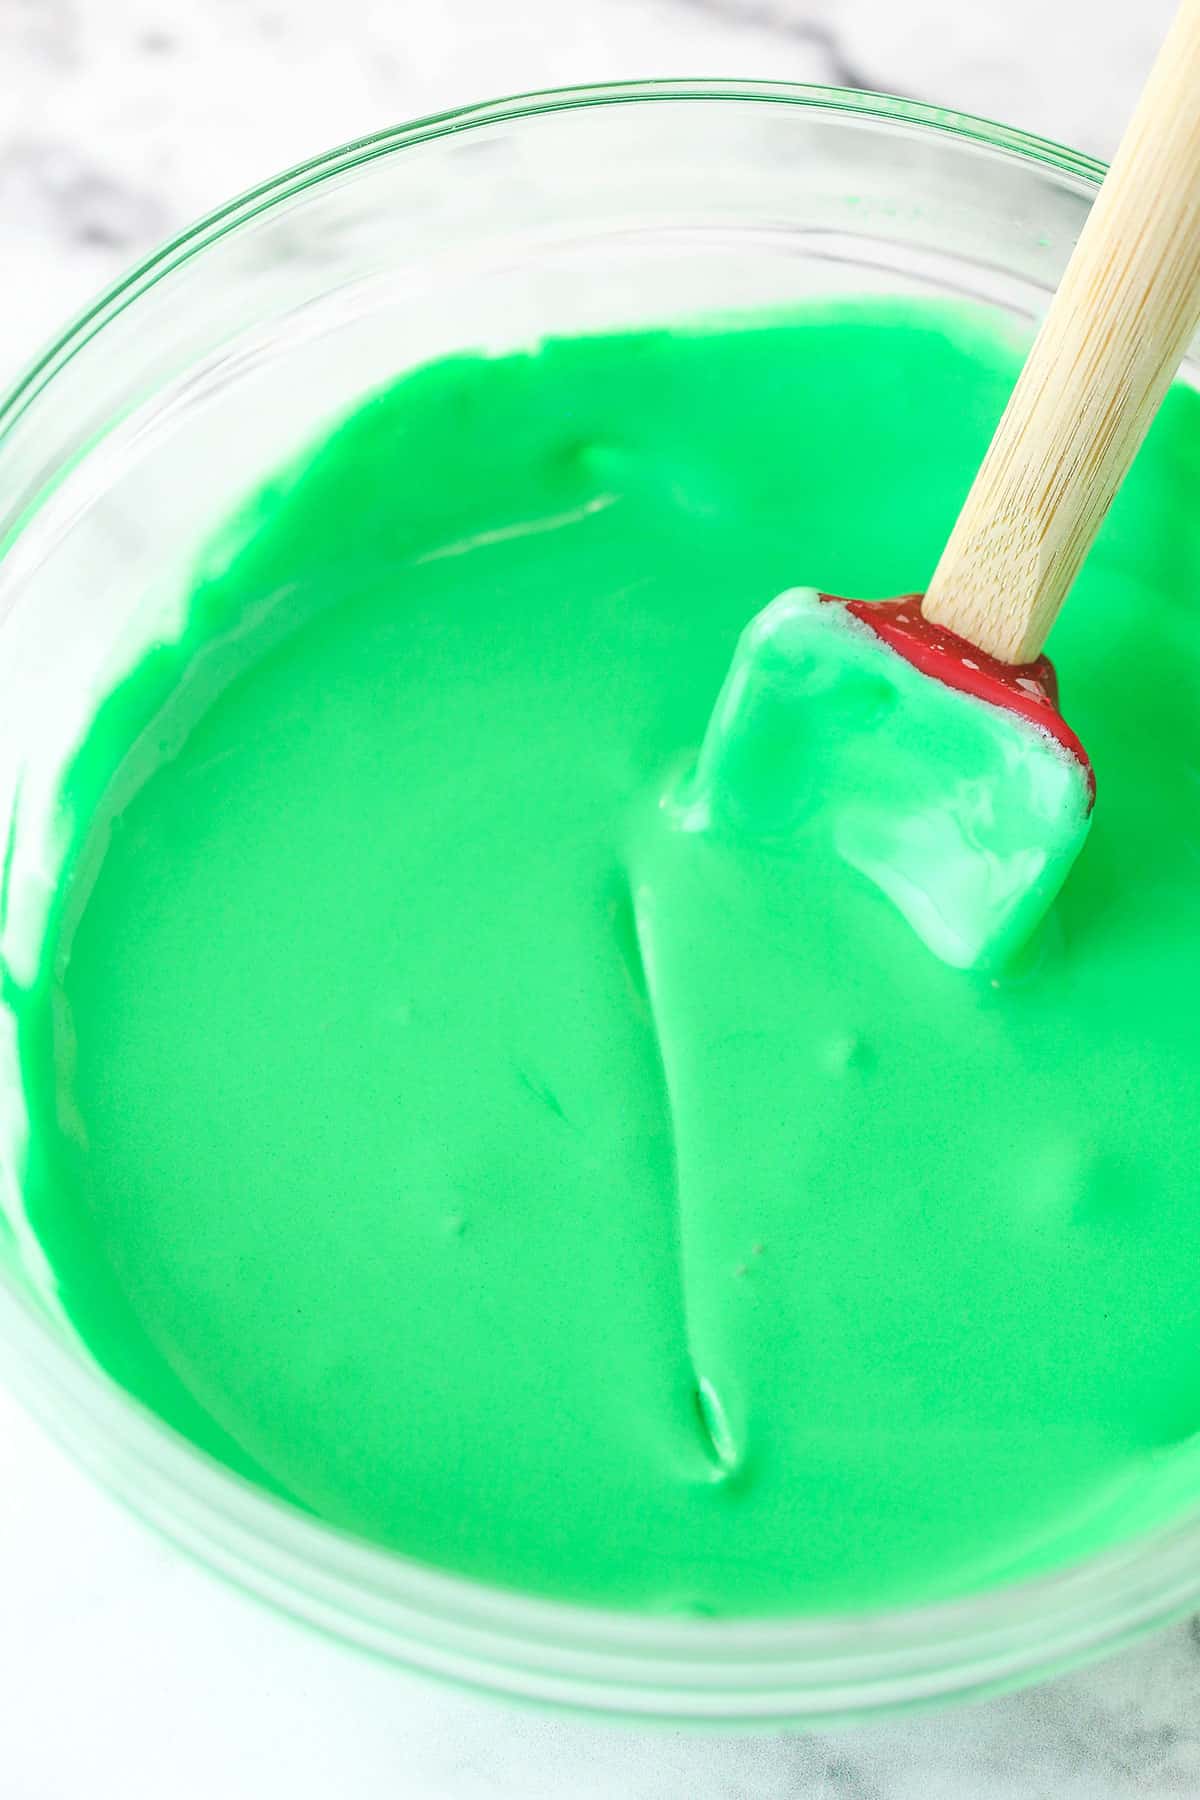
Get Ready, Get Set!
Time to get your piping bags ready. You’re almost there! Here are the tools I’d recommend having on hand.
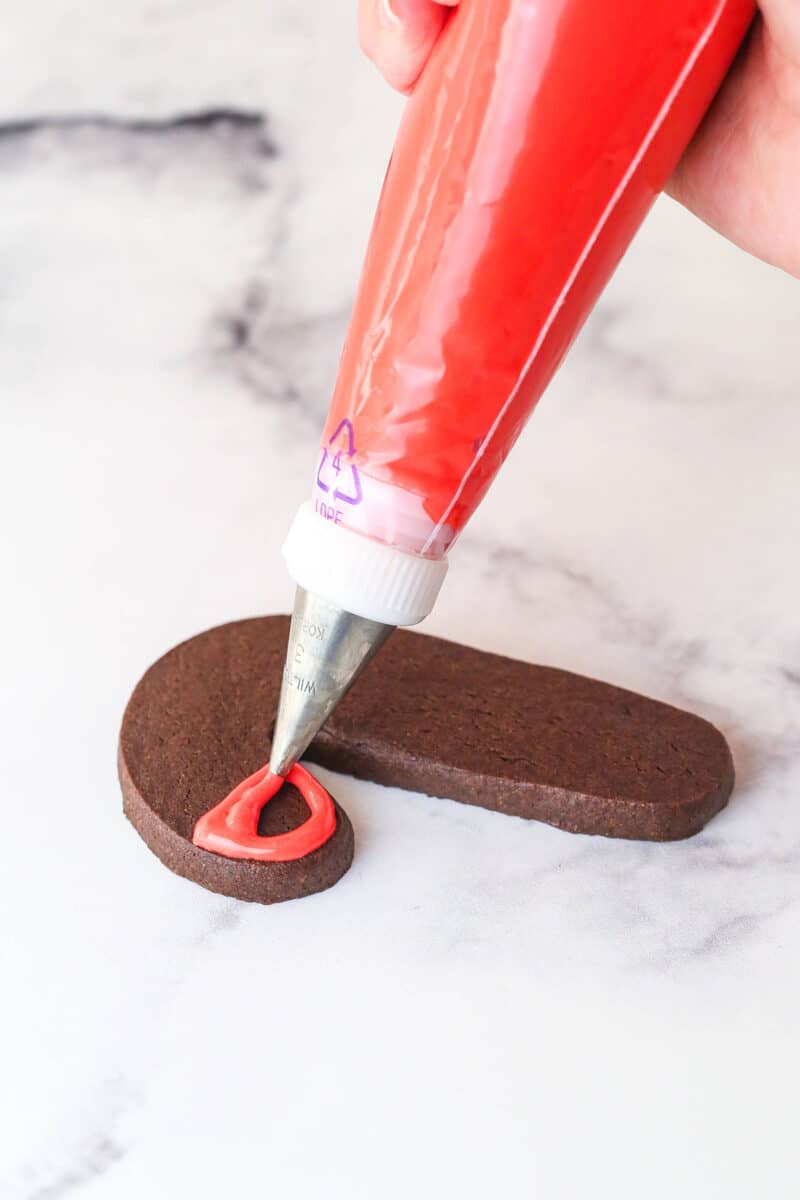
- Piping tips – There are so many options, depending on the design you are creating. But for most jobs, you’ll want the small round tips. I typically use a mix of Wilton tip 2, Wilton tip 3, Wilton tip 4 and Wilton tip 5. The large tips are generally for flooding. If you think you’ll be doing something super intricate, there’s a Wilton tip 1. It also wouldn’t hurt to have multiple of some of the sizes, so you can use multiple colors of icing at one time without moving the tips between piping bags and washing them each time.
- Piping bags – I will say that I do like the Wilton brand of these. You can get disposable ones or reusable ones. I have tried some off-brand ones and the plastic isn’t as stiff, so yo have to add more pressure to the bag, which affects the amount of control you have.
- Couplers – These are used to secure the piping tips to the piping bag so that you can change out the tip size, if needed.
- Piping tip covers – To keep the icing from drying out in the piping tip when you aren’t using it.
- Piping bag ties – To keep the icing from coming out of the top of the piping bag.
PRO TIP! Royal icing can quickly dry out, leaving your piping tip clogged, so the piping tips covers are important. If you do end up with some dried icing stuck in your piping tip, use a toothpick to help remove the blockage.
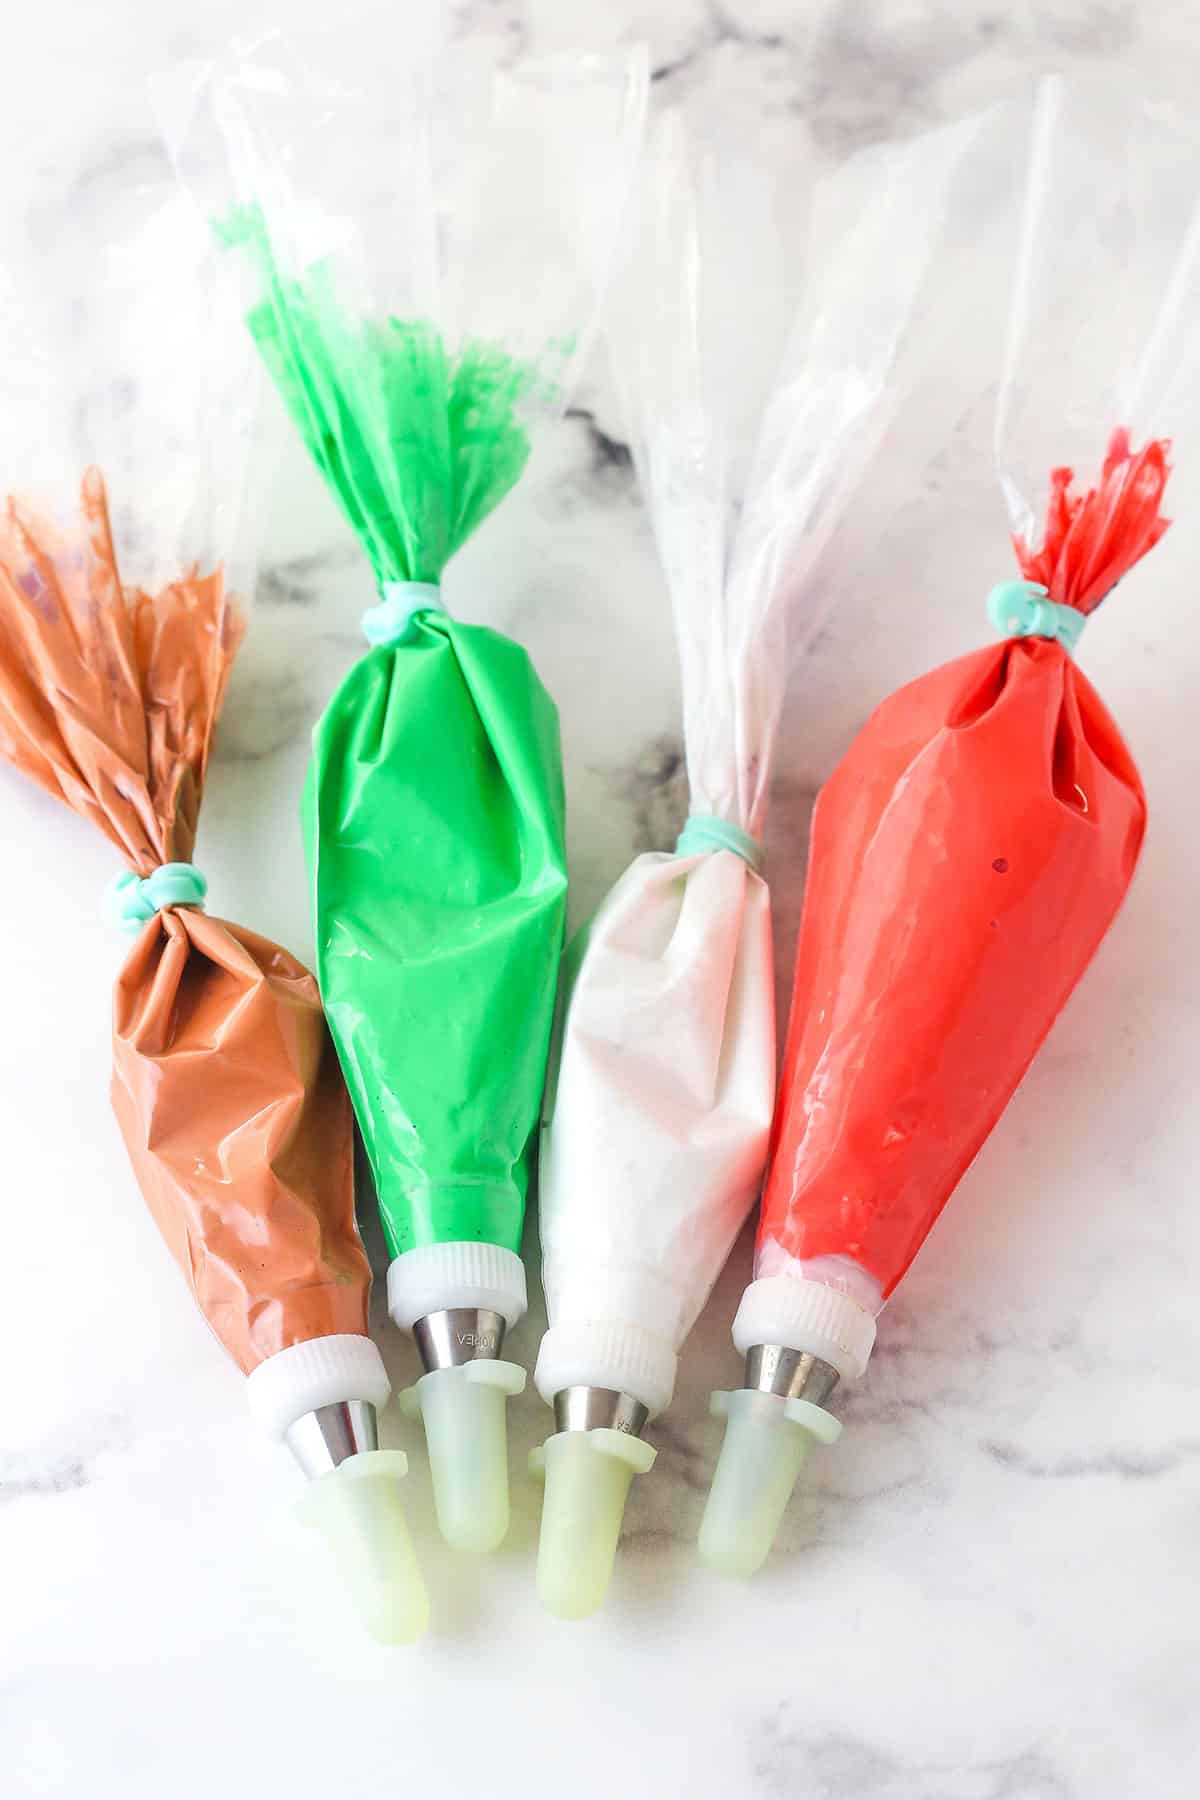
To set up your piping bag, add the larger piece of the coupler to the bag, trim the tip of the bag where needed so the coupler fits, add the piping tip to the outside of the bag and coupler, then place the outer ring of the coupler over the piping tip and screw it securely on. Add your icing to your bag, secure them with the piping bag ties and cover with the piping bag covers, and you’re ready to go!
Tips For Piping Royal Icing
- Even Pressure: You’ll want to keep even pressure on the bag as you squeeze out the icing, so that you don’t have some parts of your lines that are thicker or thinner. Consistency is key.
- Lift up a bit: For the most part I don’t keep my icing tip super close to the cookie. I actually lift up a bit so that icing falls in a more natural, soft line around the cookie.
- Think it through: You’ll want to think through the decorating before you start so you know what details you want to include and if the icing should dry or not before adding more details on top. Notice in the video below that I add the hat and main body of the snowman and then let it dry before adding the rest. If you add the details before it dries, they won’t sit on top of the icing but will settle into it. If you prefer that look, you can do that too. But you’ll want to think it through before you begin.
- Don’t give up: Decorating cutout sugar cookies with royal icing can be so fun! The first couple of times it drove me crazy, but now I love it. If you aren’t in love with your cookies the first time, don’t give up. After a few tries, you’ll develop “your touch” and it will get easier every time.
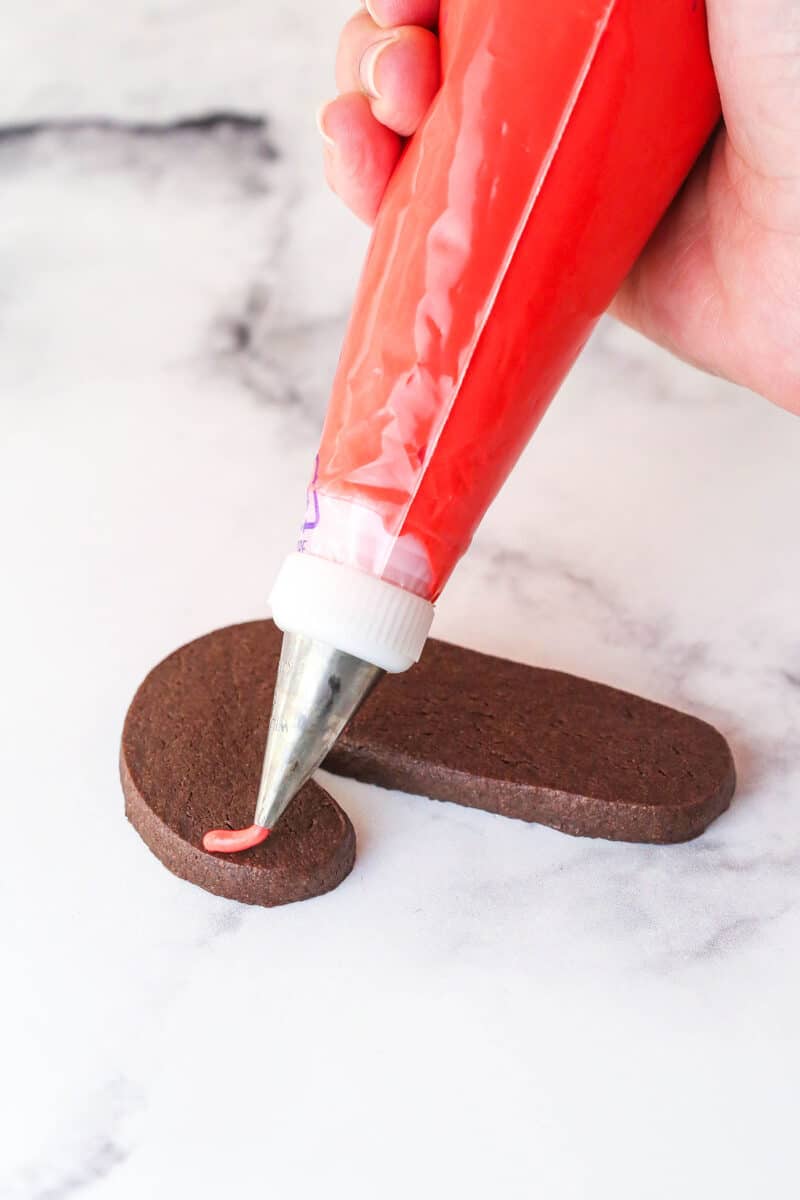
Alternatives to Royal Icing
While royal icing is a great option for decorating cookies, there are a couple others options you could consider as well.
- Easy Sugar Cookie Icing – It’s similar in that it hardens on top of your cookies and you can pipe it on for some beautiful decorating. But it’s harder to pipe designs that are as intricate with it. It comes together super quickly, and since not everyone loves the taste of royal icing, this icing has a little more flavor.
- Buttercream frosting – Buttercream frosting forms a crust as it sits and will harden in the fridge, but it doesn’t firm up at room temperature like the easy sugar cookie icing or royal icing. The pros for buttercream are that it’s the most familiar, easy to make and you don’t have to use any special equipment. You could pipe it onto cookies, but you could also go old-school and just use butter knives.

How to Dry Royal Icing
After piping royal icing onto your cookies, it will being drying. Lay the cookies flat while they dry. I usually set them on parchment lined cooling racks or baking sheets. They won’t get stale quickly, since the icing basically insulates the cookies and keeps them good for longer.
After about 20-30 minutes, the icing will form a crust, but it will still need at least a couple hours to dry, possibly longer before you’d want to stack them. Just let them dry at room temperature. Humidity changes from the fridge or freezer aren’t ideal.
- Storing: This royal icing dries nice and firm, so you can easily stack the cookies, wrap them, etc. and transport them. You can store them in an air-tight container at room temperature for up to 2 weeks, but they are naturally going to be best the sooner you eat them.
- Freezing: You can certainly freeze royal icing cookies, just keep in mind that when they thaw, the colors might bleed. I recommend thawing in the fridge to help avoid as much of that as possible.
Watch How To Do It
Print
Royal Icing Recipe
- Prep Time: 15 minutes
- Total Time: 15 minutes
- Category: Dessert
- Method: No Bake
- Cuisine: American
Description
Want to learn how to decorate cookies with royal icing? Today is the day! Follow this detailed guide to making delicious royal icing and learn how to frost with it!
Ingredients
- 3 tbsp meringue powder
- 4 cups (460g) powdered sugar
- 6–8 tbsp (90-120ml) water
- 1 tsp vanilla extract
- Gel icing colors, optional
- Additional water, optional
Instructions
- Combine meringue powder and powdered sugar in the bowl of a mixer. Add 6 tablespoons of water and vanilla extract. Whip with whisk attachment on mixer at medium speed for about 7-10 minutes, or until icing is stiff, thick, can hold a stiff peak and looses it’s sheen. Begin with 6 tablespoons and add up to an addition tablespoon (or two) if needed to get the icing smooth for mixing.
- Once icing is ready, add an additional tablespoon or 2 of water to thin it out a bit, but not too much. You want it to be closer to piping consistency, but not quite there.
- Divide the icing between the number of bowls you’ll need for the colors you’re using. Color the icing with the gel icing colors, then add additional water, if needed for the right piping consistency. See notes and video above for guidance on consistency, coloring and piping.
- Once icing is ready, cover the bowl (or bowls) it’s in with a damp cloth to keep it from drying out when not in use. Icing can be stored in an airtight container for 1-2 days. Stir again before using.









Hi, I really love ur work. I just have one question am in nigeria finding egg white powder is a bite difficult I just want to know if its ok to use fresh egg whites?
I haven’t done that before so I’m not really sure. I’m sorry!
I would
Use the lemon in your cookie recipe only.
You can whip 3 egg whites till stiff peaks form, then add four cups of powdered sugar gradually, or just whip one egg white and add enough sugar until it’s the right consistency really. However, the icing is best consumed more quickly than if you were using powdered egg white or meringue powder
Hello Lindsay,
How you get that black color on the icing? Thanks!!!
It’s a black gel icing color. I use Wilton brand.
I should have read your explanation above about black dyed icing looking dark gray before it dries. I probably used a half of the wilton gel container in a tiny bit of icing trying to get it black enough! Still worked though. My first time making royal icing and your recipe was fabulous!
Hello! I am just getting into baking and decorating cookies and understand oil will ruin my royal icing. I want to add lemon extract for flavor but cannot find one that doesn’t include oil! Do you have a brand of lemon extract you recommend for icing?
Thanks!
I’m sorry, I don’t. I don’t really use lemon extract at all. I typically use vanilla in my royal icing.
THANK YOU! This is awesome!
Lindsay, I love watching your videos–thanks for doing them! Question on filling in the large areas on cookies with the Royal Icing: I get why you wouldn’t want a thick icing for the edge and a thinner icing for the filling, but I was getting antsy watching the process of filling in the large areas, and wondered if you ever fill two bags with the same color: a smaller bag/smaller tip for the edges, and a larger bag/larger tip to more quickly fill in the large areas? You’d have to be careful not to over-fill the area, but wouldn’t that speed up the process when making a ton of cookies?
You could certainly do that. Like you said, you’d just need to be careful. You have more control with the smaller tips.
Hi Lindsay I agree great video.. I’m new to the royal icing world and this video was great. Do you make a border on your cookies with the 3 tip then let dry then flood the center? If so how long do you wait for it to dry?
I don’t let the border dry first, I just flood the center. It makes a more even appearance on the icing. I add a border after everything is done and let that dry.
Hi, I was wondering how long they should dry before packaging/stacking them, thanks 🙂
I’d say at least a couple hours, just to be sure they’re firm.
I’m new at baking and your posts and especially your videos have provided to be invaluable learning tools. Could you by any chance describe how you did the Santa like you did the Christmas tree? It would be greatly appreciated! Thanks so much for your blog!! Don’t know what I’d do without it!
I’m so glad the videos are helpful! I’ll do my best to describe it – it’s been a while. 🙂 Star by adding the the outline of the red suit and red part of the hat and filling that in. Let it dry for 15-20 minutes. Add the face, beard, hands and boots next and again allow to dry a bit. Add the red outlines on the suit and hat, then add the white “fluff” on the suit and hat. When the initial layer of white beard had dried a bit, I added a second layer so it was raised above his face a bit. I added a dot of the skin color in the middle of the top of the beard for his mouth. Once the face and beard are dry, you can add the eyes and mustache. I hope that helps!
how long will these cookies last once iced? I’ve heard Royal Icing gets too hard to eat after too many day??? Thanks for the video, it’s great!
I don’t usually have an issue with them getting too hard, especially the way I’ve suggested making the icing. It’s a little thinner to begin with and should stay nice for up to a week, in my experience.
Do you use vanilla in yoir royal ocing recipe?
I usually do, yes.
Great video! Where did you get the caps for your tips? I decorated cookies this holiday and the icing kept dripping out when I wasn’t using it. Those caps would be sooo useful!
Thanks Chris! They are wilton decorating tip covers. You can easily find them online, or in craft stores like Michaels, Hobby Lobby or even Walmart.
Love the video. Do you have a video of how u decorated the Christmas trees?
Thank you! I don’t have a video of the tree, but I can try to describe it for you. It’s a similar process to the one in the video. I did the outline of the tree and stump and filled them in first. Once the green part of tree was dry (at least 15-20 minutes, it’s pretty big area), I added the green lines for the tree branch levels and added the star. Once that was dry, I added the red strings and dots. I hope that helps!
LOVE the video! I think I’m still in that stage like you said, where the first couple times drive you crazy, haha. 🙂 But this video makes it look so easy. I really want to decorate some cookies now!
This is a great video….thanks for sharing!
Normally I don’t love royal iced cookies because the royal icing to too hard. However I had the chance to try these cookies and they were FANTASTIC! I’ve never had a royal icing that was soft when you bite into it. Love it!
Hi Lindsey! Love, love, love this tutorital. How long would you say it took the icing to dry before you added the details on the snowman?
I think it was about 15-20 minutes.
Hey, could you please tell me the ingredients measurement in grams?
I’m unsure of the weight for meringue powder, but I added the powdered sugar measurement.
Love the video, Lindsay! It’s awesome to watch you work. Do more!