This post may contain affiliate sales links. Please read my disclosure policy.
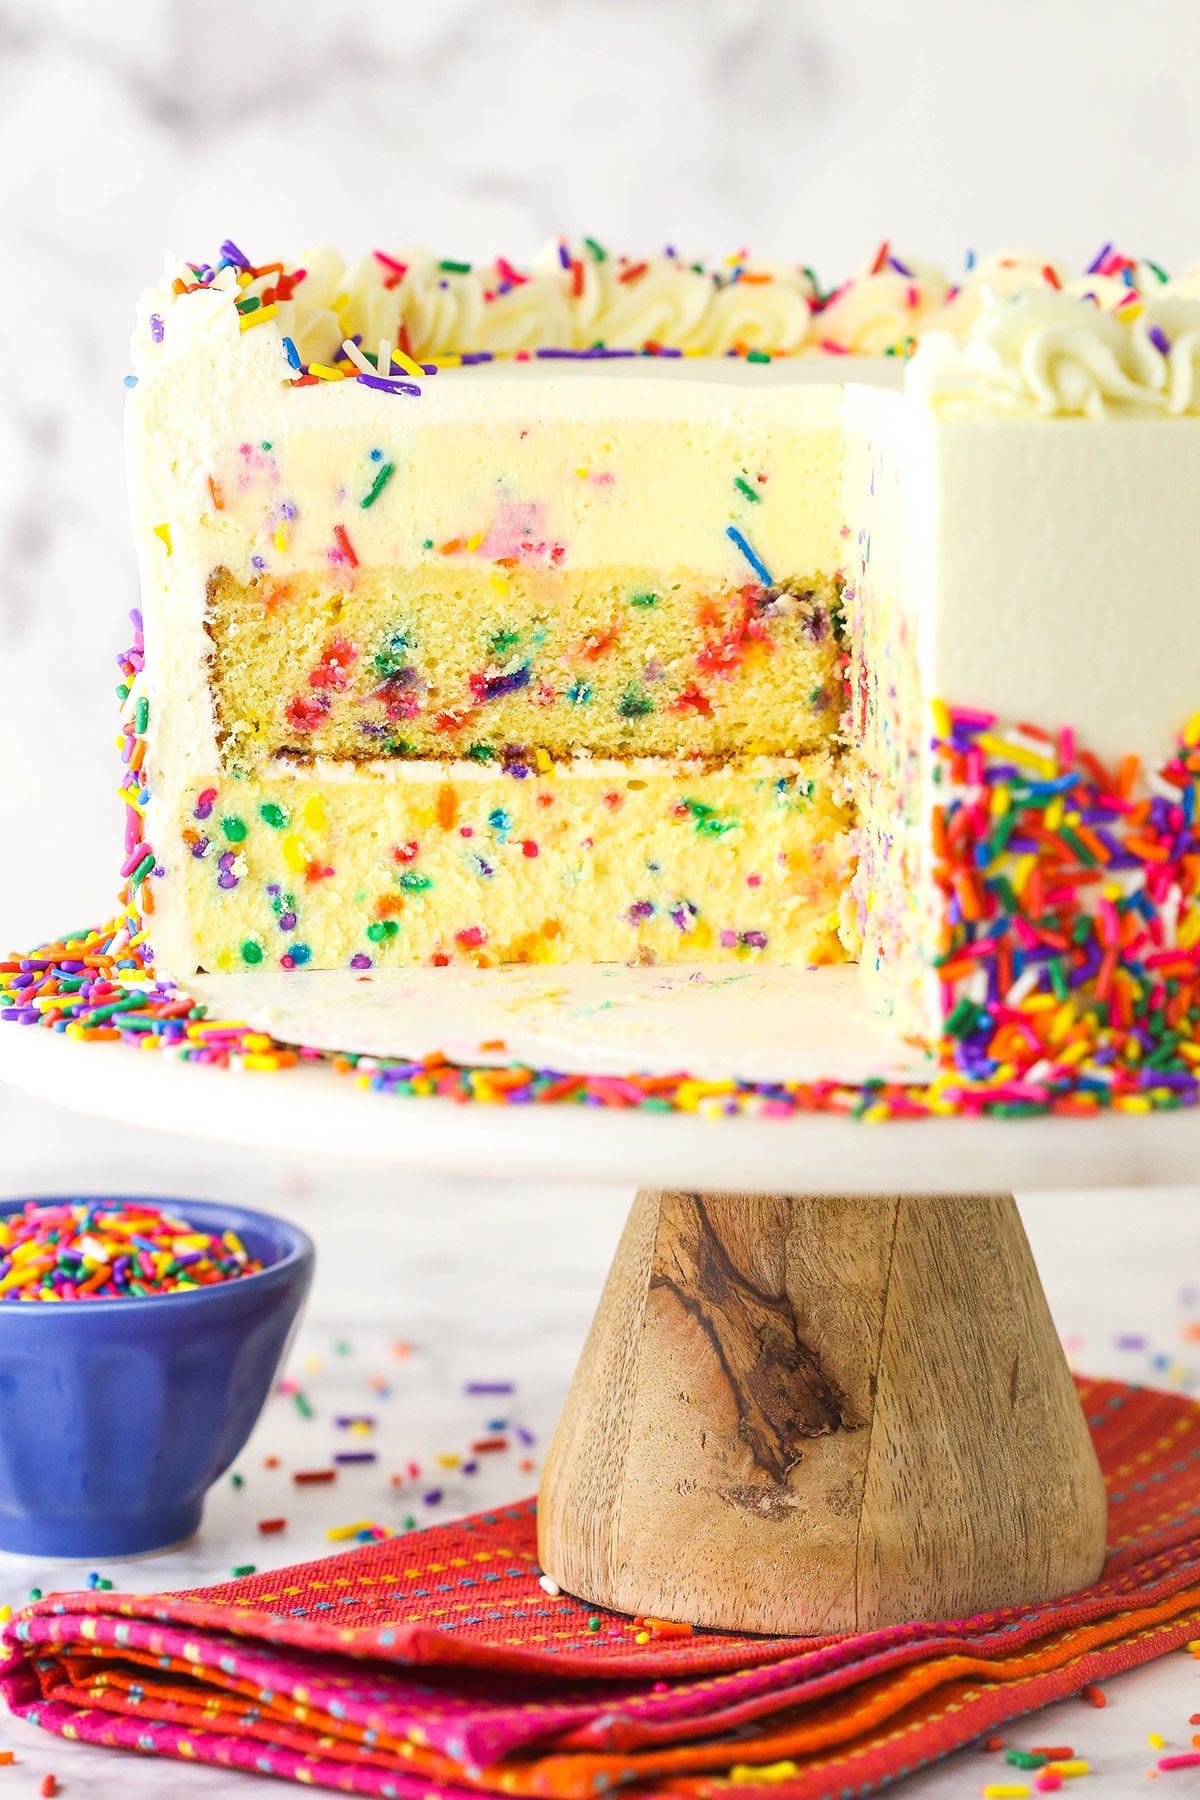
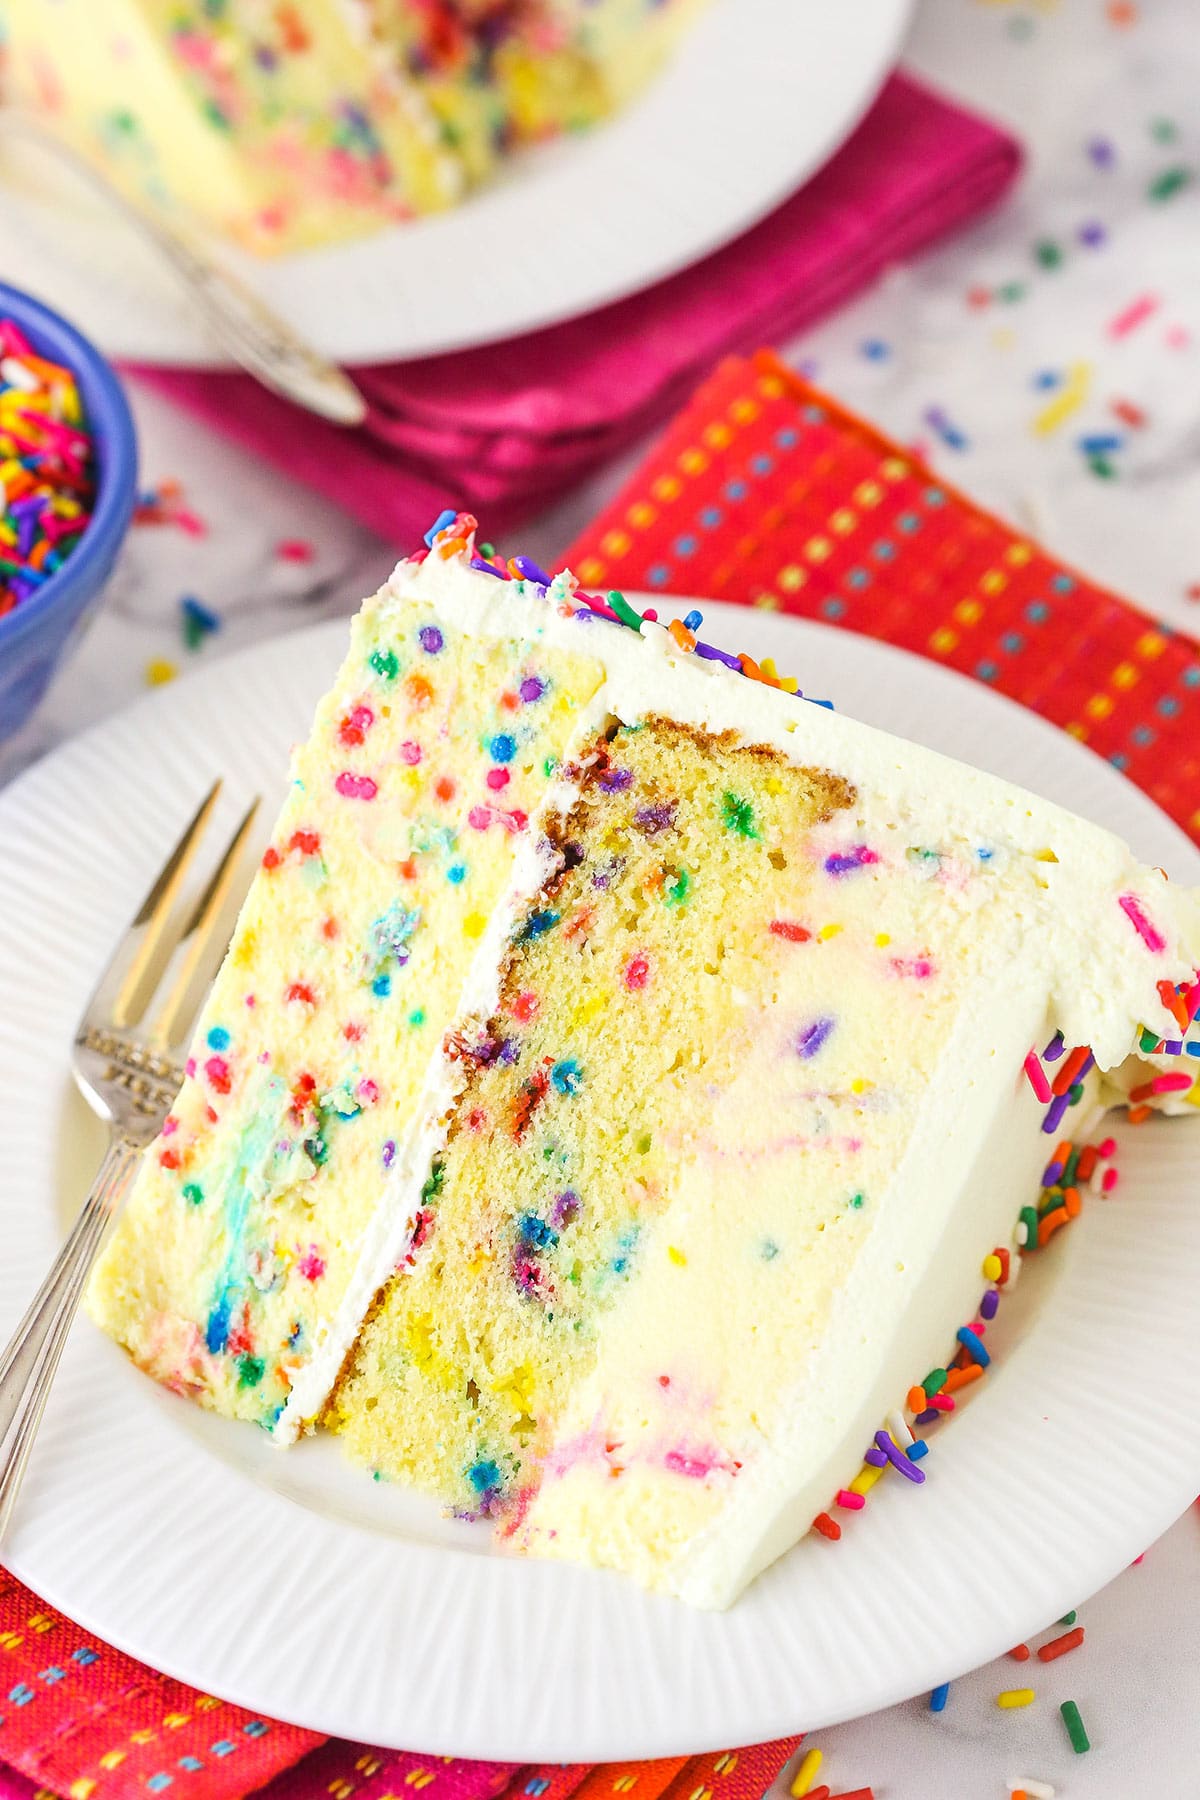
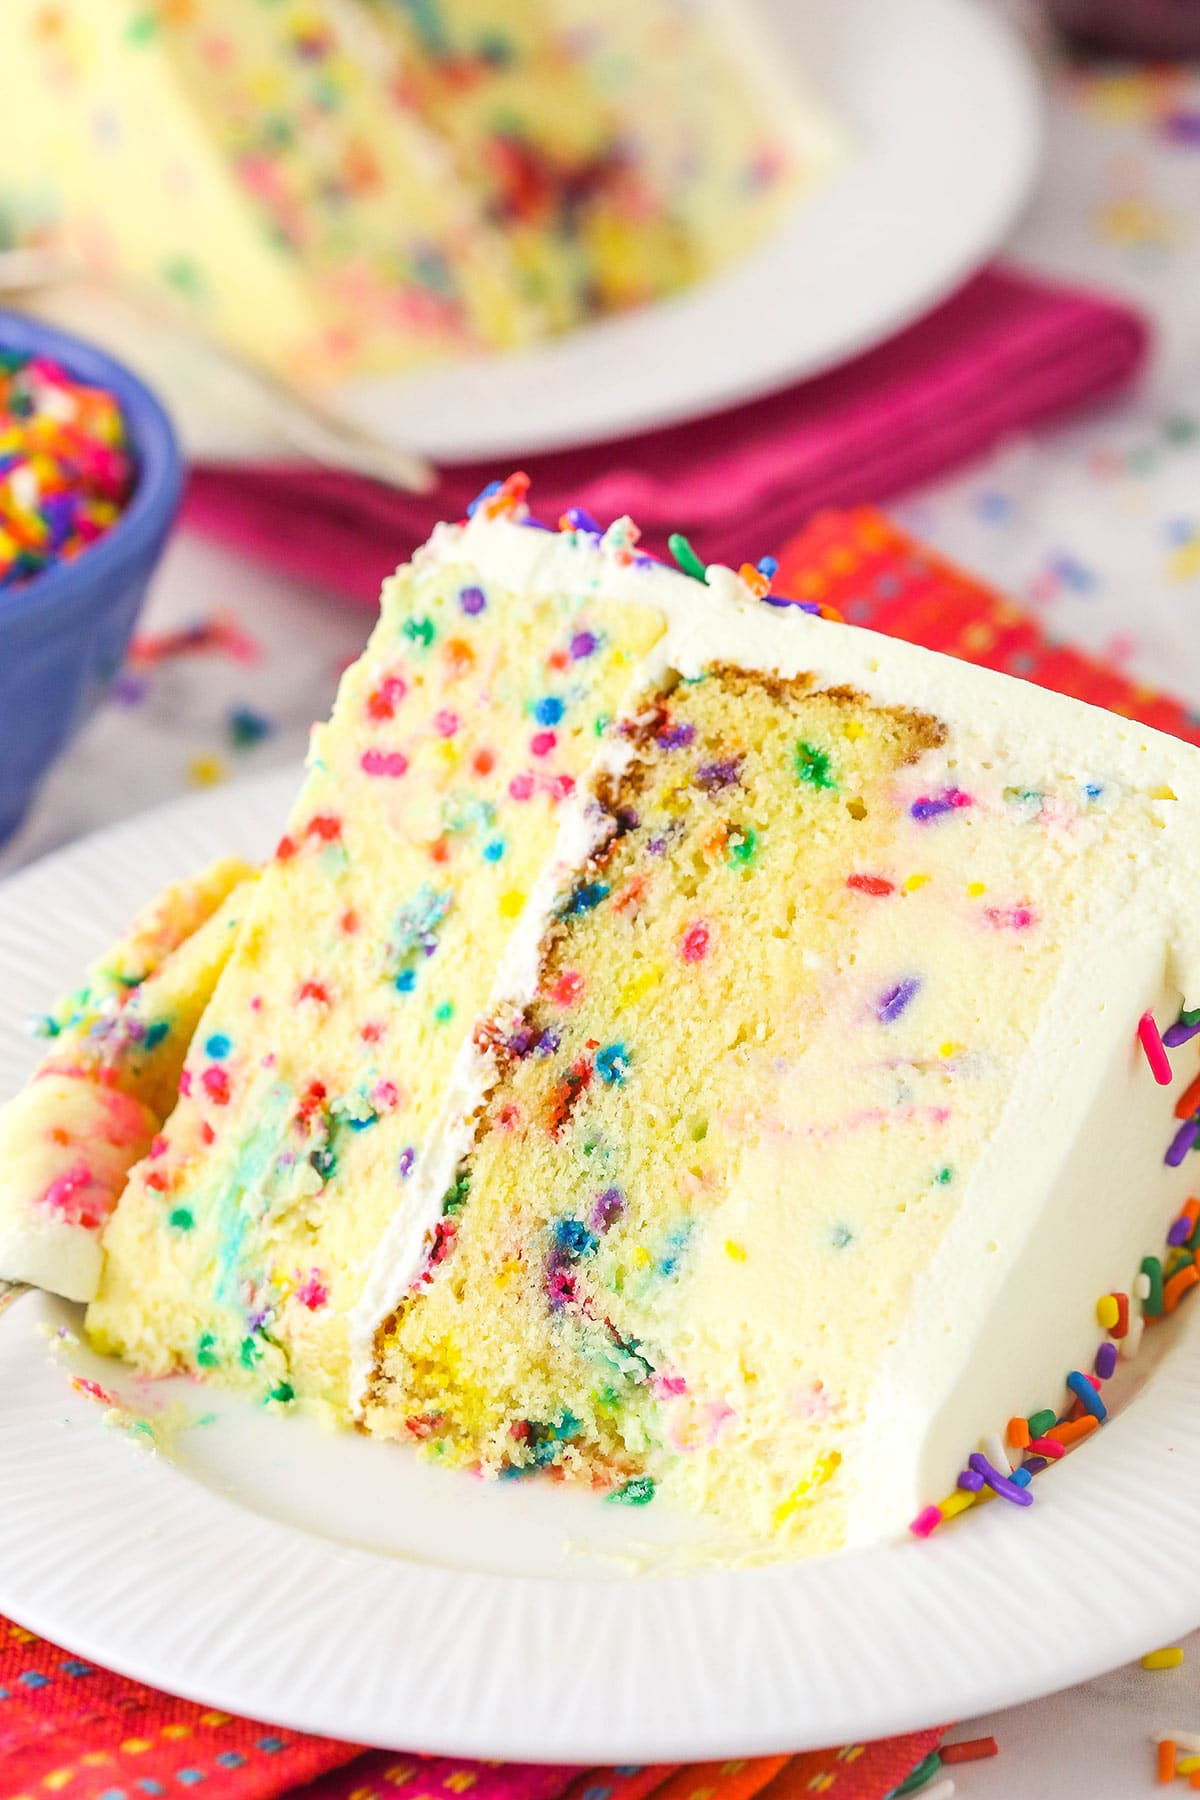
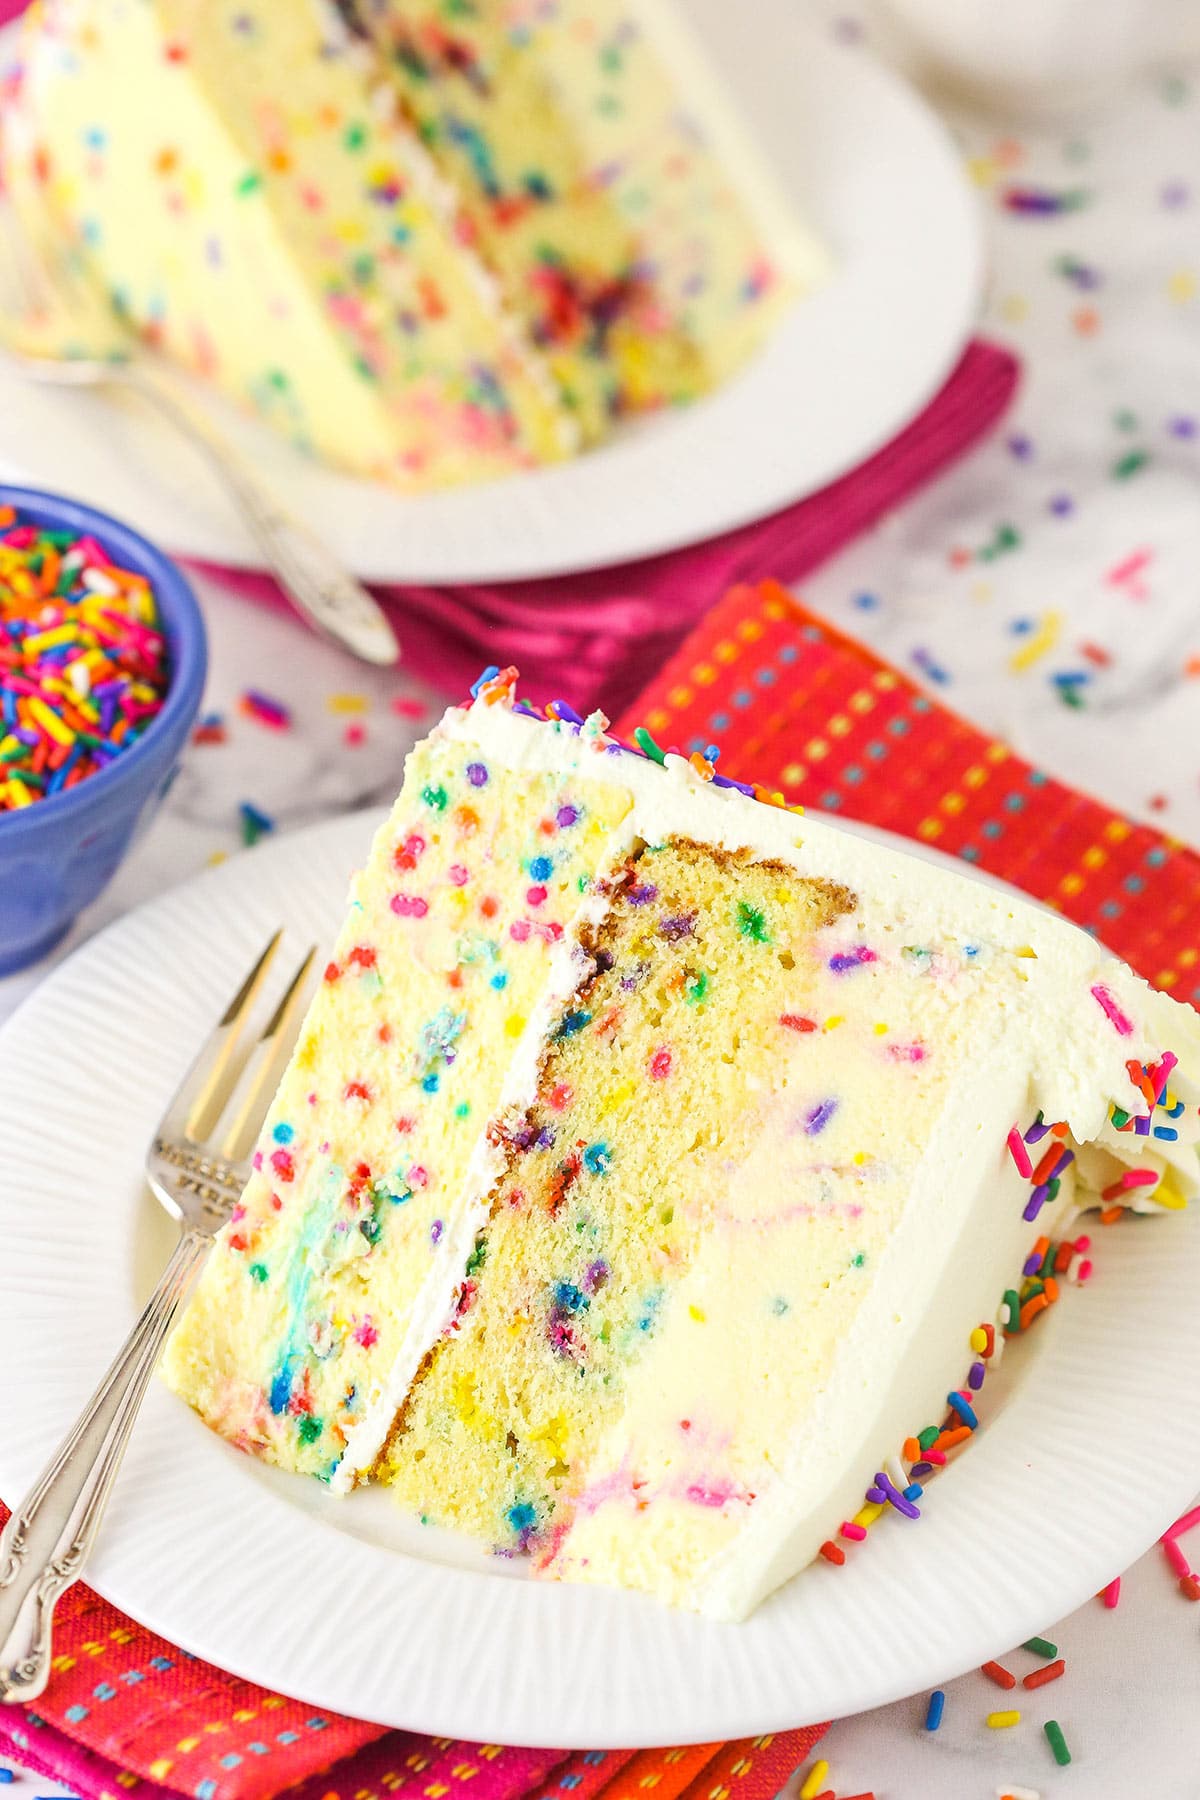
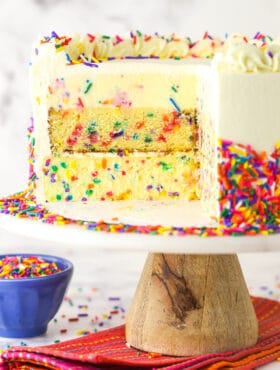
Rich and indulgent, this Funfetti Millionaire Cake features layers of creamy cheesecake, moist cake, fluffy mousse and whipped cream frosting. A truly epic, decadent cake worthy of every second it takes to prepare!
The Ultimate Funfetti Cake
This Funfetti Millionaire Cake is a funfetti-lovers dream. There’s funfetti flavor and sprinkles in every single layer, from the cheesecake to the whipped cream frosting. It’s quite possibly one of the most decadent, over-the-top cakes I’ve made and oh my, it’s so good!
Surely you know that I am a huge funfetti fan. No? Have you seen my Funfetti White Chocolate Chip Cookie Cake? Or my Funfetti Ice Cream Cake? Or maybe my Funfetti Overnight French Toast Casserole? There’s even more funfetti than that, but we’ll start with those. I abso-freakin-lutely love funfetti.
Can you tell?
Ever since I was a kid, it’s been my jam. If something hasn’t been funfetti-ized. I will do my best to funfetti-fy it. And not just any funfetti. The Pillsbury box mix will always be my first cake mix love. And I know I’m not alone. I even made a funfetti wedding cake once!
The inspiration for this cake came from a bakery near us that I’ve mentioned before. It’s called Alpine Bakery and they have the most amazing cakes. They have a “Million Dollar Cake” that is layers of chocolate mousse, NY cheesecake and flourless chocolate cake. This cake is my version of that, but with a funfetti and cake batter spin.
It’s a delicious cake and is a great way to have so many favorite desserts in one amazing cake. If you’re like me and often have a hard time deciding what to make, this solves that problem because you get all three! Mousse, cake and cheesecake! It’s rich, smooth, creamy and so good!
There are a lot of steps to this cake because of the different types of layers and you do have to make each of the 3 layers individually. Because the cheesecake takes the longest to cool and firm up, I’d make that layer first. But also keep in mind that the mousse needs time to set and you need the baked cake layer to be able to finish making the mousse. I like to make all the layers and let everything cool and set overnight, then finish putting it all together the next day.
It may seem like a lot of work but once you bite into your funfetti dessert, every second is worth it!
What You’ll Need
Don’t be too overwhelmed by this ingredient list – most are kitchen staples and lots of items repeat on each list!
For the Funfetti Cheesecake
- Cream cheese – Cream cheese should be softened to room temperature.
- Sugar
- Flour
- Sour cream – Adds that classic cheesecake tang.
- Cake batter extract – A sweet flavor that balances the cheesecake tang. Alternately you could use a combination of vanilla extract and almond extract.
- Vanilla – Just a splash.
- Eggs – Large eggs.
- Sprinkles – The funfetti in the cheesecake! I recommend using jimmies and I personally like the colors of these sprinkles.
For the Funfetti Cake
- Flour – All-purpose flour works great here.
- Baking powder – Helps the cake rise to a nice and fluffy texture.
- Salt – For flavor.
- Eggs – Divided to use separately.
- Butter – Should be room temperature.
- Sugar
- Vegetable oil
- Cake batter extract – Adds the cake batter flavor and yellow color.
- Vanilla extract – Just a splash for additional flavor.
- Milk – I use 2%.
- Sprinkles – It wouldn’t be funfetti cake without sprinkles!
Funfetti Mousse
- Gelatin – Powdered gelatin helps to stabilize the mousse.
- Water
- White chocolate chips – Use any brand of quality white chocolate chips.
- Heavy whipping cream
- Cake batter extract & vanilla extract – For flavor.
- Sprinkles
Whipped Cream Frosting
- Heavy whipping cream – Should be cold when using.
- Powdered sugar – Makes the whipped cream sweet and keeps it stable.
- Cake batter & vanilla extracts – For flavor.
How to Make Funfetti Millionaire Cake
Making this funfetti cake is a process – but so worth it! Be sure to leave plenty of time for each layer to set and cool before you plan on serving. Preparing it the day or so before might be a good idea!
Make the Cheesecake Layer
- Preheat the oven. Preheat the oven to 300F. Line the pan with aluminum foil.
- Prepare the cheesecake batter. Mix the cream cheese, sugar and flour. Add in the sour cream and extracts, followed by the eggs one at a time. Stir in the sprinkles. and pour the batter into the pan.
- Bake. Place the cheesecake pan inside another larger pan and add water for a water bath. Bake for an hour, until the center is set but jiggly. Turn off the oven but leave the door closed for 25 minutes, then crack the door for 30 minutes to slowly cool the cheesecake.
- Chill. Remove the cheesecake from the water bath and refrigerate for at least 5-6 hours.
Make the Funfetti Cake
- Preheat the oven. Preheat the oven to 350F. Spray the pan with baking spray and line the bottom with parchment paper.
- Make the cake batter. Combine dry ingredients in a bowl. Cream the butter, sugar, oil and vanilla extract until light and fluffy. Add the egg yolks on at a time. Alternate adding a third of the dry ingredients and half of the milk. Mix to combine. In a separate bowl, whip the egg whites until soft peaks fork. Gently fold into the cake batter, along with the sprinkles.
- Bake. Pour the batter into the cake pan. Bake for 25 minutes. Let cool.
Make the Funfetti Mousse
- Prepare the mousse. Sprinkle the gelatin over the water and let it stand for 5 minutes. Microwave 3/4 cup of heavy cream until it begins to boil. Stir in the gelatin until dissolved. Pour over white chocolate chips and let sit, then whisk. Heat for a few seconds if needed to fully melt, then set aside to cool. Whip remaining heavy whipping cream and extracts, then fold it into the white chocolate mixture. Fold in the sprinkles.
- Add to the cake. Use a cake collar or build one to layer the mousse on to the top funfetti cake.
- Refrigerate. Place in the fridge for at least 4-6 hours.
Assemble the Cake
- Make the whipped cream frosting. Whip all ingredients on high until stiff peaks form.
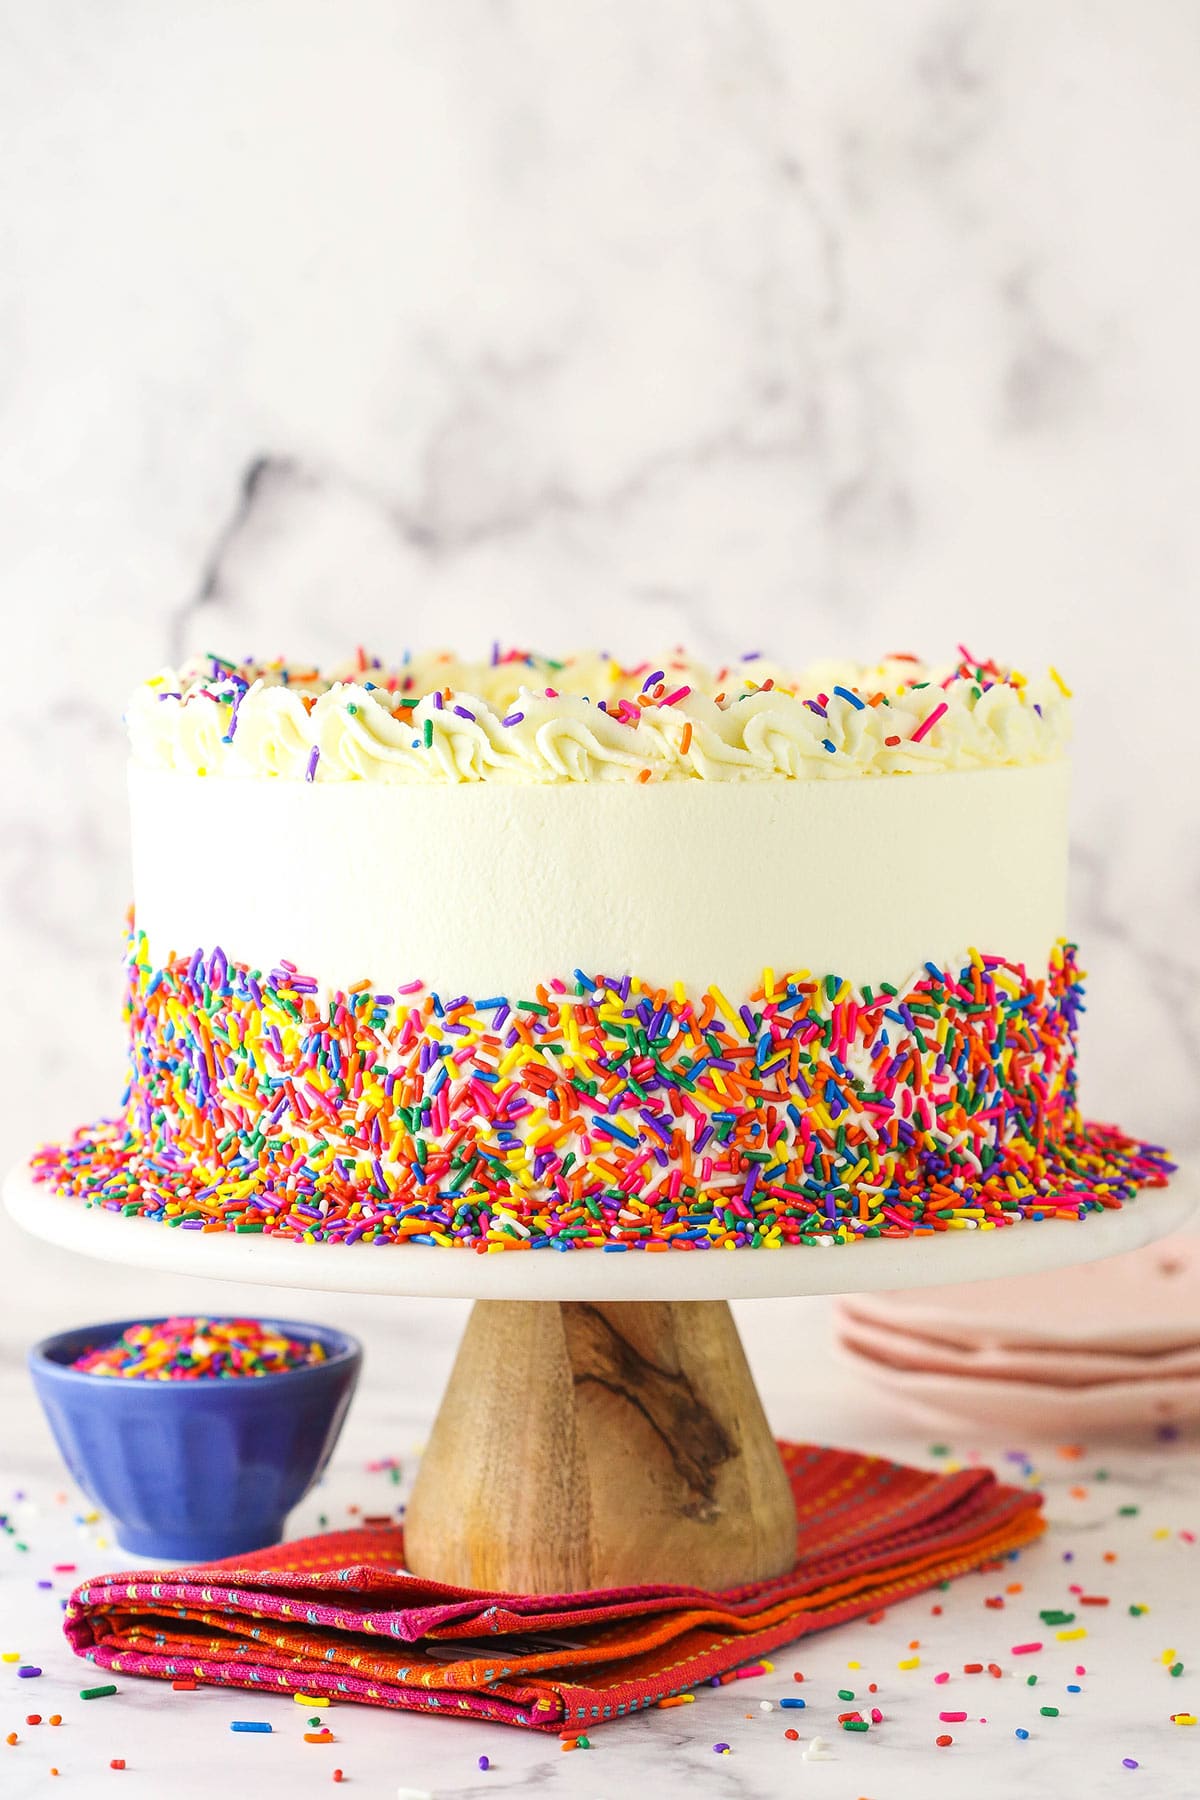
- Assemble the layers. Place the cheesecake on a serving platter and top it with whipped cream frosting. Gently place the cake and mousse layers on top.
- Frost the cake. Frost the outside of the cake with the remaining whipped cream and pipe shells around the outer edge. Finish with sprinkles.
- Serve. Refrigerate until ready to serve.
Tips for Success
While each part of this funfetti millionaire cake recipe is pretty straight forward, there are some things to keep in mind for each layer of this epic funfetti dessert. These tips are simple but important for baking the perfect cake.
- Do not overmix the cake batter. For moist and fluffy cake, it’s important to not overmix the batter. You want the ingredients to be just incorporated.
- Don’t skimp on creaming time. You should be able to see a visible change in the color and texture of the cake batter when it’s ready.
- Slowly cool the cheesecake. It’s super important to gradually cool the cheesecake, starting with turning the oven off while keeping the door closed, then cracking the oven door for a bit before pulling the cheesecake from the oven. This prevents can cracking in the cheesecake.
- Mess-free water bath. If you’ve never made a cheesecake water bath before, check out my guide on how to prevent your water bath from leaking here.
- Allow each layer to cool completely. This Funfetti Millionaire Cake is not a recipe that can be rushed. Be sure you’re leaving ample time for the cheesecake to set and for the cake to cool before adding the mousse. You may even want to prepare the cheesecake and cake layers the night before.
- Cake batter extract substitution. In the original version of this cake, I used a combination of vanilla extract and almond extract for the flavor. You could still do that if you like, but there’s a new cake batter extract out there these days that gives baked goods an awesome cake batter flavor. I decided to use that this time around, but feel free to change it up. The extract does have some yellow color to it, so that explains the overall light yellow color the cake has.
- Moving the cheesecake. I often get questions about removing cheesecakes from the pan and moving them around. This one is baked in aluminum foil, which makes it easier. After being baked and cooled, it should be firm enough to work with. I hold it upright in my open, flat palm and peel the foil down the sides with. my other hand. Then, turn it over onto your flat hand and remove the foil from the bottom. Then, place your cardboard cake circle or whatever platter you’re using against the bottom of the cheesecake, while it’s still upside down. Then flip everything right side up. You’ll want to work quickly and gently, but your cheesecake should be just fine.
Serving Suggestions
Trust me when I say this millionaire cake needs nothing else to accompany it! Since it’s so rich and piled high with layers, I find that small, thin slices are just enough. Which is perfect, because it means this cake can feed more people – or at least have some leftovers for “breakfast” the next day!
How to Store Leftovers
This funfetti layer cake needs to be stored in the fridge. It should be tightly covered with plastic wrap and/or aluminum foil or stored in an air-tight cake carrier, especially once slices have been removed. It’s best when eaten within 3-4 days.
Can I Freeze This Funfetti Millionaire Cake?
I don’t typically recommend freezing full cakes. However, you can freeze the individual funfetti cheesecake and funfetti cake layer. Wrap tightly in plastic wrap and aluminum foil, then pop in the freezer. Thaw overnight in the fridge before assembling or enjoying on their own. Once made, you can freeze individual slices.
More Funfetti Recipes:
- Funfetti Cake Batter Cinnamon Roll Casserole
- Homemade Funfetti Cupcakes
- Funfetti Ice Cream Cake
- Funfetti Cheesecake with Cake Bottom
- Easy Funfetti Cake
Funfetti Millionaire Cake
- Prep Time: 40 minutes
- Chill Time: 6 hours
- Cook Time: 1 hour 50 minutes
- Total Time: 8 hours 30 minutes
- Yield: 12-14 Slices
- Category: Dessert
- Method: Oven
- Cuisine: American
Description
Rich and indulgent, this Funfetti Millionaire Cake features layers of creamy cheesecake, moist cake, fluffy mousse and whipped cream frosting. A truly epic, decadent cake worthy of every second it takes to prepare!
Ingredients
Funfetti Cheesecake
- 24 oz cream cheese
- 1 cup (207g) sugar
- 3 tbsp (24g) flour
- 1 cup (230g) sour cream
- 1 tbsp cake batter extract
- 1 tsp vanilla extract
- 3 large eggs
- 4-5 tbsp sprinkles
Funfetti Cake
- 1 1/4 cups (163g) all-purpose flour
- 1 1/4 tsp baking powder
- 1/4 tsp salt
- 2 large eggs, divided
- 6 tbsp (84g) unsalted butter, room temperature
- 3/4 cup (155g) sugar
- 1 1/2 tbsp vegetable oil
- 1 1/2 tsp cake batter extract
- 1/2 tsp vanilla extract
- 1/2 cup + 2 tbsp (150ml) milk
- 1/4 cup sprinkles
Funfetti Mousse
- 1 1/4 tsp powdered gelatin
- 1 1/2 tbsp (22ml) water
- 9 oz white chocolate chips
- 2 1/4 cups (540ml) heavy whipping cream, cold, divided
- 2 1/2 tsp cake batter extract
- 1/2 tsp vanilla extract
- 1/4 cup sprinkles
Whipped Cream Frosting
- 2 1/2 cups (600ml) heavy whipping cream, cold
- 1 1/4 cups (144g) powdered sugar
- 1 tsp cake batter extract
- 1/4 tsp vanilla extract
Instructions
Cheesecake Layer
- Preheat oven to 300°F (148°C). Line the entire inside of a 9-inch (23cm) cake pan with aluminum foil. Press it into the pan to get it as flat as you can. You’ll use the aluminum foil to lift the cheesecake out of the pan when it’s baked and cooled.
- In a large mixer bowl, mix the cream cheese, sugar and flour until well combined (Use low speed to keep less air from getting into the batter, which can cause cracks). Scrape down the sides of the bowl.
- Add the sour cream and extracts, mixing on low speed until well combined.
- Add the eggs one at a time, beating slowly and scraping the sides of the bowl after each addition.
- Gently fold in the sprinkles and pour the batter into the prepared cake pan.
- Place the cake pan inside another larger pan. Fill the outside pan with enough warm water to go about halfway up the sides of the smaller pan.
- Bake the cheesecake for about 1 hour. The center should be set, but still jiggly.
- Turn off the oven and leave the door closed for 25 minutes. The cheesecake will continue to cook, but slowly begin to cool as well.
- Crack the door of the oven for 30 minutes to allow the cheesecake to continue to cool slowly. This process helps prevent cracking.
- Remove the cheesecake from the oven and water bath wrapping and refrigerate until firm, 5-6 hours or overnight.
Cake Layer:
- Prepare a 9-inch cake pan with baking spray around the sides and parchment paper in the bottom and preheat the oven to 350°F (176°C).
- Combine the flour, baking powder and salt in a medium sized bowl and set aside.
- Add the egg whites to a large mixer bowl and set aside. Set aside the egg yolks for later use.
- Add the butter, sugar, oil and vanilla extract to a large mixer bowl and cream together until light in color and fluffy, about 3 minutes. Do not skimp on the creaming time. You should be able to see a visible change in the color and texture of the mixture when it’s ready.
- Add the egg yolks one at a time, mixing until combined after each. Scrape down the sides of the bowl as needed to be sure all ingredients are well incorporated.
- Add about a third of the dry ingredients to the batter and mix until mostly combined.
- Add half of the milk and mix until well combined. The batter might look a little curdled, but that’s ok.
- Add another third of the dry ingredients and mix until well combined. Scrape down the sides of the bowl as needed to be sure all ingredients are well incorporated.
- Add the other half of the milk and mix until well combined.
- Add the remaining dry ingredients and mix until well combined. Scrape down the sides of the bowl as needed to be sure all ingredients are well incorporated. Do not over mix the batter. Set aside.
- Grab the egg whites and whip on high speed with the whisk attachment until soft peaks form.
- Gently fold about half of the whipped egg whites into the cake batter and gently fold together until mostly combined.
- Add the remaining egg whites and sprinkles and gently fold together until well combined.
- Pour the cake batter into the prepared cake pan and spread evenly. Bake for about 25 minutes, or until a toothpick inserted in the middle comes out clean.
- Remove cake from oven and let cool for 2-3 minutes, then remove to cooling rack to finish cooling.
Funfetti Mousse:
- In a small bowl, sprinkle the gelatin over the water and let stand for about 5 minutes.
- Place the white chocolate chips in a medium bowl. Microwave 3/4 cup of heavy cream until it begins to boil.
- Add the gelatin to the heavy whipping cream and stir until dissolved. Be careful – the cream will bubble up when the gelatin is added.
- Pour cream over the white chocolate chips and let sit for about a minute.
- Whisk until chocolate is melted and mixture is smooth. Heat for a few more seconds, it needed to fully melt. Set aside, cooling for about 5-8 minutes until it’s closer to room temperature.
- Add the remaining 1 ½ cups of heavy whipping cream and extracts to large mixer bowl and whip on high speed until stiff peaks form.
- Gently fold about a third of the whipped cream into the white chocolate mixture.
- Add remaining whipped cream and sprinkles to the white chocolate mixture and gently fold until well combined.
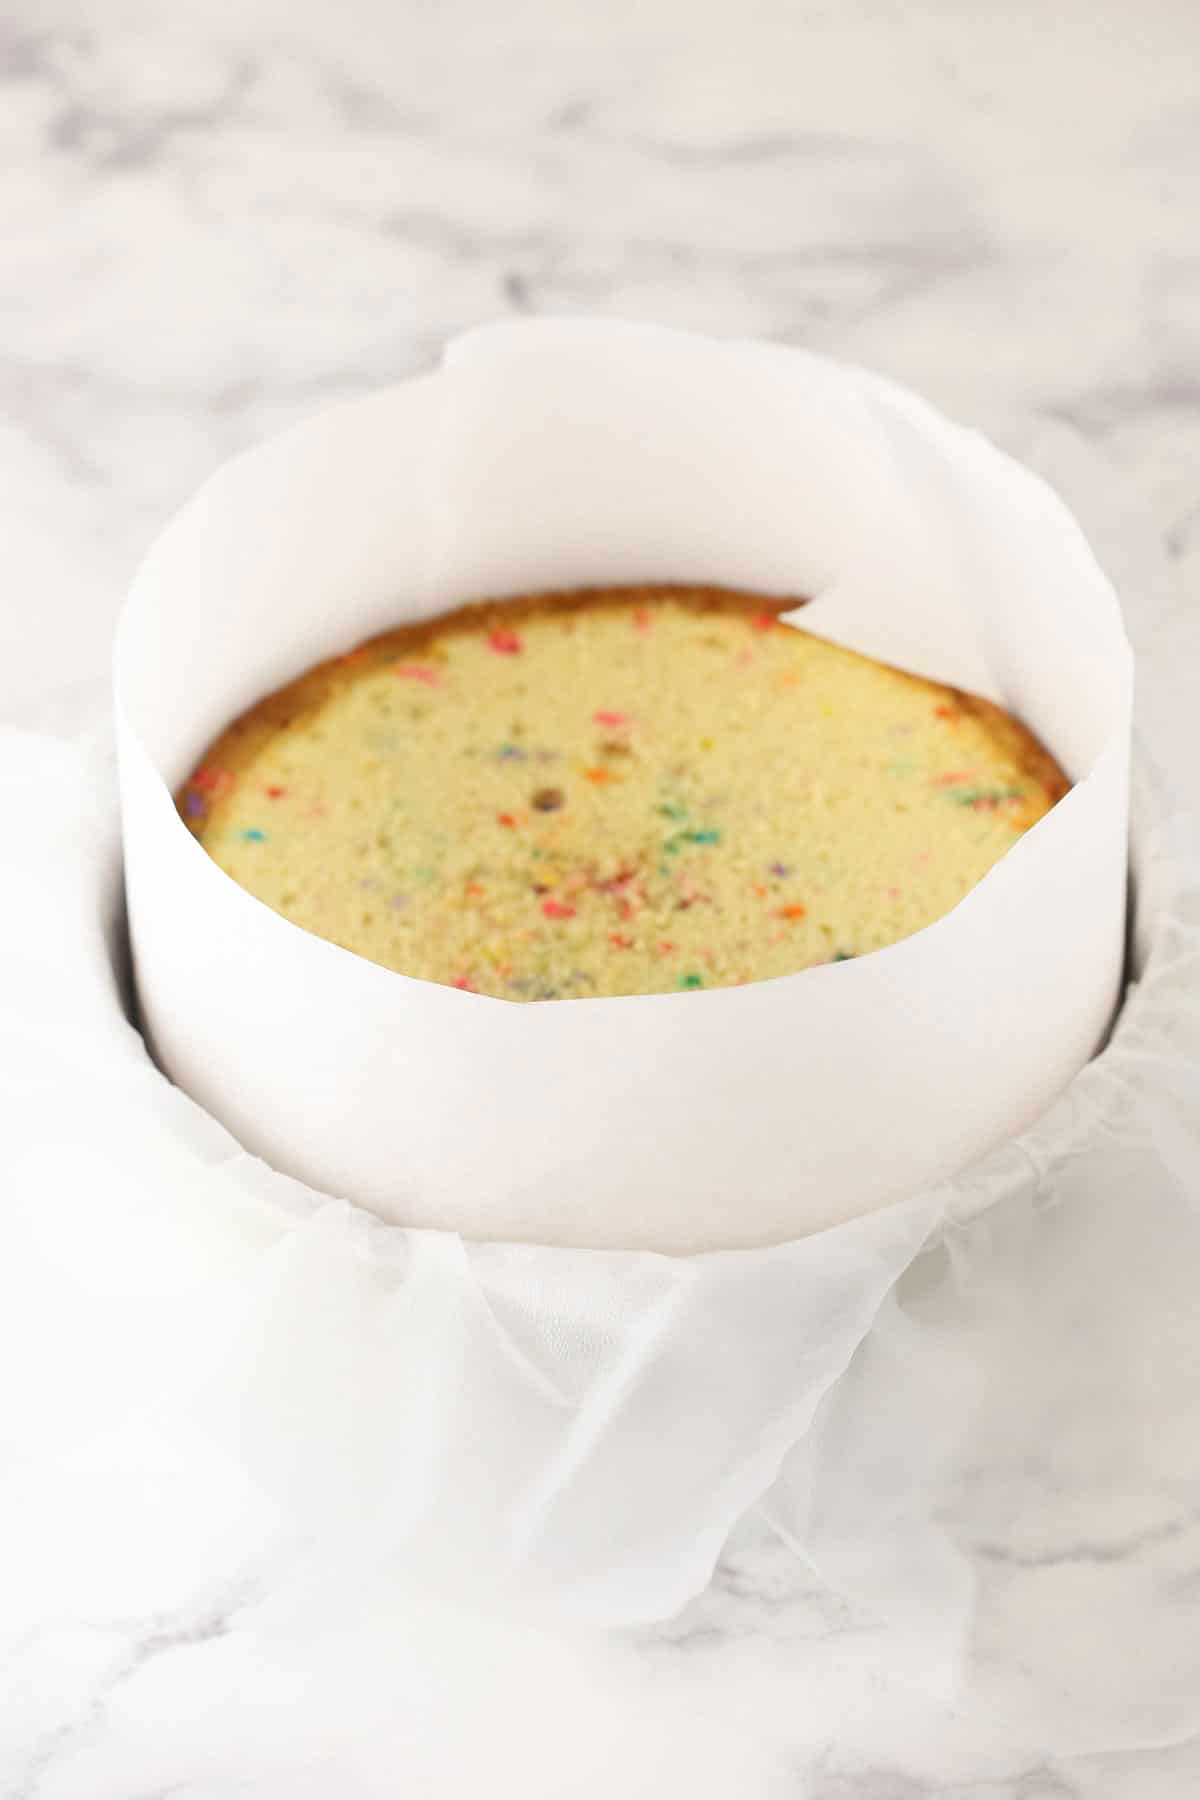
- Now you’ll need to start building the cake by adding the mousse to the top of the cake layer. You have two options. One is to use a cake collar. The other is to use the same 9 inch cake pan you used for baking the cake. If using a cake pan, line it with two pieces of clear wrap going in opposite directions. You use the clear wrap to help lift everything out of the cake pan later. Next, place an 8 inch cardboard cake circle in the bottom of the cake pan. You don’t have to use the cake circle, but it does make everything more stable when you lift it out of the cake pan so that your cake and mousse layers don’t slip around. Next, place the cake layer in the cake pan. Finally, build a mock cake collar using parchment paper. You stick the parchment paper into the cake pan and use the sides of the pan and the cake layer to keep it held in place. You can refer to the image in the post to see what the set up looks like.
- Once your cake layer is in place along with the cake collar, add your mousse and spread into an even layer. Refrigerate until firm, 4-6 hours or overnight.
To put the cake together:
- Make the whipped cream frosting. Add all the ingredients to a large mixer bowl and whip on high speed until stiff peaks form. Set aside.
- Remove the cheesecake from the springform pan and place it on a serving plate or cardboard cake circle.
- Spread about ½ a cup or so of whipped cream frosting on top of the cheesecake.
- Grab the cake and mousse layers and carefully lift them out of the cake pan. Peel off the clear wrap and remove the cardboard cake circle from under the cake layer. Gently place it on top of the cheesecake layer.
- Frost the outside of the cake with the remaining whipped cream, then pipe shells around the top outer edge of the cake. Finish it off with additional sprinkles.
- Refrigerate until ready to serve. Cake is best when stored well covered and eaten with 3-4 days.
Nutrition
- Serving Size: 1 Slice
- Calories: 826
- Sugar: 49.8 g
- Sodium: 357.6 mg
- Fat: 64 g
- Carbohydrates: 61.3 g
- Protein: 11.5 g
- Cholesterol: 231.3 mg








This cake looks AMAZING!!! I love to bake anything and everything. Mainly desserts though, so I can eat them!
I love baking bread puddings!
Looks incredible.
Cookie dough? Forget the funfetti, tell me more…
lol, cookie dough week is going on now! I posted a Chocolate Chip Cookie Dough Pizza yesterday and have another recipe coming tomorrow! 🙂
Yum!!!!
Yum!!!
Ohhh! I can’t wait to make this cake!
Cookies
I like to bake poundcakes. Thanks for chance to win.
I love to bake cocktail cakes, it’s a hobby and obsession! 😉 Congratulations!!
Cocktail cakes – how fun! Thanks Lisa!
love this recipe. can’t wait to try it
I love to bake cookies.
That cake looks so good!
Lindsay, anything funfetti is actually my favorite to bake! What a fun giveaway… and a most fabulous recipe! I love the tip you got from Sally… that IS genius!
I hear you! Funfetti ROCKS! Thanks Gloria!
I love to make a decadent double chocolate chip crater cake with a ganache frosting. It is so YUMMy!
This cake looks so yummy!!!
I love to make yellow cake with chocolate frosting…and I am quite partial to the Pillsbury Cake Mix as well 🙂 Thanks