This post may contain affiliate sales links. Please read my disclosure policy.
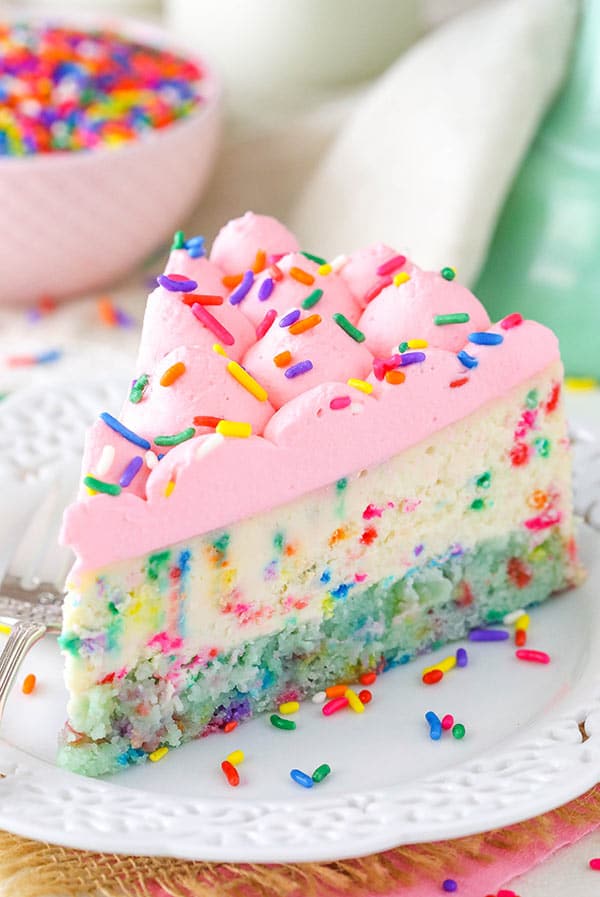
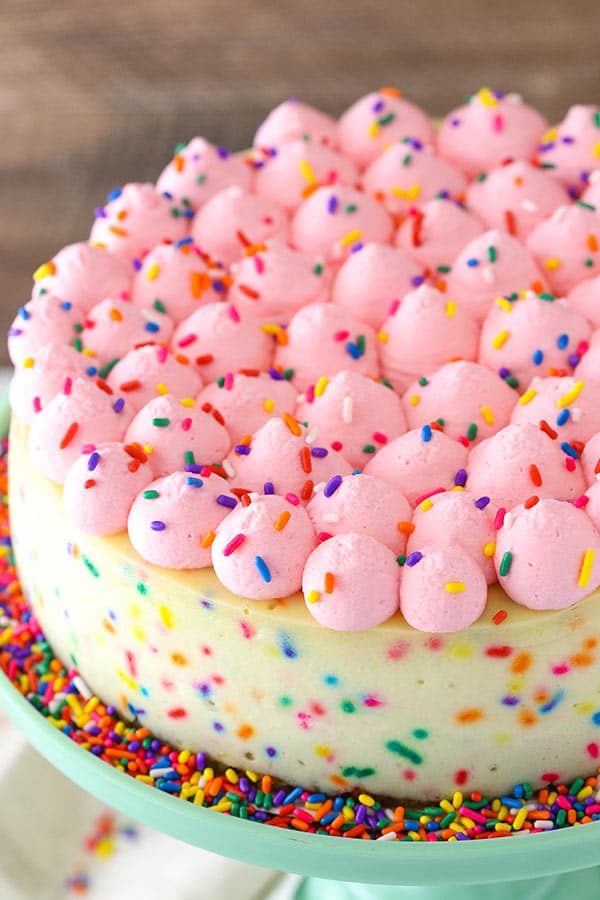
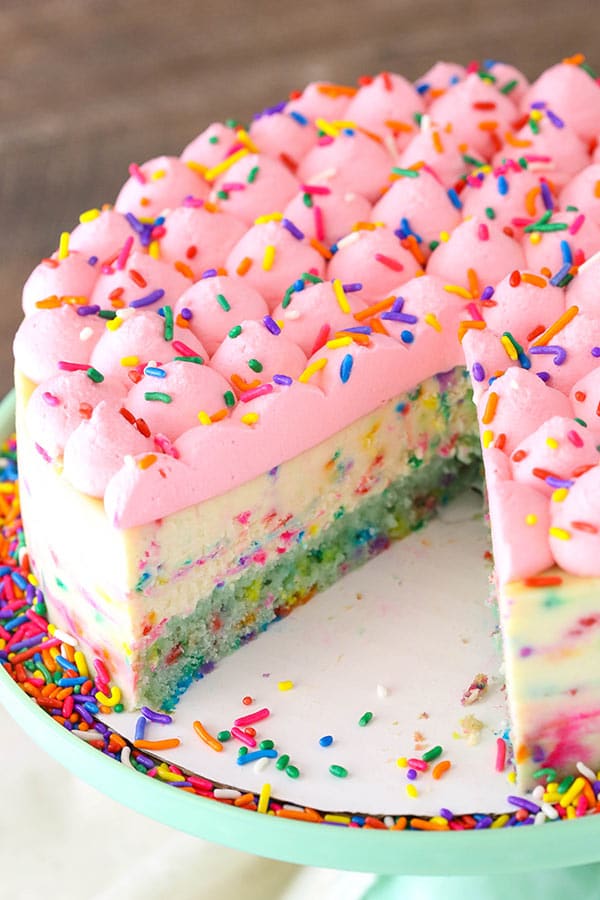
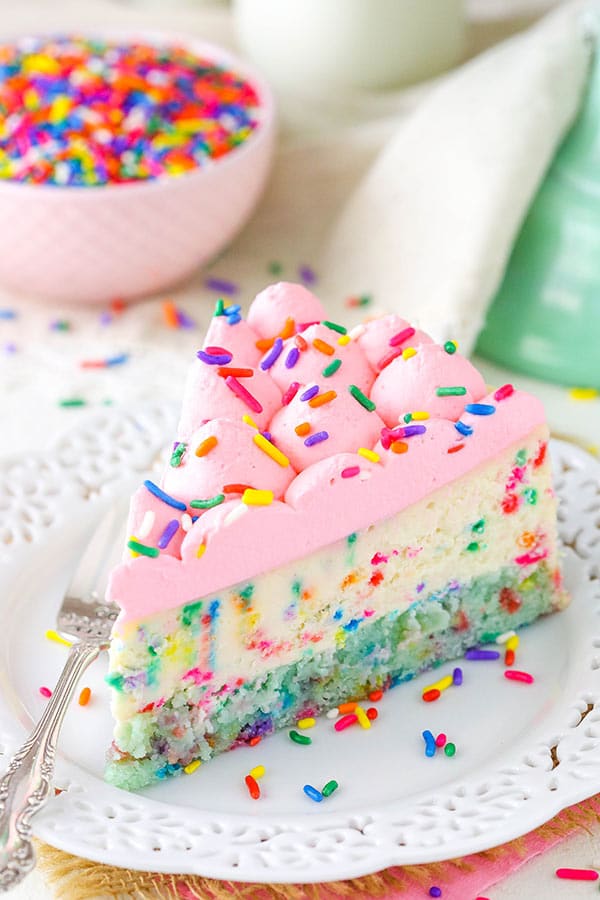
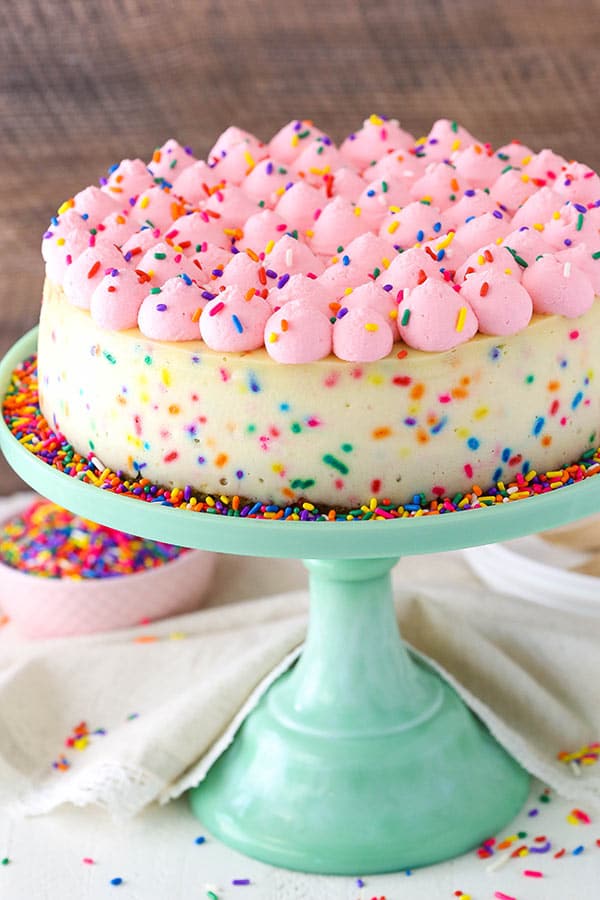
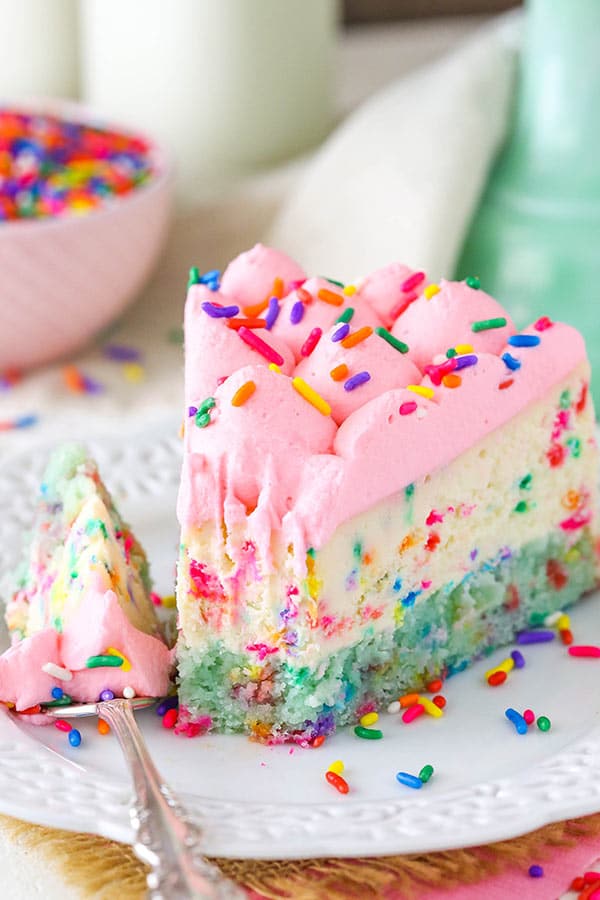
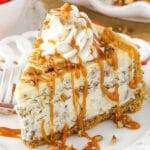
This Funfetti Cheesecake recipe is thick, creamy and delicious! And to make it even better, it’s got a homemade cake bottom instead of your average cheesecake crust. It’s a super fun recipe and perfect for celebrating any family occasion!
If you’re interested in a more traditional cheesecake, take a look at this Classic Cheesecake Recipe or this Easy No-Bake Cheesecake Recipe that makes a perfect, smooth & creamy cheesecake that sets up in the refrigerator!
So lately it feels like it’s been all about the babies around here. Today is still about babies, but not about ours. Today I am celebrating a sweet friend of mine. Sally from Sally’s Baking Addiction is expecting her first child in September and today a bunch of us bloggers are celebrating her and her baby with a virtual baby shower.
Sally’s blog is one that I started reading before I ever even created my own. If you’re not familiar with it, you must check it out. And after watching as she’s gotten engaged, married and is now expecting her first child, I couldn’t be more thrilled to celebrate her today. I’ve had the pleasure of meeting and getting to know her and she is just as super sweet as you would expect!
And even more fun – she is expecting her baby in September – the same month that her third cookbook, Sally’s Cookie Addiction, comes out. Sally is the queen of cookies and her new cookbook is all about just that – cookies! I actually have a preview copy and will be sharing a recipe from it on the blog soon.
Easy Homemade Funfetti Cheesecake
But today is all about the sprinkles! Sally is definitely a sprinkle lover so today we are all celebrating with fun sprinkle-filled recipes. My contribution is this delicious cheesecake.
This recipe is loosely based on my Boston Cream Pie Cheesecake. That one also has a cake bottom, which is such a fun combo. No need to worry, the cake doesn’t dry out when you bake it a second time with the cheesecake. It stays moist and perfect!
How To Make This Easy Cheesecake Recipe
To make this cheesecake, the first thing you’ll do is make the cake bottom. I dyed mine a shade of teal and added sprinkles, of course! You’ll want to use the same springform pan that you’ll use later to bake the cheesecake.
Once the cake is baked and cooled, it’s time to make the cheesecake. I find the cheesecake bakes best if you wash the sides of the springform pan and re-spray it with baking spray after baking the cake layer and before adding the cheesecake filling.
The filling of self is pretty straightforward. Fill it with sprinkles and then bake in a water bath. I know water baths aren’t the most fun, but they really do lend the best cheesecakes. Without it, cheesecakes tend to be dry, crack and sink in the middle.
To finish off the cheesecake, I added some fun pink whipped cream on top and more sprinkles. Don’t be fooled – it’s no indication of the gender of the baby, which Sally hasn’t revealed yet. I just thought the mix of teal and pink would be super fun! I love how it turned out and it’s quite tasty! The smooth and creamy cheesecake with the moist cake is heavenly. I hope you enjoy it as much as we did!
Sally – I wish you all the best with your growing family! Such an exciting time! Congratulations!
Funfetti Cheesecake with Cake Bottom
- Prep Time: 45 minutes
- Cook Time: 1 hour 30 minutes, plus
- Total Time: 0 hours
- Yield: 12-14 Slices
- Category: Dessert
- Method: Oven
- Cuisine: American
Description
This Funfetti Cheesecake recipe is thick, creamy and delicious! And to make it even better, it’s got a homemade cake bottom instead of your average cheesecake crust. It’s a super fun recipe and perfect for celebrating any family occasion!
Ingredients
VANILLA CAKE
- 1/4 cup (56g) salted butter, room temperature
- 1/2 cup (104g) sugar
- 1/4 cup (58g) sour cream, room temperature
- 1 tsp vanilla extract
- 2 large egg whites, room temperature
- 3/4 cups (98g) all purpose flour
- 1 1/4 tsp baking powder
- 1/4 cup (60ml) milk, room temperature
- 1 tbsp (15ml) water, room temperature
- 2 tbsp sprinkles
- Teal gel icing color, optional
CHEESECAKE FILLING
- 24 ounces (678g) cream cheese, room temperature
- 1 cup (207g) sugar
- 3 tbsp (24g) all purpose flour
- 1 cup (230g) sour cream, room temperature
- 1 tbsp vanilla extract
- 3 large eggs, room temperature
- 5 tbsp sprinkles
WHIPPED CREAM TOPPING
- 1 1/4 cups (300ml) heavy whipping cream, cold
- 3/4 cup (86g) powdered sugar
- 1 tsp vanilla extract
- Pink and Peach gel icing color
- Sprinkles
Instructions
1. Preheat oven to 350°F (176°C). Prepare a 9 inch springform pan with a circle of parchment paper in the bottom and grease the sides.
2. To make the cake batter, beat the sugar and butter together until light in color and fluffy, 3-4 minutes. Don’t skimp on the creaming.
3. Add the sour cream and vanilla extract and mix until well incorporated.
4. Add the egg whites and mix until well combined.
5. Combine flour and baking powder in a separate bowl, then add half of the dry ingredients to batter and mix until well incorporated.
6. Add the milk and water and mix until well incorporated.
7. Add the remaining dry ingredients and mix until well incorporated and smooth.
8. Stir in the sprinkles and color the batter, if desired.
9. Spread the cake batter evenly into the bottom of the prepared pan.
10. Bake for 18-20 minutes, or until a toothpick inserted comes out with a few crumbs. Set the cake aside to cool.
TO MAKE THE CHEESECAKE FILLING:
11. Add the cream cheese, sugar and flour to a large mixer bowl and beat on low speed until completely combined and smooth. Be sure to use low speed to reduce the amount of air added to the batter, which can cause cracks. Scrape down the sides of the bowl.
12. Add the sour cream and vanilla extract mix on low speed until well combined.
13. Add the eggs one at a time, mixing slowly to combine after each addition. Scrape down the sides of the bowl as needed to make sure everything is well combined.
14. Stir in the sprinkles.
15. When the cake layer has cooled, reduce the oven temperature to 300°F (148°C). Remove the sides of the springform pan and clean it off, the respray it with non-stick spray. You want to be sure it’s well done so that they cheesecake doesn’t stick to the sides after baking.
16. Reset the springform pan edges around the cake and add the cream cheese filling to the pan.
17. Prepare the pan for a water bath by wrapping the outside of the pan with aluminum foil, then place the springform pan inside another larger pan. Fill the outside pan with enough warm water to go about halfway up the sides of the springform pan. The water should not go above the top edge of the aluminum foil on the springform pan. Check out my water bath tutorial if you need more help.
18. Bake for 1 hour. The center should be set, but still jiggly.
19. Turn off the oven and leave the door closed for 30 minutes. The cheesecake will continue to cook, but slowly begin to cool as well.
20. Crack the door of the oven for 30 minutes to allow the cheesecake to continue to cool slowly. This process helps prevent cracking.
21. Remove the cheesecake from the oven and water bath wrapping and refrigerate until firm, 5-6 hours or overnight. Once completely cool and firm, remove from the springform pan.
TO FINISH OFF THE CHEESECAKE:
22. Add the heavy whipping cream, powdered sugar and vanilla extract to a large mixer bowl and whip on high speed until stiff peaks form.
23. Add the icing color to get the shade of pink you want.
24. Pipe the whipped cream on top of the cheesecake. I used a large round tip, Ateco 808.
25. Add a few more sprinkles on top of the cheesecake, then refrigerate until ready to serve. Cheesecake is best for 3-4 days.
Nutrition
- Serving Size: 1 Slice
- Calories: 405
- Sugar: 33.8 g
- Sodium: 247.1 mg
- Fat: 24.3 g
- Carbohydrates: 44.3 g
- Protein: 9.1 g
- Cholesterol: 106.7 mg
Categories
Enjoy!
This post contains affiliate links.




I just made this recipe last night for my friends birthday and it turned out great! I love the whipped icing and the cheesecake had a perfect richness. It took some time due to the cooling, but I can say I had no cracks in the cake and the effort is definitely worth it! The cake bottom stayed very moist. My friend who loves funfetti was ecstatic about it! Thank you for this recipe!
Wonderful! I’m so glad you all enjoyed!
I went through every single step to the letter with this cheesecake. It was good, but I found the cheesecake part seemed “uncooked”. It was definitely creamy, but the whole thing (not just the center) was almost like I had not baked it at all, much less for a full hour. Is that the way it is supposed to be? Just asking so that others know what to expect. After going through so much work and time to make this, I was pretty disappointed.
This cake was amazing! The cheesecake isn’t as heavy and filling as I find cheesecake tends to be, and the cake stayed SO moist even though it was baked for so long! THANK YOU!
I love the idea of this cheesecake. However, would it be possible to do this as mini-cupcake or cupcake size desserts? An organization that I work with is doing a fundraiser afternoon tea event and we are planning only finger foods for the day. Slicing a pie might not work too well
I would consider doing something like this. Here’s more of a full recipe of the funfetti cake bottom that you could use the cheesecake filling of the pumpkin cheesecake cupcakes with. If you use the full amount of the funfetti cake, you’ll probably want to double the amount of the cheesecake filling. you’d probably end up with roughly 30 cupcakes, give or take.
Do you have a variation of this with a chocolate bottom? My 16yr old daughter and I were wondering? What a beautiful blog site. This is my first time visiting.
I haven’t used a chocolate cake layer, but I have used a brownie like in this cheesecake.
Thanks so much! Glad to hear you’re enjoying the site!
Rather than wrapping the springform pan in foil which sometimes leaks despite my best effort, I insert it in a silicone cheesecake pan (same size and shape). That makes it 100% water tight. No more tears water bath.
Hi Lindsay, want to try this amazing looking cake but im lost, after the cake base is baked and cooled, do i poor the cream cheese filling on top and bake again but in the water bath? So what im asking is , is the cake base being baked twice?? Sorry if this sounds silly ????
Yes, the cake is baked twice. It doesn’t dry out, I promise. 🙂
Hi, can I use a box cake? I really don’t feel like baking one from scratch. If so, is there a brand you prefer over another?
You could, but you won’t need the whole thing. Any brand should be fine.
I’m new to your blog and this looks so amazing!!! I can’t stop looking and maybe drooling ????
Hi Lyndsay,
I would like to know what brand food color (teal) you used for the bottom cake?
Thanks
I used Wilton brand.
I love this cheesecake, Lindsay! It’s so perfectly “Sally!” Thanks for participating and THE VERY BEST OF LUCK to you as you continue on this pregnancy journey! xoxo
Thanks so much Lynn! 🙂
CAN WE TALK ABOUT THIS CHEESECAKE PLEASE. Lindsay, your talent at decorating cakes blows me away every single week. In the meantime, I can’t thank you enough for all the love and support and I’m thrilled that you are on this journey as well. So happy for you!
Thanks Sally! 🙂 Right back at you! So excited for you!
I love the idea of the virtual Sally shower by you food bloggers. I subscribe to several of the blogs and it’s a pretty neat way to support your fellow blogger. Your pink frosting is perfect for Sally’s baby girl and your cheesecake cake looks yummy.
Thank you Jodie! 🙂 The blogging community is definitely a great one!
I love Sally’s blog and actually met her a couple of years ago in St. Louis & had her sign my cookbook! Coincidentally, today she revealed she’s having a girl! So your icing is perfect!
I saw that – perfect! 🙂
Hi! Is there something else what I can replace with heavy whipping cream?? I live in Europe and can’t find one. We have whipping cream who contains 35% fat. If I used it cream would be as fluffy as yours?
What do you normally use to make whipped cream that’s stabilized? I would suggest using that.
Does cooking the cake bottom twice an issue?
Nope! It still turns out great. You would never know it was baked twice.
Heavy cream is also known as double cream (at least in Britain). Maybe try looking for that?
hey girl- this looks so yummy!
Thanks Shawnna!
Can we use a different cake recipe? 🙂
I suppose so. I can’t guarantee your results, but you could try it.
Woah! This looks absolutely amazing! I can not wait to try this. Congrats for your friend!