This post may contain affiliate sales links. Please read my disclosure policy.
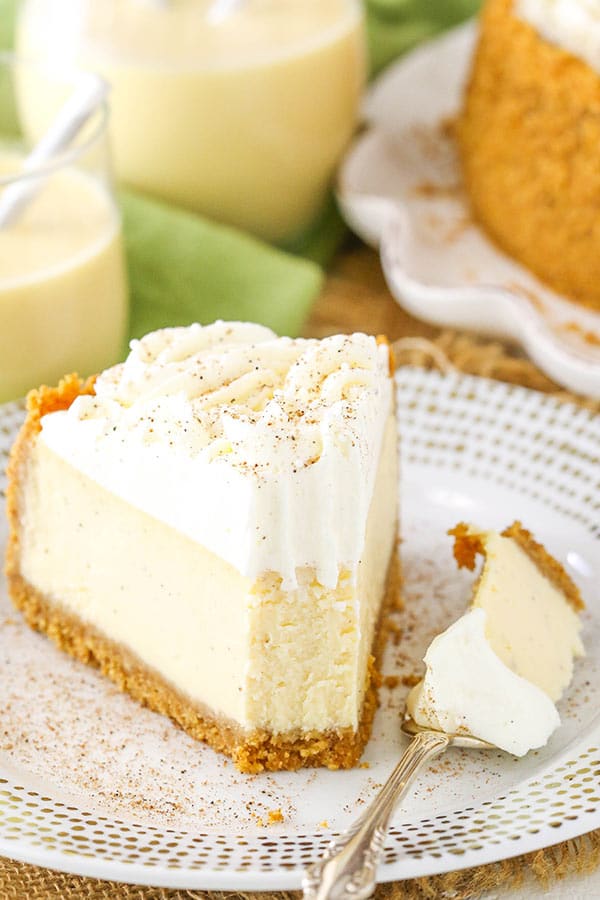
Eggnog Cheesecake is thick, creamy and full of eggnog! This easy cheesecake recipe is perfect for the holidays and a delicious way to enjoy one of my favorite drinks of the season.
Looking for an eggnog drink? Try my old-fashioned homemade eggnog recipe.
This post is sponsored by The American Dairy Association Mideast, but all opinions are my own.
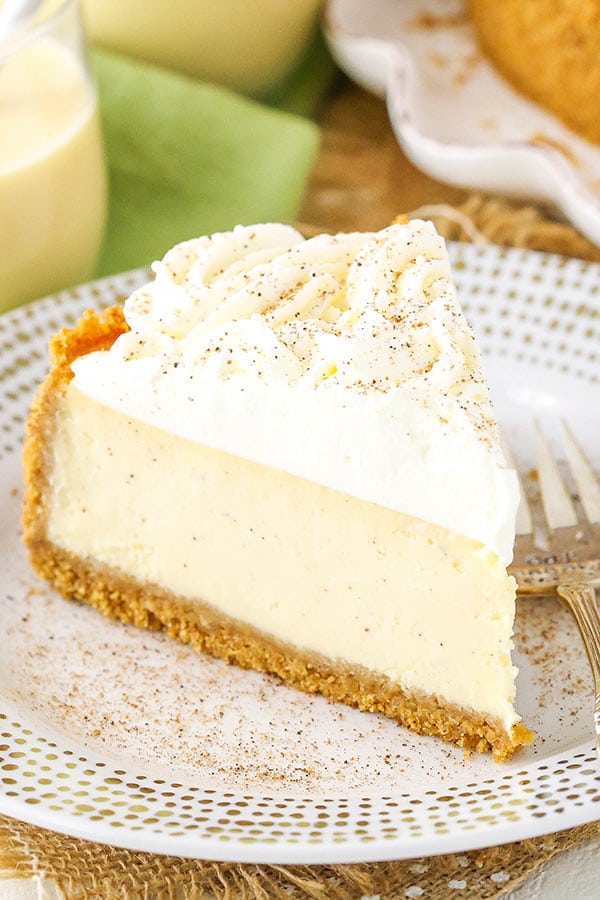
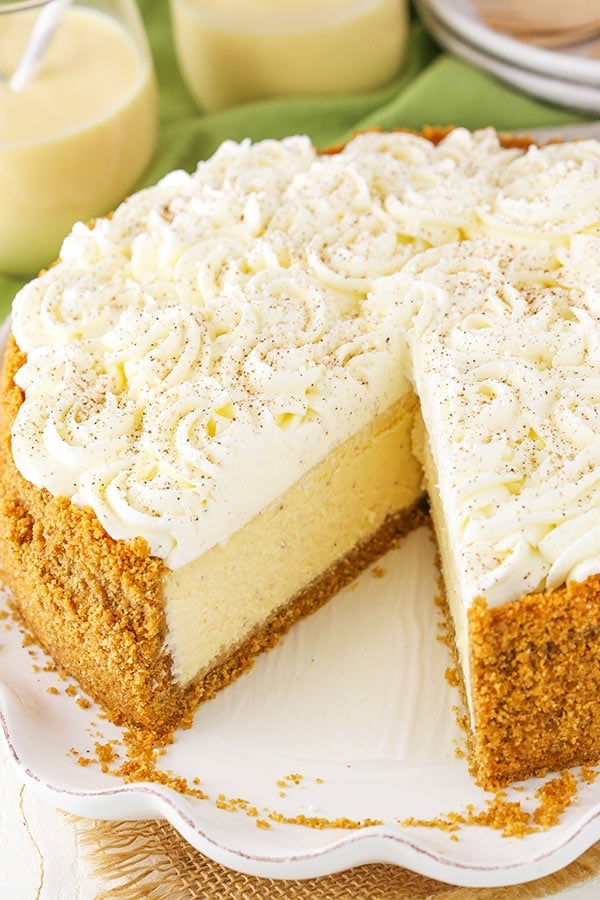
Easy Eggnog Cheesecake
One of the best things about the holiday season is giving back. One thing I love is that every year our church gives back to so many organizations in our area and around the world. Between collecting donations, giving time by volunteering at organizations in the area and donating to food kitchens in the areas, it’s a wonderful thing they do every year.
So I’m also excited to be partnering with the ADA Mideast for their holiday campaign. They’re donating 25 cents, the average cost of 1 glass of milk, to the Great American Milk Drive for every new follower on Facebook, Twitter and Instagram through Wednesday, Dec. 13. Milk is the number one nutritious product requested by food banks, but it is rarely donated. The Great American Milk Drive is delivering thousands of gallons of milk to families who would otherwise go without. How great is that? Nutritionists recommend 3 servings of milk a day, which is about a gallon each week, but 46 million Americans – including 12 million children – only get on average 1 gallon of milk ALL year. Of course if you’d like to give separately, you can do that at milklife.com/give too. A $5 donation gives a gallon of milk to a family in-need.
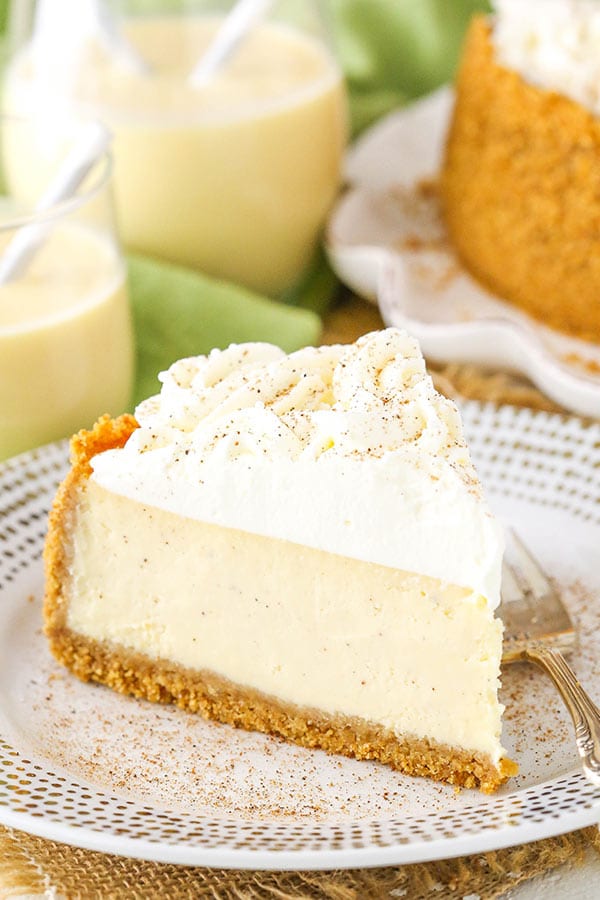
What You’ll Love About this Eggnog Cheesecake
- Tons of Eggnog Flavor: One of my favorite ways to enjoy milk this time of year is in the form of eggnog! I could probably drink my weight in the stuff. I love it! And there’s more than 1 full cup of it in this cheesecake.
- Classic Graham Cracker Crust: To start, there’s the classic graham cracker crust – with a little twist. To give it a touch of holiday fun, there’s some nutmeg. It gives the crust a little more flavor and goes perfectly with the eggnog.
- Creamy Cheesecake Filling: Next up is the cheesecake filling. It’s my classic thick and creamy cheesecake with a full cup of eggnog and a bit of nutmeg. One thing to keep in mind when baking the cheesecake is that it does bake a little longer than some. The eggnog thins out the batter a good bit, so the baking time is increased. Although baking takes a while, it’s totally worth it in the end!
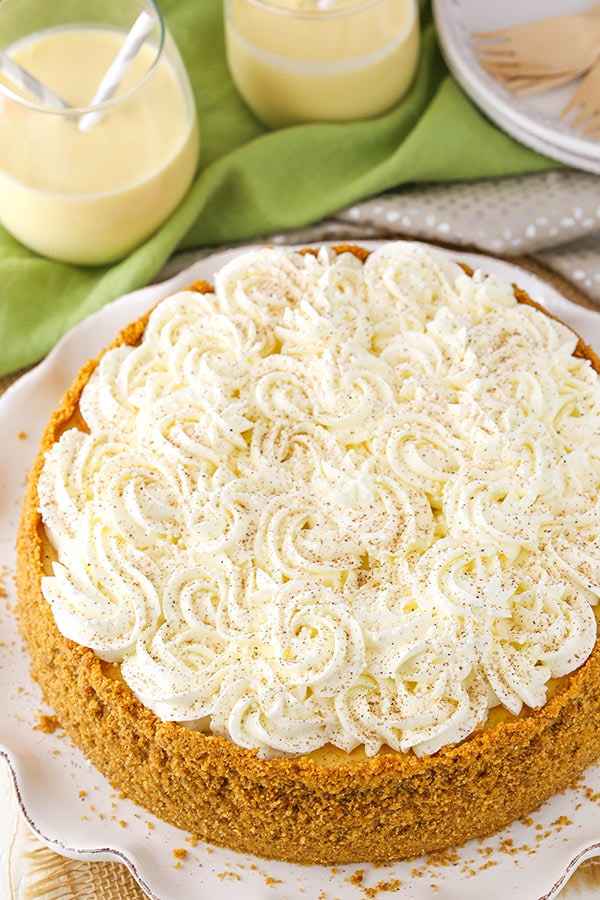
How To Decorate An Eggnog Cheesecake
On top of the cheesecake is some eggnog whipped cream, because is there such a thing as too much eggnog? I think not! I piped the whipped cream onto the cheesecake with an Ateco 844 frosting tip, but you could also use the Wilton 1M or 2D to get a similar look. Sprinkle on a touch more nutmeg and a few pearl sprinkles and you’re all done and ready to dig in!
I shared this cheesecake with lots of family and friends and it was such a HUGE hit! Some were getting a little protective over it and I thought perhaps someone might throw down over the last piece. 🙂 I hope you love it as much as we all did!
Watch How To Make It
Print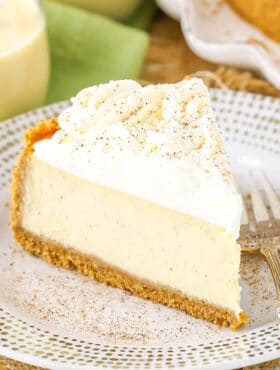
Eggnog Cheesecake
- Prep Time: 1 hour
- Cook Time: 3 hours
- Total Time: 4 hours, plus cooling time
- Yield: 12-14 Slices
- Category: Dessert
- Method: Oven
- Cuisine: American
Description
This easy Eggnog Cheesecake recipe is thick, creamy and full of eggnog! A perfect dessert recipe for the holidays, it’s a delicious way to enjoy one of my favorite drinks of the season.
Ingredients
CRUST
- 2 ¼ cups (302g) graham cracker crumbs
- ½ cup (112g) salted butter, melted
- 3 tbsp (39g) sugar
- 1/2 tsp nutmeg
FILLING
- 24 ounces (678g) cream cheese, room temperature
- 1 cup (207g) sugar
- 3 tbsp (24g) all purpose flour
- 1 cup (230g) eggnog
- 3/4 tsp ground nutmeg
- 4 large eggs, room temperature
WHIPPED CREAM TOPPING
- 1 cup (240ml) heavy whipping cream, cold
- 3 tbsp (45ml) eggnog
- 10 tbsp (72g) powdered sugar
- Nutmeg, for sprinkling
- Pearl sprinkles, optional
Instructions
1. Preheat oven to 325°F (163°C). Line a 9-inch (23cm) springform pan with parchment paper in the bottom and grease the sides.
2. Combine the crust ingredients in a small bowl. Press the mixture into the bottom and up the sides of the springform pan.
3. Bake the crust for 10 minutes, then set aside to cool.
4. Cover the outsides of the pan with aluminum foil so that water from the water bath cannot get in. See how I set up my pans. Set prepared pan aside.
CHEESECAKE FILLING AND TOPPING
5. Reduce oven to 300°F (148°C).
6. In a large mixer bowl, mix the cream cheese, sugar and flour until well combined (Use low speed to keep less air from getting into the batter, which can cause cracks). Scrape down the sides of the bowl.
7. Add the eggnog and nutmeg and mix on low speed until well combined.
8. Add the eggs one at a time, beating slowly and scraping the sides of the bowl after each addition.
9. Pour the cheesecake filling into crust and spread evenly.
10. Place springform pan (covered with aluminum foil) inside another larger pan. Fill the larger pan with enough warm water to go about halfway up the sides of the springform pan. The water should not go above the top edge of the aluminum foil on the springform pan.
11. Bake for 1 hour and 30-40 minutes.
12. Turn off heat and leave cheesecake in oven with door closed for 30 minutes.
13. Crack oven door and leave the cheesecake in the oven for about 30 minutes.
14. Remove cheesecake from oven and chill until firm, 5-6 hours or overnight.
15. To make the whipped cream, add the heavy whipping cream, eggnog and powdered sugar to a large mixer bowl. Whip on high speed until stiff peaks form.
16. Remove the cheesecake from the pan, then pipe the whipped cream onto the cheesecake. I made little rosettes with Ateco tip 844, but feel free to decorate as you like. Sprinkle with a little nutmeg and pearl sprinkles, if desired.
17. Refrigerate the cheesecake until ready to serve. Cheesecake is best for 3-4 days.
Nutrition
- Serving Size: 1 Slice
- Calories: 432
- Sugar: 32.6 g
- Sodium: 399.2 mg
- Fat: 23.8 g
- Carbohydrates: 47.2 g
- Protein: 8.6 g
- Cholesterol: 128.7 mg
Enjoy!







What would you suggest for cooking times in a 4 inch springform pan?
I honestly don’t know. I’ve never made a cheesecake that size.
Can not get the topping to set up? Followed directions even put in fridge. Going to have to use something else!
What do you mean by set up? If you are referring to the whipped cream, did you use the full amount of powdered sugar? It stabilizes it.
Hi! It’s not often I leave a reply but this recipe is so amazing I just have to! I’m going to be honest and say making cheese cake always freaked me out. After making this recipe I have concurred that fear. I followed the recipe exactly the first time I made it. I was concerned if it was baked long enough. I searched on line to find out how to know for sure. I had no idea you could check using a thermometer in the filling. At 150 to 155 degrees it is done. I took it out of the oven at the 1 hour 30 minute mark. It was only at 120 degrees. I put it back in for 10 minutes and checked again. It was 150 degrees. Perfect!???? I turned the oven off and followed the rest of the instructions. Two things I will ALWAYS do when making a cheese cake in a water bath is use the slow cooker liner around the spring form pan then extra wide tin foil (no seams). Every cheese cake I’ve made since has never had any water leaking into the cake, not a single crack, perfect!!. I do a lot of cake decorating and I’d like to share a “trick” for stabilizing the whipped cream. Your recipe calls for so much icing sugar it’s just too sweet in my opinion. If you whip 1 cup of the cream with 2 tbsp icing sugar until almost stiff and then add 1 tbsp instant vanilla pudding powder and whip a bit more it will be stabilized and pipe just like butter cream icing. It holds it shape even when left at room temp.
Thank you for this amazing recipe and I hope my tips help????
I’m so glad to hear you enjoyed it! As for the whipped cream – yes the pudding mix would work. It’s the gelatin in the mix that stabilizes it, so regular gelatin would work as well.
Hi Lindsay, I love this receipe. Can it be made in cupcakes? If so, what would the recipe look like?
They should be fine made in a cupcake pan. I’d check out this recipe for a guide for baking. If you use the full recipe, you’ll get 24-28 minis. The baking time should be close to what is listed in that recipe, just maybe a few minutes more.
Would an orange whipped cream be good on this? I want to diversify the flavors a bit instead of eggnog on eggnog.
Hmm, I haven’t ever had those two flavors together, but it could be ok.
I just made this recipe in my mini cheesecake pans. So cute and delicious. I reduced the eggnog down to thicken it and I baked them at 325° for 18 minutes. I put a pan with hot water on the bottom rack. It made 34 minis. I would post a picture if I could figure out how ☺️. Thank you!
Awesome! So glad you enjoyed them!
Argh! I was pouring the warm water into the pan and my daughter startled me and I poured some of it into the cheesecake! Can it still be ok? I think my only saving grace is that I reduced the eggnog by half before adding it, so it’s starting out a bit thicker.
Hmm, hopefully it wasn’t too much water. Did it turn out ok?
I want to make this but do not understand the water bath. If I have a convection bake option on my oven do I still need to use that? I assume its just to keep it from cracking? Convection should circulate the air and minimize that or is there another reason for it.
I’d recommend a water bath personally. You’re correct, without a water bath, cheesecakes can easily crack when cooling, sink in the middle when cooling and often brown on the edges. The cheesecake flavor will be the same, but it tends to have a less creamy texture (in my opinion, anyways). If you choose not to use a water bath though, you’ll likely want to reduce the baking time by maybe 15 minutes or so. If you’d like to see how I often set up my pan to avoid it leaking, check out my tutorial here.
Thank you, I’ll try the water bath.
I’m reviewing the recipe and comments before attempting this, my first cheesecake! For a party nevertheless. Anyway my question is with the crockpot liner, why is there still need for foil? Heat maybe? Also, glad I preread the recipe, will need to make it a day early so it will cool. Thank tou.
I add aluminum foil for double coverage. If you’d like to see more details on how I often set up my pan to avoid it leaking, check out my tutorial here.
Best cheesecake I have ever eaten!! Even better than The Cheesecake Factory!!!
I’m so glad you enjoyed! 🙂
I just made this last night. I used two premade Graham cracker pie shells. The recipe amount fit perfectly. Can’t wait to taste them this evening. Thanks.
Hi I’m about to make this and was planning on doing 2 pie shells as well. Can you please reply with how long you baked them for?
Made the eggnog and pumpkin cheesecakes for Thanksgiving, and they were a big hit. The granddaughter loved the eggnog and the son said they pumpkin was better than pie. I have to confess, I liked the eggnog best.
That’s awesome! I’m so glad you all enjoyed! 🙂
I just made this cheesecake and the top came out so nicely flat and browned I don’t even want to cover it up with whipped cream! But alas I will, because I cannot say no to whipped cream on my desserts. However, for those who were a little concerned about the longevity of the cream, as extra insurance I will stabilize the whipped cream further with a couple teaspoons of gelatin. I will get maybe 2 1/2 tbsp of cold water and sprinkle on 2 tsp of gelatin; allow the gelatin to absorb and the microwave it until it’s liquid again, it shouldn’t take any longer than 15-20 secs. Then while I’m whipping the cream I’ll pour in this gelatin mixture – this always ensures my whipped cream stays in tip top shape as long as I need it!
Thanks for your tips on the whipped cream!
Do u have to use the water bath ?
Well, no, it’ll bake without it. But it will likely fall in the middle when it cools, brown around the edges and quite possibly crack. Check out my tutorial for how I set up my water bath, if you like.
I just wish you had a “Print” button
There is a print button under the picture with the recipe. Here is a link to print as well. I hope this helps!
Worked perfectly! Seriously, this was the hit of the family dinner party. It was absolutely delicious, and turned out just the way I wanted, even at a high altitude! Thank you!
Wonderful to hear! Glad you enjoyed it! Thanks Nicole!