This post may contain affiliate sales links. Please read my disclosure policy.
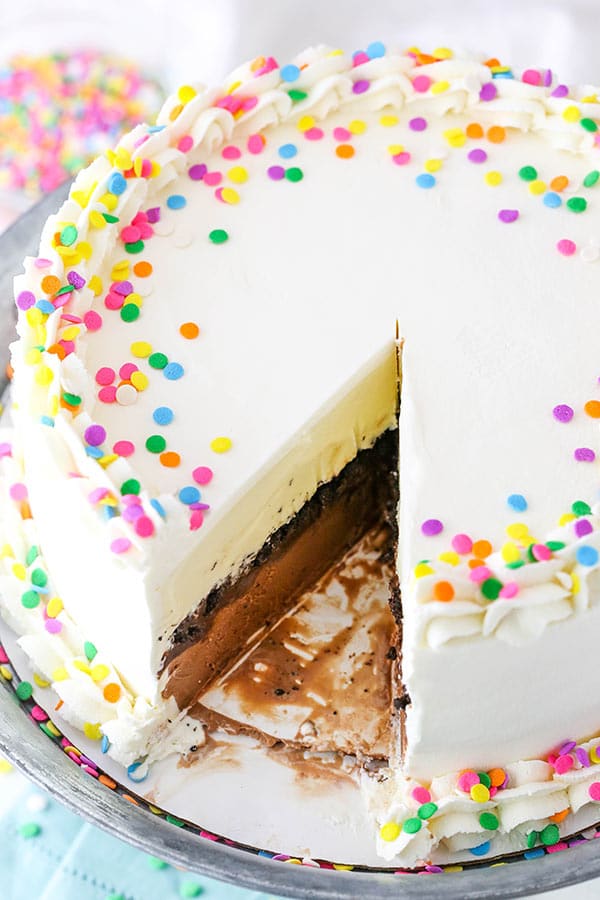
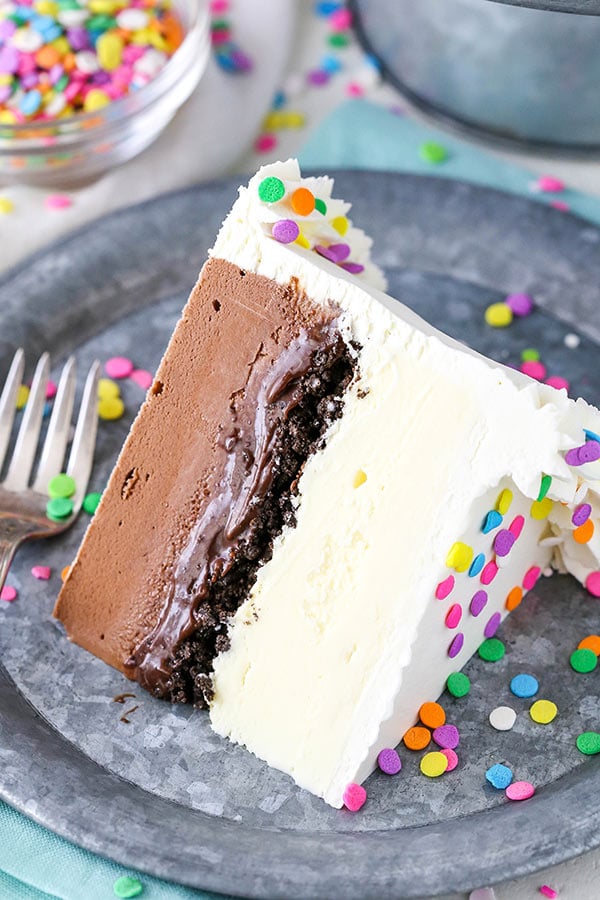
This Copycat Dairy Queen Ice Cream Cake has layers of chocolate and vanilla ice cream around the iconic layer of chocolate crunchies and chocolate fudge. It is so easy to make and tastes just like the real thing!
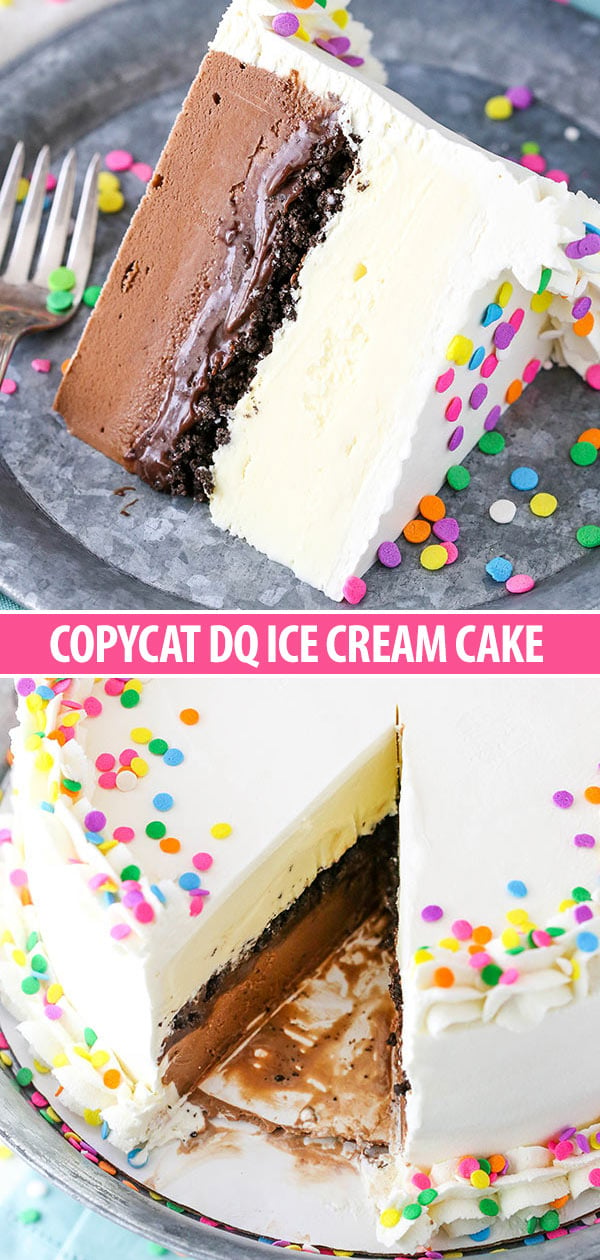
Easy Copycat Dairy Queen Ice Cream Cake
As a kid, I rarely had the same birthday cake twice. I like all kinds of cake too much to stick with one. Regular cake, cheesecake, ice cream cakes – you name it. The only one I didn’t need to have for my birthday was a cookie cake, because I knew I could depend on my dad for that one at his birthday. So naturally, I’ve tried quite a few cakes – including ice cream cakes.
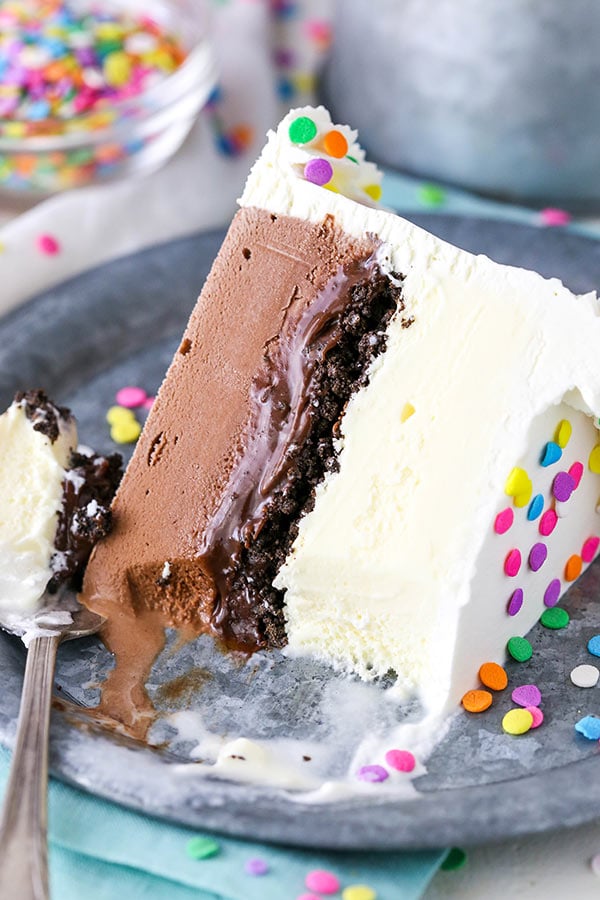
So, these days I feel like I’m a bit of an ice cream cake connoisseur. There’s definitely something to love about all the different kinds available, but when it comes to a Dairy Queen ice cream cake, that middle layer of chocolate fudge along with the chocolate crunchies is pure heaven. Often, I’d just dig that right out from between the ice cream and eat it alone. So darn good!
When I started playing around with ice cream cakes several years ago, I did a fair amount of experimenting with that middle fudge layer and finally perfected it. I’ve shared it before, but never for this copycat cake so I’m excited to share it with you today.
How to Make An Ice Cream Cake
First let’s talk about the cake pan. I used an 8 by 3 inch cake pan, because I prefer a taller cake. You could definitely use a 9 inch pan though, and a springform pan would certainly be convenient. All according to what you’re going for.
Once you’ve got your pan, you’ll want to line the inside of it with clear wrap. Now it’s time to make your cake!
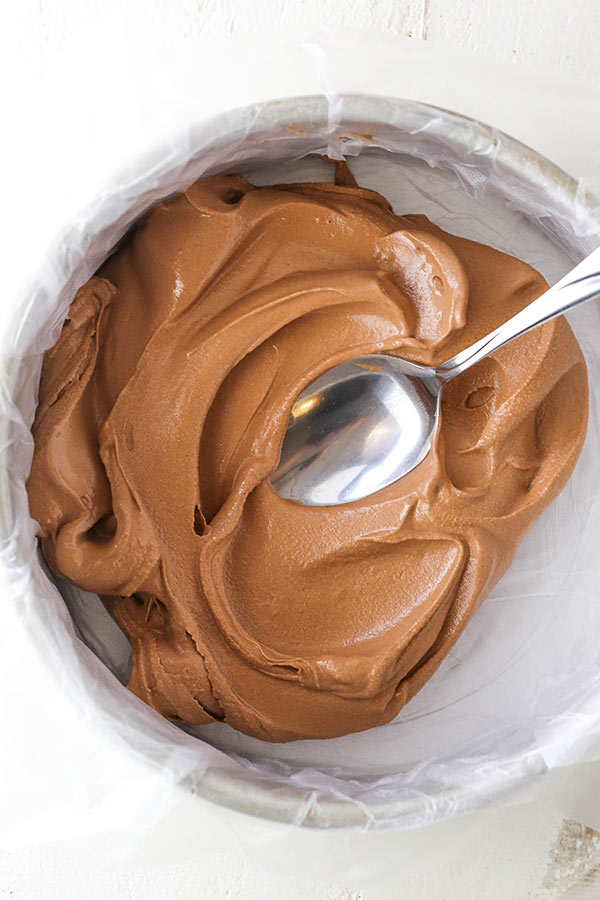
- Chocolate Ice Cream: Add your chocolate ice cream and spread it evenly into the pan. Pop the pan and ice cream into the freezer for about 30 minutes so it firms up just a bit.
- Chocolate fudge layer: You’re actually going to make chocolate ganache – it’ll just be a little thinner than normal and have some corn syrup in it. The corn syrup is really essential here. It helps it stay softer even when frozen, giving it that fudgy consistency. It’s not too firm and not too soft and drippy. The fudge layer is added on top of the ice cream and then frozen for another 10 minutes or so.
- Chocolate crunchies: You’re going to use Oreo crumbs and some melted butter for this layer. Mix the crumbs and butter together, spread them evenly onto a baking sheet and bake for about 8 minutes. As it cools, break it up into smaller pieces so you have the perfect little chocolate crunchies. They are seriously perfect! They aren’t big chunks of Oreos (yay!), but because they’ve been baked a bit they still keep their crispiness even when added to the ice cream cake. Perfection!Add the chocolate crunchy layer and then pop it back in the freezer for about two hours, so the cake can firm up and the layers stay even.
- Vanilla ice cream: Add the vanilla ice cream on top and freeze the cake until it’s firm. When it’s done, frost it with my homemade whipped cream. It uses some powdered sugar to keep it from wilting. It stays stable for days and days making it ideal for an ice cream cake. Decorate the ice cream cake as you like for your occasion and you’re ready to go!
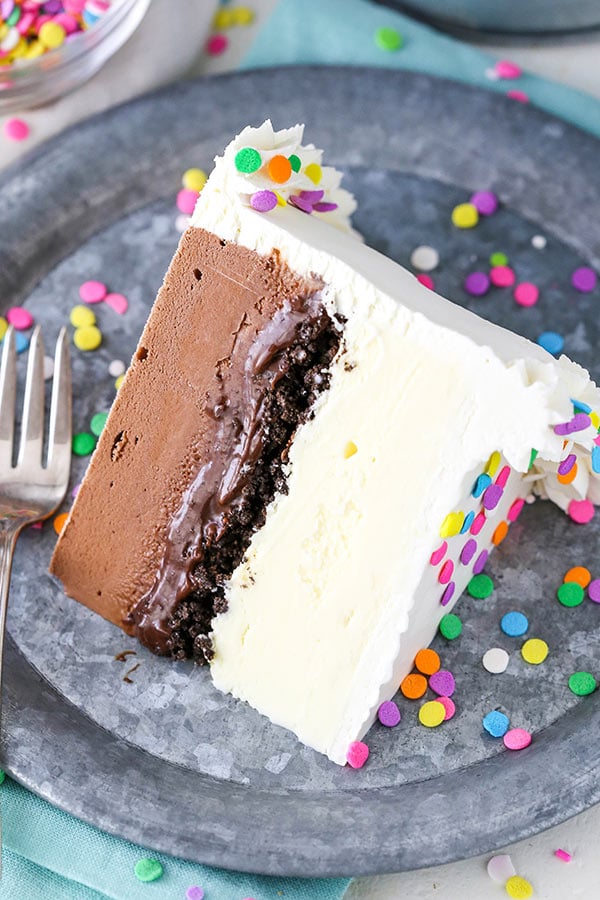
This is seriously the BEST Copycat Dairy Queen Ice Cream Cake! The middle fudge and crunchy layer is pure perfection. You will love it. And just like when I was a kid, you will want to eat the chocolate fudge and chocolate crunchy layer right out of the center!
HOW TO STORE AN ICE CREAM CAKE
This ice cream cake is actually a great recipe to make ahead. You can layer everything together, cover it and leave it in the pan you built it in. It should be fine sitting in the pan for about a week ahead of time. Then you can frost it the of or the day before you need it so that the decorations looks nice and fresh.
After decorating, it’s ideal to store it in a container (such as a cake box or cake carrier) in the freezer. If you don’t have a container that size or space in your freezer, it’ll be fine for a few days in your freezer.
You might also enjoy
Strawberry Crunchy Ice Cream Cake
Peanut Butter Chocolate Ice Cream Cone Cake
S’mores Ice Cream Cake
Oatmeal Chocolate Chip Cookie Ice Cream Cake
Red Velvet Ice Cream Cake
Chocolate Chip Cookie Dough Ice Cream Cake
Oreo Cookies and Cream Ice Cream Cake
Shop the post
Watch How To Make It
Print
Copycat Dairy Queen Ice Cream Cake
- Prep Time: 5 hours 15 minutes
- Cook Time: 10 minutes
- Total Time: 5 hours 25 minutes
- Yield: 12-14 slices
- Category: Dessert
- Method: Oven
- Cuisine: American
Description
This Copycat Dairy Queen Ice Cream Cake has layers of chocolate and vanilla ice cream around the iconic layer of chocolate crunchies and chocolate fudge. It is so easy to make and tastes just like the real thing!
Ingredients
Chocolate Cookie Crunchies
- 3/4 cup (100g) Oreo crumbs (about 9 Oreos)
- 1 1/2 tbsp butter, melted
Ice Cream Layers
- 1.5 quart container vanilla ice cream
- 1.5 quart container chocolate ice cream
Chocolate Fudge
- 6 oz | 1 cup semi-sweet chocolate chips*
- 3 tbsp light corn syrup
- 1/2 tsp vanilla extract
- 1/2 cup (120ml) heavy whipping cream
Whipped Cream
- 2 cups (480ml) heavy whipping cream, cold
- 1 cup (115g) powdered sugar
- 1 1/2 tsp vanilla extract
- Sprinkles
Instructions
1. Preheat oven to 350 degrees. Line a cookie sheet with parchment paper or a silicone baking mat and set aside.
2. Combine the Oreo crumbs and melted butter and stir until well combined. Spread the crumbs evenly onto the prepared cookie sheet.
3. Bake for 8-10 minutes, then allow to cool. Use your fingers to break any big clumps into smaller ones. Set aside.
4. Line an 8×3 inch cake pan* with clear wrap that covers the bottom and goes above the sides of the cake pan. I used two pieces.
5. About 20 minutes before you need it, set the chocolate ice cream out to soften. Once softened, stir it up until smooth and creamy. Add the softened chocolate ice cream to the prepared cake pan and spread into an even layer. Freeze for 30 minutes.
6. To make the fudge layer, add the chocolate chips, corn syrup and vanilla extract to a medium sized bowl.
7. Heat the heavy whipping cream just until it begins to boil, then pour it over the chocolate chips. Allow to sit for 2-3 minutes, then whisk until smooth.
8. Remove the cake pan with the chocolate ice cream from the freezer, then pour the chocolate fudge over the ice cream and spread into an even layer. Freeze for about 10 minutes.
9. Add the cookie crumbles to the top of the fudge layer, then freeze for about 2 hours, until mostly firm.
10. About 20 minutes before you need it, set the vanilla ice cream out to soften. Once softened, stir it up until smooth and creamy. Add the vanilla ice cream to the top of the cake, then freeze until firm, 2-3 hours.
11. Use the clear wrap to lift the frozen cake out of the pan, then place it on a cardboard cake circle or a serving plate. Set it back in the freezer.
12. To make the whipped cream, add the heavy whipping cream, powdered sugar and vanilla extract to a large mixer bowl. Whip on high speed until stiff peaks form.
13. Frost the cake with the whipped cream and decorate as desired. I used Ateco tip 844 for piping the borders.
14. Freeze the cake until ready to serve. Cake is best when stored well covered and eaten within 4-5 days.
Notes
- I like using the 8×3 inch cake pan and having a taller cake, but if you don’t have one of those pans on hand and don’t want to purchase it, you could also use a 9 inch pan (including a springform pan). The cake just won’t be as tall.
- Semi-sweet chocolate must be used, not milk chocolate or another, for the fudge layer to set properly
Nutrition
- Serving Size: 1 slice
- Calories: 661
- Sugar: 50 g
- Sodium: 118.6 mg
- Fat: 46.3 g
- Carbohydrates: 55 g
- Protein: 8.4 g
- Cholesterol: 173.7 mg








I have made several of these and they never fail, always a hit. My Mother is diabetic so I use sugar free ice cream, sugar free chocolate chips, and sugar free cookies to cut down on the amount of sugar for. Now it is her favorite birthday cake.
This is my favourite ice cream cake recipe. I have made it at least 6 times now and everyone loves it.
So glad you’ve enjoyed it!
This recipe was great! My daughter wanted a chocolate chip cookie themed cake, so we used chocolate chip cookie crumbs in the middle instead of oreo, and chocolate chip cookie dough ice cream. The only thing I would say is that with the warm weather, it was challenging to decorate on top of the whipped cream without it melting. Next time I’ll throw it in the freezer again after completing that layer. Everyone raved about it though!
I’d give this recipe 10 stars if I could! I made this for my son-in-law’s 30th birthday today. The recipe was easy to make and the flavor was spot on! Everyone loved it (especially the chocolate fudge filling!). We will definitely be making this again.
Curious Could I use a bowl for the ice cream? Was thinking bottom layer in round pan, crunchie layer on that then using the bowl ice cream layer on topTrying to make a cake with doll in the middle and the cake is her dress.
Thanks
I don’t see why not. Sounds fun!
Made this for my husband’s birthday and he was thrilled. Can the whipped cream be used to frost regular cakes as well? Or does it need to be frozen to remain stable?
Glad to hear that! Yes, you can frost regular cakes with it as well.
Love this recipe, only problem I had was the icing kept running down the side of the cake when I was trying to decorate it.
I am excited to try to make this recipe for my younger sons birthday…..just to clarify….you say to line the cake pan/pot with clear wrap……do you mean cling/saran wrap or something heavier?
If I wanted to make this without frosting, is there another topping you could suggest?
Could you make the whipped cream chocolate? How would you go about doing so?
I use chocolate whipped cream on this ice cream cake, so I’d check that out.
You can make regular whipped cream into chocolate whipped cream by adding a couple tablespoons of cocoa powder and carefully stirring then in. When I make chocolate whipped cream, I usually slightly reduce the amount of icing sugar also to help with consistency and just because I personally don’t enjoy overly sweet chocolate.
The base recipe is great and such a hit last summer I was asked by the two birthday boys (my son and dad!) I was asked to make it again. I made a coffee themed one for my dad, and my only suggestion to others is to NOT use flavored chips. Use chocolate. The coffee chips did not harden enough and made a mess!
Have you ever tried using store bought Cool Whip for the icing? Trying to save time and wonder if it would work as well?
Yes, you could definitely use Cool Whip.
Question: when they say Oreo cookie crumbs do I remove the white filling from the Oreos??? This is probably a stupid question. Ca
I want to make this but with some variations. Anyone used peanut butter chips to make the “fudgy” layer? And anyone used pretzels for the crunchy layer?
For a faster way to do the Oregon layer ( and this is how they do it at DQ – my husband worked there as a teen), chop the oreos roughly and mix them up in a bowl with some Magic shell. This also keeps the two halves from falling apart when the cake is cut.
A great recipie, thank you for sharing Lindsey.
I was wondering, would a layer of the magic shell work on the top
ice-cream layer and then apply the whipped cream layer?
What do you think?