This post may contain affiliate sales links. Please read my disclosure policy.
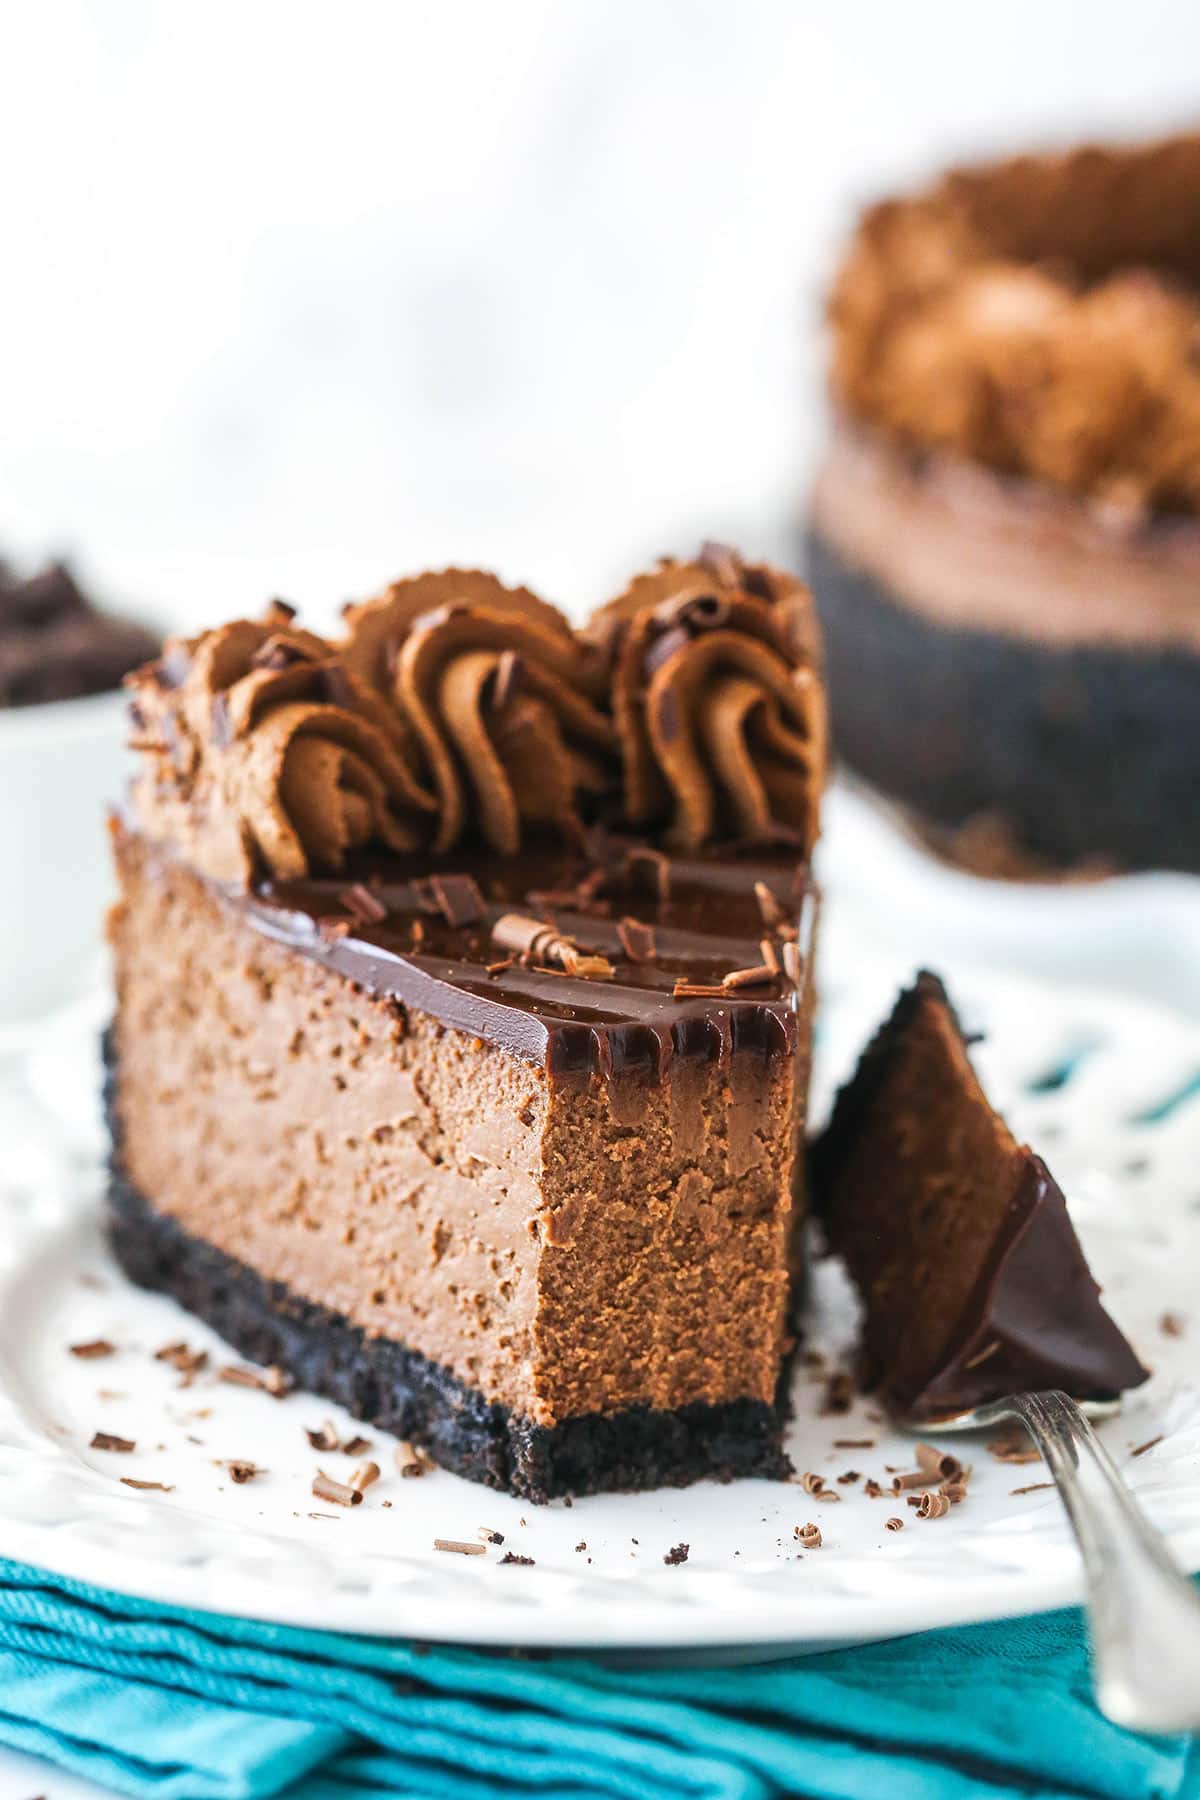
This chocolate cheesecake is rich, creamy and full of chocolate flavor! The chocolate cheesecake filling is baked in an Oreo cookie crust and topped with homemade chocolate ganache and chocolate whipped cream! The perfect dessert for chocolate lovers!
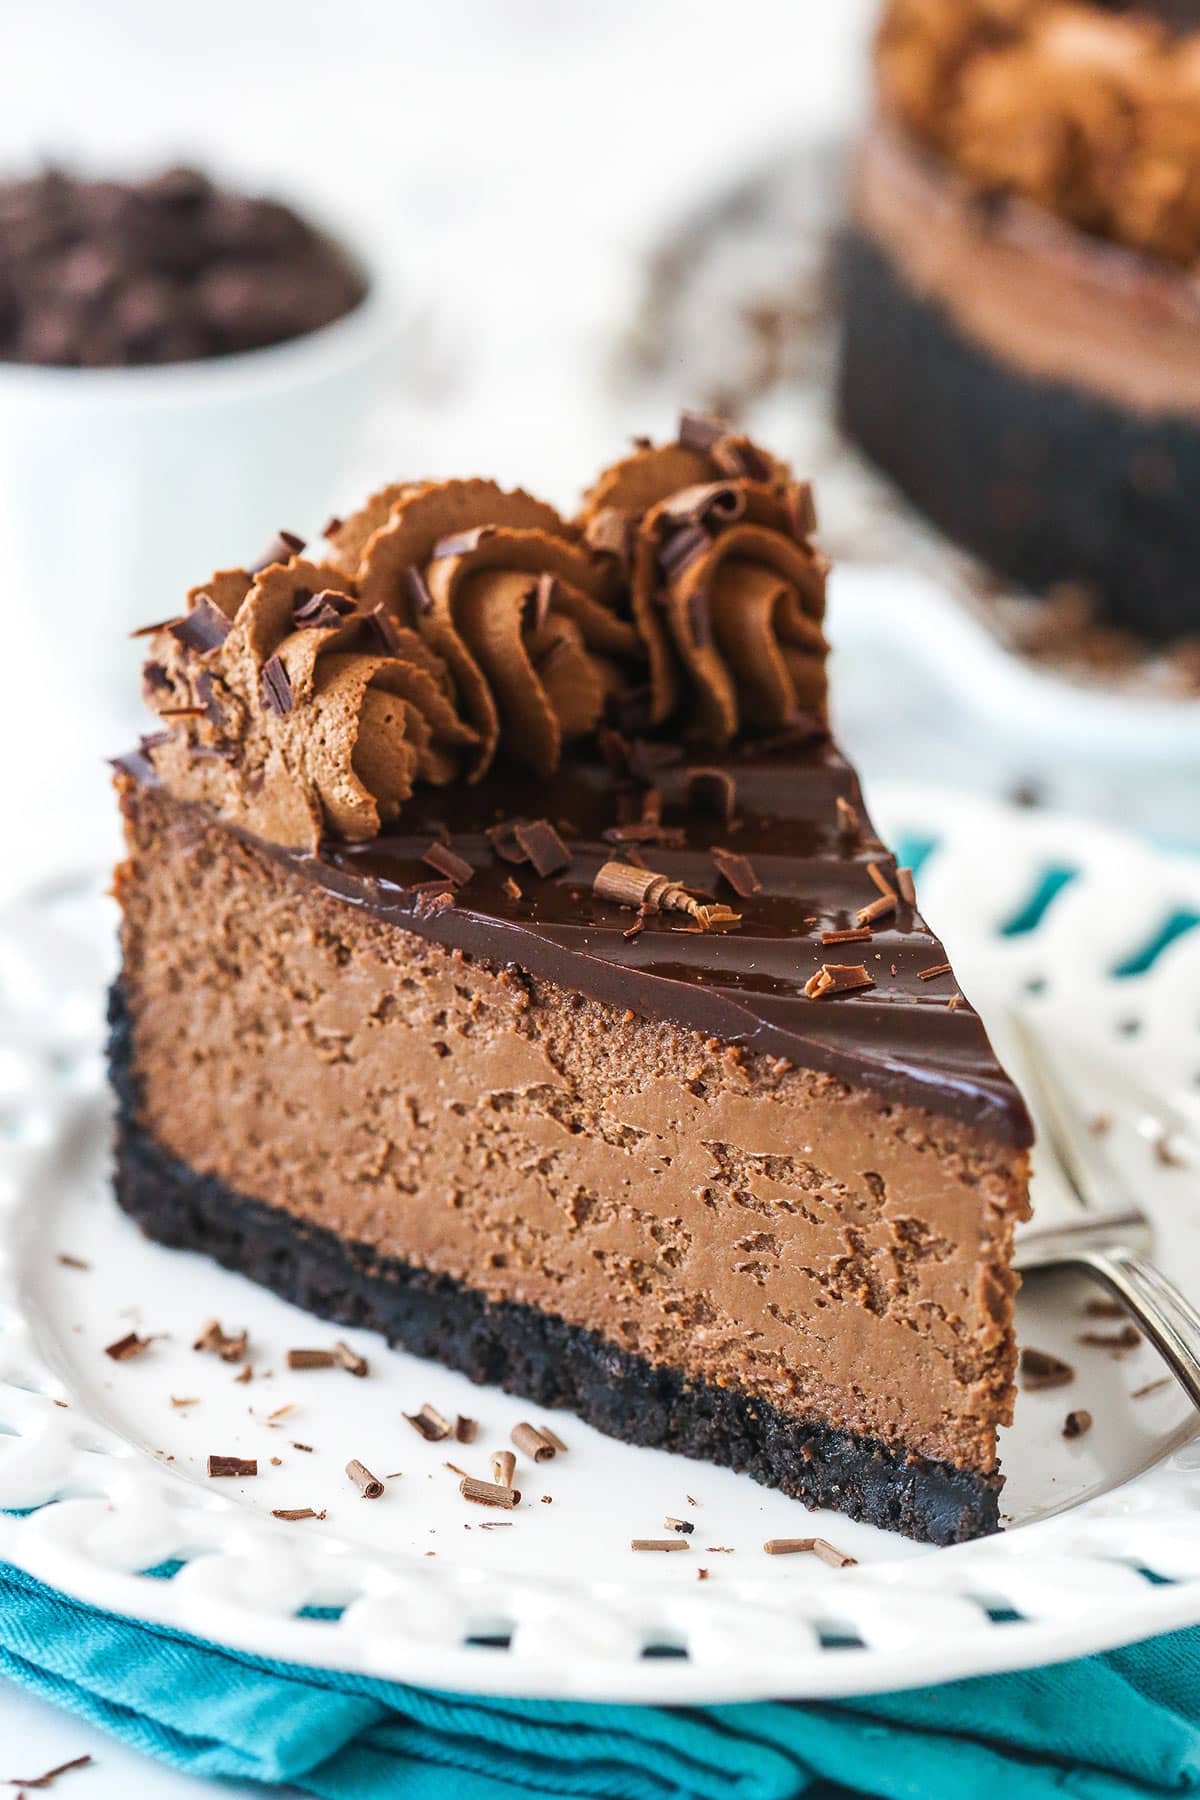
Table of Contents
- The Best Chocolate Cheesecake Recipe
- Why You’ll Love This Rich & Decadent Chocolate Cheesecake
- What You’ll Need
- How To Make Chocolate Cheesecake
- Tips for the Best Homemade Chocolate Cheesecake
- How to Tell When my Cheesecake is Done?
- How to Remove my Cheesecake From The Pan?
- Can I Prepare This Chocolate Cheesecake in Advance?
- Proper Storage
- More Decadent Cheesecake Recipes
- Watch How to Make Chocolate Cheesecake
- Get the Recipe
The Best Chocolate Cheesecake Recipe
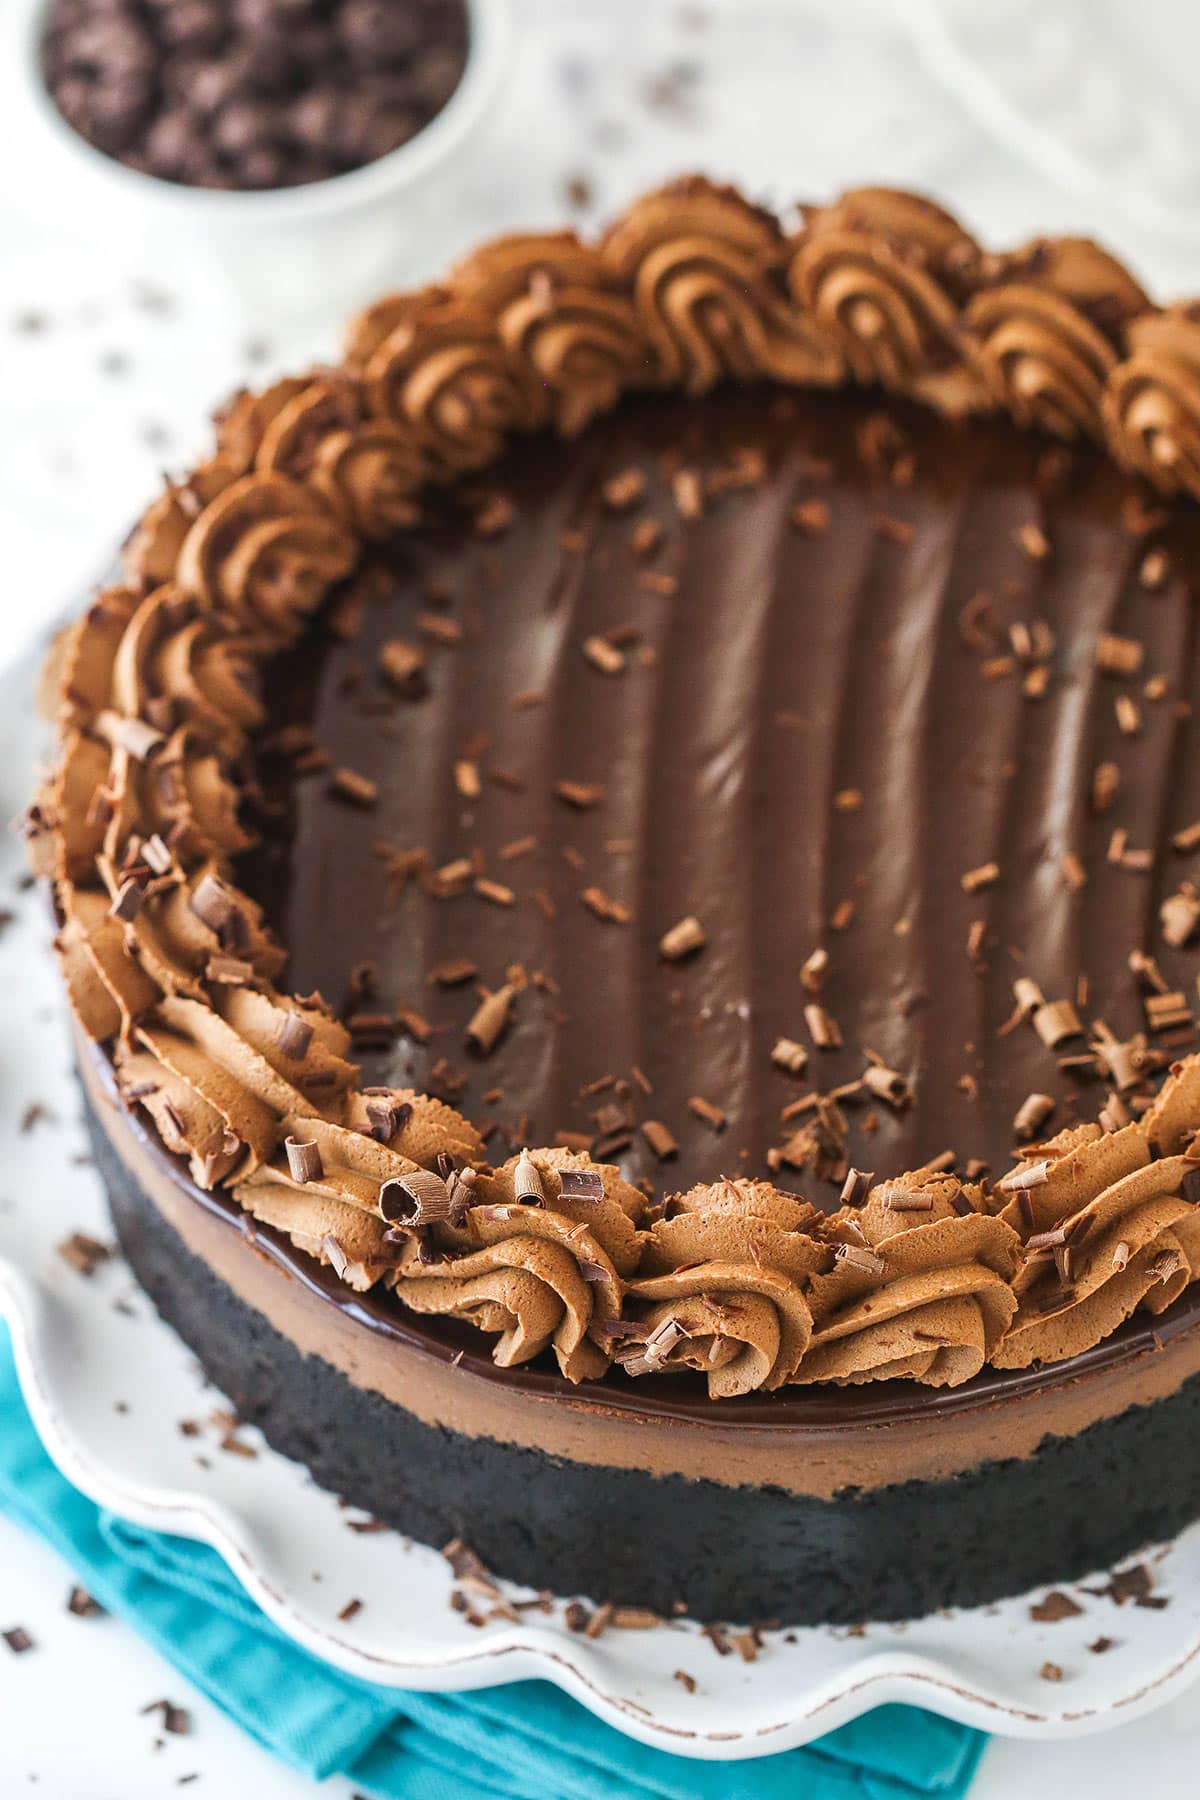
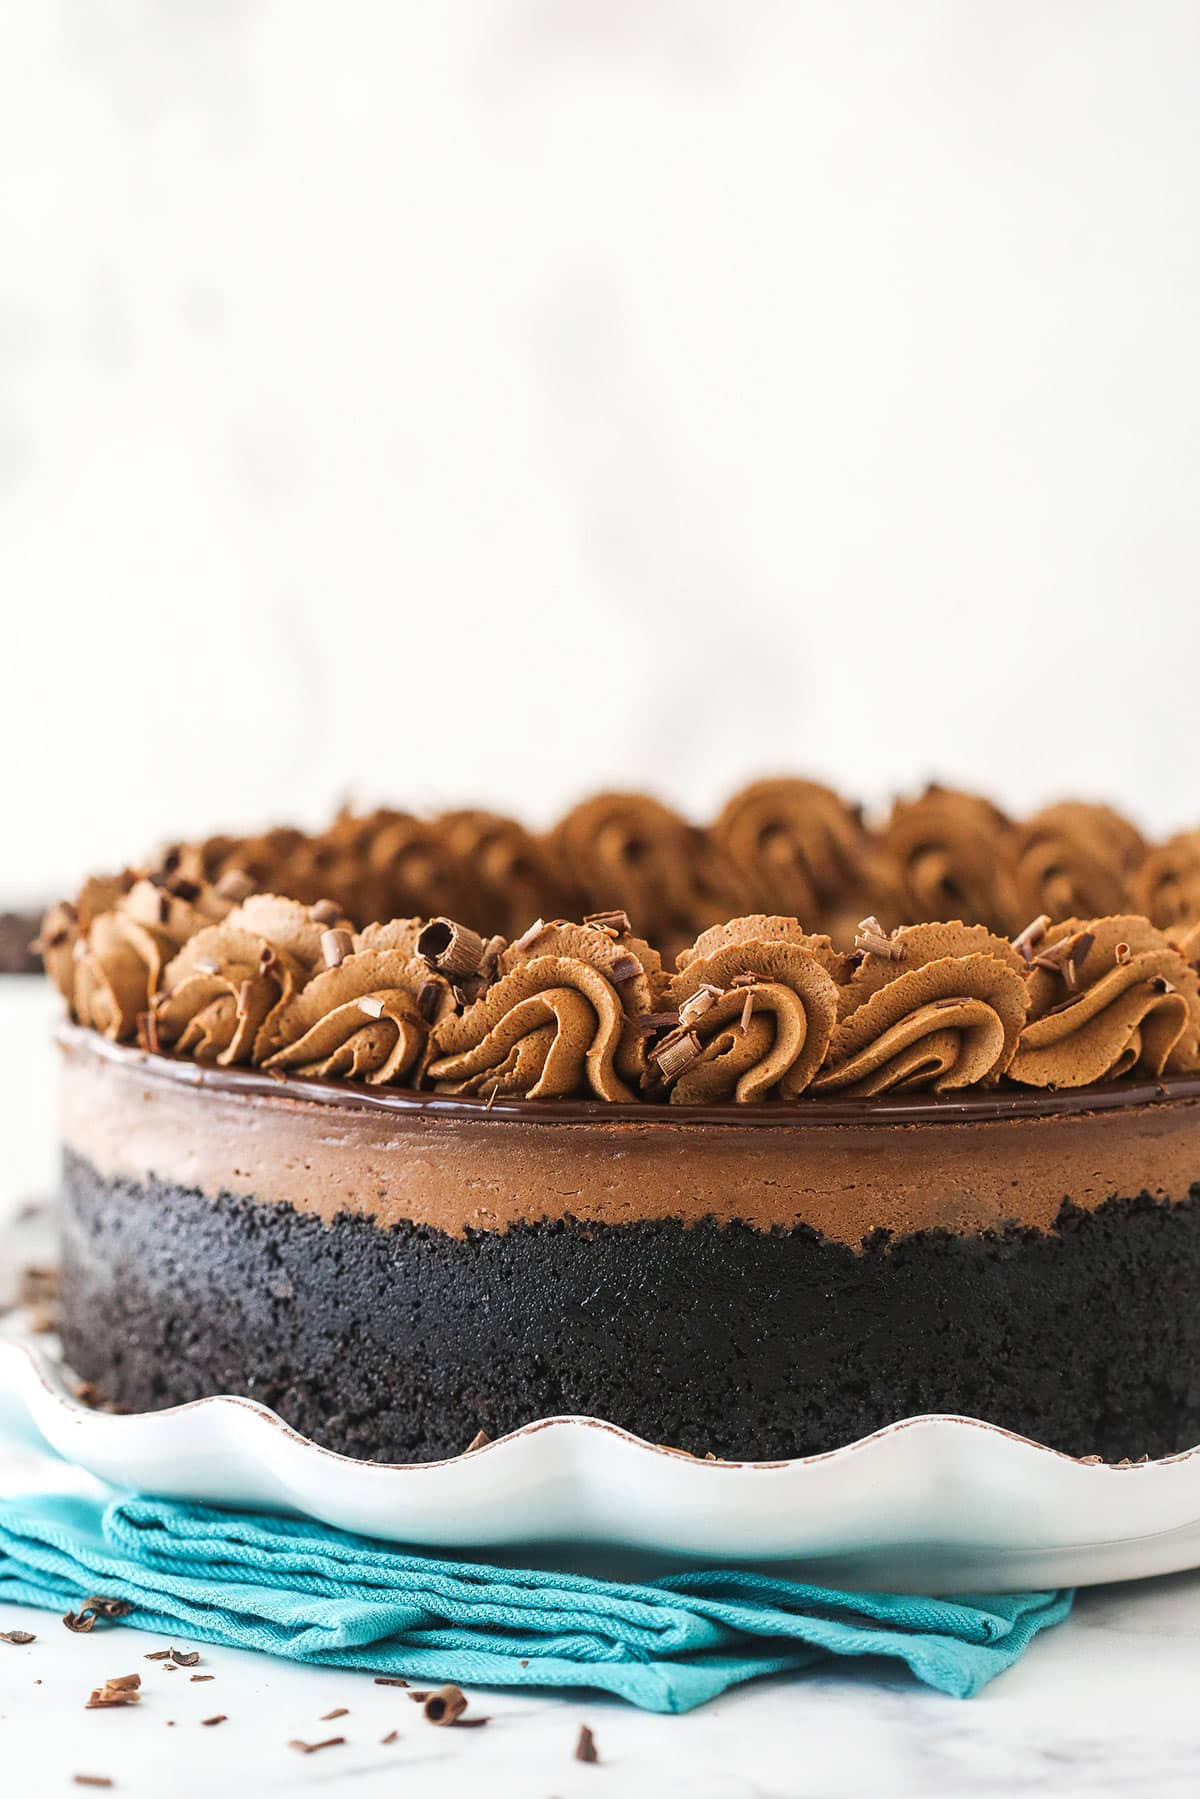
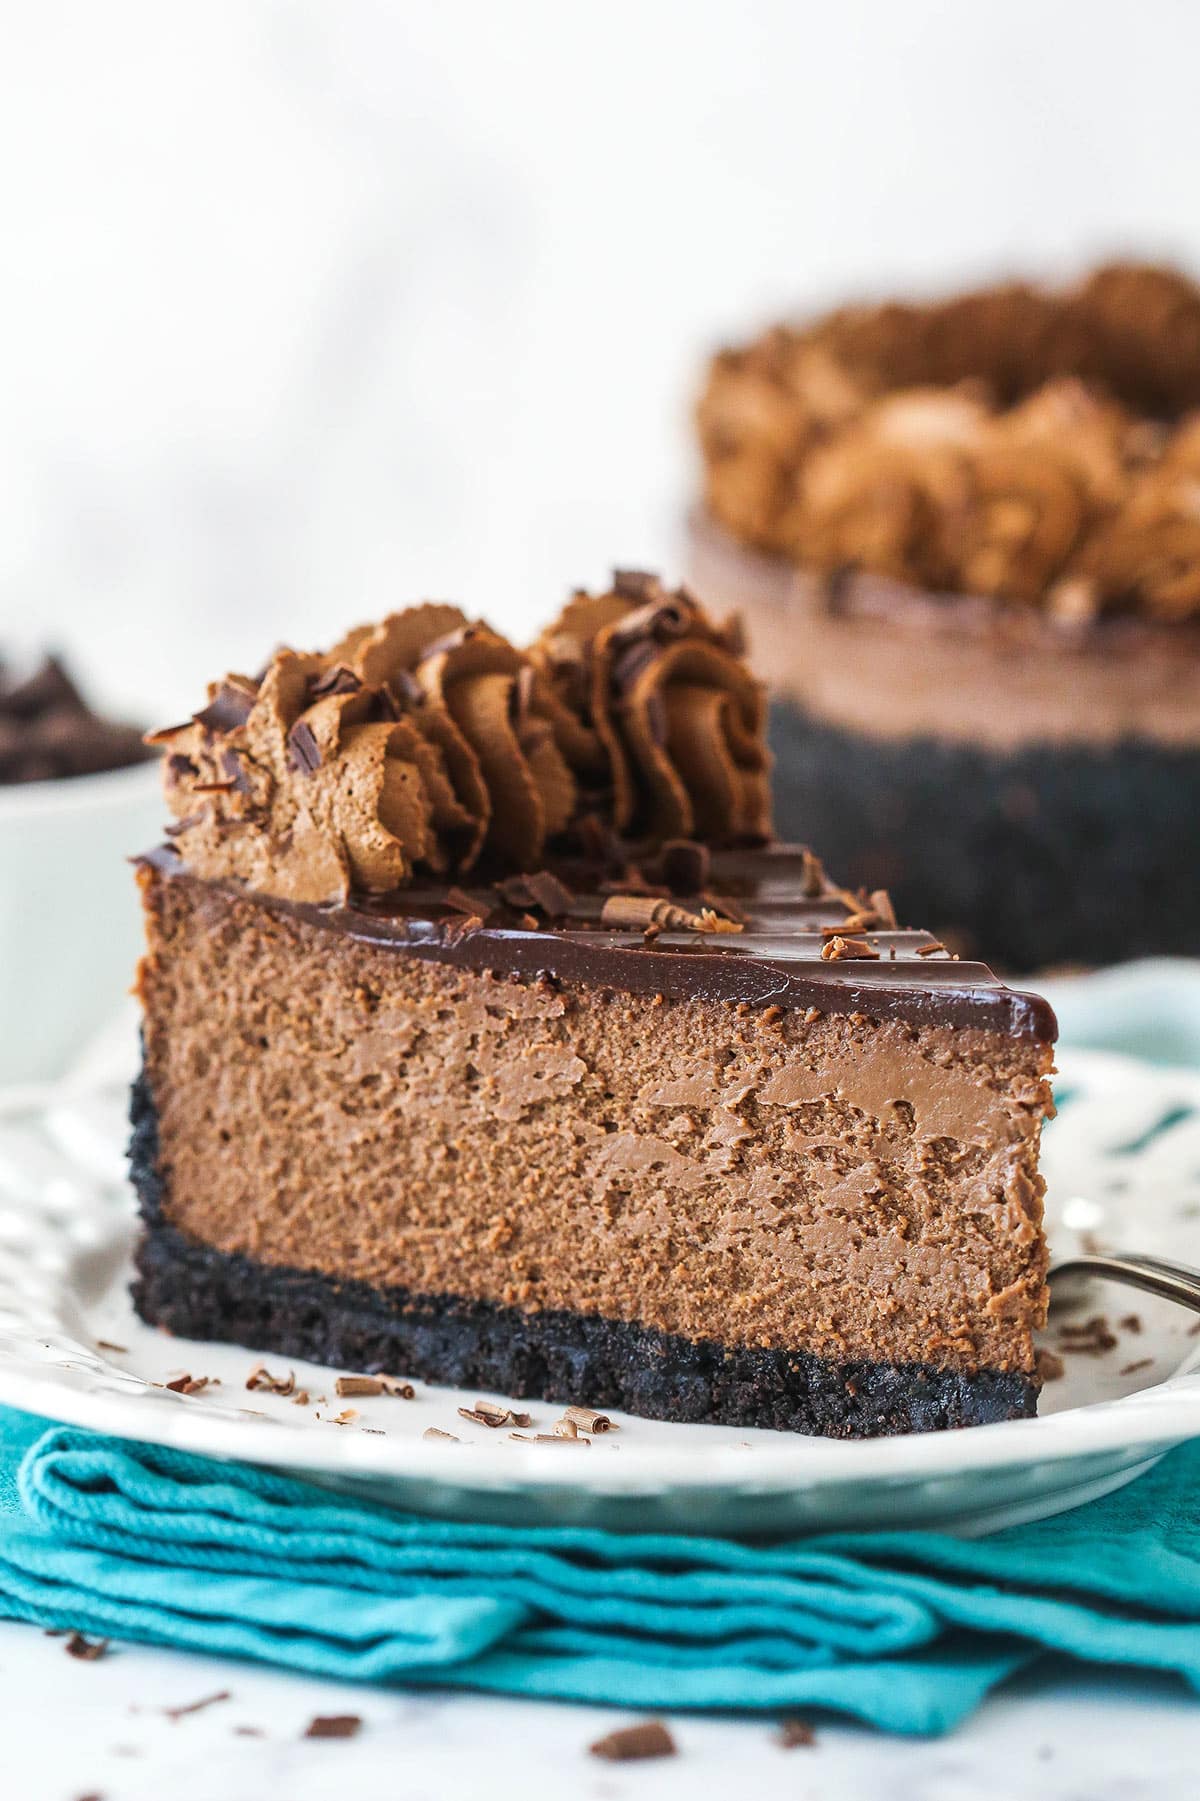
Got chocolate cravings? This baby is the perfect cure. A classic, buttery Oreo crust serves as the base for this decadent cheesecake. On top of it sits the richest, creamiest chocolate cheesecake filling I have perhaps ever tasted. Made with cocoa powder and actual melted chocolate, it is wonderfully thick and lacks nothing in the realm of chocolate flavor. The tangy, chocolaty filling is topped with a rich chocolate ganache, fluffy homemade chocolate whipped cream, and elegant chocolate curls. Smooth, creamy and loaded with chocolate flavor from start to finish, this cheesecake will definitely be a hit.
Sure cheesecake takes time, but this one’s worth it. Trust me. If you’re looking for more chocolate-loaded cheesecakes, check out my German Chocolate Cheesecake or this Guinness Chocolate Cheesecake.
Why You’ll Love This Rich & Decadent Chocolate Cheesecake
If you love chocolate there’s pretty much no way you won’t fall in love with this cheesecake but, in case you need extra convincing, here are some of the things that I think make it so heavenly.
- Texture. The addition of melted chocolate to the filling makes it thicker than most, which I love. Combined with the smooth creaminess of the cream cheese-sour cream combo, it’s totally irresistible.
- Balanced. I used cream cheese and sour cream in this recipe. The subtle tang of the sour cream breaks up the richness of the cream cheese beautifully. The filling is still super rich and decadent, but not overwhelmingly so.
- Chocolate on chocolate. This really is a chocolate lover’s dream cheesecake. There’s just so much chocolate going on. I put both cocoa powder and melted chocolate in the filling itself, which gives it a rich, almost fudge-y chocolate flavor. Then of course there’s the chocolate Oreo crust, the chocolate ganache and the chocolate whipped cream. Every bite is a chocolate explosion!
What You’ll Need
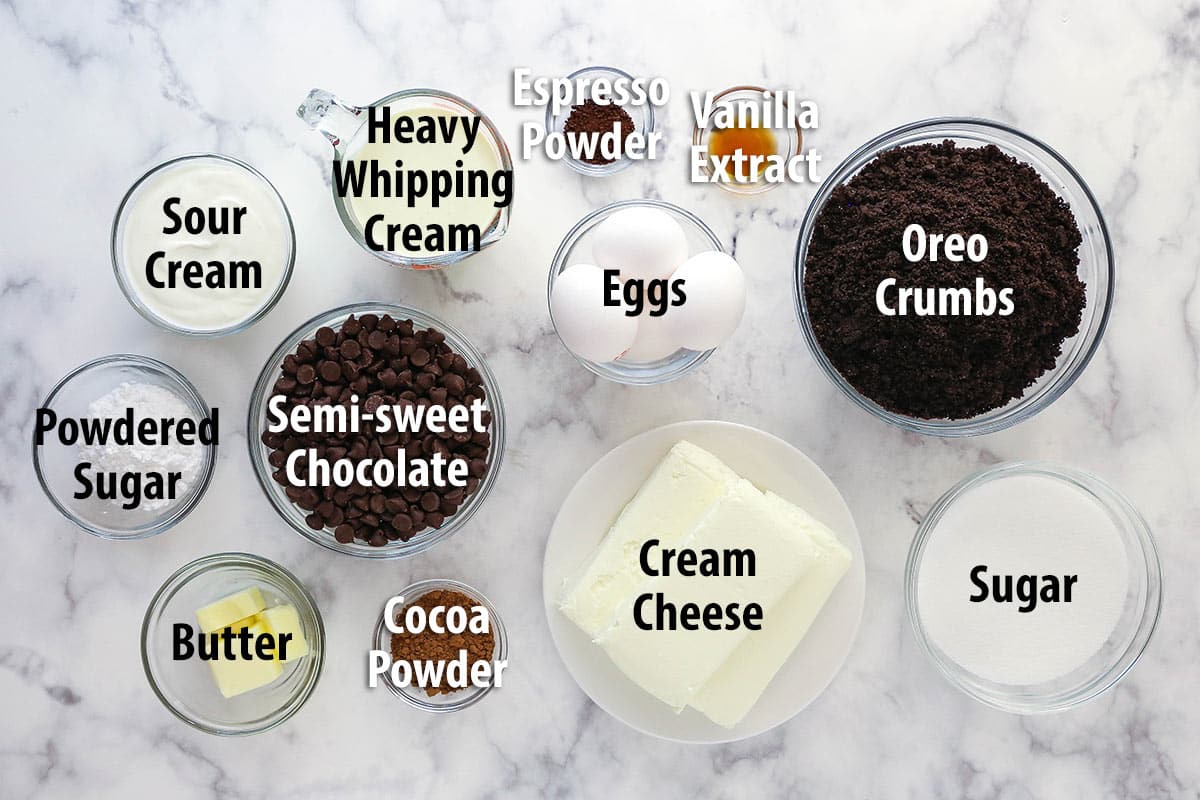
Here’s what you’ll need to make chocolate cheesecake. Don’t forget to scroll to the recipe card below for precise measurements.
Chocolate crust
- Oreos – Use regular Oreos and leave the cream filling inside when you grind them into crumbs.
- Butter – You can use salted or unsalted butter.
Chocolate cheesecake
- Cream cheese – The cream cheese should be at room temperature, otherwise, it won’t combine smoothly with the other ingredients and you’ll find yourself with a lumpy filling.
- Sugar
- Natural unsweetened cocoa – This cheesecake is plenty full of chocolate flavor, but you could also use Dutch-processed cocoa, if you like.
- Sour cream – Be sure that the sour cream is at room temperature. It will combine more smoothly and easily with the other ingredients. You could also use heavy cream, but you may need a few more minutes of bake time.
- Vanilla extract
- Espresso powder – The espresso powder is optional but can emphasize the chocolate flavor in the filling.
- Semi-sweet chocolate – Melt the chocolate chips and allow them to cool slightly before stirring them into the cheesecake filling.
- Eggs – Allow your eggs to come to room temperature before incorporating them into the filling. If they are too cold, they won’t blend smoothly with the other ingredients.
Chocolate ganache
- Semi-sweet chocolate chips – You could also use a chocolate baking bar.
- Heavy whipping cream
Chocolate whipped cream
- Heavy whipping cream – The heavy whipping cream must be cold, otherwise, it will not hold volume properly and you’ll end up with a flat whipped cream.
- Powdered sugar – This adds a touch of sweetness and stabilizes the whipped cream, so that it won’t ever wilt.
- Natural unsweetened cocoa – Again, you could use Dutch-processed cocoa, but it would make the whipped cream a little more bitter and dark in color.
- Vanilla extract
- Chocolate bar (optional) – This is just if you want to make chocolate shavings to decorate the cake. They look great and I’m a fan, but you could also just add some chocolate sprinkles or a drizzle of chocolate sauce.
How To Make Chocolate Cheesecake
Here’s a quick overview of how to make a chocolate cheesecake with an Oreo crust. Scroll to the recipe card below for more in-depth instructions.
Crust
- Prep. Preheat oven to 325°F, line the bottom of a 9-inch springform pan with parchment and grease the sides.
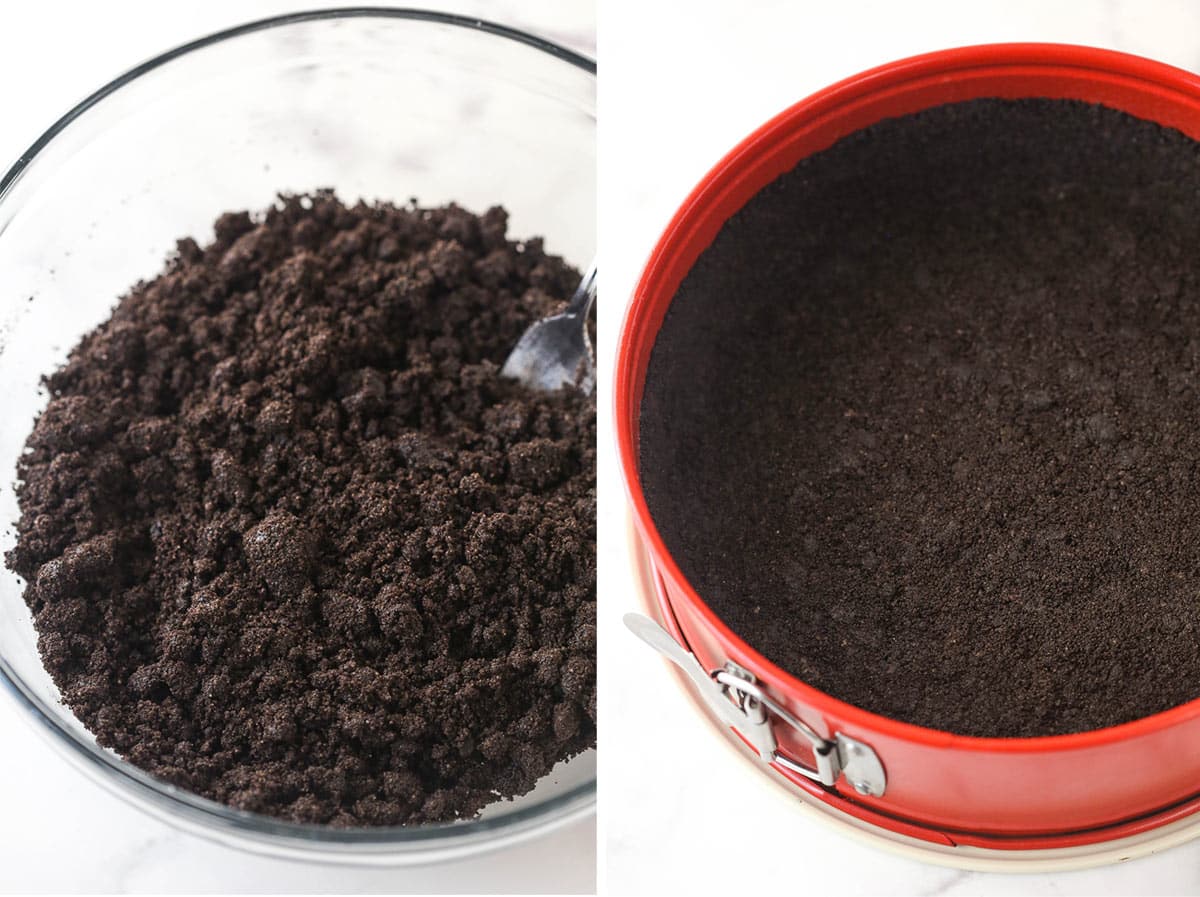
- Make the crust. Combine the crust ingredients and press them into the bottom and up the sides of the pan. Bake for 10 minutes and set aside to cool.
- Leakproof your pan. Wrap the outsides of the springform pan with aluminum foil.
Cheesecake
- Prep. Reduce oven temperature to 300°F.
- Make the batter. Beat together the cream cheese, sugar, and cocoa powder on low speed before mixing in the sour cream, vanilla extract, and espresso powder.
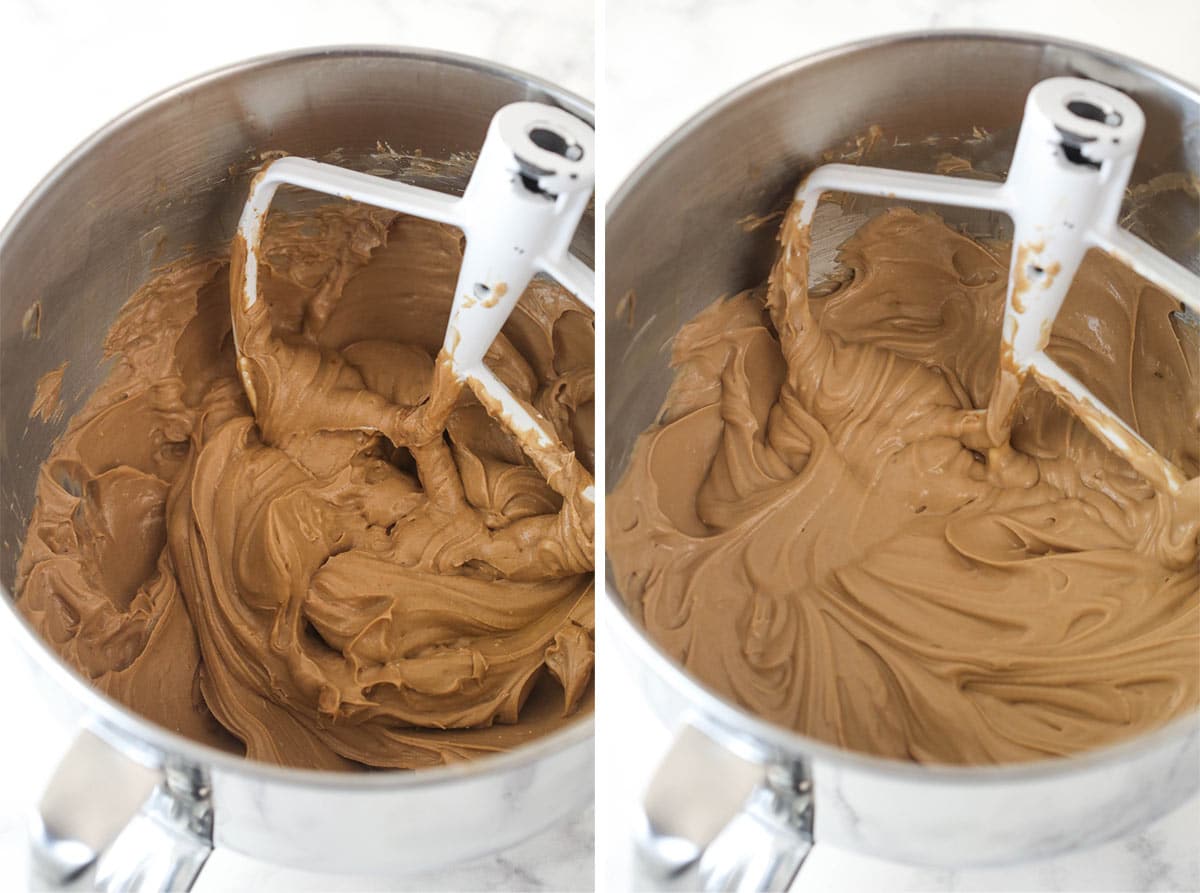
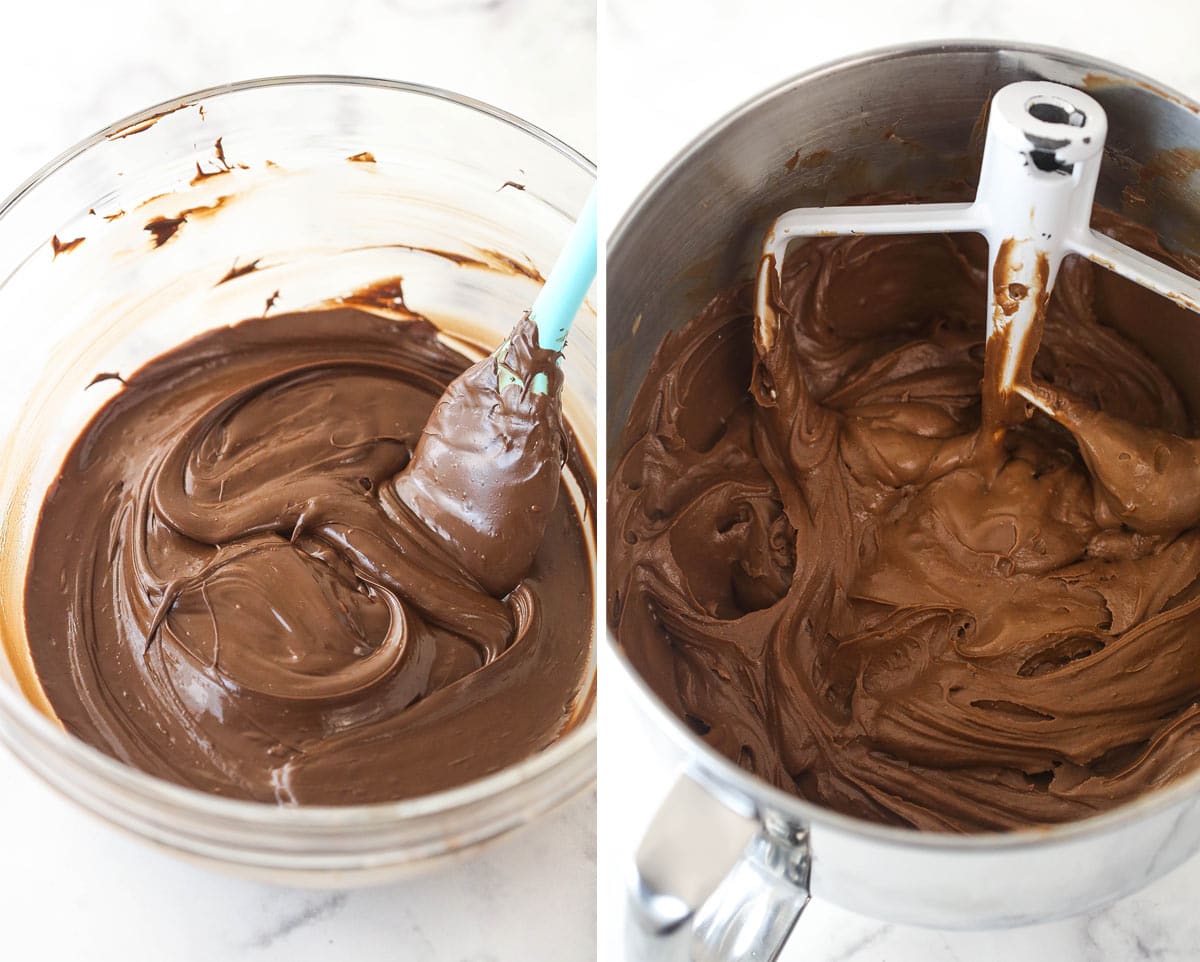
- Add the chocolate and the eggs. Gradually fold in the melted chocolate then stir in the eggs, one at a time.
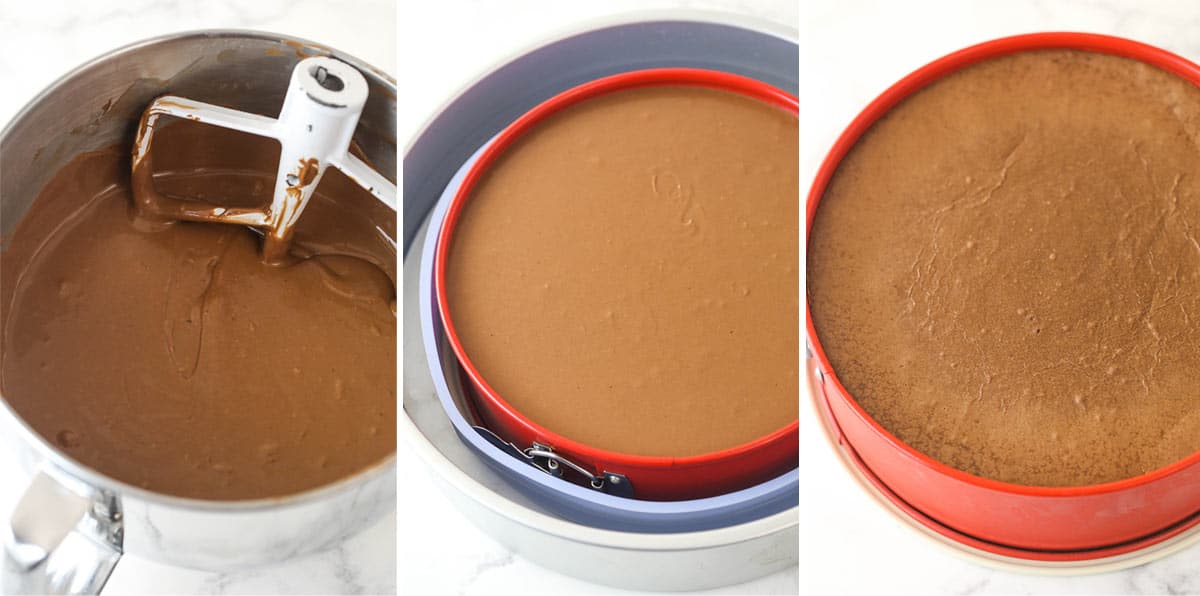
- Prepare to bake. Pour the cheesecake batter into the crust and place the springform pan in a water bath.
- Bake. Bake for 1 hour 20-25 minutes.
- Cool gradually. Turn the oven off and leave the door closed for 30 minutes (with the cheesecake inside). Crack the door of the oven and allow the cheesecake to continue cooling in the oven for 30 more minutes.
- Chill. Remove the cheesecake from the oven and water bath wrapping and refrigerate for 5-6 hours or overnight.
Topping
- Prep. Remove the cheesecake from the springform pan and set it on a serving plate.
- Make the ganache. Microwave the heavy whipping cream until it just begins to boil, then pour it over the chocolate chips. Allow it to sit for 2-3 minutes, then whisk until smooth.
- Add the ganache to the cake. Spread the ganache over the top of the cake.
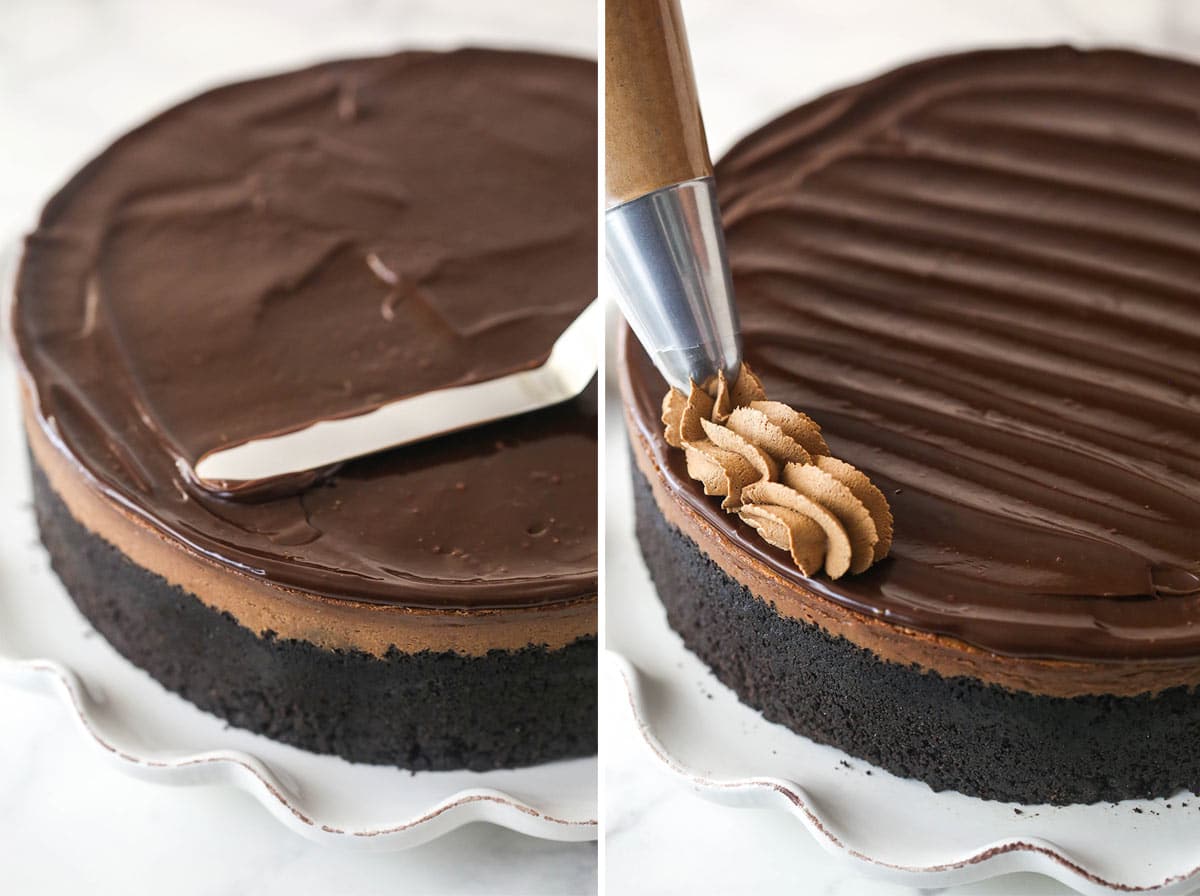
- Make the whipped cream. Whip the heavy cream, powdered sugar, cocoa powder, and vanilla on medium-high speed until stiff peaks form.
- Decorate. Pipe the whipped cream in shells around the border of the cheesecake.
- Make chocolate curls (optional). Use a vegetable peeler and run it down the side of a chocolate bar to create chocolate curls to garnish, if desired.
- Chill. Refrigerate until ready to serve.
Tips for the Best Homemade Chocolate Cheesecake
Cheesecake can be finicky so I want you to pay close attention to these tips and tricks so that you end up with the best chocolate cheesecake possible.
- Start with room-temperature ingredients. To achieve a smooth and lump-free cheesecake filling, be sure to bring your cream cheese, sour cream, and eggs to room temperature before beginning this recipe. Failing to do so can result in a lumpy filling and is likely to lead you to over-mixing (see my next point).
- Don’t over-mix. Over-mixing the cheesecake filling (or mixing too quickly) will incorporate excess air, which can result in a cracked top.
- Add the melted chocolate in three parts. Adding the chocolate in parts helps ensure that it is incorporated smoothly and evenly into the filling.
- Use a springform pan. Trust me. You don’t want to deal with the mess of removing a cheesecake from a standard pan. Invest in a quality springform pan and just use it as an excuse to make more cheesecakes in the future!
- Use a water bath. Sure water baths take a little extra time and energy, but using one here will help ensure that your cheesecake cooks evenly, stays moist, and doesn’t crack. Check out my post on How to Bake Cheesecake in a Water Bath to learn how to do it.
- No peaking. As the cheesecake bakes, it is important not to open the oven as this will release the steam from the water bath and otherwise disrupt the baking process, causing the cheesecake to potentially fall and/or crack.
- Cool gradually. When you have turned the oven off, allow the cheesecake to cool in the closed oven for 30 minutes and then for another 30 minutes in the oven with the door left slightly ajar. The cheesecake will continue to cook during this process. This gradual cooling will also help to keep the cheesecake from cracking.
- Serve with sauce! For an even more decadent cheesecake, drizzle some of my Caramel Sauce, Homemade Hot Fudge Sauce, or Raspberry Sauce over a slice of chocolate cheesecake.
How to Tell When my Cheesecake is Done?
The cheesecake is done baking when the edges are set and in the middle 2-3 inches look just set but are still jiggly. Even if it seems a little underdone, it will continue to cook as it cools during the cooling process. For more on how to tell, check out my post on How to Tell When your Cheesecake is Done Baking.
How to Remove my Cheesecake From The Pan?
To do this properly, you want to set up your pan with non-stick baking spray and parchment paper in the bottom. Then, after your cheesecake is fully chilled and firm, remove the sides from your pan, loosen the cheesecake from the bottom and gently slide the cheesecake off and onto a platter. For more on this, see my post on How to Remove Cheesecake from a Springform Pan.
Can I Prepare This Chocolate Cheesecake in Advance?
Totally! In fact, I encourage it. It takes a while to set in the fridge, so I often make it the day before and cheesecakes hold up really well. Allow the cheesecake to firm up for a few hours before removing it from the springform pan, wrapping it in plastic wrap, and storing it in the fridge for up to 2 days (or in the freezer for up to 3 months). Boom. Most of your work is done. When you are ready to serve, all you have to do is thaw the cake (if applicable), make the chocolate ganache, whipped cream, and chocolate curls, and decorate!
Proper Storage
- Refrigerator. Seal the cheesecake in an airtight cake carrier. If you don’t have one, wrap it in a double layer of plastic wrap (I suggest using toothpicks to prop the plastic away from any decorations). If you already sliced the cake, arrange the slices in a single layer in an airtight container. Store the cake in the refrigerator for up to 5 days.
- Freezer. Pop the cake in the freezer for a couple of hours to firm up before wrapping it in a double layer of plastic wrap. Alternatively, slice the cake and arrange the slices in a single layer in an airtight container. You can store chocolate cheesecake in the freezer for up to 3 months. Allow it to thaw in the fridge before serving.
Check out my post on How To Store Cheesecake for more information.
More Decadent Cheesecake Recipes
In a rich, creamy, cheesecake-y kind of mood? You came to the right place. Here come some of my most decadent, taste bud-delighting cheesecake recipes for you to try.
- Decadent Dark Chocolate Cheesecake
- Baileys Cheesecake
- Chocolate Cheesecake With Cake Bottom
- Chocolate Chip Cookie Crust Cheesecake
- Nutella Cheesecake
- Smores Cheesecake
Watch How to Make Chocolate Cheesecake
Print
Chocolate Cheesecake
- Prep Time: 1 hour
- Cooling Time: 6 hours
- Cook Time: 1 hour 20 minutes
- Total Time: 8 hours 20 minutes
- Yield: 12-14 Slices
- Category: Dessert
- Method: Oven
- Cuisine: American
Description
This chocolate cheesecake is rich, creamy and full of chocolate flavor! The chocolate cheesecake filling is baked in an Oreo cookie crust and topped with homemade chocolate ganache and chocolate whipped cream! The perfect dessert for chocolate lovers!
Ingredients
Crust
- 3 cups (403g) Oreo crumbs (From about 35 Oreos)
- 4 tbsp (56g) butter, melted (salted or unsalted is fine)
Filling
- 24 oz (678g) cream cheese, room temperature
- 1 cup (207g) sugar
- 4 tbsp (29g) natural unsweetened cocoa powder
- 3/4 cup (173g) sour cream, room temperature
- 1 tsp vanilla extract
- 1 tsp espresso powder, optional
- 12 oz | 339g | 2 cups semi-sweet chocolate, melted and slightly cooled
- 4 large eggs, room temperature
Chocolate Ganache Topping
- 4 oz | 113g | 2/3 cup semi-sweet chocolate
- 6 tbsp heavy whipping cream
Chocolate Whipped Cream
- 1 cup (240ml) heavy whipping cream, cold
- 4 tbsp (29g) powdered sugar
- 3 tbsp (21g) natural unsweetened cocoa powder
- 1 tsp vanilla extract
- Chocolate baking bar, optional for garnish
Instructions
CRUST
- Preheat oven to 325°F (163°C). Line a 9-inch (23cm) springform pan with parchment paper in the bottom and grease the sides.
- Combine the crust ingredients in a small bowl. Press the mixture into the bottom and up the sides of the springform pan.
- Bake the crust for 8-10 minutes, then set aside to cool.
- Cover the outsides of the pan with aluminum foil so that water from the water bath cannot get in (see how I prepare my pan for a water bath). Set prepared pan aside.
CHEESECAKE
- Reduce oven temperature to 300°F (148°C).
- In a large bowl, beat the cream cheese, sugar and cocoa on low speed until well completely combined and smooth. Be sure to use low speed to reduce the amount of air added to the batter, which can cause cracks. Scrape down the sides of the bowl.
- Add the sour cream, vanilla extract and espresso powder and mix on low speed until well combined.
- Add the melted chocolate in three parts, stirring until combined after each. Adding it in parts helps ensure that it incorporates evenly and helps prevent clumping.
- Add the eggs one at a time, mixing slowly to combine after each addition. Scrape down the sides of the bowl as needed to make sure everything is well combined.
- Pour the cheesecake batter evenly into the crust.
- Place the springform pan inside another larger pan. Fill the outside pan with enough warm water to go about halfway up the sides of the springform pan. The water should not go above the top edge of the aluminum foil on the springform pan.
- Bake for 1 hour 20-25 minutes. The center should be set, but still jiggly (see how to tell when your cheesecake is done baking).
- Turn off the oven and leave the door closed for 30 minutes. The cheesecake will continue to cook, but slowly begin cooling as well.
- Crack the door of the oven for 30 minutes to allow the cheesecake to continue to cool slowly. This process helps prevent cracking.
- Remove the cheesecake from the oven and water bath wrapping and refrigerate until firm, 5-6 hours or overnight.
TOPPING
- When the cheesecake is cool and firm, remove from the springform pan and set on a serving plate.
- For the chocolate ganache topping, put the chocolate in a heat proof bowl. Microwave the heavy whipping cream until it just begins to boil, then pour it over the chocolate chips. Allow it to sit for 2-3 minutes, then whisk until smooth.
- Pour the ganache onto the cheesecake and spread into an even layer. Allow to firm up a bit.
- For the whipped cream, add all the ingredients to a large mixer bowl and whip on medium-high speed until stiff peaks form. Pipe shells around the border of the cheesecake. I used Ateco tip 847.
- Use a vegetable peeler and run it down the side of a chocolate baking bar to create chocolate shavings for on top, if desired.
- Refrigerate until ready to serve. Store well-covered. Cheesecake is best eaten within 4-5 days.
Nutrition
- Serving Size:
- Calories: 535
- Sugar: 38.9 g
- Sodium: 201.6 mg
- Fat: 37.8 g
- Carbohydrates: 45.8 g
- Protein: 9 g
- Cholesterol: 128.6 mg







Cheesecake turned out amazing! I used chocolate Teddy Grahams for the crust (took the entire box in case anyone wants to know) and they were just perfect. My chocolate curls weren’t lovely, even with the tutorial, but chocolate “shards” worked just fine and no one complained. The combination of all of the chocolates and the different textures just made the cake. Delicious!
Absolutely THE BEST cheesecake I have ever made. I didn’t use a water bath and it still turned out perfectly smooth and creamy and wonderful. Thanks for making me look like a genius in the kitchen!!
Wonderful! Glad you enjoyed it!
Lindsay you are a NINJA. This cheesecake recipe takes some time, but your instructions walked me through it with ease. It was absolutely perfect and delicious. I cannot for the life of me bake a decent biscuit, but today , thanks to your detailed instructions and tips, i created a chocolate cheesecake that put The Cheesecake Factory to shame. My birthday boy was delighted.
Thank you!
Awesome! Thanks so much Melanie! Glad to hear the recipe was easy to follow and delicious! 🙂
How can I substitute the cocoa powder for melted dark chocolate in the cheesecake filling?
I was wondering if this chocolate cheesecake does well freezing for lets say 30 days? I have company coming and I try to make all I can ahead so I do not have to spend lots of time in the kitchen.We do not like going out to eat,with food restrictions,so I was going to make this ahead if I could. Thanks!
I haven’t tried, but well wrapped, it should do alright. I’d suggest wrapping it in clear wrap, then aluminum foil. Defrost it in the refrigerator.
Well, my FIRST ever cheesecake is in the oven now – and I’m 62 years old!!! ???????????? My husband loves chocolate, so wish me luck!!
Kathy
It’s never too late! 🙂 I hope you enjoy it!
I would really like to make this cake but dont have any cookies that i can use to make a crust with on hand. Could i just not have a crust at all? please reply ASAP 🙂
You could make a crustless cheesecake, I’d just might wrap the inside of the pan with foil first.
Ok yep just tried it OOOOOOOHHHHH MYYYYYY SWEET BABY JESUS! This is the best freaking cheesecake everrrrrrr… I’m not good at baking at all and this turned out amazing, didn’t so water bath and no cracks 🙂
I’m so glad you enjoyed it! 🙂
Making this cheesecake now. I’m so excited to try it! I couldn’t find a pan big enough for my water bath though 🙁 sooo ill probably have cracks, but I’m sure it will still taste good! I’ve never made ganache or whipped cream before so this is exciting lol
I hope you enjoyed it!
This has to be the most gorgeous chocolate cheesecake I’ve ever seen, and I’ve made a copy of the recipe for my file. You’re a cheesecake genius, Lindsay! Darnell 🙂
Thanks Darnell! I hope you enjoy it!
I made the cheesecake portion of this recipe today, so I’m hoping you can answer my question quickly. How well does the chocolate whipped cream hold up over time? I usually stabilize regular whipped cream to be on the safe side, especially if the dessert doesn’t get eaten in one day. What about this chocolate whipped cream? Thanks for any input!
The chocolate whipped cream should be stable for days. Just be sure to use the amount of powdered sugar and cocoa it calls for – that’s how I stabilize my whipped cream as opposed to gelatin or something else.
Thanks for the quick response! I really do appreciate it!
I wanted to report back on my thoughts on this cheesecake now that I’ve gotten to try it. I’ve made LOTS of cheesecakes, and in the past, I haven’t loved chocolate cheesecakes. But yours just looked SO good, so I had to try it. It is DELICIOUS! I loved all the chocolate elements–the crust, the cheesecake, the ganache, the whipped cream, the curls. I loved all of that together. I will say that 2 1/4 cups of chocolate wafer crumbs did not equal 302 grams for me. Perhaps it was processing them that caused the crumbs to be extra fluffy? I had a lot more crumbs than what fit in 2 1/4 cups. I decided to start with 2 1/4 cups, and when the crumbs still looked too moist, I ended up putting in the total 302 grams, so I would suggest following the gram measurements instead of the cup measurements. This is definitely worth adding to my cheesecake repertoire. Thanks for such a fantastic recipe!
I can’t wait to try this, all of your recipes look incredible!! I’m also really enjoying reading both of your cookbooks, thanks for sharing your recipes! I was wondering what kind of springform pan you use, the brand I have now leaks filling and I would love a good recommendation :). Thanks!
I’m glad you’re enjoying everything! I’ve had trouble finding a non-leaking pan too. I recently got one at Target, but I had to buy two and test them at home. One was good, one wasn’t. I wish there was a better option. Have you seen this tutorial? It helps with leaky pans.
This was incredible. Thank you for another beautiful dessert recipe.
I’m so glad you enjoyed it!
Made this last week and it was fantastic! Thanks so much for the recipe and guidance.
So glad you enjoyed it!
I want to make this so much right now! Do you have a tutorial for the chocolate curls? Yours are the thickest and nicest I’ve seen!
Thanks Melissa! I actually have a tutorial coming next week. 🙂
This looks amazing! Just one question…in step 2 of the directions you mention flour, but there is no flour in the ingredient list…was it accidentally omitted?
Thanks for pointing it out – there’s no flour in there, just the cocoa. 🙂 It’s been updated.
This has become my go to cheesecake to make for events. Everyone LOVES it. Its my favorite thing to bake. Thank you for the recipe!!
I believe that might satisfy my chocolate fix for a month! Yum! I must make this! 🙂 Thanks so much for sharing Lindsay!
This looks amazing!! You are a wonderful creative baker. I can’t wait to make this!!
Thanks so much Suzie! I hope you enjoy it!