This post may contain affiliate sales links. Please read my disclosure policy.
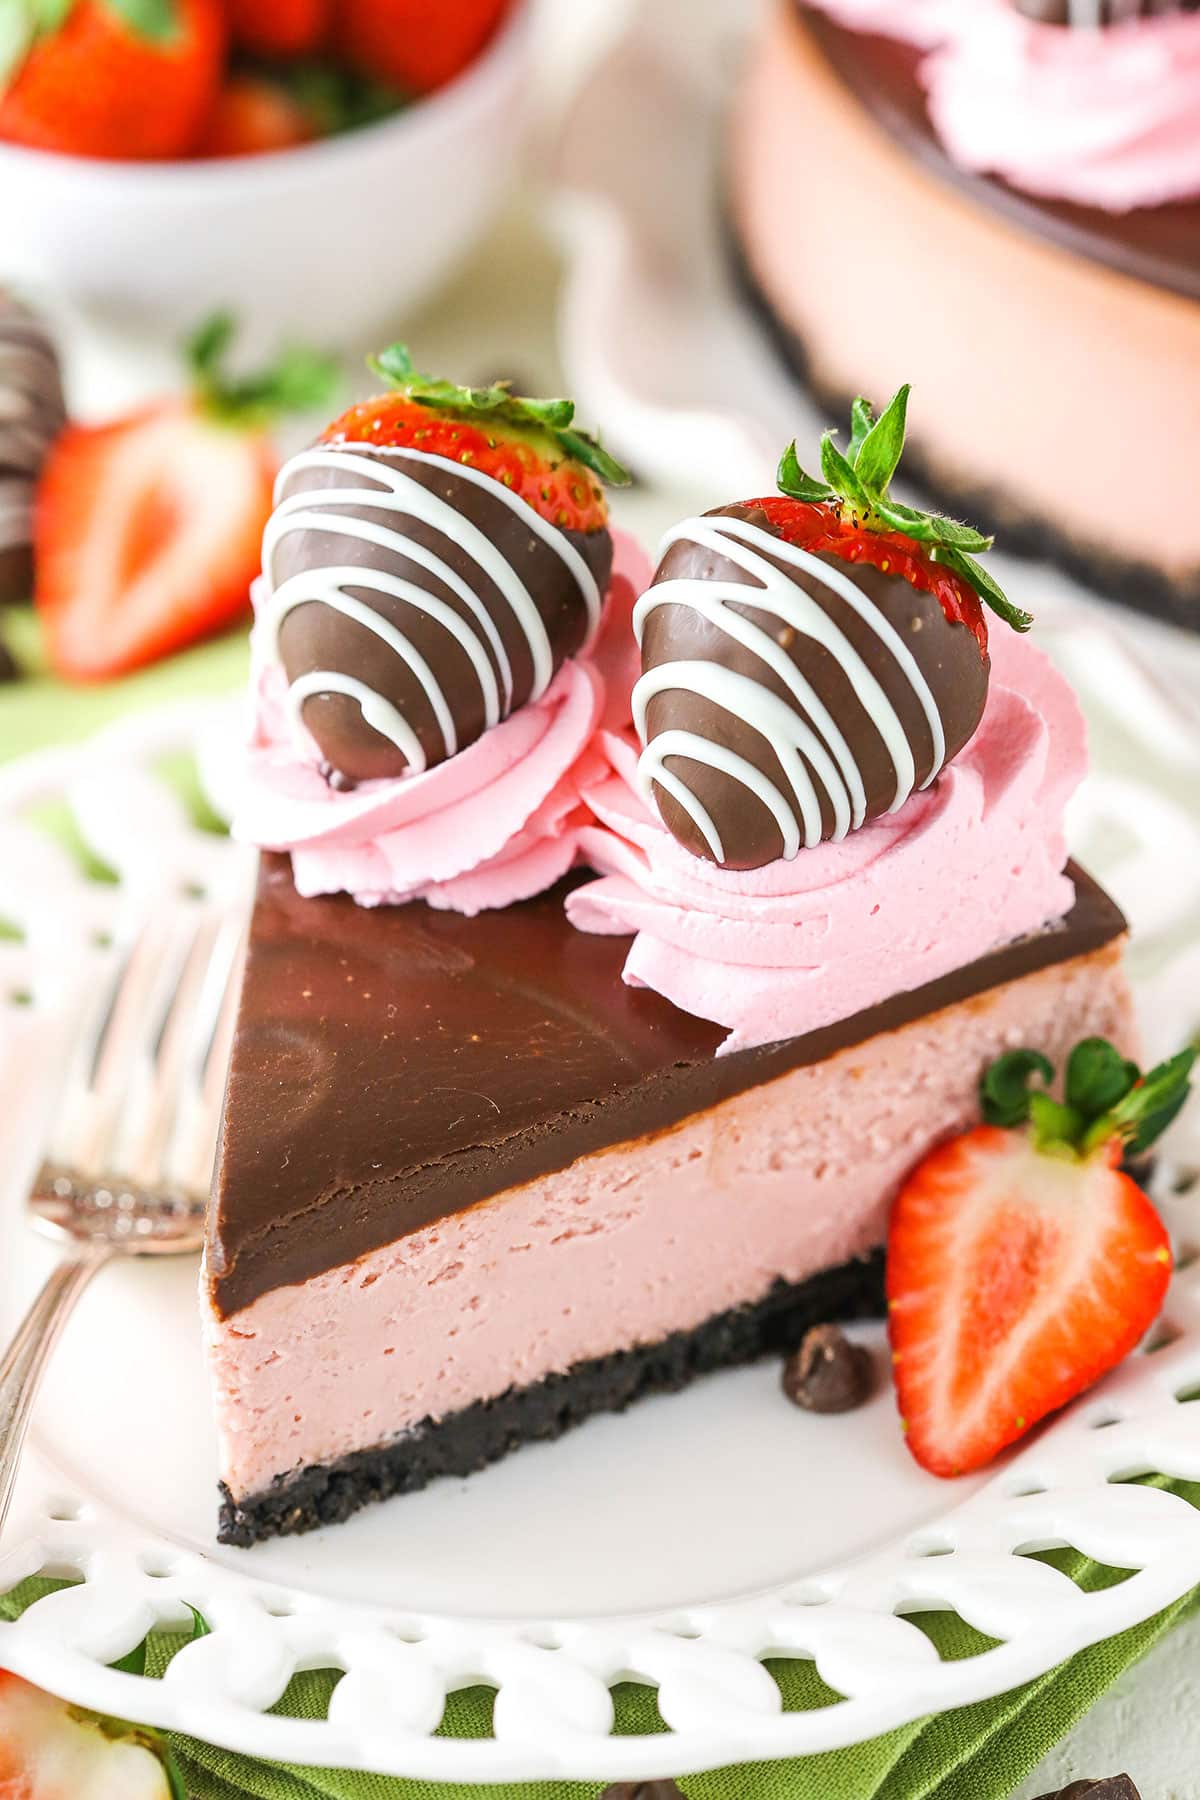
This Chocolate Covered Strawberry Cheesecake recipe is made with strawberry cheesecake filling and chocolate Oreo crust, all covered in chocolate ganache and chocolate covered strawberries! It’s an amazing cheesecake recipe that’s perfect for special occasions.
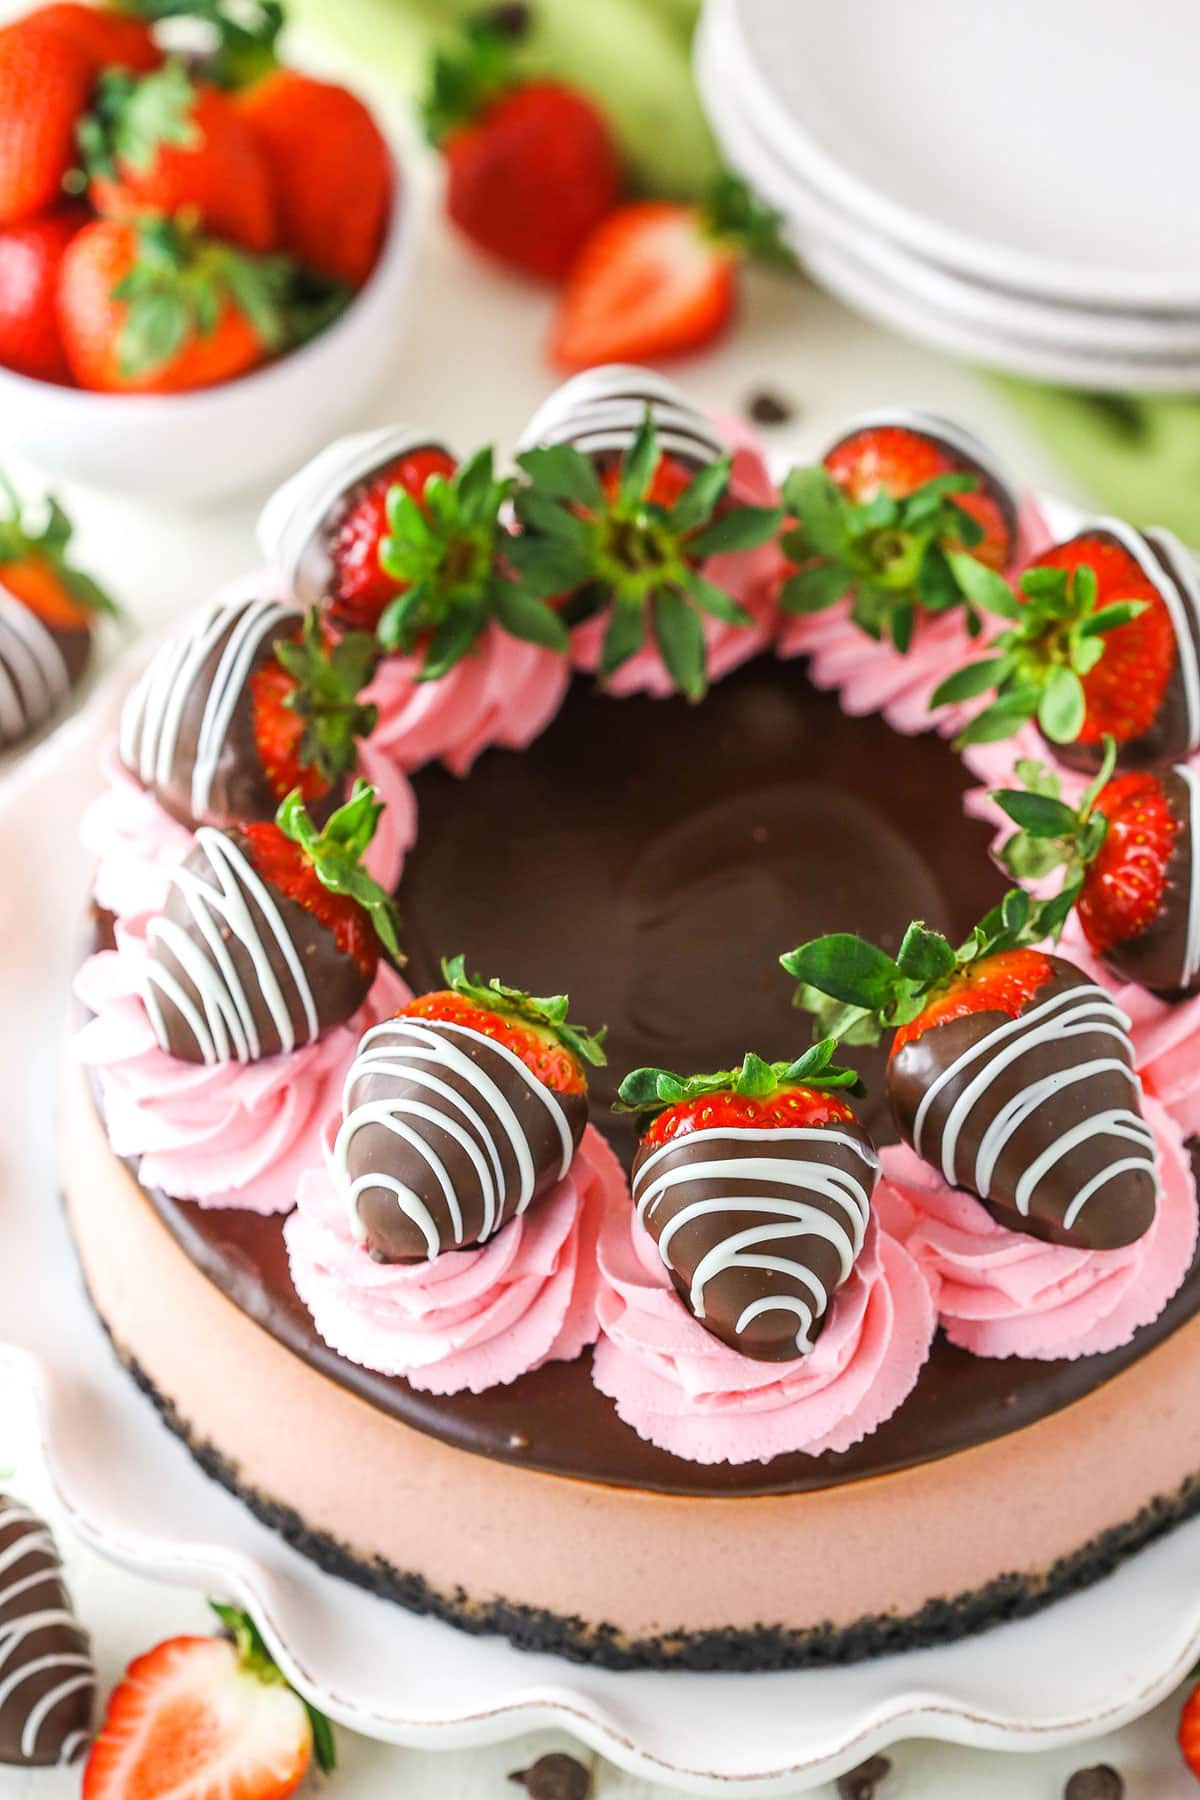
Table of Contents
- Why You’ll Love Chocolate Covered Strawberry Cheesecake
- What You’ll Need To Make A Chocolate Covered Strawberry Cheesecake
- How to Make Strawberry Cheesecake Topped With Chocolate Covered Strawberries
- Tips for Success
- Storage Information
- More Strawberry Cheesecake Recipes
- Watch How To Make It
- Get the Recipe
Why You’ll Love Chocolate Covered Strawberry Cheesecake
Strawberries and chocolate are a classic dessert combo, and when you add cheesecake to the mix you have one irresistible treat! I mean, what’s not to love about creamy strawberry cheesecake with an Oreo cookie crust, chocolate ganache topping and chocolate covered strawberries? They compliment each other so well, without either flavor overpowering the other. Let me explain what I mean.
- Bursting with strawberry flavor. The cheesecake uses both strawberry puree (made from a full 3 cups of strawberries) and strawberry extract to achieve the perfect strawberry flavor. Plus, there are real chocolate covered strawberries on top. I’m in heaven!
- Plenty of chocolate. This cheesecake starts with my failproof Oreo crust and has a glossy chocolate ganache topping. Did I mention the strawberries are dipped in chocolate?! Trust me, there’s plenty of chocolate to go around.
- Easy to make. And the best part? Even though this strawberry cheesecake looks super fancy, it is actually pretty simple to put together. I’ve broken everything down for you in easy to follow steps.
- Perfect for special occasions. This cheesecake recipe is also an excellent choice for Valentine’s Day, bridal showers or anytime you’re in the mood for a decadent strawberry dessert and a little romance. It’s the perfect way to say I love you when words just aren’t enough.
The final cheesecake is delightfully delicious, but if you’re looking for more cheesecake recipes I’ve got you covered! For example, this Classic Vanilla Cheesecake and Basic Strawberry Cheesecake are always a hit. You can dress them up with homemade Whipped Cream, Strawberry Sauce or Hot Fudge Sauce to fit your style and mood.
What You’ll Need To Make A Chocolate Covered Strawberry Cheesecake
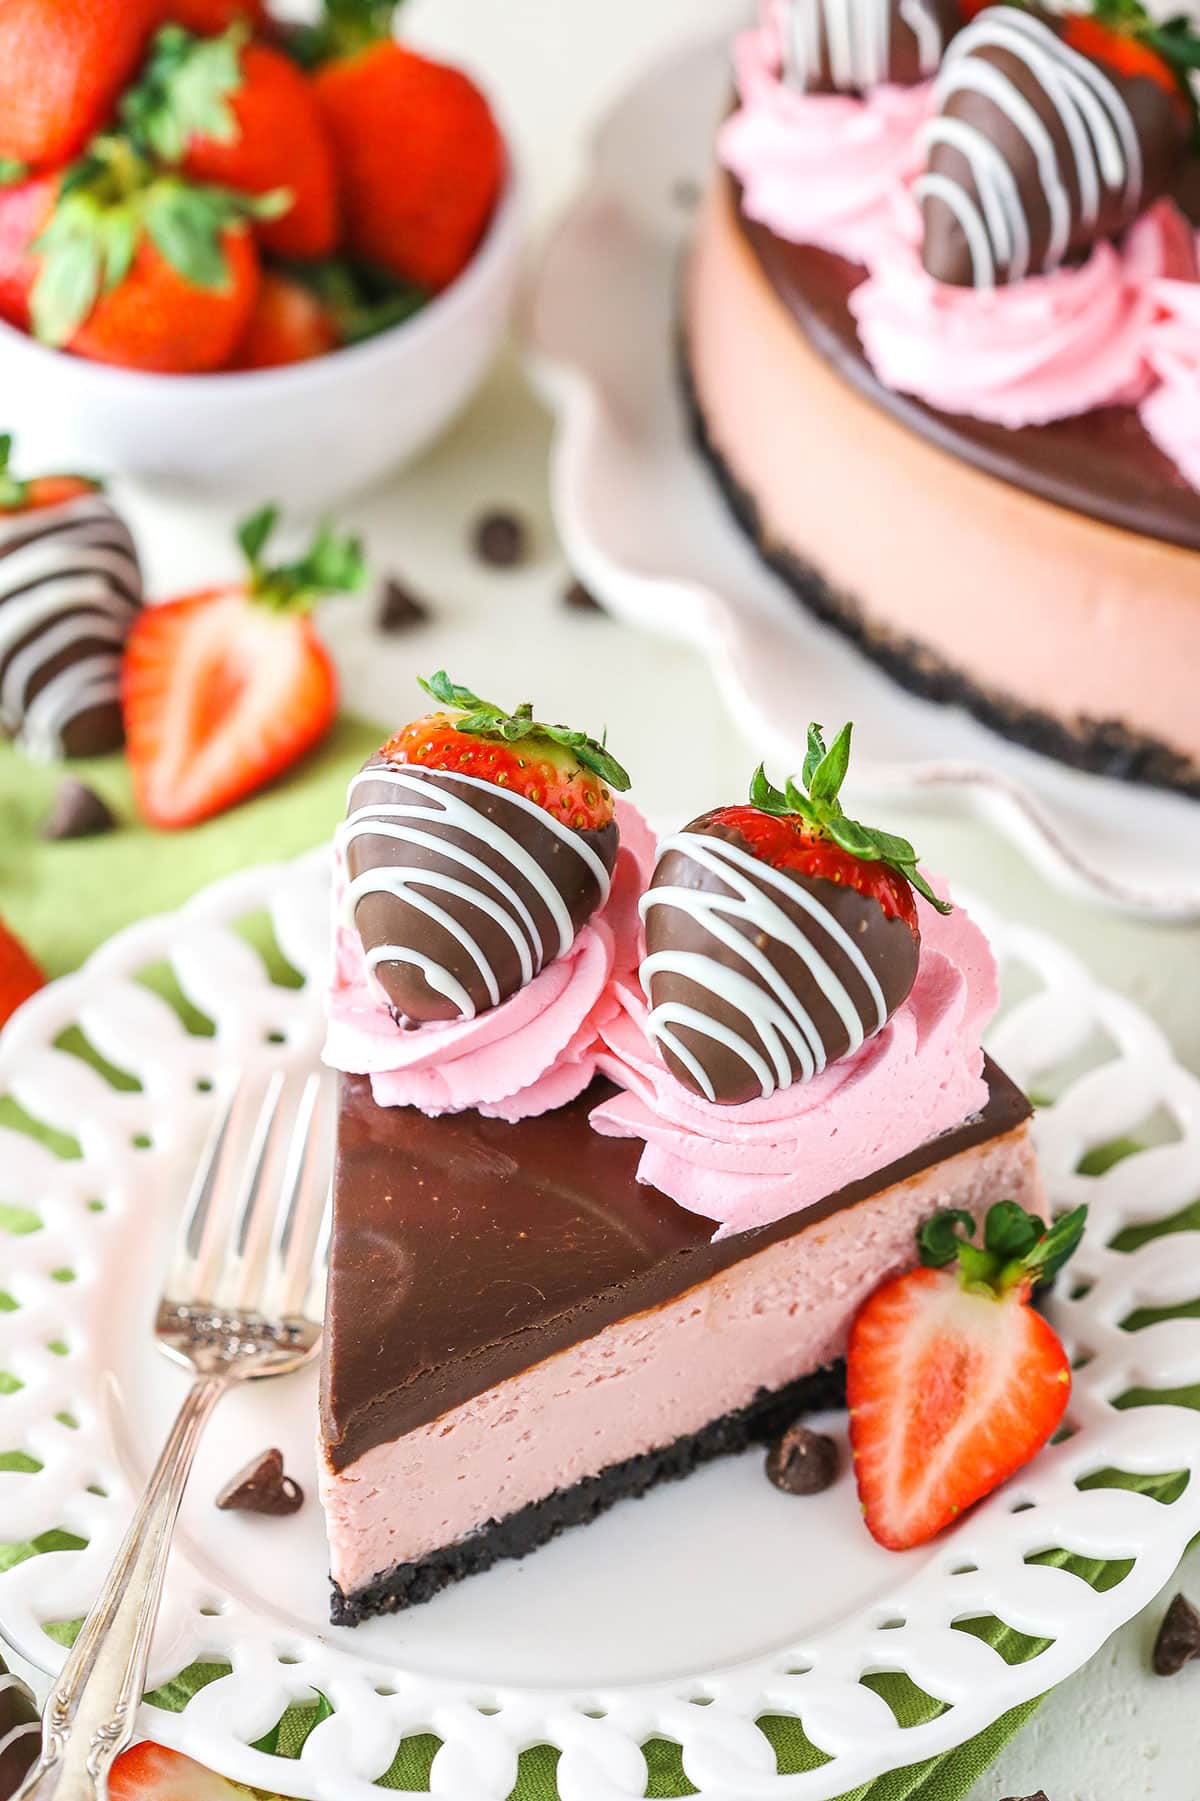
If you start with the right ingredients, your cheesecake will turn out perfectly. Here are my top ingredient tips so you’ll know what you need. You can find full ingredient amounts in the recipe card.
Chocolate Crust
- Oreo cookie crumbs – You’ll need 25-30 whole Oreos to make 2 1/4 cups of crumbs. See the tips section below for directions on how to make your own cookie crumbs.
- Salted butter – I like to use salted butter in cheesecake crusts. It gives the crust just a bit more flavor.
Strawberry Cheesecake
- Strawberries – I really recommend using fresh chopped strawberries for the reduction needed to create the strawberry flavor of the filling. You can also use frozen berries if you prefer. You’ll just need to thaw and remove any excess liquid.
- Cream cheese – Use room temperature, full-fat bricks of cream cheese. You’ll know they are ready to use when you can gently press the wrapper with your thumb and leave an imprint. Do not use whipped or tub-varieties of cream cheese.
- Sugar – Granulated sugar sweetens the cheesecake and enhances the strawberry flavor.
- Flour – All-purpose flour in the filling gives the cheesecake a lighter, creamier texture. Flour also helps to prevent cracking.
- Sour cream – For creamy texture, use full-fat, room temperature sour cream.
- Strawberry extract – For extra strawberry flavor! It enhances the overall flavor obtained by the strawberry reduction.
- Eggs – To get the perfect consistency for the filling, make sure to use large, room temperature eggs (not medium or extra large).
- Red food coloring – The cheesecake will have a slightly pink color from the strawberry puree, but I wanted a brighter shade, so I decided to add a little red food coloring. It’s definitely optional, but I liked the nice pink color it created. Whether you use gel or liquid coloring, you don’t have to add much. Start slow and adjust the color until you are satisfied.
Toppings
- Semi-sweet chocolate chips – To make the ganache, I recommend using semi-sweet baking chips. They will help to balance out the overall sweetness of the final cake.
- Heavy whipping cream – Heated cream will be used for the ganache and COLD cream will be used to make the whipped cream.
- Powdered sugar – Used to sweeten and thicken the whipped cream.
- Vanilla extract – Adds a hint of flavor to the whipped cream.
- Pink gel icing color – Again, this step is optional, but I think coloring the whipped cream pink adds to the overall color scheme of the cake. I recommend using pink gel icing color because it is highly concentrated, and you’ll only need a tiny bit to get the right color.
- Chocolate covered strawberries – I made my chocolate covered strawberries, but you could certainly buy them already made. If you want to go the DIY route, check out my recipe for chocolate covered strawberries. I like to dip them in dark chocolate and then drizzle them with white chocolate. It’s delicious and super easy!
How to Make Strawberry Cheesecake Topped With Chocolate Covered Strawberries
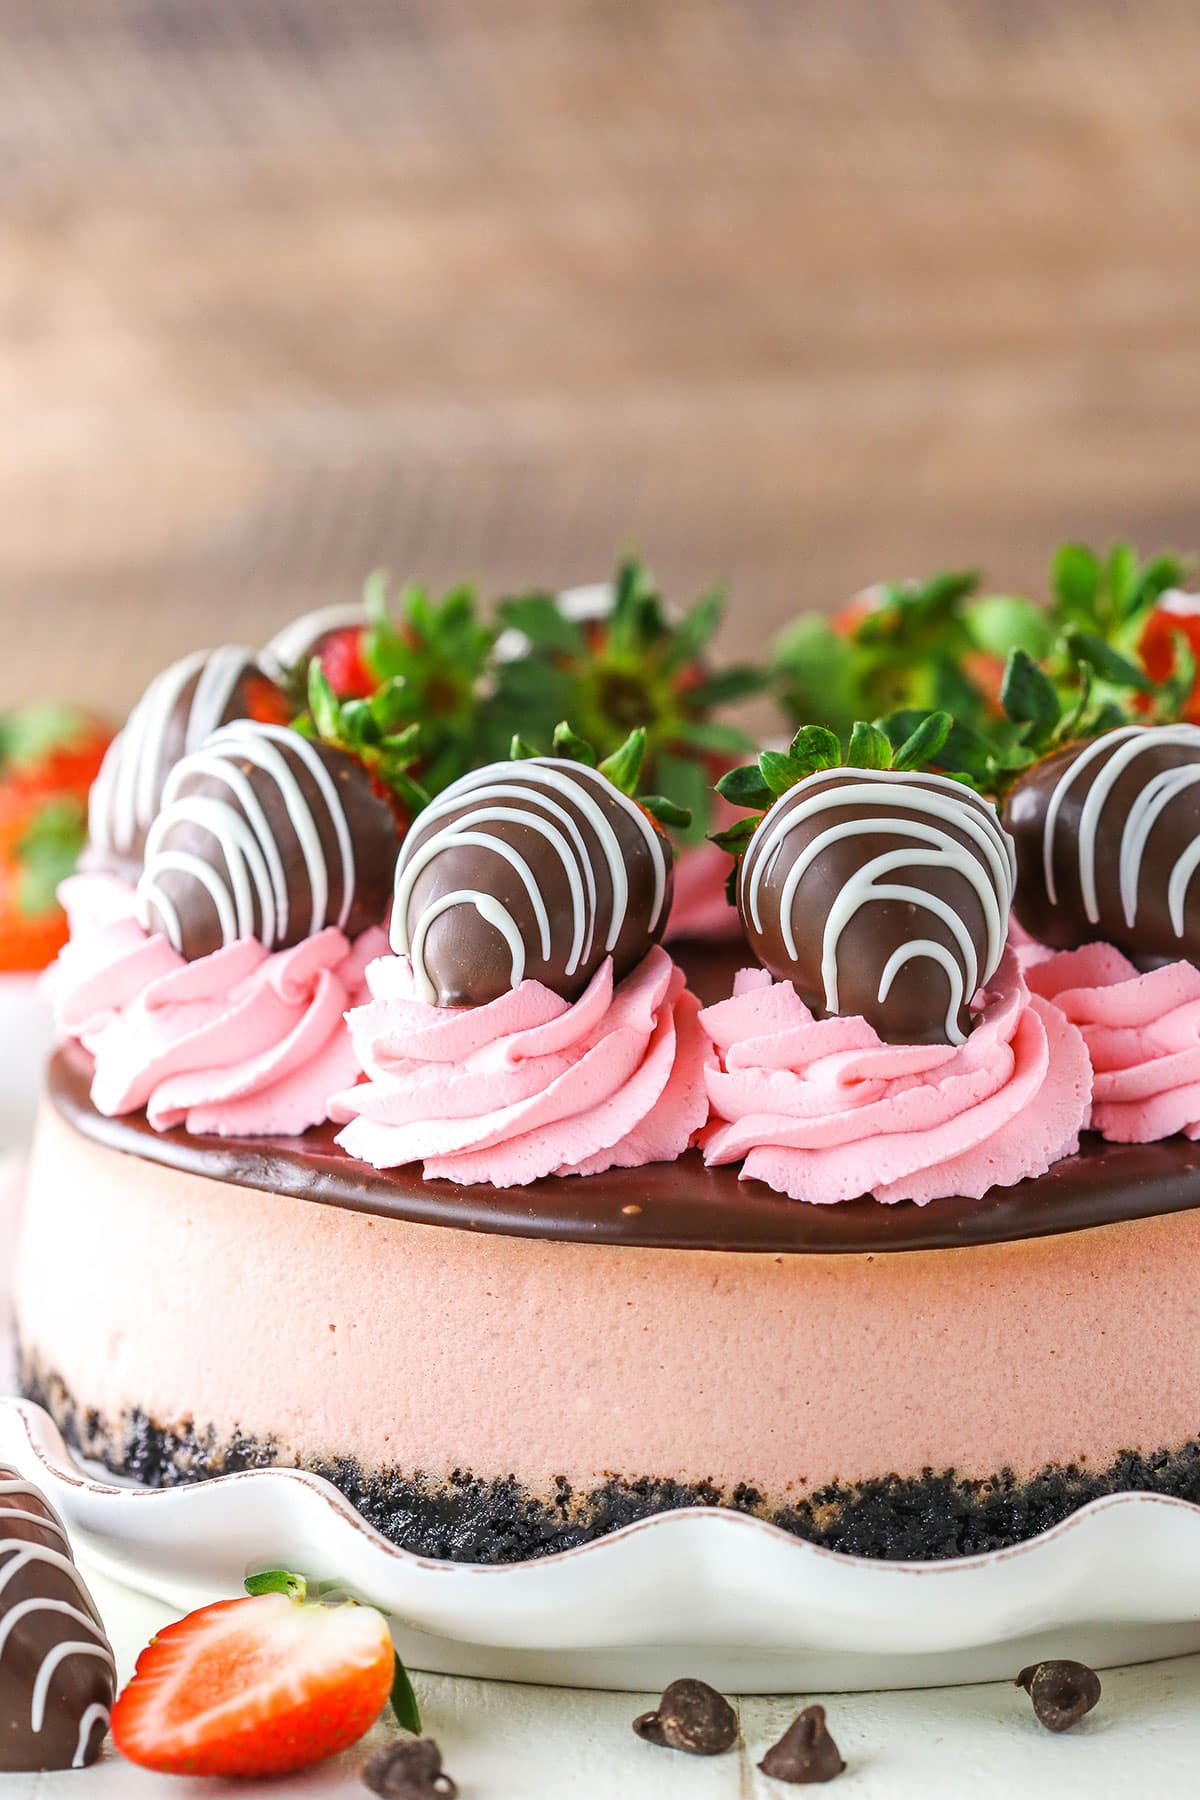
There’s nothing like step-by-step instructions to help you stay on track when making a recipe with a lot of different components. Take a look, and familiarize yourself with what you’ll be doing to bring this beauty to life. More comprehensive directions can be found in the recipe card below.
To Make the Chocolate Crust
- Prepare to bake: Preheat oven to 325°F. Line a 9-inch springform pan with parchment paper in the bottom and grease the sides.
- Combine crust and press into pan: Combine the crust ingredients in a small bowl. Press the mixture into the bottom and up the sides of the springform pan.
- Bake: Bake the crust for 10 minutes, then set aside to cool.
- Cover pan with foil: Cover the outsides of the pan with aluminum foil so that water from the water bath cannot get in. Set prepared pan aside.
To Make the Strawberry Cheesecake Filling
- Puree and strain strawberries: Add the strawberries to a food processor or blender and puree until smooth, then strain through a fine mesh sieve to discard the seeds.
- Cook puree until thickened: Add the puree to a medium sized saucepan and cook over medium heat. Allow the mixture to come to a boil and continue to boil, stirring consistently to keep it from burning, until it has thickened and reduce to 1/2 cup, about 20 minutes. To measure, pour the puree into a measuring cup. If it’s more than 1/2 cup, add it back to the pan and continue to cook it.
- Cool strawberry reduction: When the puree has thickened and reduced, pour into a small bowl and allow to cool to at least room temperature. This strawberry mixture can be made ahead, if you like.
- Set oven temperature: When ready to proceed with the filling, set oven temperature to 300°F.
- Beat cream cheese, sugar and flour on low: In a large bowl, beat the cream cheese, sugar and flour on low speed until completely combined and smooth. Be sure to use low speed to reduce the amount of air added to the batter, which can cause cracks. Scrape down the sides of the bowl.
- Mix in sour cream: Add the sour cream and mix on low speed until well combined.
- Add strawberry puree and extract: Add the strawberry puree and strawberry extract and mix on low speed until well combined.
- Add eggs one at a time: Add the eggs one at a time, mixing slowly to combine after each addition. Scrape down the sides of the bowl as needed to make sure everything is well combined.
- Mix in food coloring: Stir in drops of red food coloring until you reach your desired shade of pink.
- Pour filling over the crust: Pour the cheesecake batter evenly into the crust.
To Bake and Cool the Cheesecake
- Set up water bath: Place the springform pan inside another larger pan. Fill the outside pan with enough warm water to go about halfway up the sides of the springform pan. The water should not go above the top edge of the aluminum foil on the springform pan. See the tip section below for more help setting up a water bath.
- Bake: Bake for 1 hour 10 minutes. The center should be set, but still jiggly. The cheesecake will continue to cook and firm up as it cools.
- Cool in oven: Turn off the oven and leave the door closed for 30 minutes to begin the cooling process.
- Cool in oven with door cracked open: Next, crack the door of the oven open for another 30 minutes to continue slowly cooling the cheesecake. This process helps prevent cracking.
- Remove from oven and unwrap water bath: Remove the cheesecake from the oven and water bath wrapping.
- Refrigerate and remove from pan: Refrigerate until firm, 5-6 hours or overnight. When the cheesecake is firm, remove from the springform pan and set on a serving plate.
To Make the Chocolate Ganache
- Put chocolate chips in a bowl: Place chocolate chips in a heat proof bowl.
- Heat whipping cream: Microwave the heavy whipping cream until it just begins to boil, then pour it over the chocolate chips. Allow it to sit for 2-3 minutes, then whisk until smooth.
- Pour ganache over the cheesecake and cool: Pour the ganache onto the cheesecake and spread into an even layer. Allow to cool and firm.
To Decorate with Whipped Cream and Strawberries
- Mix cream, powdered sugar and vanilla: Make the whipped cream by adding the heavy whipping cream, powdered sugar, and vanilla extract to a large mixer bowl. Whip on high speed until stiff peaks form and then add some pink icing color until the cream takes on a pink color.
- Pipe on whipped cream: Pipe the whipped cream around the edge of the cheesecake.
- Refrigerate and top with strawberries before serving: Refrigerate cheesecake until ready to serve. Since fresh chocolate covered strawberries spoil quickly, it is best to add them just before serving.
Tips for Success
Take the worry out of making cheesecake by reading through my top tips for success. These simple suggestions will help guide you through the process and help you avoid common mistakes. Don’t forget to give them a read!
- Make cookie crumbs in a food processor. It’s best to grind up whole Oreos (including the filling) in a food processor until you are left with fine crumbs. Big chunks can cause your crust to crumble when you cut into it. You’ll grind the whole cookie because the filling helps to bind the crust together, along with the butter. If you don’t have a food processor, you can crush the whole cookies in a plastic zipper bag with a rolling pin until all the big chunks are gone.
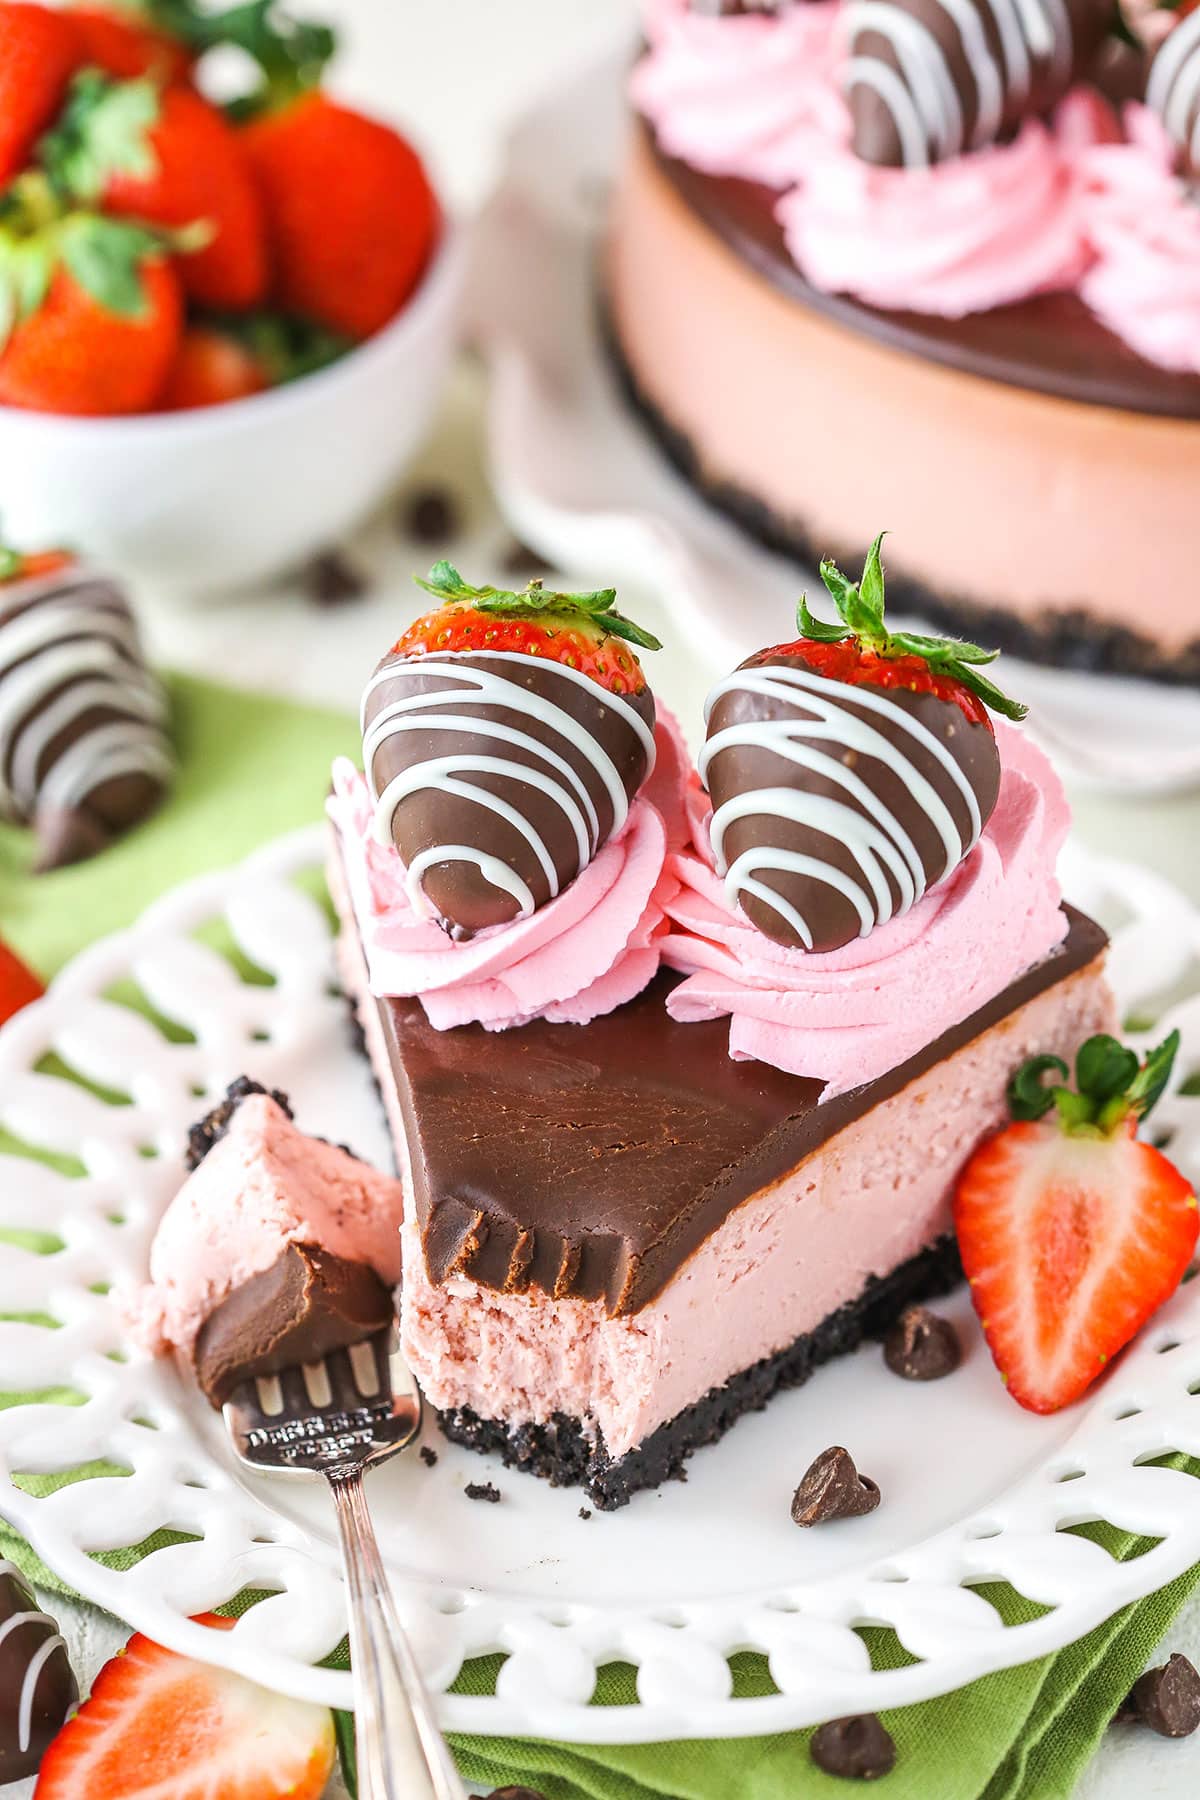
- Keep the crust flat. Usually I like having the crust go up the sides of the pan, but for this cheesecake I decided it was best to keep the crust flat on the bottom of the pan to highlight the pink strawberry filling center. I wanted to be able to see the center before slicing into the cake, and I loved the final look it gave.
- Use room temperature ingredients for the filling. Always start with room temperature butter, sour cream, cream cheese and eggs when making cheesecake. It’s so much easier to blend them when they are the right temperature. Plus, you’ll avoid lumps and over-mixing!
- Don’t over-mix. Use a nice low speed and be patient with the process of blending the cheesecake filling together. Using high speeds to mix the filling will incorporate excess air into the batter which can cause cracks.
- Use a springform pan. A 9 inch springform pan is essential when making cheesecake. Springform pans have removeable sides, which allow you to remove the cheesecake easily after it has been baked.
- Use a water bath. This recipe uses a classic water bath to create a smooth, creamy strawberry cheesecake. If you are unsure about how to make cheesecake using a water bath, check out my post containing 7 tips for successful baking with a water bath and its sister post containing 10 tips for baking the perfect cheesecake.
- Don’t over-bake. Cheesecake is done baking when it is set around the edges and jiggly in the center. Naturally, you’ll want to keep baking, but the jiggly center is actually very important. Follow the baking/cooling directions as written, and the cheesecake will continue to cook and firm up as it cools.
- Cool gradually. Cool your cheesecake nice and slow. Once you turn the oven off, allow the cake to cool inside with the door closed for 30 minutes and then for another 30 minutes with the door cracked. This is the best way to prevent cracks on the surface of the cheesecake.
Storage Information
Proper storage will help your Chocolate Covered Strawberry Cheesecake stay fresher longer. Here’s what you need to know.
- Refrigerate. Put the cheesecake in an airtight cake carrier. If you don’t have one, wrapping it in a double layer of plastic wrap will also work, but I’d recommend using toothpicks to prop the plastic away from the toppings. If you already sliced the cheesecake, arrange the slices in a single layer in an airtight container. It will keep in the fridge for up to 5 days but tastes best when eaten within 3-4 days.
- Freeze. If you plan to freeze the cake, it’s ok to top it with whipped cream, but you’ll want to wait to put the chocolate covered strawberries on top. Put the cheesecake in the freezer for a couple of hours to firm up a little. Remove it briefly and wrap in a double layer of plastic wrap. If you want to freeze individual slices of cheesecake, arrange them in a single layer in a freezer-safe airtight container. It can be stored in the freezer for up to 3 months. Thaw completely in the refrigerator (overnight preferred), and top with berries just before serving.
More Strawberry Cheesecake Recipes
Love the flavor of strawberries and chocolate together? Try these other fantastic cheesecake variations on this theme.
- Easy No Bake Chocolate Cheesecake
- Mini Strawberry Cheesecakes
- Easy Strawberry Cheesecake
- Strawberry Brownie Cheesecake
- Mini Strawberry Champagne Cheesecakes
- Strawberry Shortcake Cheesecake
- No Bake Strawberry Cheesecake
- Mini Strawberry Cheesecake Chocolate Cookie Cups
Watch How To Make It
Print
Chocolate Covered Strawberry Cheesecake
- Prep Time: 1 hour 15 minutes
- Cook Time: 2 hours 45 minutes
- Total Time: 4 hours
- Yield: 12-14 slices
- Category: Dessert
- Method: Oven
- Cuisine: American
Description
This Chocolate Covered Strawberry Cheesecake recipe is made with a strawberry cheesecake filling and chocolate Oreo crust, all covered in chocolate ganache and chocolate covered strawberries!
Ingredients
Chocolate Crust
- 2 1/4 cups (302g) Oreo cookie crumbs (25–30 Oreos)
- 4 tbsp (56g) salted butter, melted
Strawberry Cheesecake
- 3 cups (380g) chopped strawberries
- 24 oz (678g) cream cheese, room temperature
- 1 cup (207g) sugar
- 3 tbsp (24g) flour
- 1/2 cup (115g) sour cream, room temperature
- 1 1/2 tbsp strawberry extract
- 4 large eggs, room temperature
- 8 drops red food coloring
Chocolate Ganache
- 8 oz (227g) semi sweet chocolate chips
- 1/2 cup (120ml) heavy whipping cream
Whipped Cream Topping
- 1 cup (240ml) heavy whipping cream, cold
- 1/2 cup (58g) powdered sugar
- 1 tsp vanilla extract
- Pink gel icing color
- Chocolate covered strawberries, homemade or store bought
Instructions
Make the Crust
- Preheat oven to 325°F (163°C). Line a 9-inch (23cm) springform pan with parchment paper in the bottom and grease the sides.
- Combine the crust ingredients in a small bowl. Press the mixture into the bottom and up the sides of the springform pan.
- Bake the crust for 10 minutes, then set aside to cool.
- Cover the outsides of the pan with aluminum foil so that water from the water bath cannot get in (see how I prepare a pan for a water bath). Set prepared pan aside.
Make the Cheesecake Filling
- Add the strawberries to a food processor or blender and puree until smooth, then strain through a fine mesh sieve to discard the seeds.
- Add the puree to a medium sized saucepan and cook over medium heat. Allow the mixture to come to a boil and continue to boil, stirring consistently to keep it from burning, until it has thickened and reduce to 1/2 cup, about 20 minutes. To measure, pour the puree into a measuring cup. If it’s more than 1/2 cup, add it back to the pan and continue to cook it.
- When the puree has thickened and reduced, pour into a small bowl and allow to cool to at least room temperature. This strawberry mixture can be made ahead, if you like.
- When ready to proceed with the filling, set oven temperature to 300°F (148°C).
- In a large bowl, beat the cream cheese, sugar and flour on low speed until completely combined and smooth. Be sure to use low speed to reduce the amount of air added to the batter, which can cause cracks. Scrape down the sides of the bowl.
- Add the sour cream and mix on low speed until well combined.
- Add the strawberry puree and strawberry extract and mix on low speed until well combined.
- Add the eggs one at a time, mixing slowly to combine after each addition. Scrape down the sides of the bowl as needed to make sure everything is well combined.
- Stir in the red food color to your desired shade of pink.
- Pour the cheesecake batter evenly into the crust.
Bake Your Cheesecake
- Place the springform pan inside another larger pan. Fill the outside pan with enough warm water to go about halfway up the sides of the springform pan. The water should not go above the top edge of the aluminum foil on the springform pan.
- Bake for 1 hour 10 minutes. The center should be set, but still jiggly. See how to tell when your cheesecake is done baking.
- Turn off the oven and leave the door closed for 30 minutes. The cheesecake will continue to cook, but slowly begin to cool as well.
- Crack the door of the oven for 30 minutes to allow the cheesecake to continue to cool slowly. This process helps prevent cracking.
- Remove the cheesecake from the oven and water bath wrapping and refrigerate until firm, 5-6 hours or overnight.
- When the cheesecake is cool and firm, remove from the springform pan and set on a serving plate. See my tips for removing your cheesecake from the pan.
Make the Chocolate Ganache
- To make the chocolate ganache, put the chocolate chips in a heat proof bowl.
- Microwave the heavy whipping cream until it just begins to boil, then pour it over the chocolate chips. Allow it to sit for 2-3 minutes, then whisk until smooth.
- Pour the ganache onto the cheesecake and spread into an even layer. Allow to cool and firm.
Decorate with Pink Whipped Cream and Chocolate Covered Strawberries
- To make the whipped cream, add the heavy whipping cream, powdered sugar, and vanilla extract to a large mixer bowl and whip on high speed until stiff peaks form. Add some pink icing color to your desired shade of pink.
- Pipe the whipped cream around the edge of the cheesecake, then top with chocolate covered strawberries. The fresh chocolate covered strawberries are best added fresh before serving, since they can spoil more quickly.
- Refrigerate cheesecake until ready to serve. Cheesecake is best when stored well covered and eaten within 3-4 days.
Nutrition
- Serving Size: 1 Cupcake
- Calories: 481
- Sugar: 38.1 g
- Sodium: 287.8 mg
- Fat: 29.8 g
- Carbohydrates: 47.3 g
- Protein: 9.3 g
- Cholesterol: 119.8 mg
Enjoy!








I’m trying this cheesecake for the holidays and my strawberry ‘batter’ seems extremely runny! Is this normal🙈 scared I’ve done something wrong!
Thanks!
It’s hard to say from a distance if it’s the normal thin batter or if it’s more thin than usual. It does tend to be thin though. Just keep an eye on it while it bakes and check out my post for knowing when it’s done baking. Add more time, if needed.
This is the best cheesecake I have ever had!!!
I’m so glad to hear that!
Could l omit the flour? My husband can’t have gluten.
You could, or you could use cornstarch in half the amount.
I would love to try to make this recipe but would like to do mini cheesecakes (muffin tin size) any idea on length of time to cook? Maybe 20 minutes?
It should be relatively similar to my mini cheesecakes, so I’d check those out. I use a bake time and then cool them in the oven with the door closed while they finish cooking and have a slow cooling process.
I am contemplating bringing the crust up the sides of the pan. Is the current crust recipe enough to do that?
It depends on how thick you like your crust, I guess. I’d probably make more. Feel free to check out my Oreo crust recipe, which accounts for going up the sides of a cheesecake.
My goodness, I made this cheesecake this past Sunday and it was so good! Everyone that I gave a piece to said it was delicious! I just have one question, any idea on why my cheesecake came out so much thinner compared to the photo of yours? I am new to making cheesecake and your website is my go-to place!
I’m so glad it was a hit! I’m not sure why it would’ve been thinner, unless you reduced an ingredient. Using 3 eggs instead of 4 actually makes a good difference in the height.
Hello! I just made this cheesecake yesterday and it is delicious! Thank you for sharing this recipe!
Awesome! So glad you enjoyed it!
Can freeze dried strawberries be used in this recipe for real strawberries
I would imagine so. I just haven’t tried it. If you’d like to try it, replace the strawberry reduction with another 1/2 cup of sour cream and then add your freeze dried strawberries.
Am I supposed to remove the cream from the oreo or just use the entire cookie?
Use the entire cookie.
just made this but wondering if u put ganache on while still in pan your video shows u did but i thought i read in a comment that u take out of pan. I want to take it somewhere so it would travel better in pan. I would prefer it not to drip so thought leaving in an would help that also. Does it matter or is it better to take it out? Thanks for the post I am sure it will taste great!
You could really do it either way.
Hi! Will skipping the water bath affect the taste of the cheesecake? (I’m not worried about cracking it because of the ganache!)
I mean, it doesn’t affect taste, but the texture is impacted. It’s not just cracks, it falls in the center and can be a little less creamy and just overall isn’t ideal. But if you really don’t care, you could skip it. It’s just a lot of work to make a cheesecake, I’d think you’d want to just use the extra step to have it turn out right.
I made this last night and it looks amazing! However I cut into it and the center is runny. I’ve made cheesecakes before but have never had this problem. I’m not sure if my new elevation gain (moving from Cali to Colorado) is the problem. What should I do?! Any tips would be appreciated! I already baked it for another 30 mins. I’ll see if that helps
I’m not really familiar with high altitude baking, so I’m not sure if that had something to do with it or not. It does sound like it was under baked. Hopefully baking it a little longer helped, but I’m not sure that it would help to bake it again after it cools. Here’s a post on how to tell when you’re cheesecake is done, that may be helpful next time. Sorry you had that happen!
Have you ever made this with dried strawberries? 🙂 would it be the same measurement as fresh strawberries? Strawberries aren’t in season for me right now so I feel the dried will provide more flavor. Thank you so much, I loveeee your recipes.
So sorry for the delay in responding. I haven’t ever used dried strawberries in baking, so it’s hard for me to say. You could try frozen strawberries. Just thaw them and remove the excess liquid.
Made this tonight, in the process of the cheesecake cooling, I didn’t have red food coloring. It looks muted in color, but I assume it will not affect the taste. I figure I will just let the chocolate topping drip down.
The muted color is from the lack of food coloring, but you’re right that it doesn’t affect taste. I hope you enjoy it!