This post may contain affiliate sales links. Please read my disclosure policy.
These Spritz Cookies are buttery, tender and such festive Christmas cookies! The cookie dough is super easy to put together and there’s so many ways to decorate them. A great make-ahead cookie!
Looking for more Christmas cookie recipes? Try my soft gingerbread cookies, or these easy cut out sugar cookies!
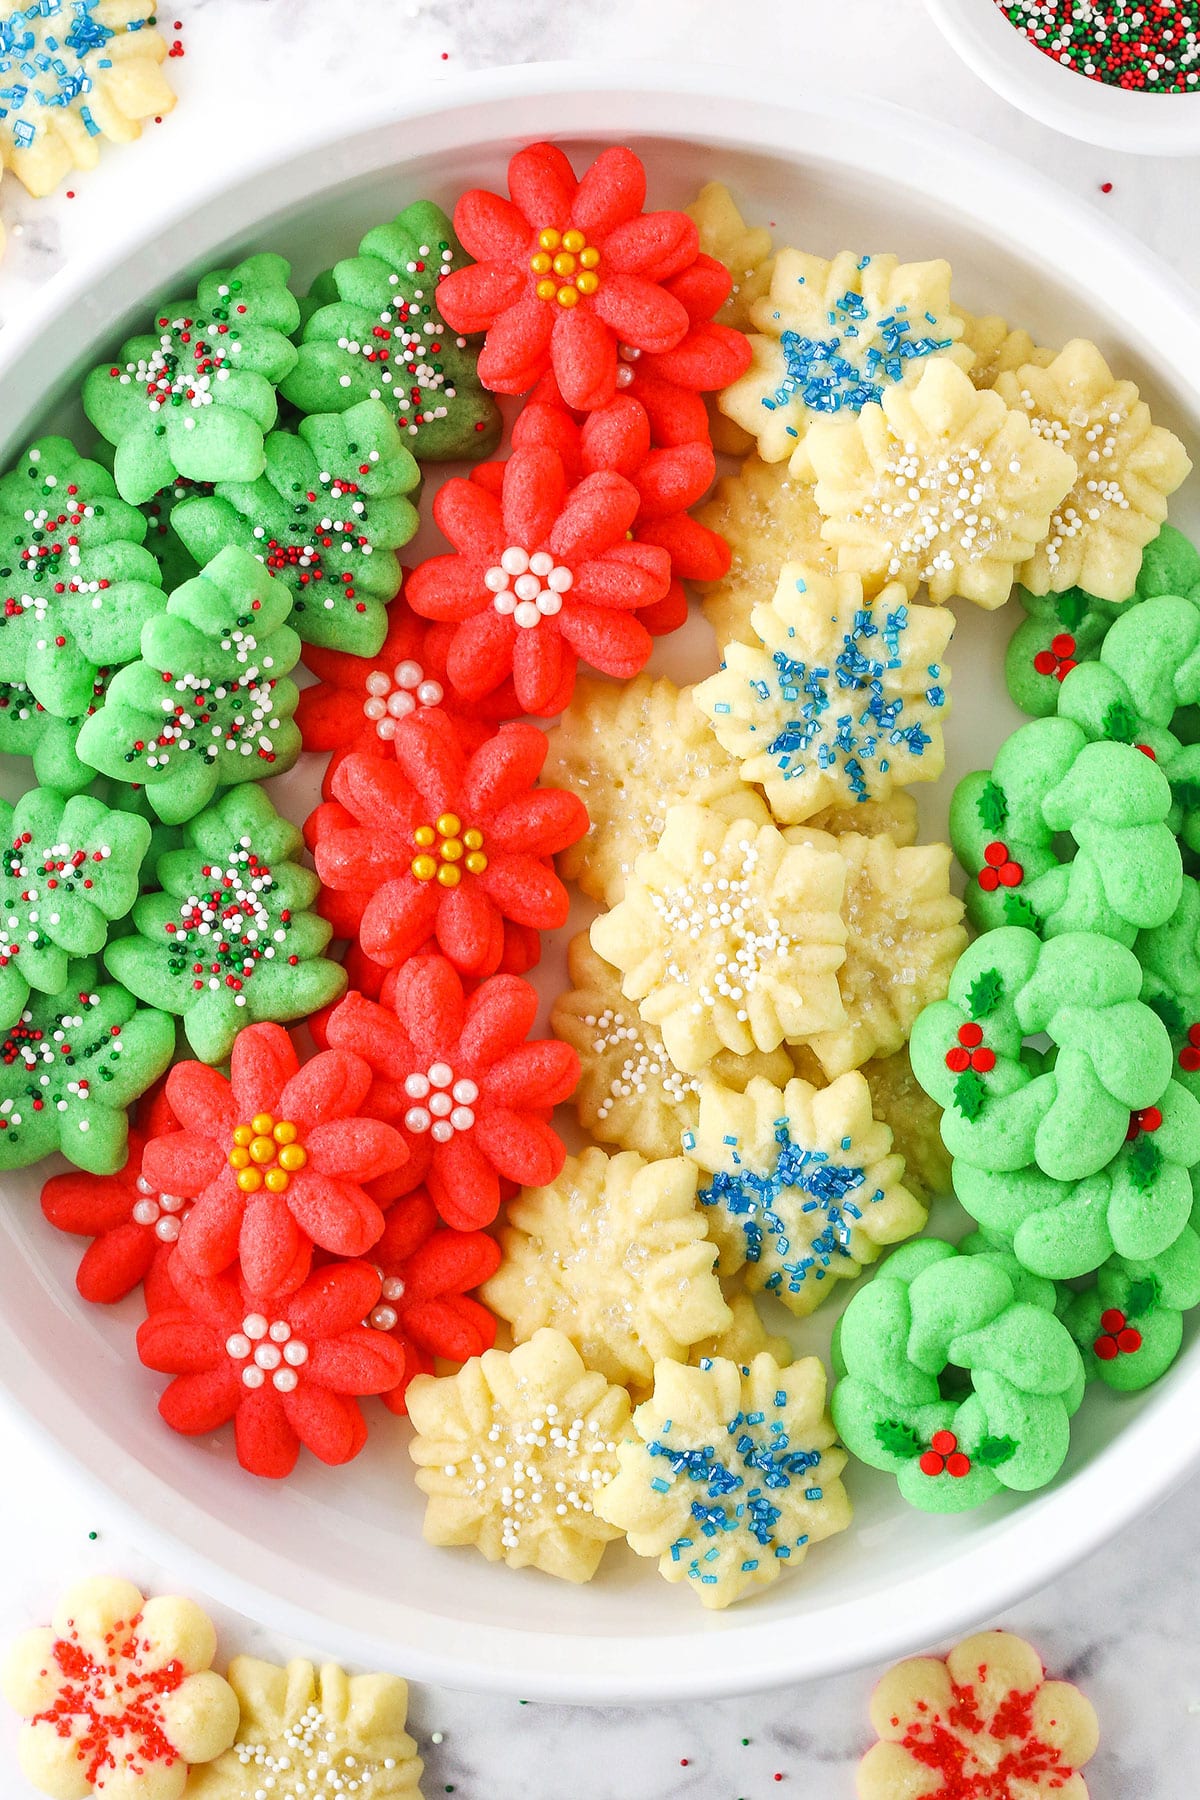
I’m going to be honest with you. Spritz cookies never used to appeal to me. Whenever I had them they were store-bought versions or something and they were usually super crispy and lacked flavor. Well as with most things, when you make themselves and see how they should really taste, it changes everything!!
These Spritz Cookies are so dang good! Where have they been all my life?!? As long as you don’t over bake them, they are super soft and tender and stay that was for at least a week. They have a lovely buttery flavor that is accentuated with some soft almond flavor and together it all just melts right in your mouth! I literally couldn’t stop eating them.
And bonus – they are SUPER easy to make! The cookie dough comes together easily and doesn’t need to be refrigerated. And the cookies don’t really spread while baking and their small, so you can make a bunch at a time – quickly and easily!
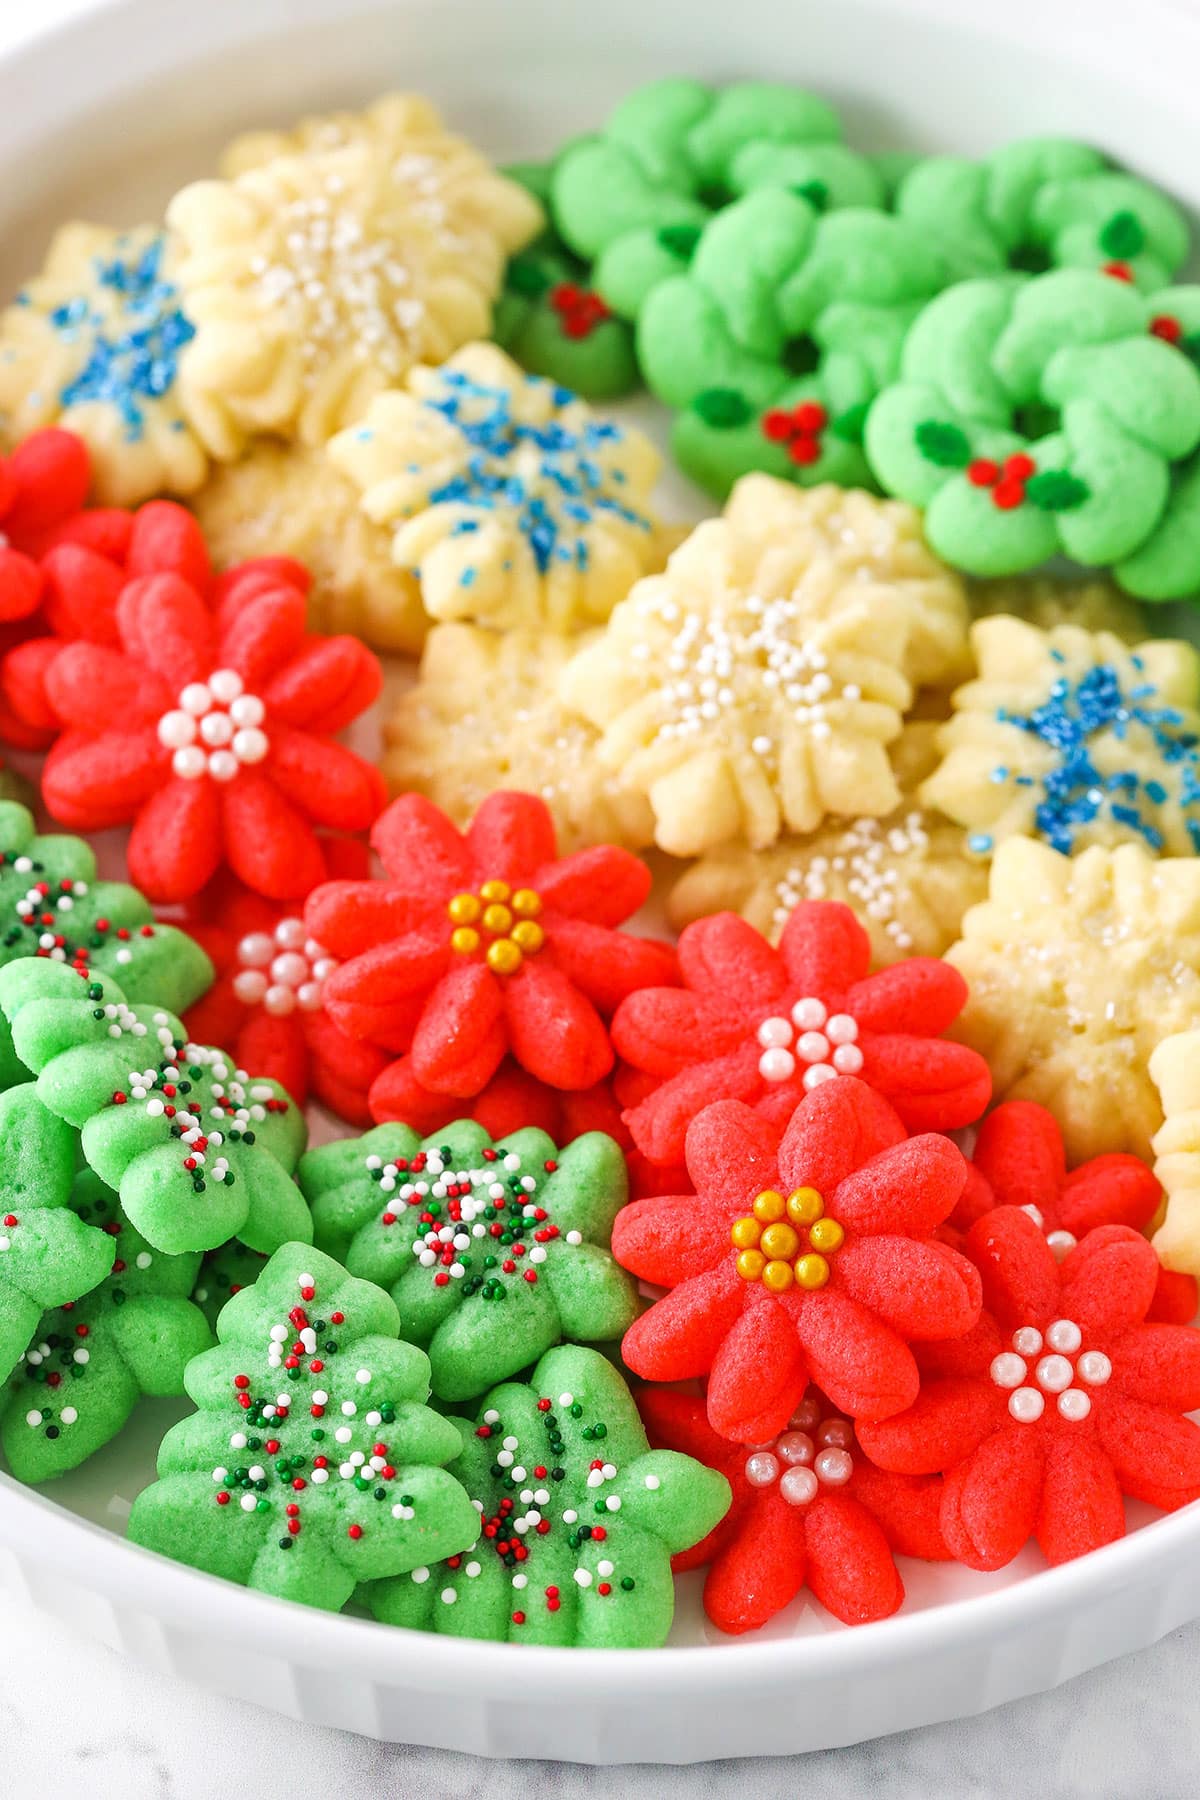
Now before we go into how to make these awesome cookies, lets talk about what they are exactly. The word “spritz” comes from the German word “spritzen”, which means “to squirt”. They are basically named for the way they are made – by squirting/pressing the cookie dough through a cookie press.
As for taste and texture of these cookies, I would describe them as a cross between a cutout sugar cookie and shortbread. They are like sugar cookies in their simple flavor and the fact that you make them into shapes, but with sugar cookies you’ll use cookie cutters and with spritz cookies, you use a cookie press (which is easier and faster!). They are kind of like shortbread in texture – but totally better. Shortbread is often more dry and crumbly. With the addition of the egg to these cookies, they are more tender and don’t fall apart when you bite into them. Instead they melt in your mouth!

Step 1: Make and Color Your Cookie Dough
- Make the cookie dough. You’ll cream the butter and sugar together, then add the egg and the extracts (I use a little vanilla and almond). Finally, add the flour and salt and mix just until combined.
- Color your cookie dough. If you want to use a few colors, divide your dough into parts and color it. I recommend gel icing color, not food coloring. Gel icing color allows you to add a small amount to achieve bright color. With food coloring you have to add a lot and it thins out your cookie dough, which will cause your cookies to spread too much.

Step 2: Add Your Cookie Dough to a Cookie Press
Now you add your cookie dough to the cookie press and shape your cookies! I’m a big fan of this cookie press, but feel free to use whichever you have.
How to Use a Cookie Press
You’ll add the plate of the shape you want to make to the bottom of the press and then add your cookie dough into the top. Hold the press upright with the bottom directly on the cookie sheet. Press the lever to release a cookie, then lift up the press and you have your cookie!
If the cookie dough sticks to the press, you can use your finger to gently release the cookie. If it holds it’s shape, great. If not, add it back to your press and keep going. It is important to not try to press the cookies out onto something that’s really non-stick, like parchment paper, or you will have trouble.

Step 3: Decorate Your Spritz Cookies!
To decorate the cookies, I used a variety of sprinkles. The options are endless when it comes to sprinkles. But you could also decorate them with chocolate chips or add a chocolate drizzle after baking them.
Step 4: Bake Your Spritz Cookies
Now it’s time to bake the cookies. I wanted to be sure that my cookies were super soft and tender, so I baked them just until they were done – about 5 minutes. Definitely don’t over bake them and dry them out.
The final cookies are purely amazing! Soft, tender and buttery! It’s hard not to eat one right after the other until they’re all gone! These will definitely be a hit for you this Christmas!
- Best Cutout Sugar Cookies for Decorating
- Best Gingerbread Cookies (Soft & Chewy Cutouts)
- Candy Cane Cookies
- Easy Sugar Cookie Recipe
- Christmas Tree Chocolate Chip Cookie Cake
- Peanut Butter Blossoms
- Chocolate Crinkle Cookies
- Chocolate Peppermint Thumbprint Cookies
- Classic Chewy Snickerdoodles
- White Chocolate Dipped Cranberry Oatmeal Cookies

- Prep Time: 35 minutes
- Cook Time: 5 minutes
- Total Time: 40 minutes
- Yield: 65-70 cookies
- Category: Cookies
- Method: Oven
- Cuisine: American
Description
These Spritz Cookies are buttery, tender and such festive Christmas cookies! The cookie dough is super easy to put together and there’s so many ways to decorate them. A great make-ahead cookie!
Ingredients
- 1 cup (224g) unsalted butter, room temperature
- 3/4 cup (155) granulated sugar
- 1 large egg
- 1 tsp vanilla extract
- 1 tsp almond extract
- 2 1/4 cups (293g) all purpose flour
- 1/2 tsp salt
- Red gel icing color, optional
- Green gel icing color, optional
- Sprinkles
Instructions
1. Preheat oven to 350°F (180°C). Line baking sheets with silicone baking mats. I don’t recommend parchment paper with these cookies. You want the cookie dough to stick to the surface you press them onto and parchment paper is non-stick. Set cookie sheets aside.
2. Cream the butter and sugar together in a large mixer bowl on medium speed until light in color and fluffy, about 3-4 minutes. You should be able to see the mixture lighten in color and get a creamy texture and know it’s ready.
3. Add the egg and mix until well combined.
4. Add the vanilla extract and almond extract and mix until well combined.
5. Add the flour and salt and mix until the dough is combined, then remove the bowl from the mixer and finish combining with a rubber spatula, if needed. Do not over mix.
6. If coloring some of the cookie dough, divide it into parts. I used white, red and green, so I divided it evenly into three parts.
7. Use the gel icing color to color the dough. Add small amounts to begin with, then add more as needed. You can always add additional color, but can’t remove it if you add too much. Adding too much liquid will thin out your cookie dough a bit.
8. Add one of the colors of cookie dough to your cookie press (I use this one) and follow the directions for your press to set it up. Hold the cookie press perpendicular to your cookie sheet and press out the cookies. They can be fairly close together, since they don’t really spread.
9. Decorate the cookies with sprinkles, if desired.
10. Bake cookies for 5-8 minutes. I prefer them nice and soft, so I went with 5 minutes, but feel free to increase that time and adjust based on your oven.
11. Remove from the oven and allow to cool on baking sheets for 4-5 minutes before transferring to a wire rack to cool completely.
12. Store cookies in an air tight container for up to about 1 week.
Nutrition
- Serving Size: 1 cookie
- Calories: 48
- Sugar: 2.2 g
- Sodium: 18.1 mg
- Fat: 2.7 g
- Carbohydrates: 5.2 g
- Protein: 0.5 g
- Cholesterol: 9.6 mg



Can the dough be made ahead and frozen until ready to use?
I haven’t tested that, but it should be fine.
They only last one week?? I want to make now but Xmas is in 3 weeks? Is that ok?
You could consider freezing them or making them a little closer to Christmas. Most cookies don’t last 3 weeks.
Can you freeze these after they are prepared?
Yes, just be aware that if there are sprinkles on them, the colors may bleed when they thaw.
I loved this recipe. I think the almond extract added the perfect amount of flavor. My grandchild loved them and Requested more!
I used the same cookie press that was used in the recipe and I had 70+ cookies!
I made the recipe but added a bit more sugar. I didn’t get very many cookies at all, I used a pampered chef press and some came out ok but I didn’t have a baking mat and the dough wouldn’t stick to pan and I would forget to wipe it off so would squeeze one more time. I still don’t see how you get so many cookies out of this recipe…my advice…make a double batch! Other than that they taste great!
Chill your cookie sheet
Great recipe! I haven’t made these in a long time and I couldn’t find what I had used in the past. These turned out perfect. Both 5 minutes and 6 minute cooking times turned out great! I had no food coloring on hand so they are all plain but either way my kids will gobble them up!!
These are delicious! I colored and marbled my dough and they turned out great! Such wonderful tasting cookies too, thank you for the great recipe!
We followed the recipe exactly and these cookies are horrid. We gave them to our dogs.
My coolies came put too soft – almost wet in the center – even after an 8 minute bake.
Could i have over worked the dough?
I used wilton gel color.
There can be variations between ovens. You may have just need to bake them longer. It could also depend a little on how much gel you added to the cookie dough. If it thinned out the dough a little bit more then they may have needed a smidge more of baking time.
what brand of gel icing color do you recommend?
I use Wilton and AmeriColor.
Is there anything you can use besides a silicone baking mat? Can you just put it on the cookie sheet?
The cookie press works best when the cookie dough sticks to what you press the cookies onto. I find the baking mat works best.
This receipe is a little confusing. The top says cook time 25 minutes but the recipe itself says 5-8 minutes.
Can you make the dough and refrigerate until ready to use
Yes, that should be fine.
I used this recipe last week, and forgot to bring it with me to my boyfriends house.. So I ended up using another recipe. This one by far is better! Just do remember not to use parchment paper. I spent so long fighting with these and when I came home the silicone mat is perfect. I LOVE these! I am in Culinary School for Pastry and baking and I am very picky on my recipes!
I made this recipe for the very first time and it was a hit! I made the recipe just as instructed with the exception of using coloring. I decided to just do plain with sprinkles so good!
So glad you enjoyed them!
This was super easy! Years ago I tried spritz cookies with my kids got frustrated and tossed my cookie press. I got the Oxo this year. I let my butter sit at room temp until soft. I used salted butter and omitted the salt. I used 3/4 teaspoon almond extract since I have a picky kiddo. They were SO EASY and delish! Now if you could tell me how to stop eating them!
Awesome! So glad you enjoyed them!