This post may contain affiliate sales links. Please read my disclosure policy.
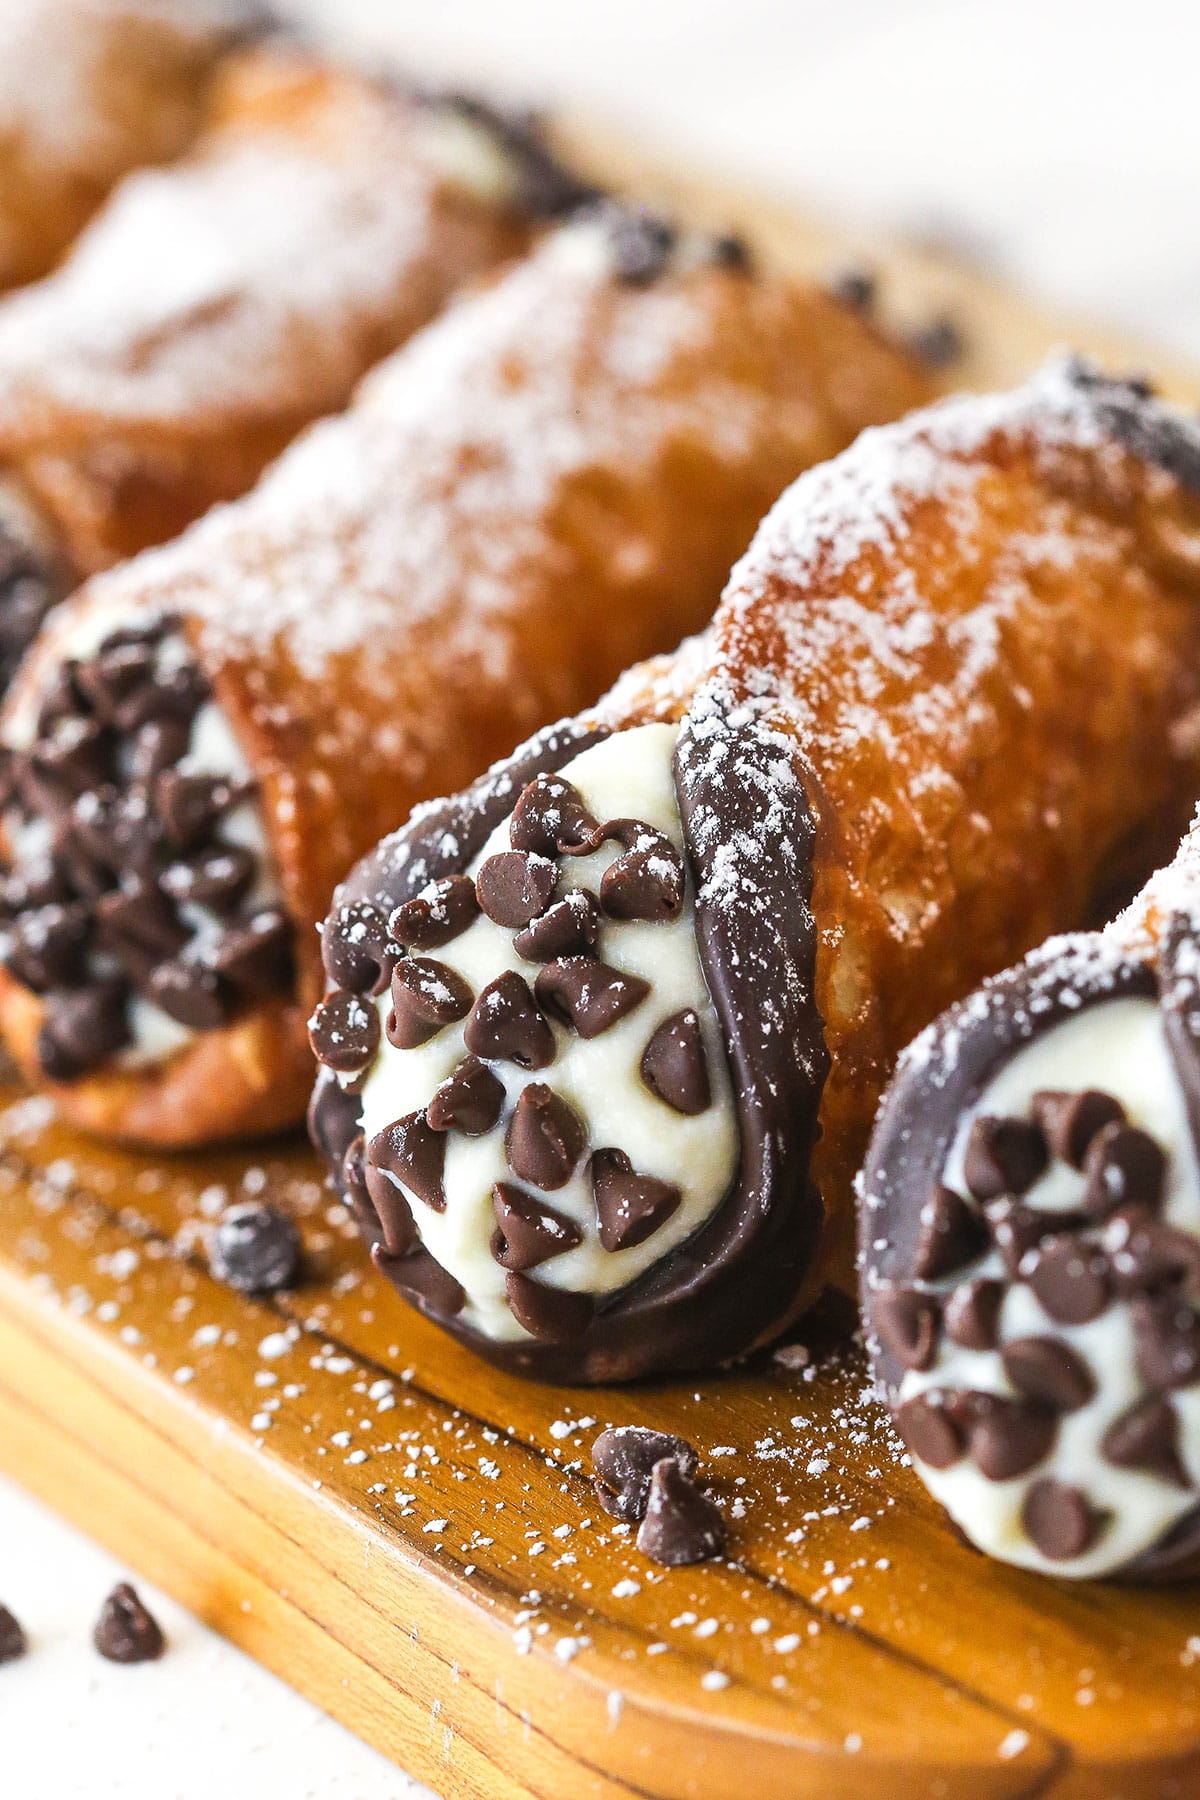
Thin, crispy shells are made and filled with a lightly sweet filling made with ricotta cheese, mascarpone, and powdered sugar in this Homemade Cannoli Recipe. Enjoy them plain or dip the shells in chocolate and add some mini chocolate chips!

Why You’ll Love This Homemade Cannoli Recipe
Cannoli are a classic and there are surely many opinions as to what makes one the best. And as for making them homemade, it’s quite a process. But it can really be a lot of fun with the right recipe and it gives you a little control over the process to make sure your cannoli truly are the best. Here’s why I love this recipe.
- Light, crispy shell. Lots of trial and error went into figuring out exactly how to make the perfect cannoli shell for this recipe. The dough can be a little tricky to work with! But the final result is a thin, crispy shell that’s golden brown and bubbly.
- Smooth, creamy filling. The filling for this recipe is made with ricotta cheese, mascarpone cheese, and powdered sugar. It’s sweet but not too sweet, though you can add more/less powdered sugar as desired. You can absolutely make it with just ricotta cheese but I just love the flavor of the mascarpone.
- Detailed directions. Making cannoli can be tricky. I spent a lot of time testing, especially the shells. You will find all the details (and step-by-step pictures) on how to get those shells just right.
- Prep ahead. Homemade cannoli is definitely not one of those quick and easy desserts ready in 30 minutes but the good part is that you CAN make parts of it in advance. The dough for the shells can be refrigerated overnight or you can even make the shells and store them for a month. Just be sure to wait to assemble the cannoli to avoid a soggy shell!
- Chocolate! This recipe does include the option to dip half of the shells in melted chocolate and add some mini chocolate chips. Both are optional but really…chocolate does make everything better!
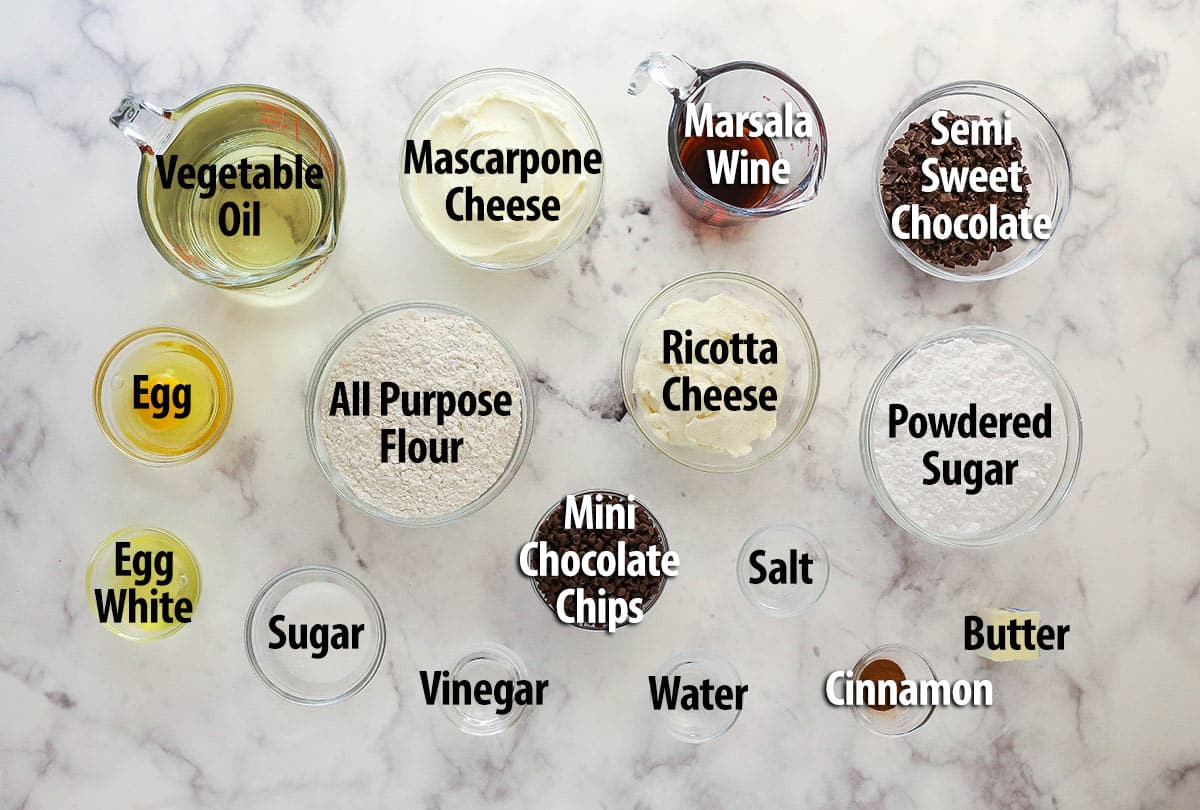
Recipe Ingredients
Both the shells and the filling are made with just a few basic ingredients. You can find the exact measurements in the recipe card below.
Cannoli Shells
- All-purpose flour – Be sure to measure this correctly so that your dough isn’t too dry. I recommend a food scale. You need enough moisture in the dough to get those iconic bubbles when you fry the shells.
- Sugar
- Ground cinnamon – I love the flavor the cinnamon adds, but you could leave it out.
- Unsalted butter – Cold & cubed.
- Egg – Use a large egg, not medium or extra large.
- Sweet Marsala wine – This is a traditional addition to cannoli shells. It helps create the ideal texture and flavor and contributes to the signature crispy bubbles. The alcohol also helps to tenderize the dough.
- Water – You could also use additional marsala if you love that flavor and want more of it
- Distilled white vinegar – Helps create the signature bubbly look
- Vegetable oil – You may need more or less, depending on the size of the pot that you’re frying in. You want to have 2-3 inches of oil to fry in.
- Egg white – For sealing the shells around the mold.
Cannoli Filling
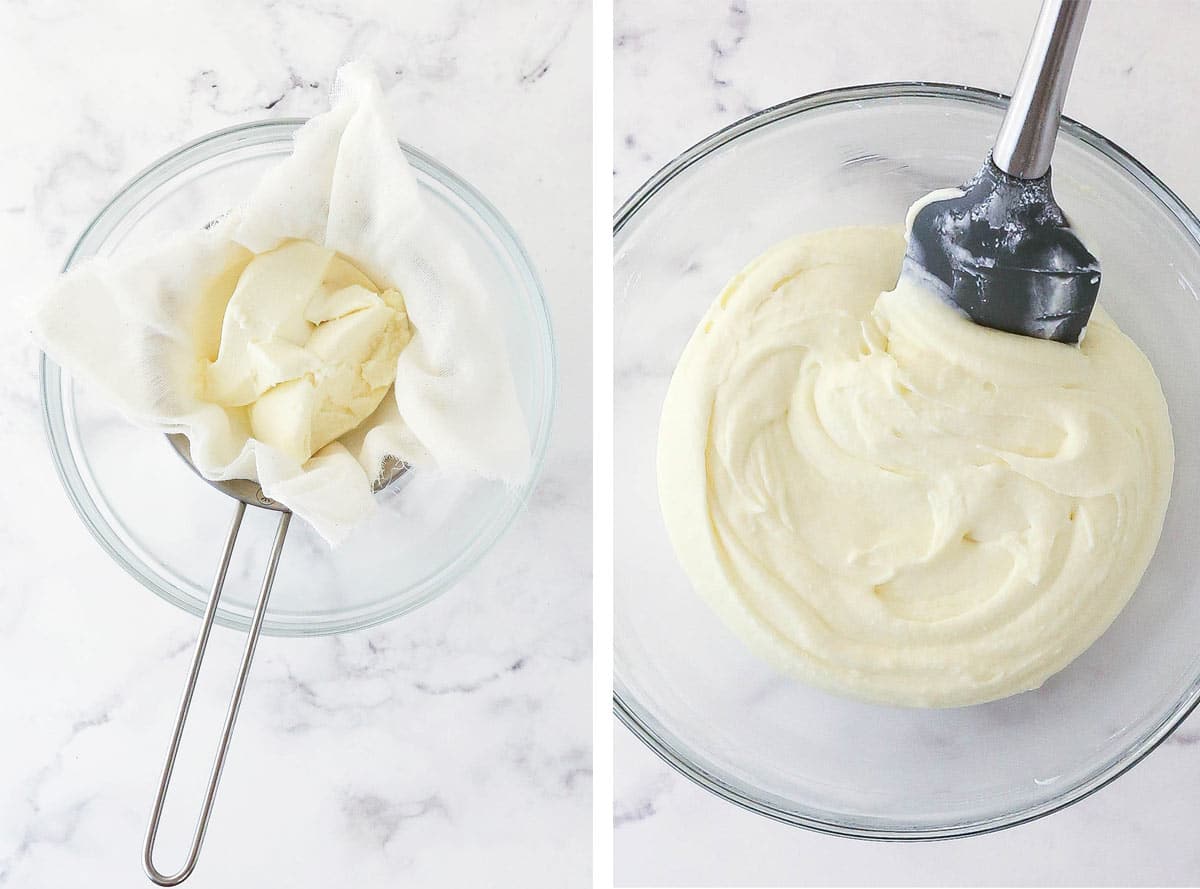
- Ricotta cheese – Be sure that you strain it to remove excess moisture
- Mascarpone cheese – You can use it cold right out of the fridge or let it sit out for 5-10 minutes, but you don’t want it to get to room temperature or get too warm. It can get watery and doesn’t firm back up well. You could use just ricotta in the filling, but I really love the flavor of the mascarpone.
- Powdered sugar – Feel free to adjust this depending on how sweet you like it.
Extras for decorating
- Semi-sweet chocolate – You could use your favorite type of chocolate to coat the shells. It’s optional. The amount listed is enough to dip about half of the shells.
- Mini chocolate chips – A traditional addition to cannoli. See below for some other options.

Flavor Variations
Mini chocolate chips are a common cannoli ingredient but there are many other tasty flavor options too. Here are a few ideas for decorating your cannoli:
- Finely chopped pistachios
- Chopped candied fruit
- Cinnamon in the filling
- Chopped hazelnuts
- Pumpkin spice in the filling
- Dark chocolate in place of the semi-sweet
How To Make Cannoli
Making cannoli is a pretty hands-on process that requires a bit of time but it’s worth every second. Just remember to make the dough in advance! You can find the printable version of the instructions in the recipe card below.
Make the shell dough
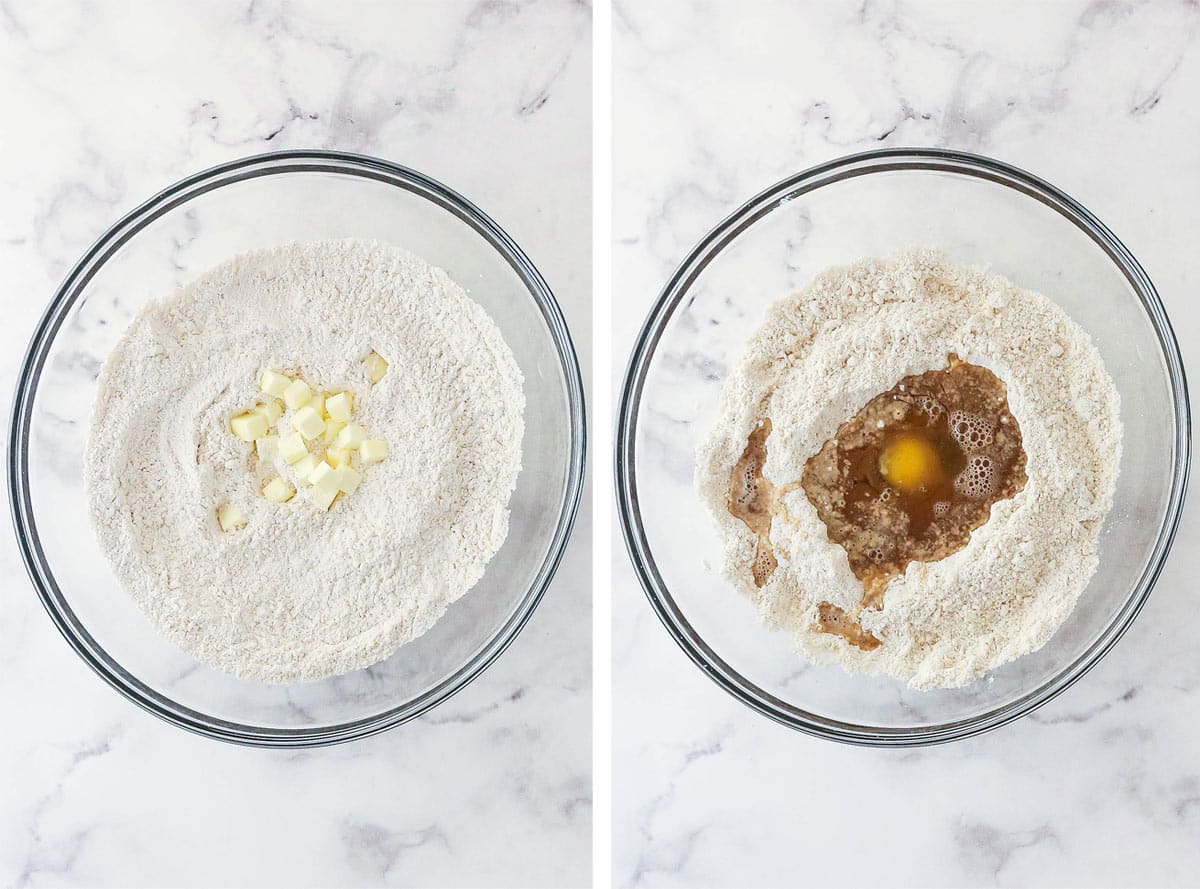
- Combine the dry ingredients and butter. Whisk together the flour, sugar, cinnamon, and salt. Use a pastry cutter or fork to cut the cubed butter into the flour mixture until the pieces are about the size of peas. Use your fingers to continue working mixture until the butter is evenly distributed. Form a well in the middle of the mixture and set aside.
- Form the dough. Add the egg, wine, water, and vinegar to the well in the flour mixture. Stir the mixture together with a fork then use your hands to form a cohesive ball.
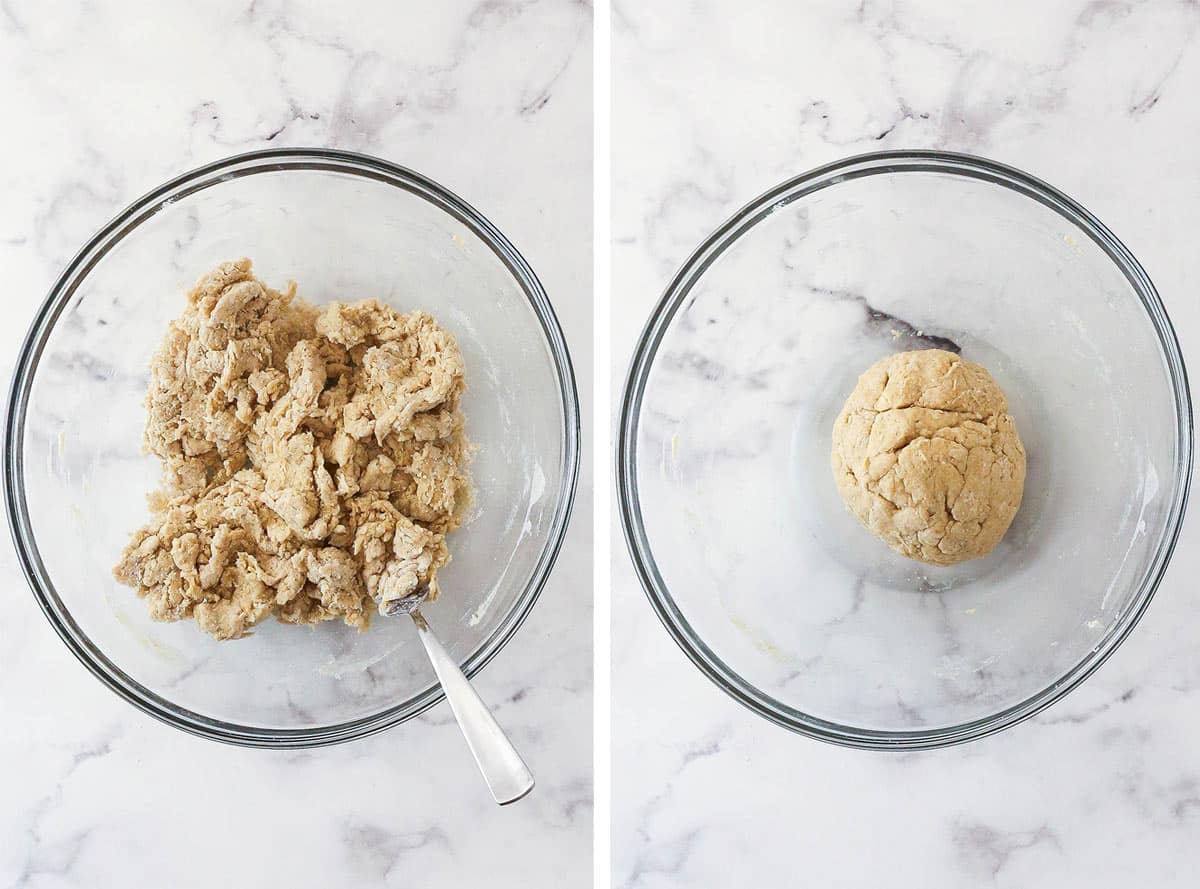
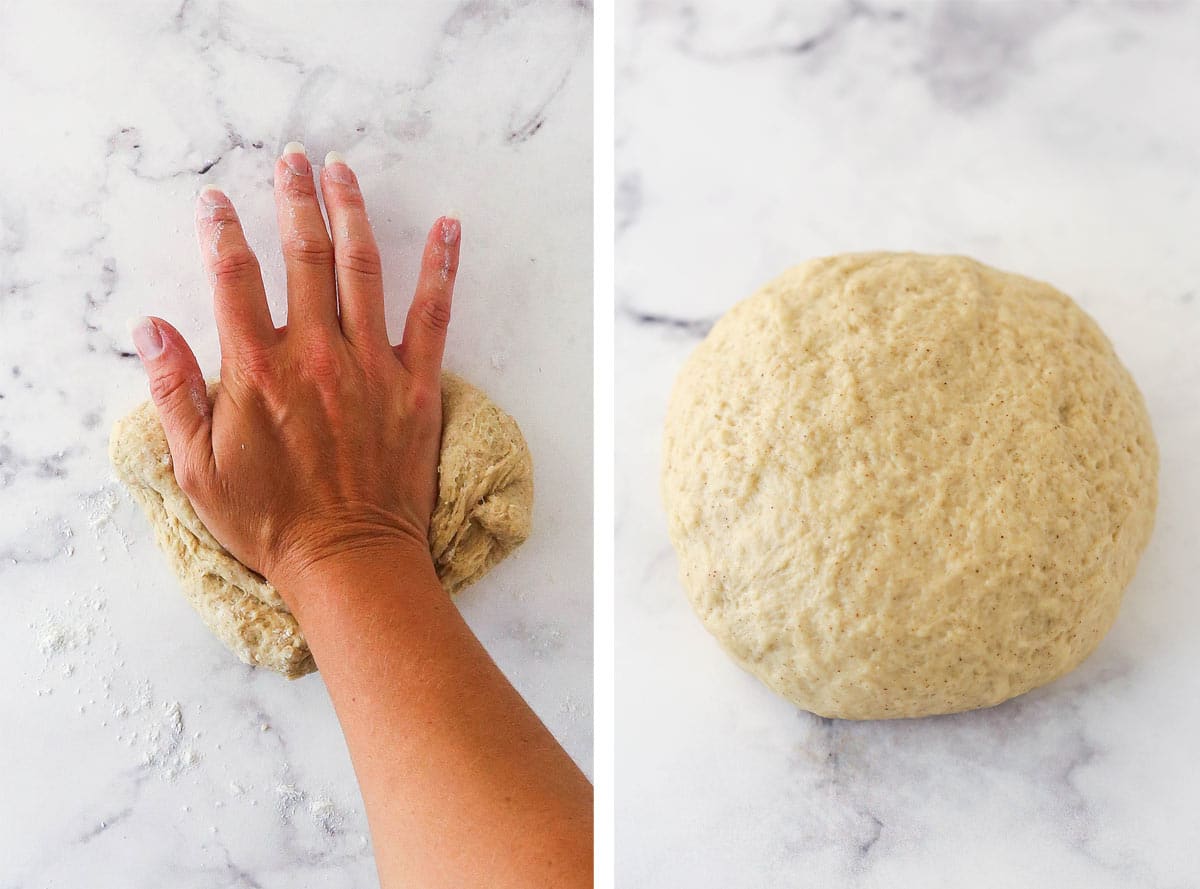
- Knead the dough. Transfer the dough to a lightly floured surface. Use the heel of your hand to push the dough away then fold it back onto itself. Repeat, adding more flour as needed to prevent sticking, until the dough is cohesive, elastic, and soft.
- Chill. Wrap the dough ball in plastic. Refrigerate for at least 2 hours (and up to 24 hours).
Make the filling
- Combine the ingredients. Gently fold together the drained ricotta, mascarpone cheese, and powdered sugar until well combined.
- Chill. Cover the mixture and chill in the fridge for 2-3 hours.
Create the shells
- Prep. Grease the cannoli mold with vegetable oil. Set aside. Cut the dough in half, wrapping one half back in the plastic and setting it aside.
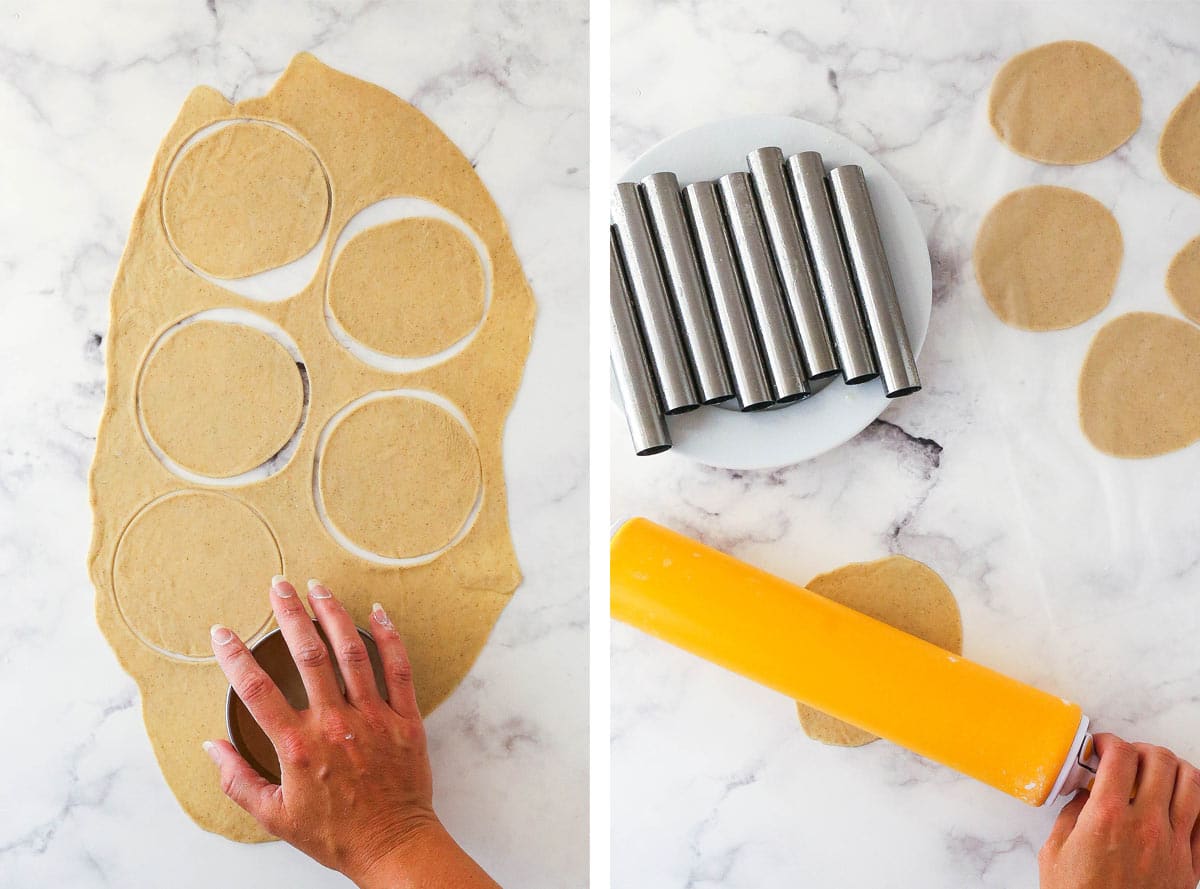
- Cut out the shells. Roll the dough out on a lightly floured surface, adding more flour as needed to prevent sticking. Roll it out to 1/8-inch thick then use a round cutter to cut out as many circles as possible. Place under a layer of clear wrap. Repeat with the second half of the dough then combine the scraps from the two batches and repeat until you have about 25 shells.
- Let relax. Let the covered circles sit for about 10 minutes, giving the dough time to relax. They will likely shrink up a bit, which is fine. (By the time you finish cutting the second batch, the first ones might be ready.)
- Re-roll each circle. Re-roll each circle, one at a time, to the original size. If it doesn’t stay round, you can use the rounder cutter again. I sometimes find that sprinkling some flour onto the dough helps in not snap back so much.
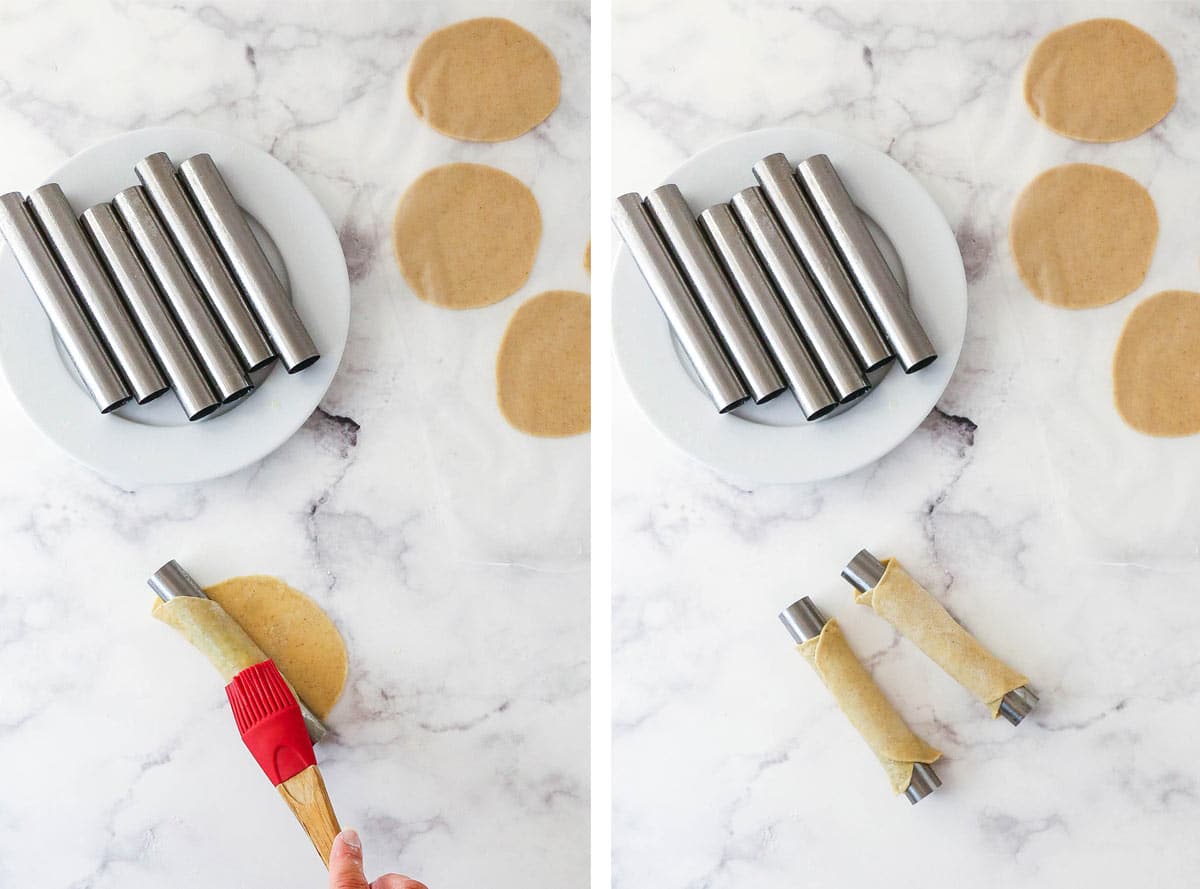
- Shape the shells. Place the cannoli mold down on the center of a dough round. Bring one set up to rest over the mold, brush it with the egg white, then fold the opposite dough up and over, pressing into the eggy surface. Repeat with the other circles.
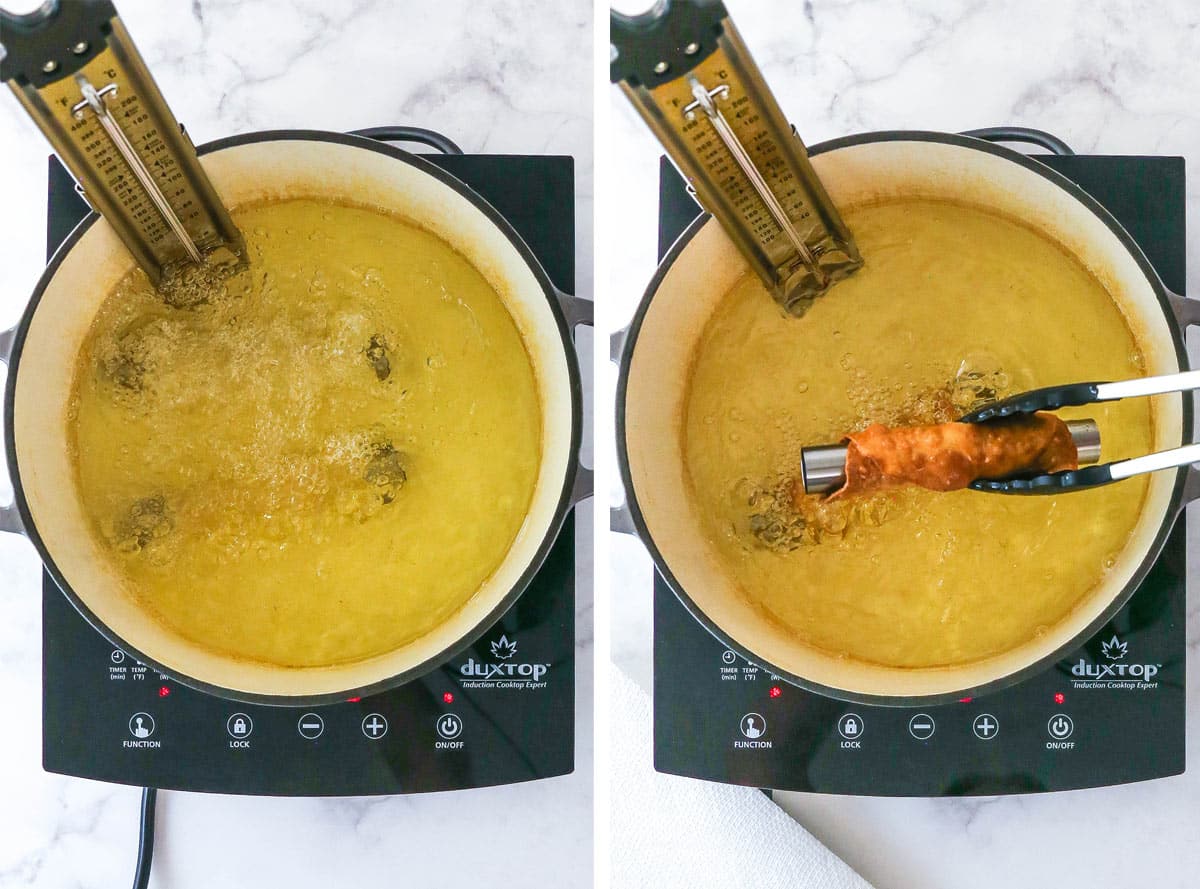
- Preheat the oil. Pour 2-3 inches of vegetable oil into a Dutch oven or deep skillet. Heat to 375F over medium-high heat then reduce the heat to medium and continue to heat.
- Cook the shells. Use tongs to add 2-3 shells to the oil at a time, allowing them to be fully covered. Fry until the dough blisters and turns golden, about 1-2 minutes. Transfer to a paper towel-lined pan to cool. Adjust the temperature as needed to maintain the oil at 375F.
- Remove the molds. After the shells cool for a minute, carefully remove the molds. Allow the shells to continue cooling.
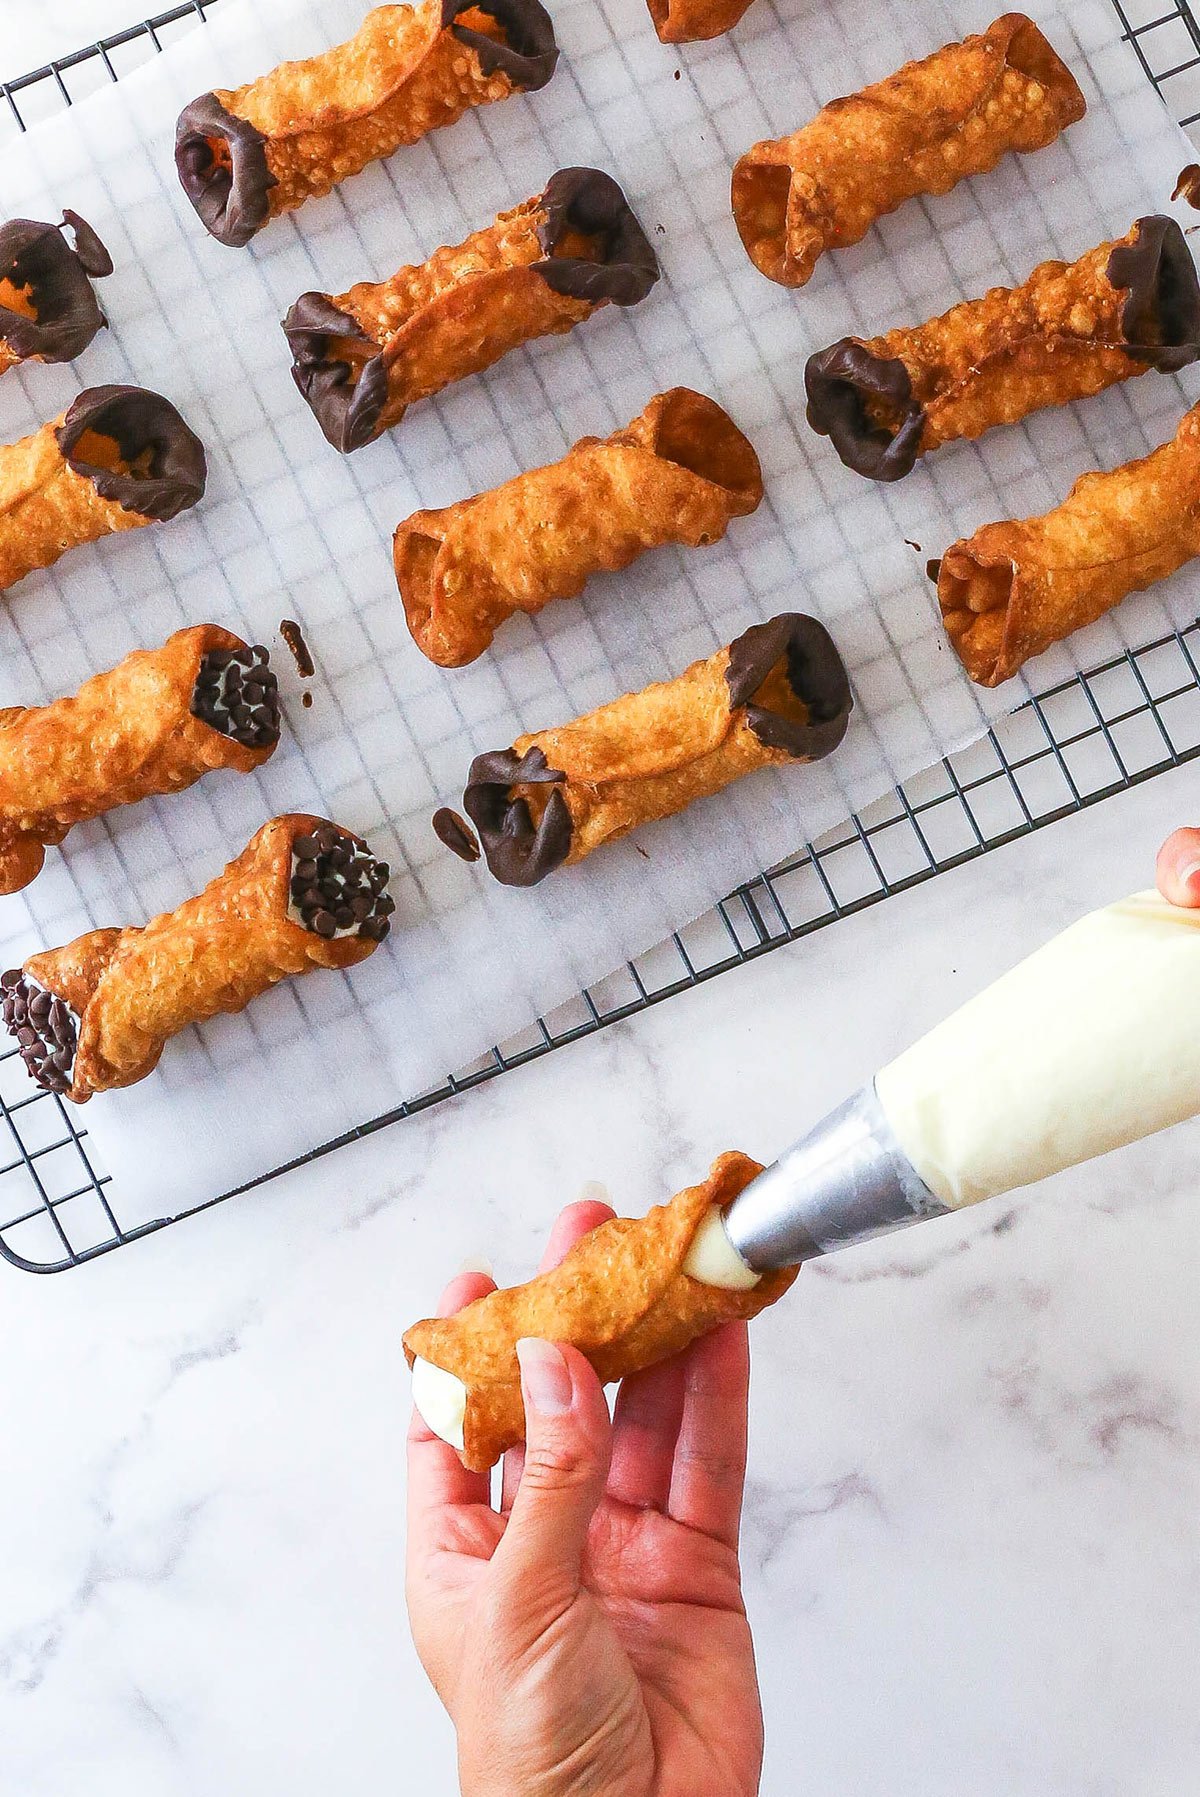
- Dip in chocolate. Melt the chocolate then dip the ends of the cannoli shells in the chocolate. Set on the parchment paper to cool completely.
- Fill the cannoli shells. Transfer the chilled filling to a piping bag. Pipe the filling into cannoli shells, piping from the middle out on one side then repeating on the other side. Add any decorations, like the mini chocolate chips. Enjoy!
Making Perfect Cannoli Shells
One of the biggest issues I noticed when making the shells is the dough snapping back when you roll it out and again when you cut out the circles. While you can just deal with it and fry them anyway, I found that made it much harder to get the dough thin enough to bubble properly and they always ended up smaller than I wanted.
The solution: Do your best to roll the dough out thinly and cut out the circles. It’s ok if they snap back at this point. Let the dough circles rest (while covered with plastic wrap so it doesn’t dry out), then re-roll them, dusting with flour as needed (which also helps it not snap back so much). Then you can use the circle cutter to cut it to the right shape again and it shouldn’t snap back this time. This worked SO well and I got the shape I wanted and the beautiful bubbles on the shell.

Tips for Success
Beyond the above note about rolling out the dough for the shells, here are a few other tips to help you make the perfect cannoli.
- Don’t over mix. Mix the filling until just fully combined, as mascarpone cheese can start to break down if it’s over-mixed and then it won’t firm back up as well.
- You may need more/less filling. The number of cannoli you get from the recipe will depend a little on how big you make them and how thinly you roll them out. So you might need more or less filling, depending on how big and how many cannoli you make.
- Strain the ricotta. This is super important to creating the perfect texture for the filling! If you don’t strain the ricotta, the filling will be too runny.
- Roll the shells thin. Otherwise, they brown on the outside without getting as fully cooked on the inside, so then they aren’t as crispy and don’t bubble as well.
- Wrap the shells loosely. I like to wrap the shells a little more loosely around the mold. It gives them more of a flared end, which I like, and makes them easier to fill.
- Wait to fill the shells. If you don’t plan on serving your cannoli soon, wait. Don’t fill them until ready to serve them, or up to about an hour before so they stay crispy.
Make Ahead & Storage
- Make ahead. Unfilled cannoli shells can be stored in an airtight container or Ziploc bag at room temperature for 1-2 months. The cannoli filling can be made a day or two ahead and stored in an airtight container in the fridge.
- Fridge. Store leftover filled cannoli in an airtight container in the fridge. The shells will soften over time, staying crispy for only about an hour.
- Freezer. You can also freeze them in an airtight container for up to a month. Thaw them in the fridge before using. If the shells were still crispy when you frozen them, they should be crisp for a little bit after thawing them. You can also freeze the shells un-filled.
More Cannoli-Inspired Recipes
Print
Cannoli Recipe
- Prep Time: 2 hours
- Chill: 2 hours
- Cook Time: 1 hour
- Total Time: 5 hours
- Yield: 25-28 cannoli
- Category: Dessert
- Method: Stove
- Cuisine: Italian
Description
Thin, crispy shells are made and filled with a lightly sweet filling made with ricotta cheese, mascarpone, and powdered sugar in this Homemade Cannoli Recipe. Enjoy them plain or dip the shells in chocolate and add some mini chocolate chips!
Ingredients
Cannoli Shells
- 1 3/4 cups (228g) all-purpose flour (measured properly)
- 2 tbsp (26g) sugar
- 1/2 tsp ground cinnamon
- 1/4 tsp salt
- 2 tbsp (28g) unsalted butter, cold, cubed
- 1 large egg
- 1/4 cup (60ml) sweet Marsala wine
- 1 tbsp water
- 1/2 tbsp distilled white vinegar
- About 8 cups vegetable oil, for frying
- 1 large egg white, beaten
Cannoli Filling
- 2 cups (504g/16 oz) ricotta cheese, strained
- 2 cups (454g/16 oz) mascarpone cheese, cool*
- 2 cups (230g) powdered sugar
Extras for decorating
- 4 ounces semi-sweet chocolate, chopped, optional
- 3/4 cup (129g) mini chocolate chips, optional
Instructions
Make the shell dough
- Combine the flour, sugar, cinnamon and salt in a medium sized bowl. Add the cubed butter and use a pastry cutter or fork to cut it into the flour mixture. When the butter pieces are about the size of peas, use your fingers to continue working the butter into the flour until the butter is evenly distributed. Form a well in the middle of the mixture and set aside.
- In a small bowl, beat the egg. Add the egg, wine, water and vinegar to the well in the flour mixture. Stir mixture together with a fork. It’ll look a little shaggy at first and then start co come together. Switch to using your hands and help the dough form a cohesive ball, kneading it together in the bowl.
- Pour the dough out onto a lightly floured countertop or work surface and knead it. Use the heel of your hand to push the dough away from you, then fold it back onto itself. Repeat, adding more flour as needed to prevent sticking, until the dough is cohesive, elastic and soft. The texture of the ball of dough may look a little rough. It will smooth out as it rests.
- Wrap the dough in plastic wrap and refrigerate for at least 2 hours and up to 24 hours.
Make the filling
- Add the drained ricotta, mascarpone cheese and powdered sugar to a medium size bowl and gently fold together until well combined. Don’t over mix. Mascarpone cheese can start to break down if it’s over mixed and then it won’t firm back up as well.
- Cover and chill in the fridge for 2-3 hours, while you finish making the cannoli shells.
Create the shells
- Grease the cannoli mold with a little vegetable or spray them lightly with non-stick baking spray. Set aside.
- Remove the dough from the fridge and cut in half. Wrap one half back up in the plastic wrap and set aside.
- Place the other half on a lightly floured countertop or work surface and lightly dust with flour. Roll it out, dusting with more flour as needed, to prevent sticking. The dough may spring back at you, but keep rolling it out, adding flour as needed. Sometime a light dusting of flour before rolling and can help it not spring back so much. Once it’s rolled out to about 1/8-inch thick, use a 4 or 4 ½ inch round cutter to cut out as many circles as will fit. Place the circles under a layer of clear wrap. Gather the scraps, wrap and set aside.
- Repeat the rolling process with the second half of the dough. Be sure to keep all the circles that have been cut under a layer of clear wrap to prevent them from drying out. You may notice that they spring back and get much smaller than they were when you cut them out. That’s ok.
- Combine the scraps from the two batches of dough and repeat the rolling process 1-2 more times, until you’ve used it all or have about 25 shells.
- Let the covered circles sit for about 10 minutes, so that the dough can relax. By the time you’re done cutting them all out, the first ones that were cut may have been sitting long enough.
- Working one circle at a time, re-roll each circle, dusting with flour as needed, until it reaches its original size. After resting for about 10 minutes, it shouldn’t spring back so much and you should be able to get it to that size. You can try to roll it out and keep its round shape, but if it doesn’t stay round you can use use your round cutter and re-cut the circle.
- Again, working one circle at a time, place a cannoli mold down the middle of the dough round, then bring one side up and over so that it’s resting on the mold. Brush the edge on the mold with the beaten egg white, then fold the opposite side of the dough up and over the mold, pressing into onto the eggy surface so that they overlap. Set aside while you work on the rest.
- While you form the shells, heat up the oil. Pour the vegetable oil into a large Dutch oven or deep skillet so that you have about 2-3 inches of oil. Clip the candy thermometer to the side of the pot and heat over medium-high until the oil is at 375°F. Reduce heat to medium and continue to heat. Line a baking sheet with paper towels.
- Use a pair of tongs to add the shells to the hot oil, 2-3 at a time. You want the shells fully covered by the oil. Fry the shells until the dough blisters and begins to turn golden, about 1-2 minutes. Use the tongs to grab the mold and remove the hot shell from the oil. Place on the paper towel lined pan to cool. Keep an eye on the oil temperature and adjust the cooking temperature as needed to maintain around 375°F.
- Allow the shells to cool for a minute, then very carefully remove the molds and allow the shells to cool completely.
- If coating the ends of the cannoli shells in chocolate, melt the chocolate and dip the ends of the shells into the chocolate, gently shaking off the excess. Set on parchment paper to cool completely.
- To fill them, grab the filling from the fridge and add it to a piping bag or Ziplock bag. Snip off the corner, about an inch long, and pipe the filling into the cooled cannoli shells. You’ll want to pipe from the ends, piping from the middle out on one side, then repeat on the other side. If decorating the ends, add that now. Dust with powdered sugar and serve.
- Store leftovers in an air-tight container in the fridge. The shells will soften over time, staying crispy for only about an hour. You can also freeze them in an air-tight container for up to a month. Thaw them in the fridge before using, to keep the shells from getting too soggy. You can also freeze the shells un-filled.
Notes
- Tools I used: Cannoli mold, Candy thermometer, 4 to 4 ½ inch cookie cutter.
- Mascarpone cheese: I use mine straight out of the fridge, but you could also let it sit out for 5-10 minutes. You just don’t want it to get too warm. It’ll turn watery at that point and you can’t really save it. You could use just ricotta in the filling, but I really love the flavor of the mascarpone.
- Semi-sweet chocolate: The amount listed is enough to dip about half of the shells. If you’d like to dip them all, you may want to double it.
- Sweet Marsala wine – If you’d prefer not to use alcohol, you can replace it with a combination of water and vinegar (2 tablespoons of each).
- Vegetable oil – You may need more or less, depending on the size of the pot that you’re frying in. You want to have 2-3 inches of oil to fry in.
Nutrition
- Serving Size: 1 cannoli
- Calories: 178
- Sugar: 9.4 g
- Sodium: 46.4 mg
- Fat: 11.5 g
- Carbohydrates: 16.1 g
- Protein: 3.2 g
- Cholesterol: 41 mg


