This post may contain affiliate sales links. Please read my disclosure policy.
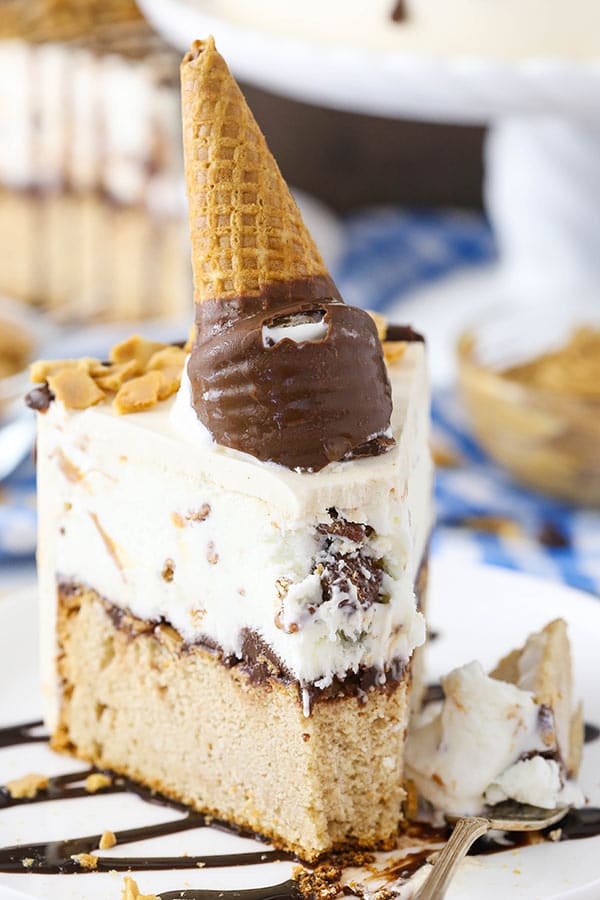
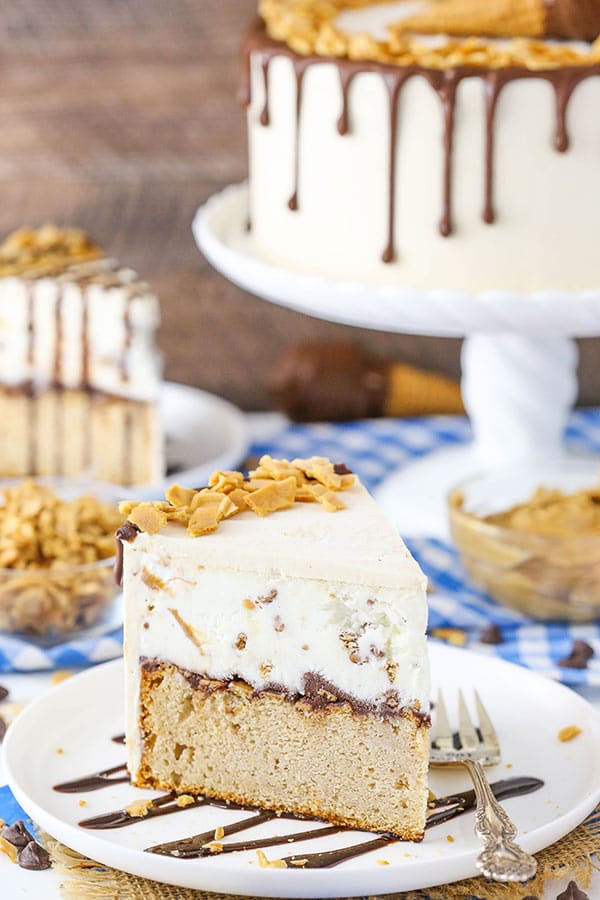
This Peanut Butter Chocolate Ice Cream Cone Cake is made with a layer of peanut butter cake, chocolate and waffle cone pieces, and Blue Bunny PB ‘N Cones Ice Cream. The flavors are delicious and the overall cake is so darn fun!
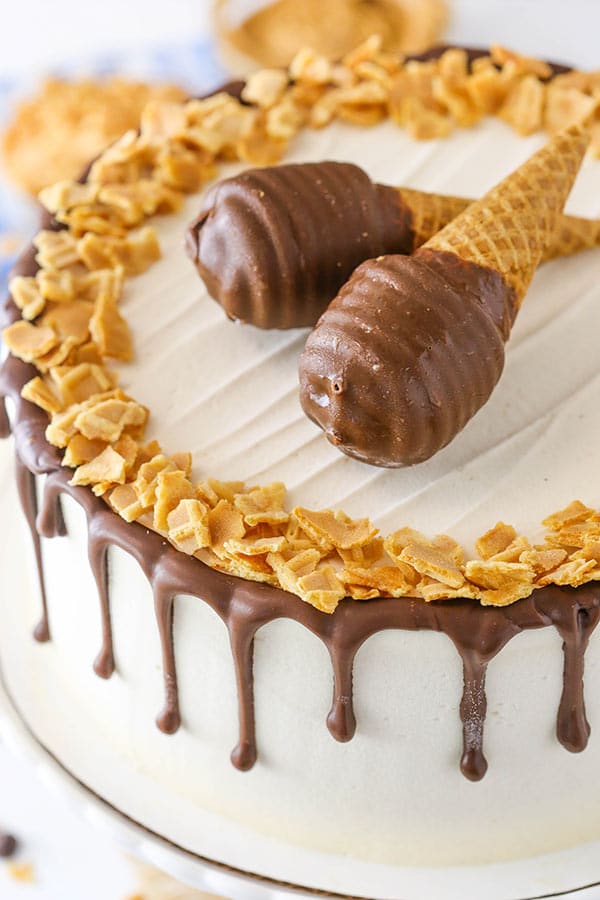
Peanut Butter Chocolate Ice Cream Cone Cake
This post is sponsored by Blue Bunny Ice Cream, but all opinions are 100% my own.
Ice cream has been one of my biggest weaknesses lately. With the warm weather and all the fun flavors, which I love trying, it’s just so perfect. The only way I can love ice cream even more is when it’s paired with cake. In this ice cream cake, the ice cream and the cake go perfectly together.
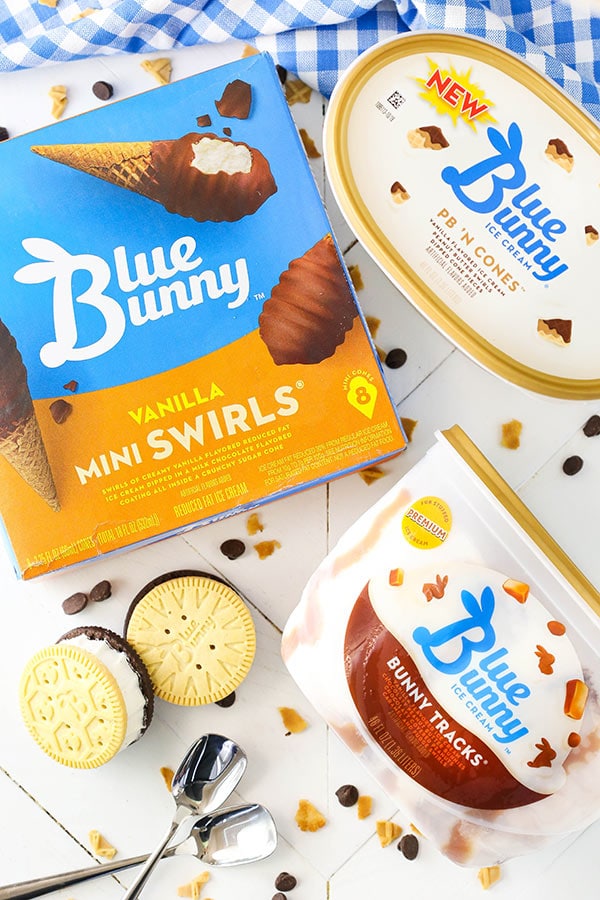
When I was given the chance to try some of the new Blue Bunny Ice Cream flavors that are now available in the Atlanta market, I couldn’t wait – and they definitely didn’t disappoint. The new Bunny Snacks are like little ice cream sandwiches and the hubs and I devoured those in no time! Both new ice cream flavors feature peanut butter and chocolate, one with peanut butter flavored chocolate bunnies and some caramel swirls and the other with peanut butter swirls and chocolate dipped cone pieces, which is the one featured in this ice cream cake.
One of my favorite things in ice cream is have to have something a little chewy in it. The chocolate covered cone pieces in the ice cream are just that! I love their subtle crunch and chewiness. They were the inspiration for the decoration of this fun cake, made to mirror the fun and playful ice cream.
When putting this together, you’ll want to start with the peanut butter cake. It’s fairly straightforward and begins with the creaming of the butter and peanut butter. The creaming is an important step so don’t skimp on it. It adds air to the cake batter to help you get a moist and fluffy cake.
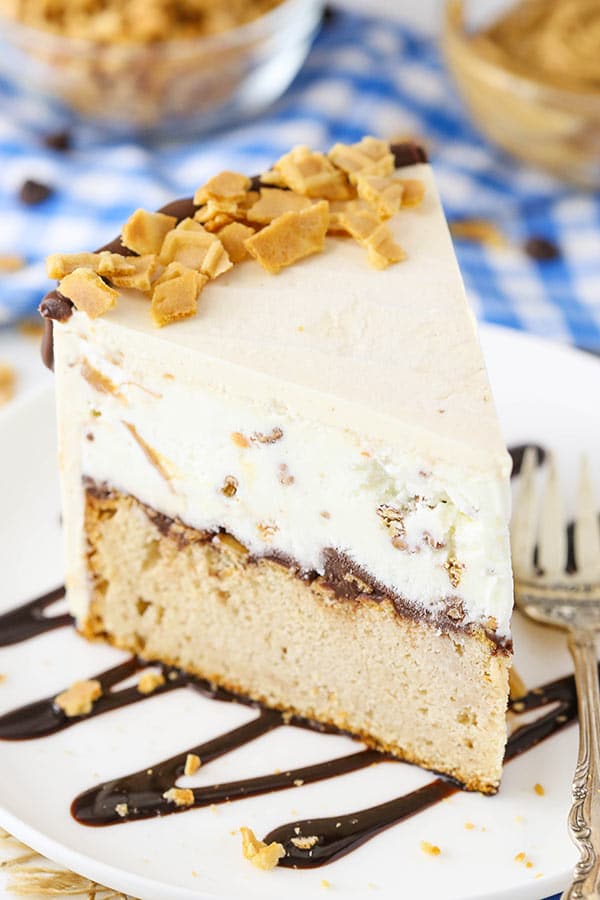
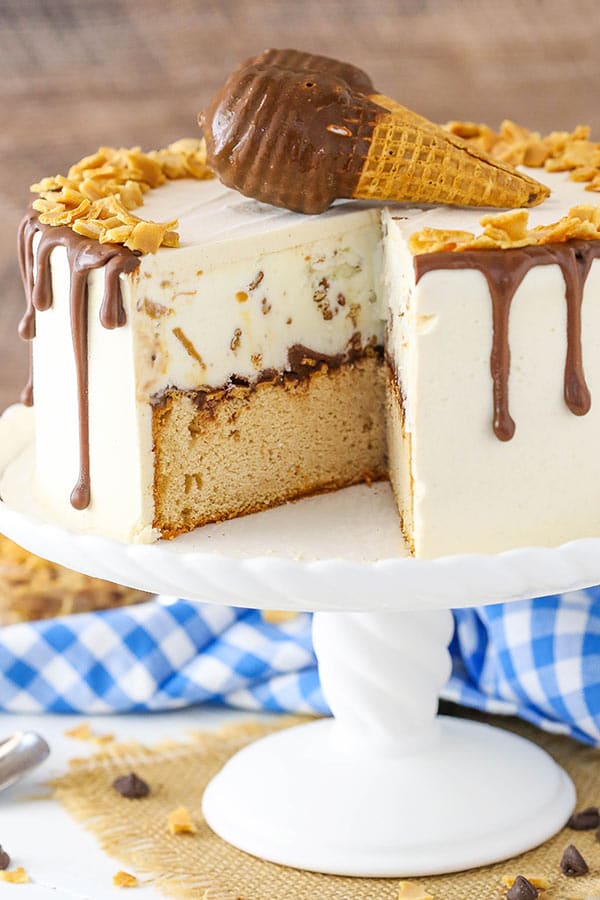
Once the cake is baked and cooled, it’s time to put the cake together. To get the ice cream ready, set it in the fridge for about an hour. You want to have it soft, but not completely melted. To layer the cake and ice cream together, there are two options. One would be to use a clear plastic cake collar. The other is to build the cake inside a cake pan. I like to use an 8×3 inch pan so that it’s plenty tall enough and line the cake pan with parchment paper to make the cake easy to remove when it’s done (see example).
On top of the cake, prior to adding the ice cream, add some chopped waffle cone pieces and chocolate ganache. Again, it plays off of the fun cone pieces in the ice cream and adds some crunch. The ice cream is added on top and smoothed into an even layer. Let the whole cake freeze until firm. I usually make the cake a day ahead and let it freeze overnight.
When it’s time to decorate the cake, make the peanut butter whipped cream. Remove the cake from the pan it was built in (or from the cake collar) and cover it with the whipped cream. You will need to work quickly and remove the cake from the freezer only when you’re ready, since the ice cream will melt. I had to pop it back in the freezer between frosting it and adding the rest of the decor.
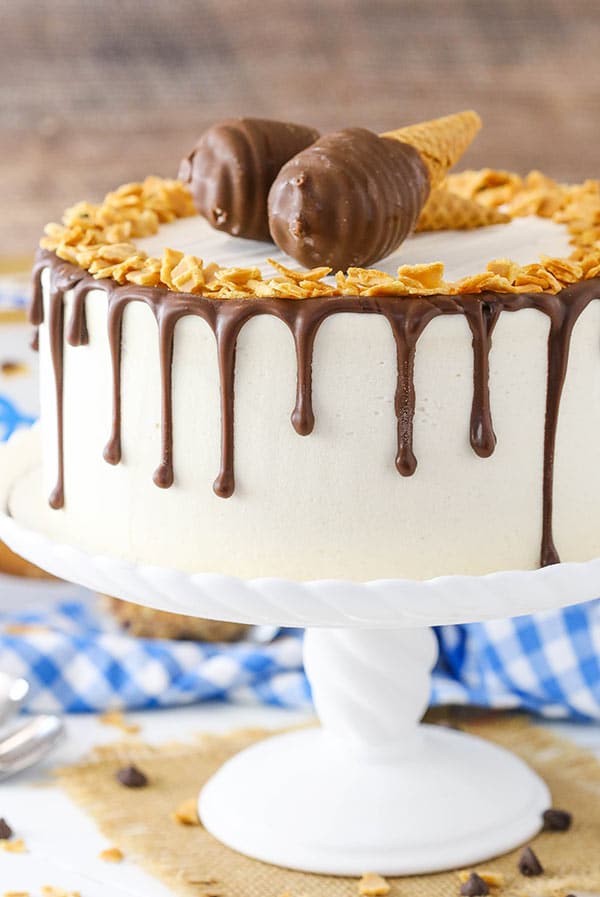
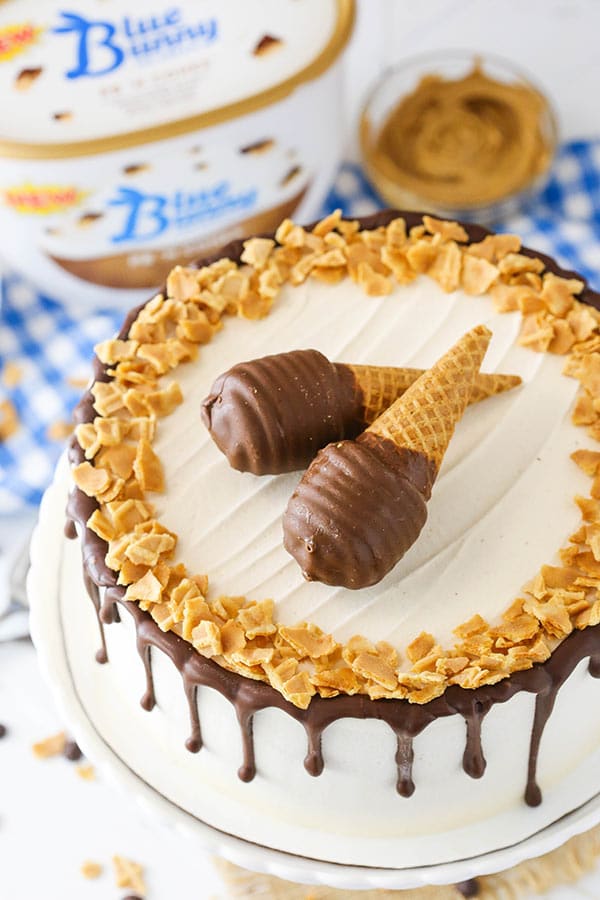
For the final decor, I used a chocolate ganache drizzle and fun ring of chopped waffle cone pieces. I even grabbed a couple Blue Bunny Mini Swirl Cones to place in the center of the cake. The whole cake is just so darn fun, I can’t even handle it. It’s full of delicious chocolate and peanut butter flavor and just screams summer! I have no doubt that you need to make this and will love it – and the ice cream! To find Blue Bunny Ice Cream in your area to use in the cake, use their store locator.
Peanut Butter Chocolate Ice Cream Cone Cake
- Prep Time: 25 minutes
- Cook Time: 38 minutes
- Total Time: 1 hour 3 minutes
- Yield: 12-14 Slices
- Category: Dessert
- Method: Oven
- Cuisine: American
Description
This Peanut Butter Chocolate Ice Cream Cone Cake is made with a layer of peanut butter cake, chocolate and waffle cone pieces, and Blue Bunny PB ‘N Cones Ice Cream. The flavors are delicious and the overall cake is so darn fun!
Ingredients
Peanut butter cake
- 1/2 cup (104g) sugar
- 1/4 cup (45g) lightly packed light brown sugar
- ¼ cup (56g) unsalted butter, room temperature
- ½ cup (140g) peanut butter
- ¼ cup (58g) sour cream, room temperature
- 1 tsp vanilla extract
- 3 large egg whites, room temperature, lightly beaten
- 1 1/4 cups (163g) all purpose flour
- 2 tsp baking powder
- ¼ tsp salt
- 6 tbsp (90ml) milk, room temperature
- 2 tbsp (30ml) water, room temperature
Ice cream and filling
- 3 oz (1/2 cup | 86g) semi sweet chocolate chips
- 1/4 cup (60ml) heavy whipping cream
- 1 tsp corn syrup
- 1/2 cup chopped waffle cone pieces
- 46 oz container Blue Bunny PB ‘N Cones Ice Cream
Whipped cream frosting
- 2 cups (480ml) heavy whipping cream, cold
- 1 cup (115g) powdered sugar
- 1/4 cup (70g) peanut butter
- 1 tsp vanilla extract
Chocolate ganache topping
- 3 oz (1/2 cup | 86g) semi sweet chocolate chips
- 1/4 cup (60ml) heavy whipping cream
Additional
- 1/2 cup chopped waffle cone pieces
- 2 mini ice cream cones, optional
Instructions
To make the cake
- Preheat oven to 350°F (176°C) and prepare an 8 inch round cake pan (or springform pan) with parchment paper in the bottom and non stick spray around the sides.
- In a large mixing bowl, cream sugars, butter and peanut butter until light in color and fluffy, about 3-4 minutes.
- Add sour cream and vanilla extract and mix until well combined.
- Add egg whites in two batches, mixing until well combined after each. Scrape down the sides of the bowl as needed to be sure all ingredients are well incorporated.
- Combine the dry ingredients in another bowl, then combine milk and water in another bowl.
- Add half of the dry ingredients to the batter and mix until well combined. Add the milk mixture and mix until well combined. Add remaining dry ingredients and mix until well combined. Scrape down the sides of the bowl as needed to be sure all ingredients are well incorporated.
- Add the cake batter to prepared cake pan. Bake for 38 minutes, or until a toothpick inserted comes out with a few crumbs.
- Remove cake from oven and allow to cool for 2-3 minutes, then remove to cooling rack to finish cooling.
For the ice cream filling
- When the cake has finished cooling, put the ice cream in the fridge for about an hour to soften.
- Once the cake is cool, set up your 8-inch cake pan (or springform pan) for layering. If not using a springform pan, you can put some plastic wrap in the bottom of the pan and up the sides and use it to lift the cake out of the pan when it’s done. Put a cardboard cake circle in the bottom of the pan. Line the sides of the pan with parchment paper. The parchment paper should stick up above the top edge of the pan (see example).
NOTE: You should be using the same 8-inch pan you used for the cake. Not all 8-inch pans are exactly the same size. Your cake needs to fit in this pan. Alternatively, you could use a clear cake collar. - Cut the dome off of the top of the cake layer, then place the cake layer into the bottom of the pan.
- To make the filling, add 3 oz of chocolate chips to a small bowl.
- Heat the heavy whipping cream and corn syrup until it begins to boil, then pour it over the chocolate chips. Allow the mixture to sit for 3-4 minutes, then whisk until smooth.
- Add the chopped waffle cone pieces and stir to combine. Spread the mixture evenly over the top of the peanut butter cake.
- Top the waffle cone pieces with the ice cream and spread the ice cream into an even layer.
- Freeze the cake until firm, 5-6 hours.
To frost and decorate
- To prepare the whipped cream frosting, add the heavy whipping cream, powdered sugar, peanut butter and vanilla extract to a large mixer bowl. Whip on high speed until stiff peaks form.
- Remove the frozen cake from the pan and quickly frost the outside with the whipped cream. The ice cream will melt, so pop it back in the freezer as needed and when you’re done.
- To make the chocolate ganache topping, heat the heavy whipping cream until it begins to boil, then pour it over the chocolate chips. Allow the mixture to sit for 3-4 minutes, then whisk until smooth.
- Drizzle the ganache around the edge of the cake, then top with chopped waffle cone pieces and a coupe mini ice cream cones (see my tips on making a chocolate drip cake). Freeze until ready to serve.
Notes
If you are unable to find this ice cream in your area, you can use vanilla ice cream. Add about 1/3 to 1/2 cup of chopped chocolate-covered waffle cone pieces to the ice cream and swirl in some peanut butter when you add the softened ice cream to the cake.
Nutrition
- Serving Size: 1 Slice
- Calories: 841
- Sugar: 33.1 g
- Sodium: 373.2 mg
- Fat: 36.8 g
- Carbohydrates: 114 g
- Protein: 15.7 g
- Cholesterol: 59.2 mg
Enjoy!





I have a question- is it important if we use standard peanut butter (no stir) or the natural kind? Thank you; can’t wait to make this next week for my daughter’s 10th birthday!
I would use a regular peanut butter, not one of the natural ones that separates. I hope you enjoy it!
Hubbys birthday is next week. I have made tons of your cakes. How do you think this would be with your chocolate cake recipe instead of the one you used in this recipe and then follow everything else?? Thoughts?
You could definitely use that chocolate cake. It should be great!
I wonder about this kind of recipe, does the cake taste any good seeing it’s frozen when you eat it??
It sure does! Lots of ice cream cakes use frozen cake and they’re great!
Ice cream cake is a must in the Summer and this recipe looks insanely good! Awesome combination of flavors!
Ice cream is definitely a must – and this one is SO good! Thanks!
Wow! You are using the ice cream that is made right here in my home town! We are known as the ice cream capital of the world. they do make good ice cream, and half of my home town works for them!
thanks for show casing it, and as always, your recipes are the greatest, and I love to see what new things you come up with!
How neat, Janet! I’m so glad you enjoy the site – thank you! I hope you get a chance to try the cake! 🙂
Your so talented, you always give us very unique and beautiful goodies.
Thank you Cathy!
hey girl- this cake looks amazing!
Thanks Shawnna!
You’re killing me with all these outrageously yummy-looking cakes!!
I couldn’t wait for this post once I saw the preview on your Insta-story. This looks amazing!! I’m even more excited it’s peanut butter and chocolate!! And peanut butter whipped cream! Wow delicious!!! This def went to the top of my baking list 🙂
Aww yay! Thanks Brittany! 🙂 I hope you enjoy it!