This post may contain affiliate sales links. Please read my disclosure policy.
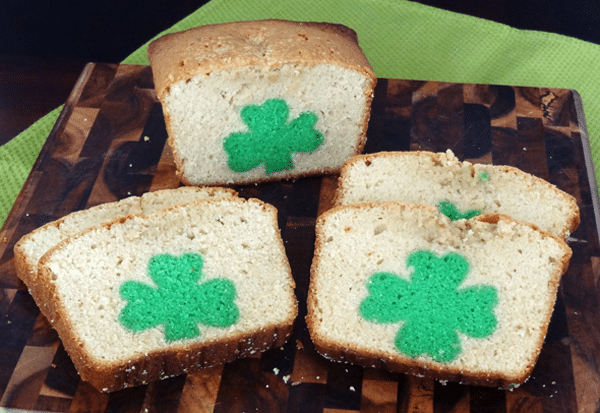
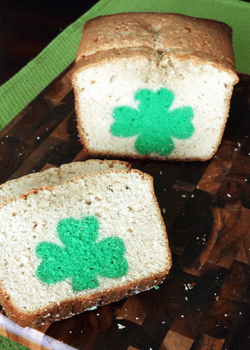
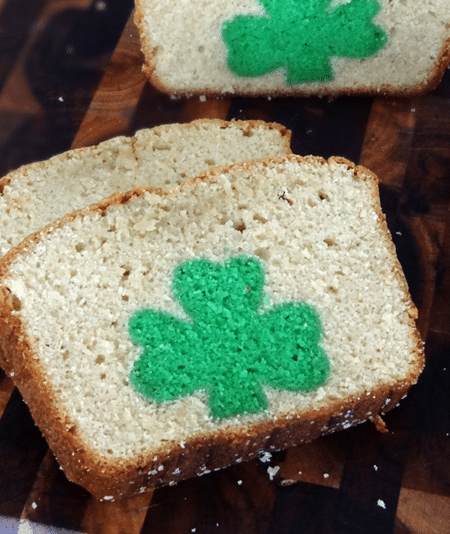
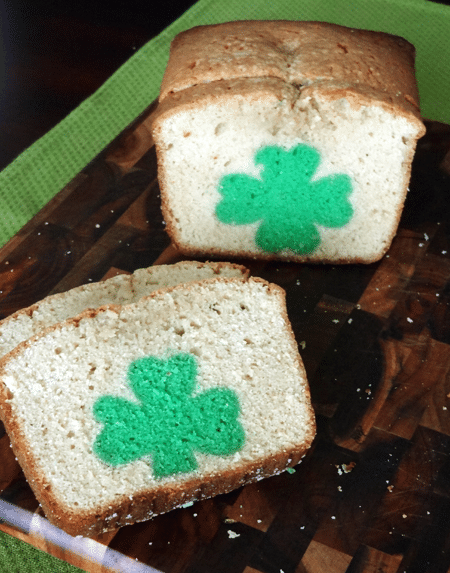
This St. Patrick’s Day Peek A Boo Pound Cake is the perfect festive and delicious St. Patrick’s Day dessert recipe! It’s super moist, soft and delicious!
Need another snack for St. Patty’s Day? Whip up my tasty St. Patrick’s Day Puppy Chow!
The Best St. Patty’s Day Dessert Recipe
I was SO excited to make this cake! And I couldn’t wait to share it with you. I mean, how cool is a pound cake that has shamrocks hidden inside? And not just shamrocks, but a four leaf clover?!? It reminded me of a king cake – whoever gets the slice with the baby has special privileges…or something. In this case if you get the slice with the four leaf clover you get good luck!! How awesome is that?! So I got all my ingredients together and bought this shamrock cutter from Michaels. Again, SO SO excited.
And then the journey that was my peek a boo cake happened and that excitement turned to dread. Would I not be able to make this awesome idea come to life?? I mean the peek a boo cakes are so cute. And they sound so easy. Just bake a cake, cut out some shapes and bake them in another cake. Sounds simple enough. However, it was not so simple for me. It took a few tries. And I know I’m not the only one.
But I don’t want that fate for you. So I did all the hard work – failed a few times, took notes and now I’m here to tell you what to do and what not to do to have a successful peek a boo pound cake experience. To do that, I’ll give you a brief rundown of my own experience.
Attempt #1
Notable facts about this attempt:
1. This is a St. Patrick’s Day pound cake, so naturally I wanted a festive flavored cake if possible and not just a box mix. I chose Mommy’s Kitchen’s Happy St. Pattys Day Irish Cream Pound Cake.
2. I used a loaf pan given to me by my mother years ago. I assumed it was the correct 9×5 size. Well, you know what they say about assuming…
3. I used the Wilton cookie cutter I linked to above.
Result:
Pound cake that overflowed. When it happened with the green loaf, I pushed on. It was only a little bit of overflow and it didn’t really mess up the look of the cake and I was still able to cut out the shamrocks. Plus, it tasted awesome.
When I surrounded my shamrock cutouts with the batter, I knew it had a slim chance of surviving but I’d gone this far and didn’t want to turn back.
Well like I said, it overflowed. Also, the shamrocks were poking out of the top. I figured the reason was the overflow. I wasn’t entirely entirely sure what my problem was – the pan? or the cake recipe? I decided to try again.
Attempt #2
Notable facts about this attempt:
1. I bought a loaf pan that was 9×5, just in case size was the issue.
2. I used a box mix, just in case that was the issue.
Result:
I never got a finished result because my dumb*** forgot to cutout a four leaf clover. I had ALL regular three leaf shamrocks. That would not do!!
Lesson #1: Pay attention to what you are doing and cut out the right things. Duh!
Attempt #3
Notable facts about this attempt:
Same as above because my dumb*** simply forgot to cut out a four leaf clover.
Result:
I was convinced this would be my final attempt. If it didn’t work, I was DONE! So
I payed attention this time and had the right cutouts. Phew! And while my loaf was much closer to surviving – there was no overflow – the shamrocks floated to the top and were again sticking out of the top of the loaf after being baked. There was a bunch of white pound cake on the bottom and then the shamrocks were barely sticking out of the top. Urggg!!
Lesson #2: Don’t put any batter underneath the shamrocks.
But I could also kind of tell from looking at it that even if the shamrocks hadn’t floated up, they were still pretty big and that could be giving me my poking out issues as well.
Lesson #3: Don’t use a cookie cutter that is more than 2 1/2 inches. Two inches is probably best. The Wilton one I’d been using is 3 inches. No good for this project.
But at least there was no overflow! Could pan size have been my problem all along?? Maybe I should go back to my original recipe.
Lesson #4: Use the right size pan. Duh!! Seriously?
Attempt #4
Notable facts about this attempt:
1. I went back to using my original recipe.
2. I used all my lessons learned.
Result:
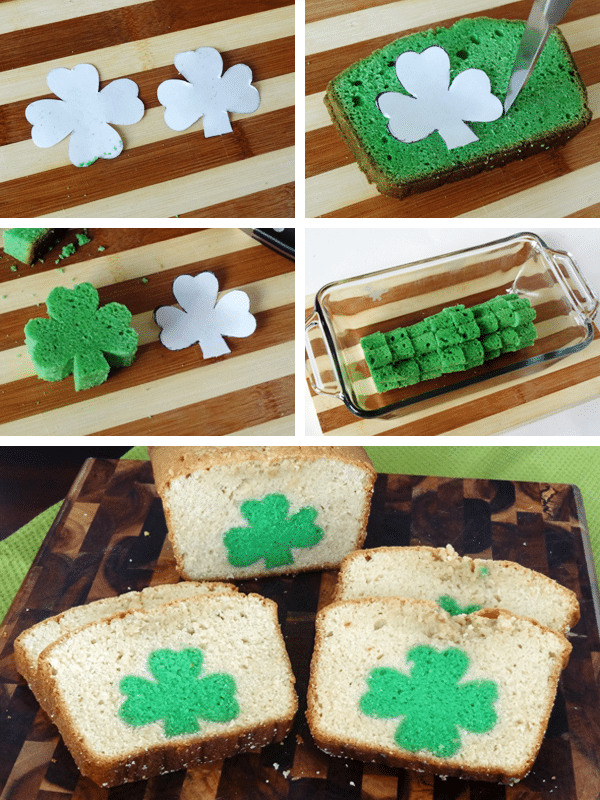
Ok I lied. Number 3 was not my final attempt. But I couldn’t give up! Not after I’ve put in so much time! I HAD TO GET IT RIGHT! And I felt I had the right set up this time. I had learned so much – I couldn’t fail! I was totally paying attention, I had the right pan size, I made my own shamrock cutout pattern (I wasn’t going to buy another thing!) and I didn’t put any batter underneath the shamrocks. I was careful and attentive. And it worked!! No overflow, the shamrocks stayed where I put them and they were fully covered. SUCCESS!!
So now that I’ve told you it took me 4 tries you are probably like “there is no way I’m doing that” but don’t worry – I totally learned for you. Just follow the directions and don’t forget about my lessons learned and you’ll be good. Only one try for you! And when it works, please tell me so that I know I didn’t just make 4 pound cakes (well actually 7) for nothing. Please. That’s a lot of pound cake.
St. Patrick’s Day Peek A Boo Pound Cake
- Prep Time: 1 hr 15 minutes
- Cook Time: 2 hrs 40 minutes
- Total Time: 3 hrs 55 minutes
- Yield: 10-12 slices
- Category: Dessert
- Method: Oven
- Cuisine: American
Description
This St. Patrick’s Day Peek A Boo Pound Cake is the perfect festive and delicious St. Patrick’s Day dessert recipe! It’s super moist, soft and delicious!
Ingredients
The ingredients below are for one 9×5 loaf. You will need two.
- 3/4 cup butter
- 1 cup firmly packed brown sugar
- 1/2 cup sugar
- 3 eggs
- 1 1/2 cups flour
- 1/2 tsp baking powder
- 1/2 cup whole milk (or 1/4 + 1/8 cup whole milk and 1/8 cup Baileys Irish Cream liqueur)
FOR GREEN LOAF:
- 1 tsp food coloring
- Shamrock cutout pattern
NOTE: You can use a cookie cutter if you have one, but it should be about 2 inches in size. No more than 2 1/2 inches.
BAILEYS IRSH CREAM GLAZE (OPTIONAL:
- 1 1/4 cups powdered sugar
- 3 tbsp Baileys
Instructions
1. In a large bowl, beat butter and sugar at medium speed until fluffy.
2. Add eggs one at a time, mixing after each addition.
3. In a separate bowl, combine flour and baking powder.
4. Gradually add flour mixture to butter and sugar mixture alternately with milk, beginning and ending with the flour mixture. Beat after each addition.
5. Stir in green food coloring and Baileys Irish Cream if you are using it.
6. Add batter to greased 9×5 loaf pan and bake at 325 degrees for about 1 hour and 10-15 minutes.
7. Allow to cool for 10 minutes and then remove from pan.
8. Refrigerate for about 4 hours.
CUT OUT GREEN SHAMROCKS:
1. Remove green loaf from fridge and cut into slices. The slices should be thin enough that you won’t have trouble cutting out the shamrocks, but not so thin that they won’t stand up well. My slices were 1/2 to 3/4 inch.
2. Use your shamrock cutout pattern to cut around and cut out your shamrocks. Remember to cut out 1 or 2 of the four leaf clovers.
3. Stack your shamrocks side by side down the center of a greased loaf pan.
PREPARE SECOND POUND CAKE LOAF:
1. In a large bowl, beat butter and sugar at medium speed until fluffy.
2. Add eggs one at a time, mixing after each addition.
3. In a separate bowl, combine flour and baking powder.
4. Gradually add flour mixture to butter and sugar mixture alternately with milk, beginning and ending with the flour mixture. Beat after each addition.
5. Stir in Baileys Irish Cream if you are using it.
6. Add batter to 9×5 loaf pan very carefully. You do not want to move the shamrock cutouts around too much. They should stay centered. I used a spoon to spoon even amounts on each side of the shamrocks, going slowly and carefully. Do not put batter underneath the stems of the shamrocks, just make sure that batter gets underneath the leaves.
NOTE: When you are done adding your batter, the shamrocks should be completely covered and not sticking up out of the batter.
7. Bake at 325 degrees for about 1 hour and 15-20 minutes.
8. Allow to cool for 10 minutes and then remove from pan and completely cool.
9. Make glaze and drizzle over pound cake, if desired.
GLAZE (OPTIONAL):
1. Whisk together the Baileys and powdered sugar.
2. Drizzle over the top of the cake.
Nutrition
- Serving Size: 1 Slice
- Calories: 580
- Sugar: 53.4 g
- Sodium: 58.4 mg
- Fat: 26.9 g
- Carbohydrates: 77.8 g
- Protein: 8.8 g
- Cholesterol: 157.1 mg
Filed Under:
Recipe modified from Mommy’s Kitchen and Very Culinary.
Enjoy!




Ive used this recipe several times. Always fun w
to see peoples reactions when the cake is cut. Just a query though, could you use all white sugar rather than brown, as it makes the cake a dull color. 🙂
Glad you’ve enjoyed it! White sugar should be fine.
I’m doing my first attempt at this, and my green cake is currently sitting in the fridge… However, I’m a little nervous it overflowed a bit too much because it was very risen out of the pan… I have the right size pan and followed your recipe and I’m scared that attempting with the white cake will make it even higher… Have I missed anything or done something wrong you think?
BTW, this is the cutest thing I’ve ever seen and your hard work is very appreciated!!!
Gosh, it’s been so long since I made this and I don’t really remember it well. From reading over everything, it seems like it shouldn’t overflow. Maybe try added a little less batter to the pan for the final loaf, to avoid overflow?
Tried to make it today for this Saturday for St. Patrick’s dinner with family. When I tried to get the green cake out of the pan, it stuck and ripped the cake in half. So needless to say I never even got to the next cake. Very disappointed.
Wow amazing super cute.!!
These look perfect!! wow
Looking forward to trying your pound cake, I hope that it works on the first attempt LOL …. I do have a question though, you say to be sure to cut out `1 or 2 of the 4 leaf clovers… should they be placed in a particular place when I’m lining the pan?
I think wherever you want them is fine. Part of the fun is cutting into the cake and not knowing where they are. 🙂
This is the most helpful and by far the most hilarious tutorial/instructions I have found. Thanks! Glad it finally worked out!
I’m glad you enjoyed it! 🙂 It certainly was a process.